# Route Contacts by Shifts
Routing Contacts by shifts or business hours is helpful if you have Contacts from different locations, messaging you at different times of the day. This strategy can be used to optimize the allocation of your resources to ensure your Contacts receive timely responses to their inquiries.
### Benefits of Routing Contacts by Shifts
Route Contacts by shifts to:
* improve response time by automatically routing customers to the available team in a timely manner and [assigning](/ismessenger/support-use-cases/how-to-identify-contacts-by-email-and-phone-numberi.md) customers to agents that are currently on shifts.
* increase customer satisfaction with proper routing and shorter waiting time for Contacts.
### Workflow Setup
In the **Workflows** module, click **+ Add Workflow** > Click **Multi-Team Routing: Shifts** > Click **Use Template**.
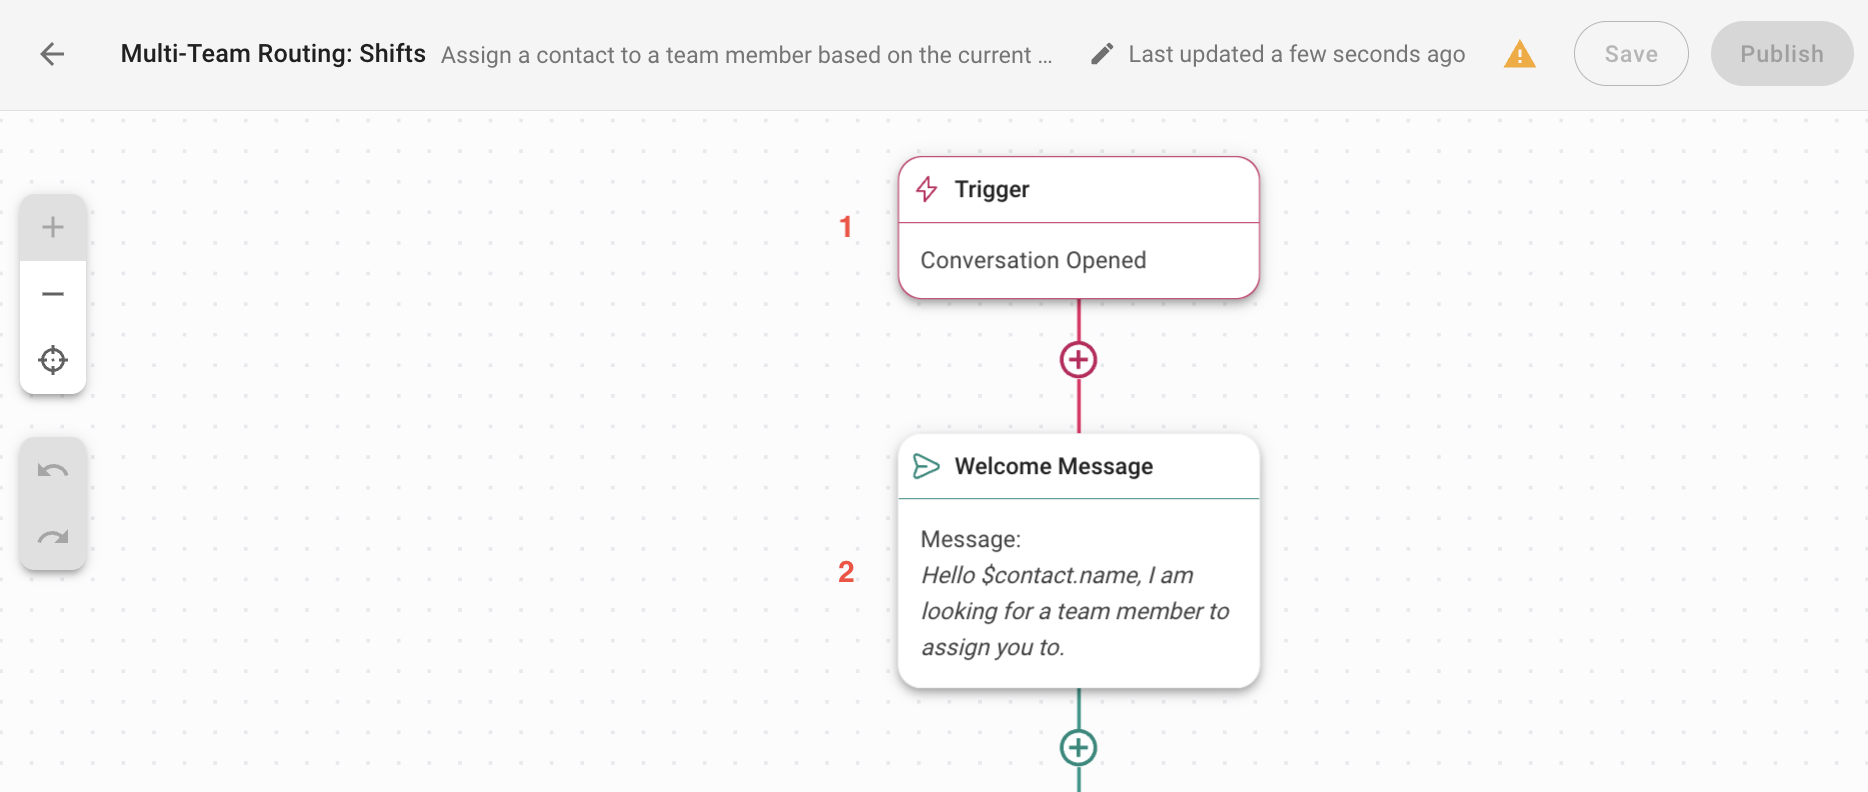
**1.** [**Trigger**](/ismessenger/modules/workflow.md): The Workflow starts when a conversation is opened by a Contact.
**2. Welcome Message:** [Sends a message](/ismessenger/modules/workflow.md) to greet your Contact and let them know the inquiry will be attended to by an agent.
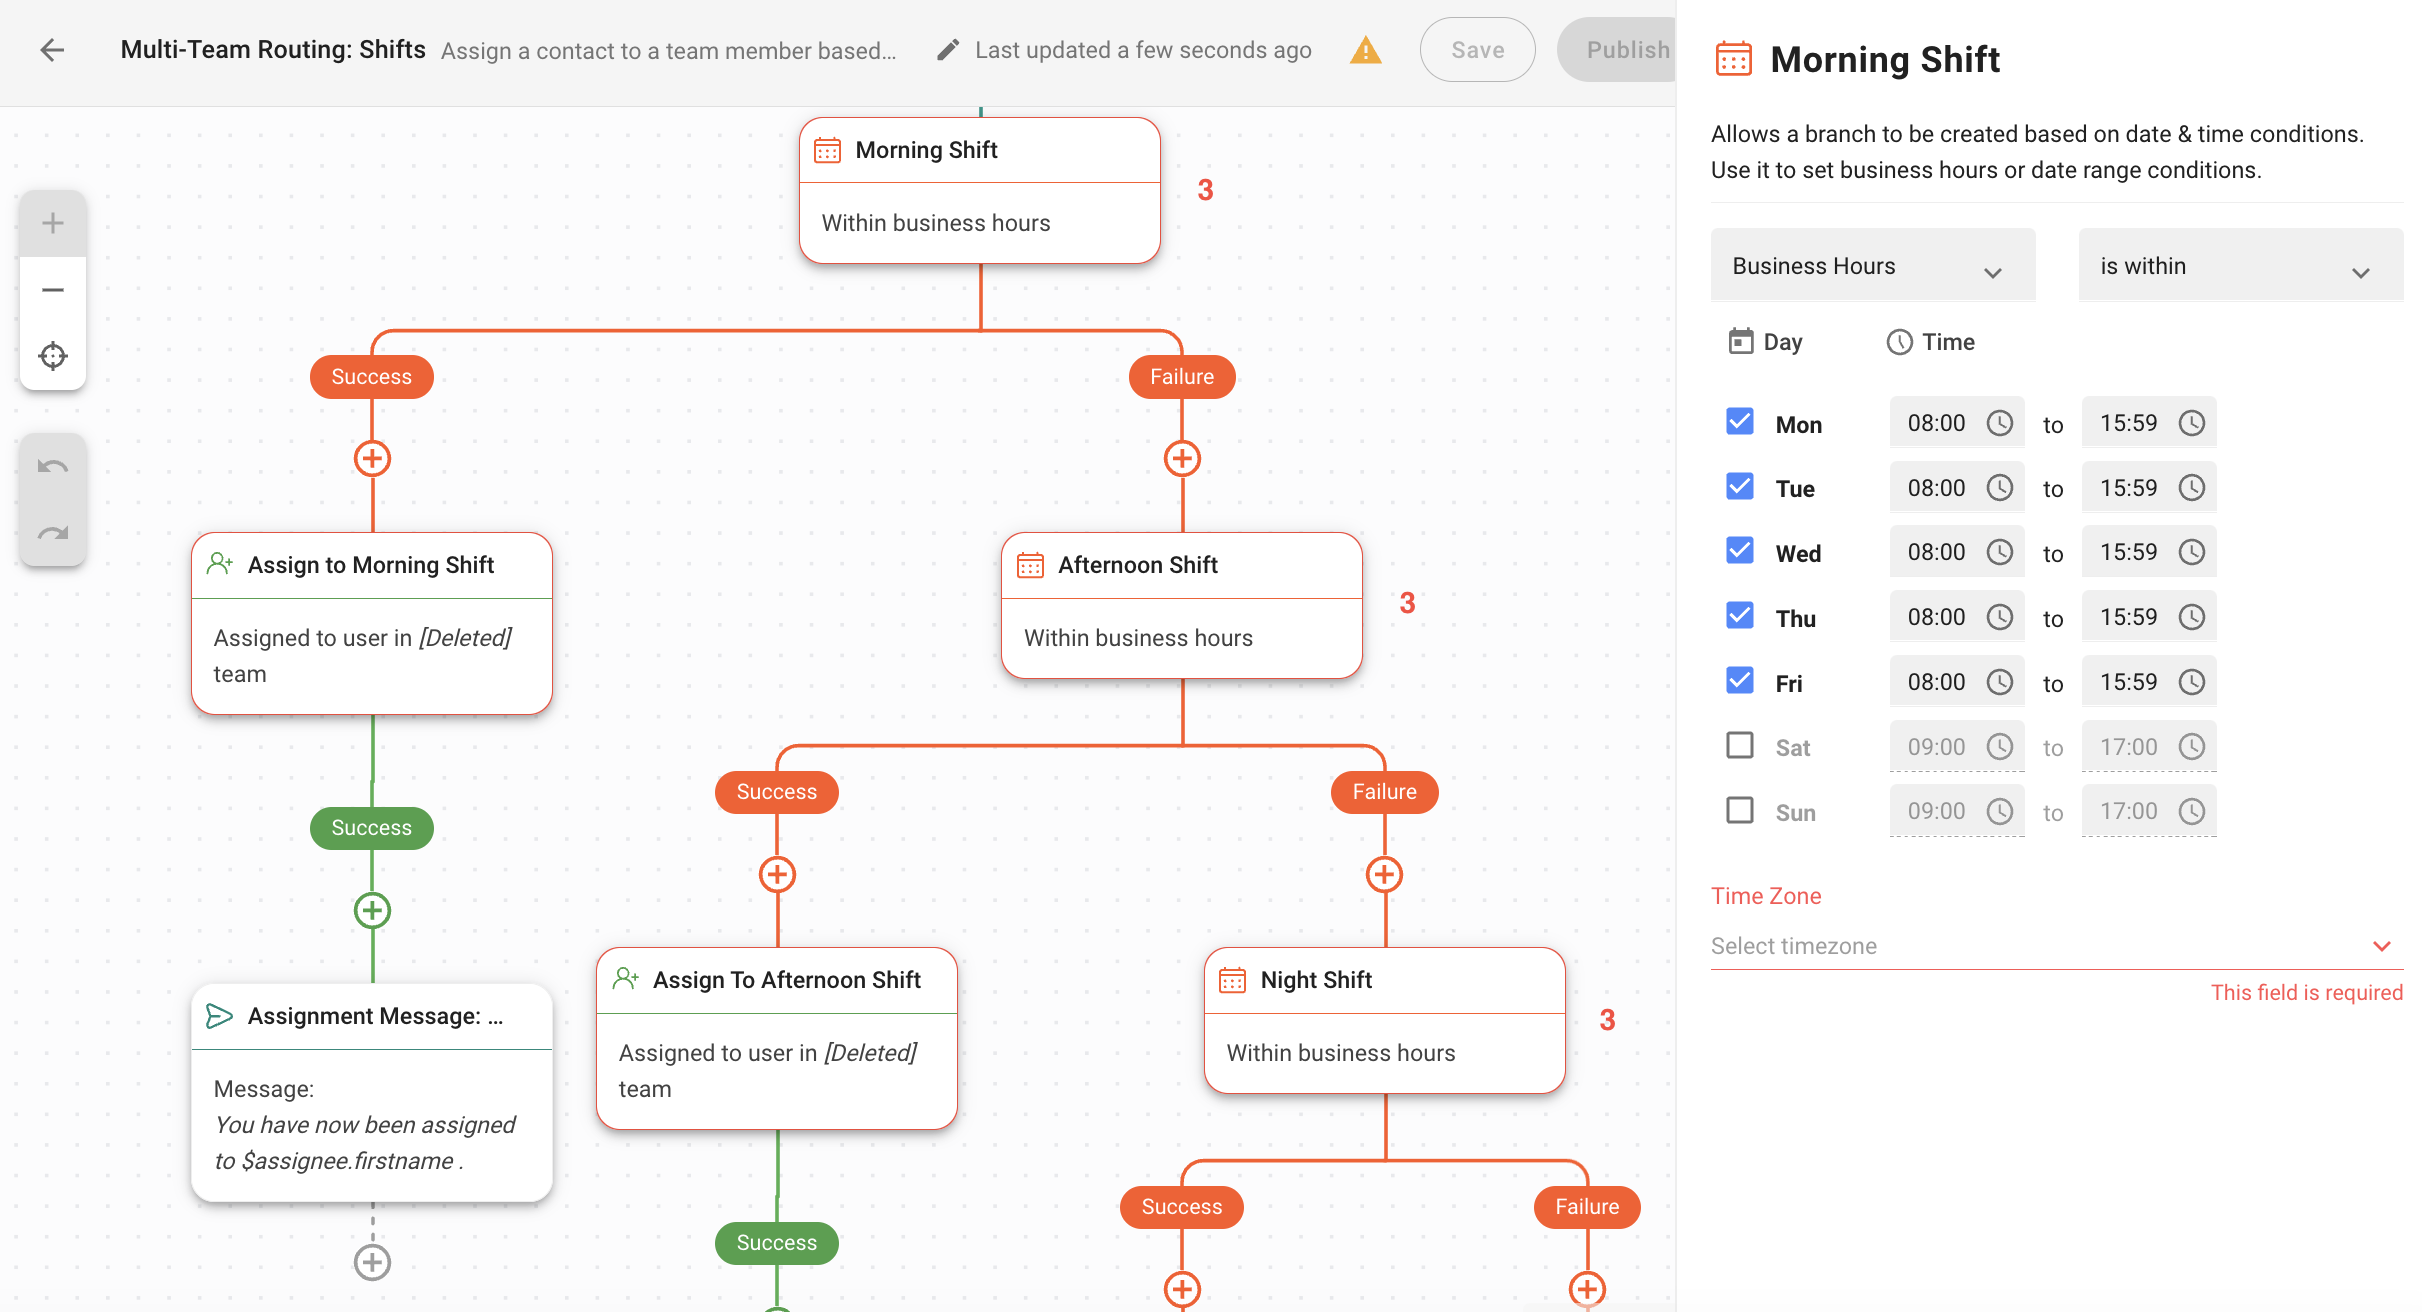
**3. Morning Shift / Afternoon Shift / Night Shift**: [Set up your business hours](/ismessenger/modules/workflow.md) for the morning, afternoon and night shifts. In this Workflow Template example, the shifts are configured to cover 24 hours of the day from Monday to Friday. This step will route Contacts to an agent on the team that is on shift, based on the date and time conditions.
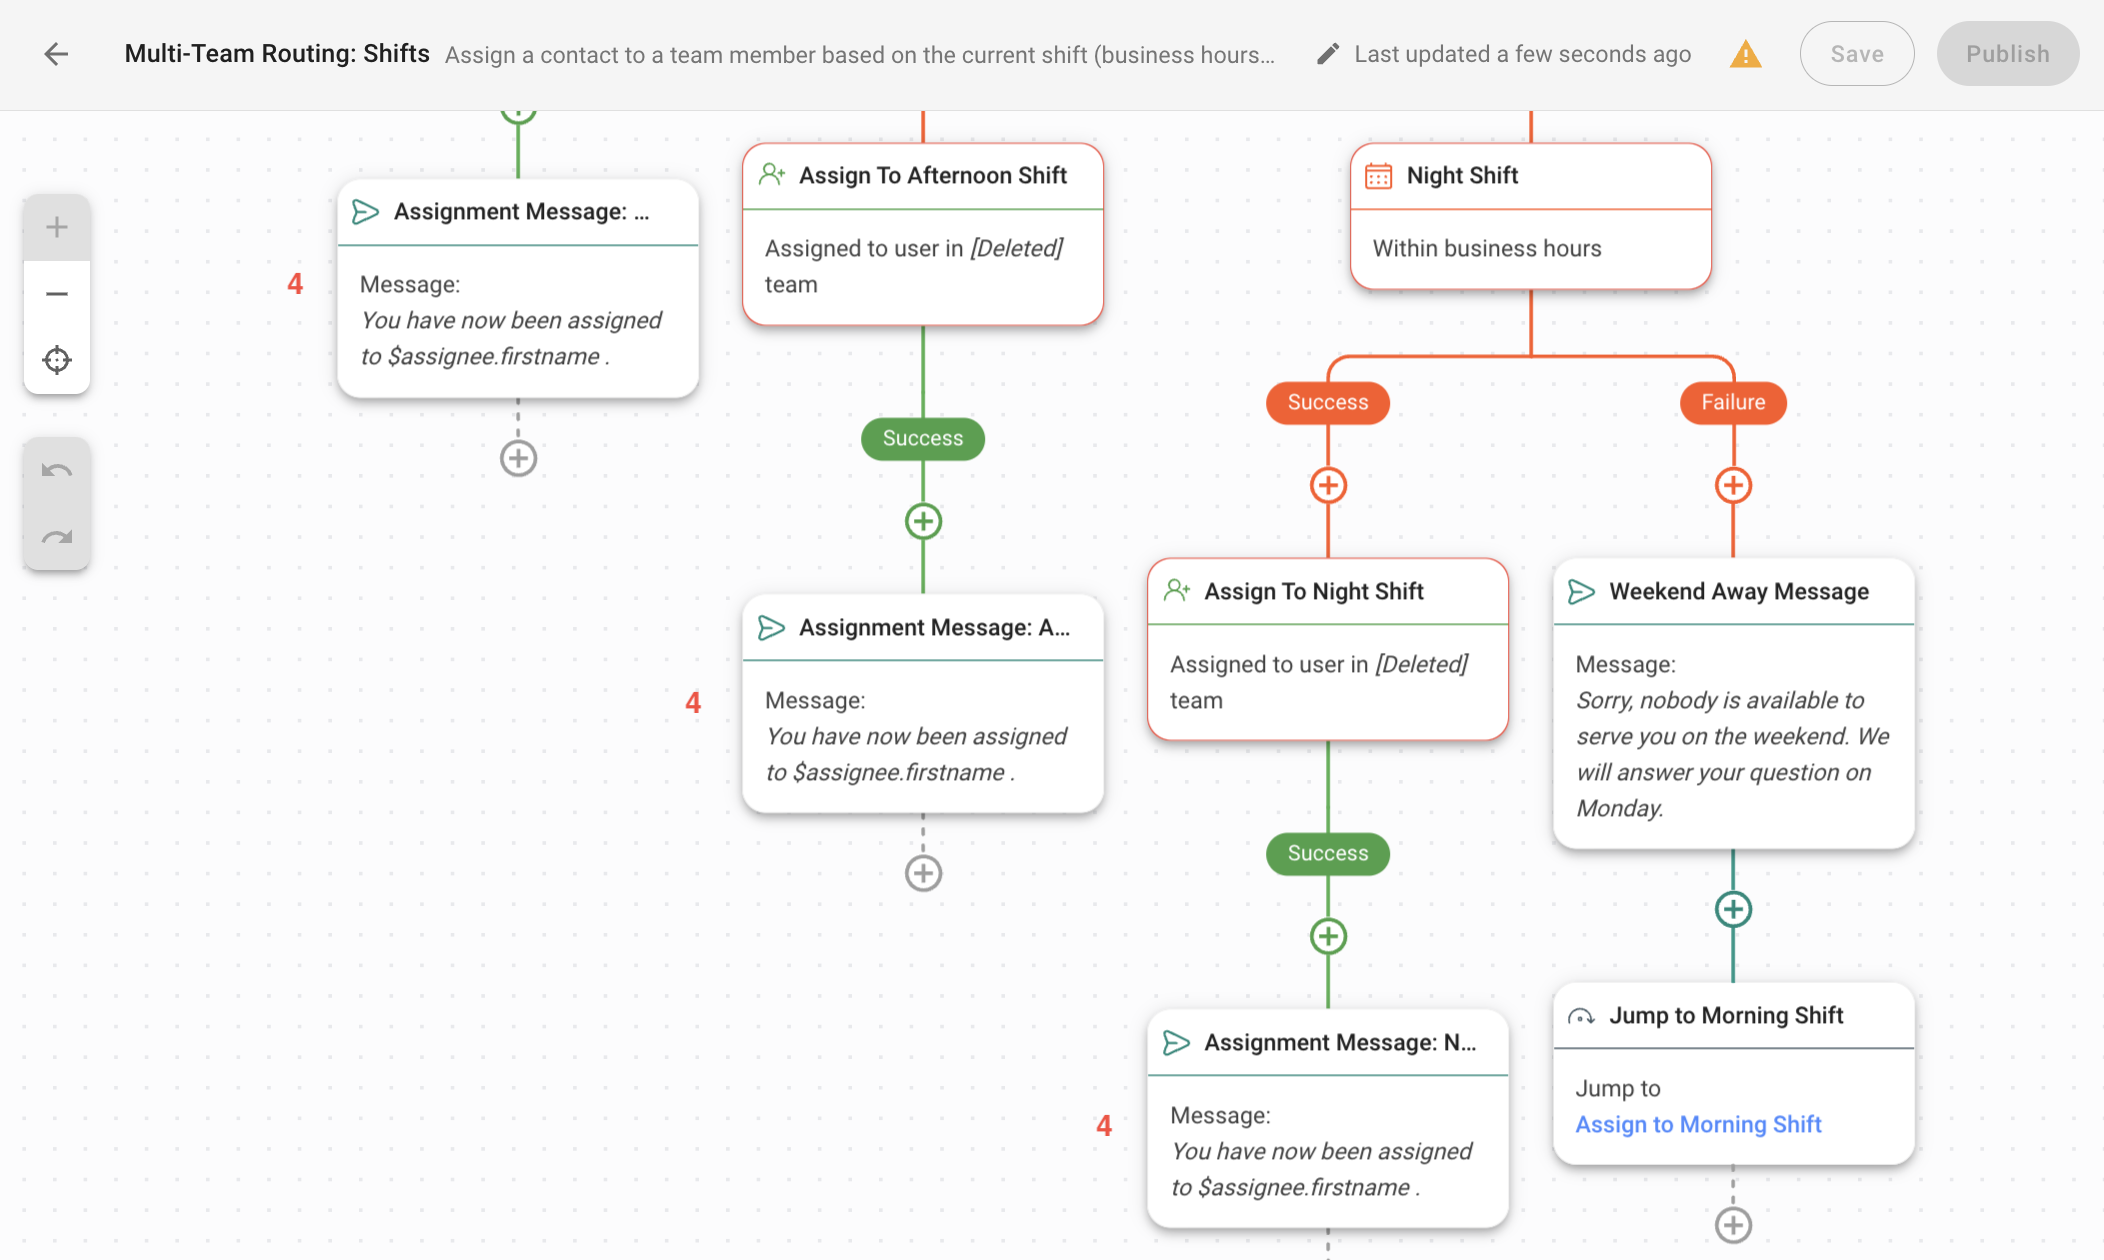
**4. Assignment Message**: Sends a message to inform Contact about their assignment status.
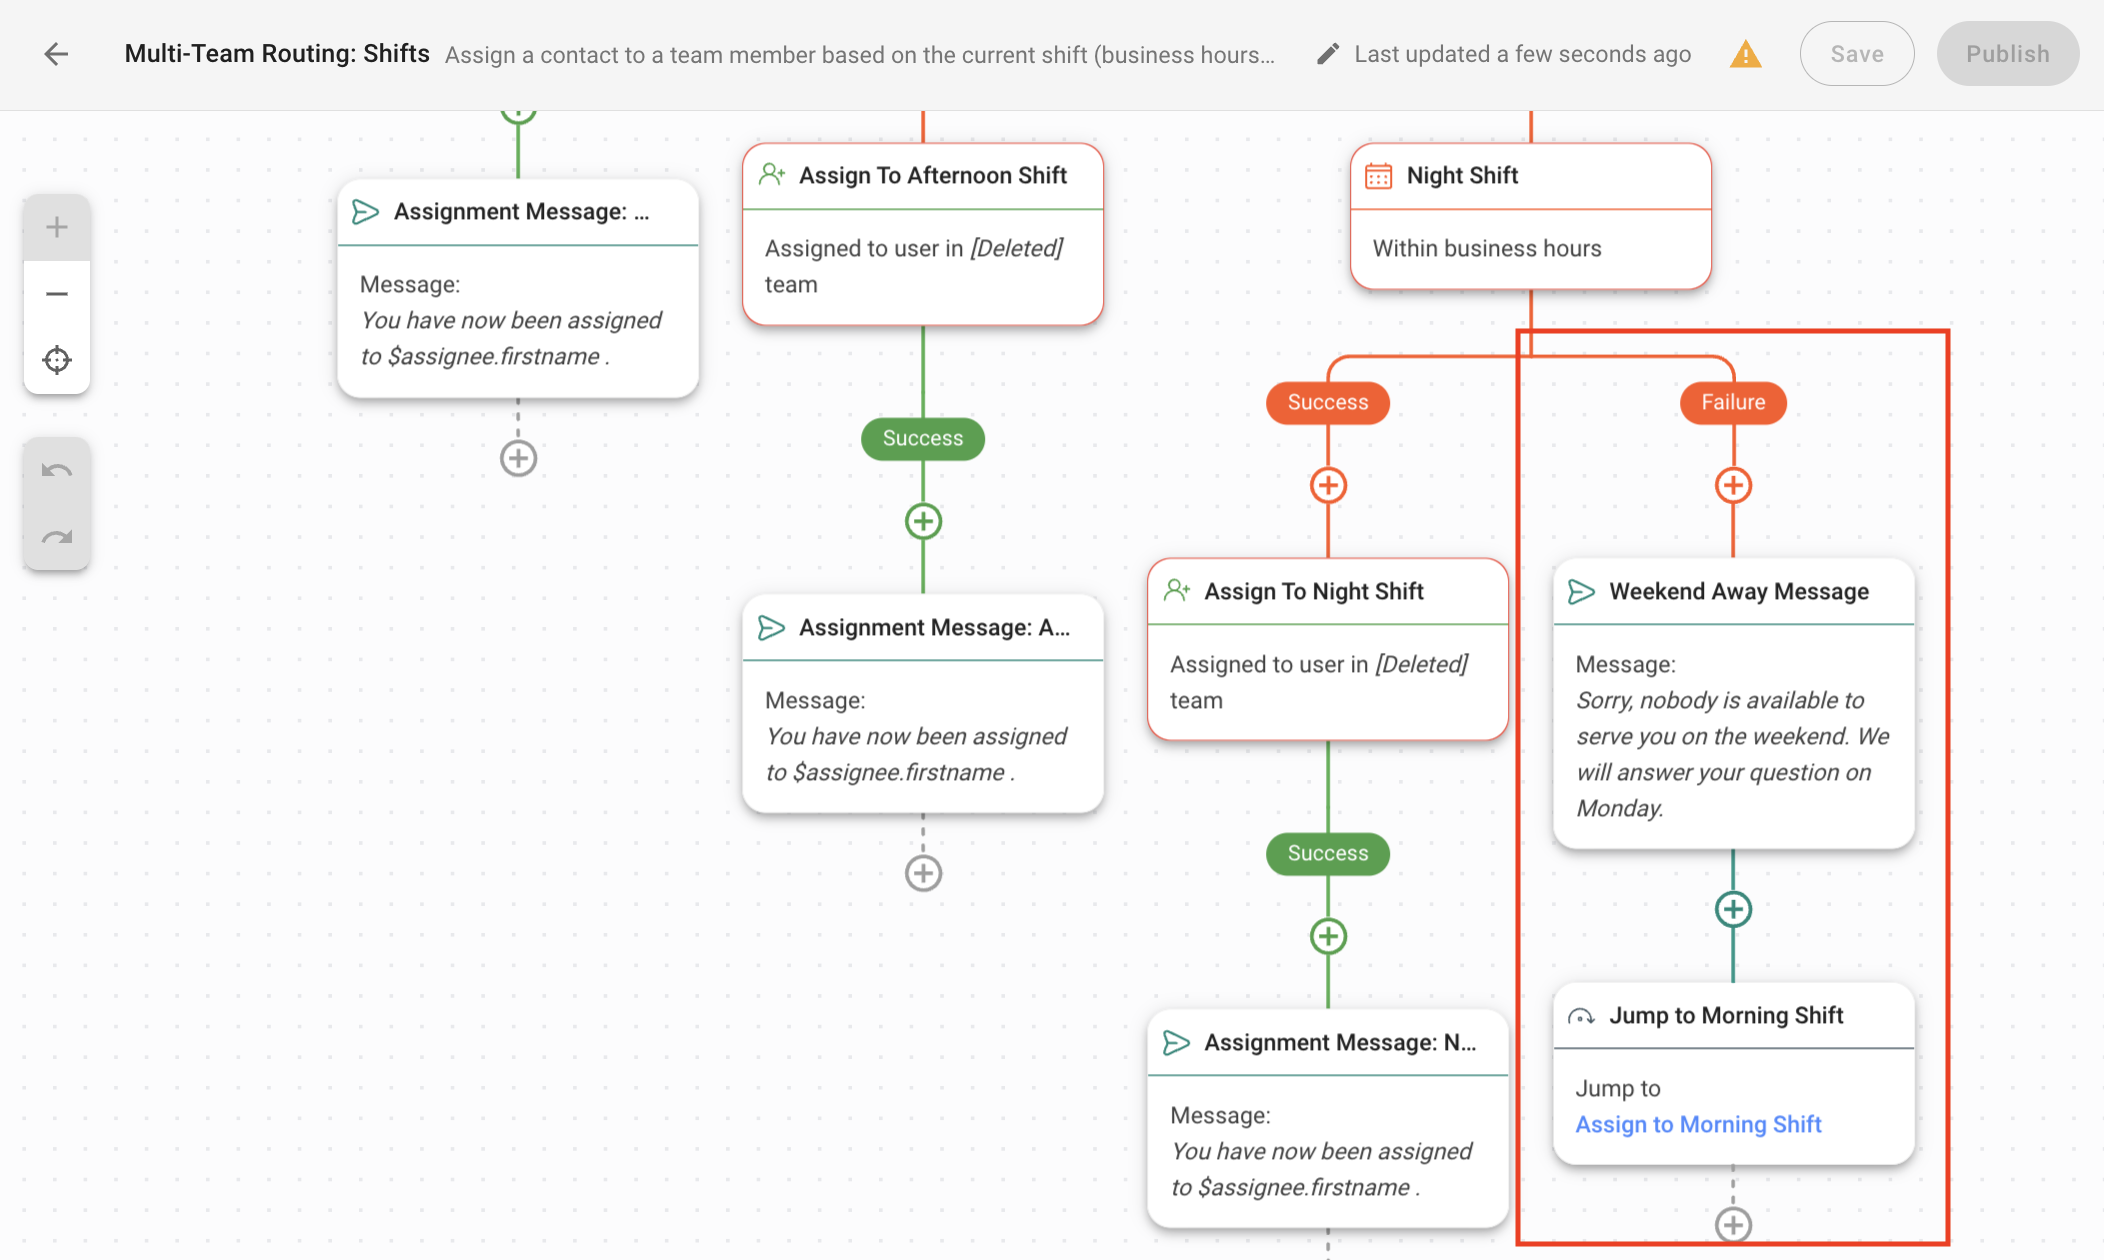
Contacts will be routed to the Failure Branch if they have contacted you outside of your business hours, in this case during the weekend. This Branch will send an away message to the Contacts and has a [Jump](/ismessenger/modules/workflow.md) step to assign the Contact to an agent on the team for the next upcoming shift, in this case the morning shift. You can configure and customize these steps as needed.
### Customer Journey Example
1. Customer sends your business a message on Monday at 4.30pm.
2. Conversation opens and triggers this Workflow.
3. Customer automatically receives a welcome message.
4. This Workflow will automatically route customer to the team working in the afternoon shift and an agent from that team will be handling the inquiry.
5. Customer automatically receives a message informing about the assignment status
---
# Agent Instructions: Querying This Documentation
If you need additional information that is not directly available in this page, you can query the documentation dynamically by asking a question.
Perform an HTTP GET request on the current page URL with the `ask` query parameter:
```
GET https://docs.is-messenger.com/ismessenger/handling-inbound-conversations/route-contacts-by-shifts.md?ask=
```
The question should be specific, self-contained, and written in natural language.
The response will contain a direct answer to the question and relevant excerpts and sources from the documentation.
Use this mechanism when the answer is not explicitly present in the current page, you need clarification or additional context, or you want to retrieve related documentation sections.