# How to Convert Image to Text Using AI
{% hint style="success" %}
In this article, you’ll explore methods for extracting information, such as text from images, empowering you to efficiently use the information to enhance the performance of your AI.
{% endhint %}
Using AI with Optical Character Recognition (OCR) technology enables businesses to extract information from images, hence streamlining the data entry process, reducing the manual effort and minimizing the risk of errors.
This approach facilitates the conversion of crucial information from images into text format, enabling businesses to upload the information as [Knowledge Sources](/ismessenger/workspace-setting/respond-ai.md#knowledge_sources). Consequently, this contributes to enhancing the accuracy of AI replies, ensuring they are up-to-date.
### How to Convert Image to Text
This article outlines steps for converting image to text using two AI tools in the market: Sider and ChatGPT-4. For your consideration, read on to find out which tool fits your business requirements and budget.
1\. Sider
* Extracts text, numbers and equations from images.
* It can only recognize handwriting in English.
* Extraction feature is free, requires a paid upgrade to use additional features.
* Requires a word processor to convert the extracted text into a PDF file (for those wanting to use extracted text as Knowledge Source).
2\. ChatGPT-4 Text Extractor
* Can accurately recognize text in images.
* Only available in ChatGPT-4 and requires a paid upgrade to use this feature.
* Can directly convert the extracted text into a PDF file.
### **Method Objectives**
* [Convert image to text using Sider](#how_to_convert_image_to_text).
* [Convert image to text using Text Extractor in ChatGPT-4](/ismessenger/converse-with-customers/how-to-convert-image-to-text-using-ai.md).
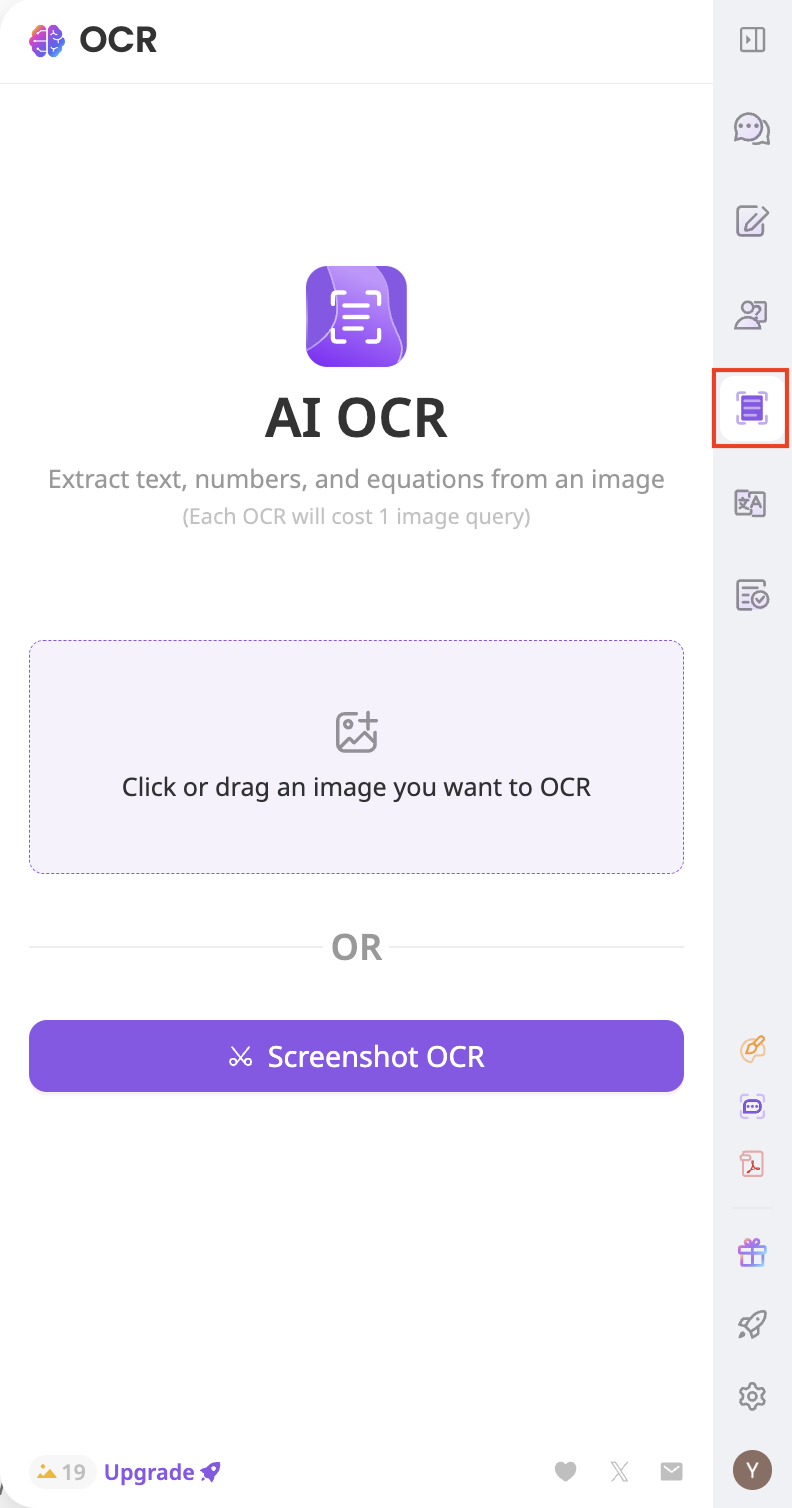
### **Convert image to text using Sider**
1. Download the [Sider](https://sider.ai/) extension on your computer > Create an account and log in.
2. Click the Sider icon on the extension bar to launch the sidebar > Click the *OCR* icon.
3. Upload the image. Ensure the file size is less than 10MB and the width or height of the image is not more than 4096 pixel.
{% hint style="info" %}
Read [here](#how_to_convert_image_to_text) for more tips on how to enhance the accuracy of the extraction process.
{% endhint %}
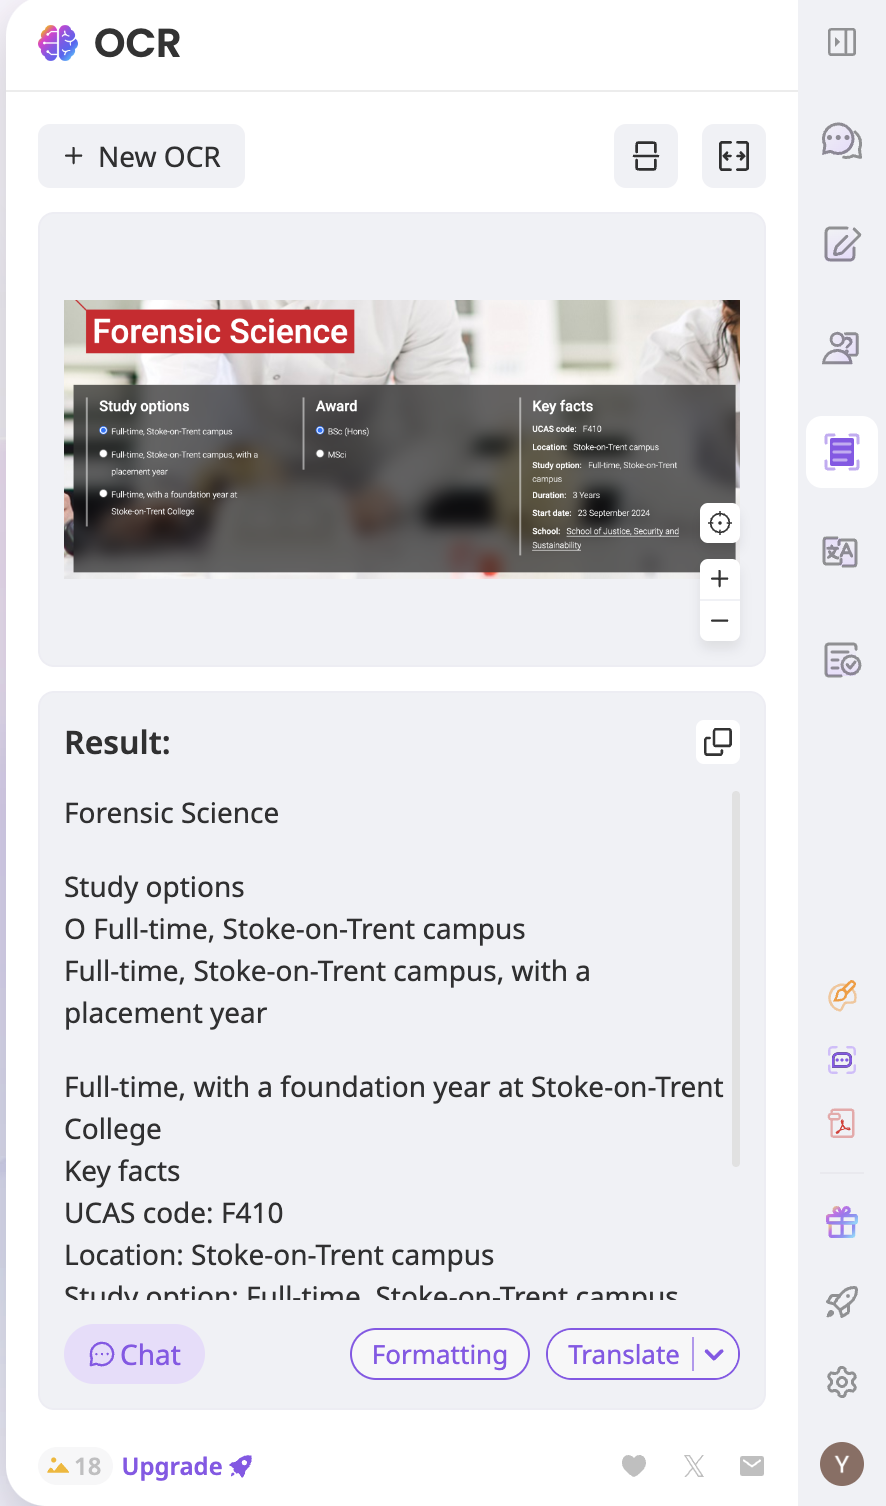
If the image uploaded fits the requirements, the extraction process will automatically begin and the result is displayed once the process is complete.
4. Click *Formatting* for Sider to automatically format the text into a readable layout.
5. To upload the extracted text as a Knowledge Source, convert the text into a PDF file by clicking the Copy icon at the result to copy the entire text.
6. Paste the text to a word processor (e.g. Microsoft Word or Google Docs) and save the file as PDF.
7. Then, refer to [this guide](/ismessenger/workspace-setting/respond-ai.md#knowledge_sources) to learn how to upload the PDF file as a Knowledge Source.
### **Convert image to text using Text Extractor in ChatGPT-4**
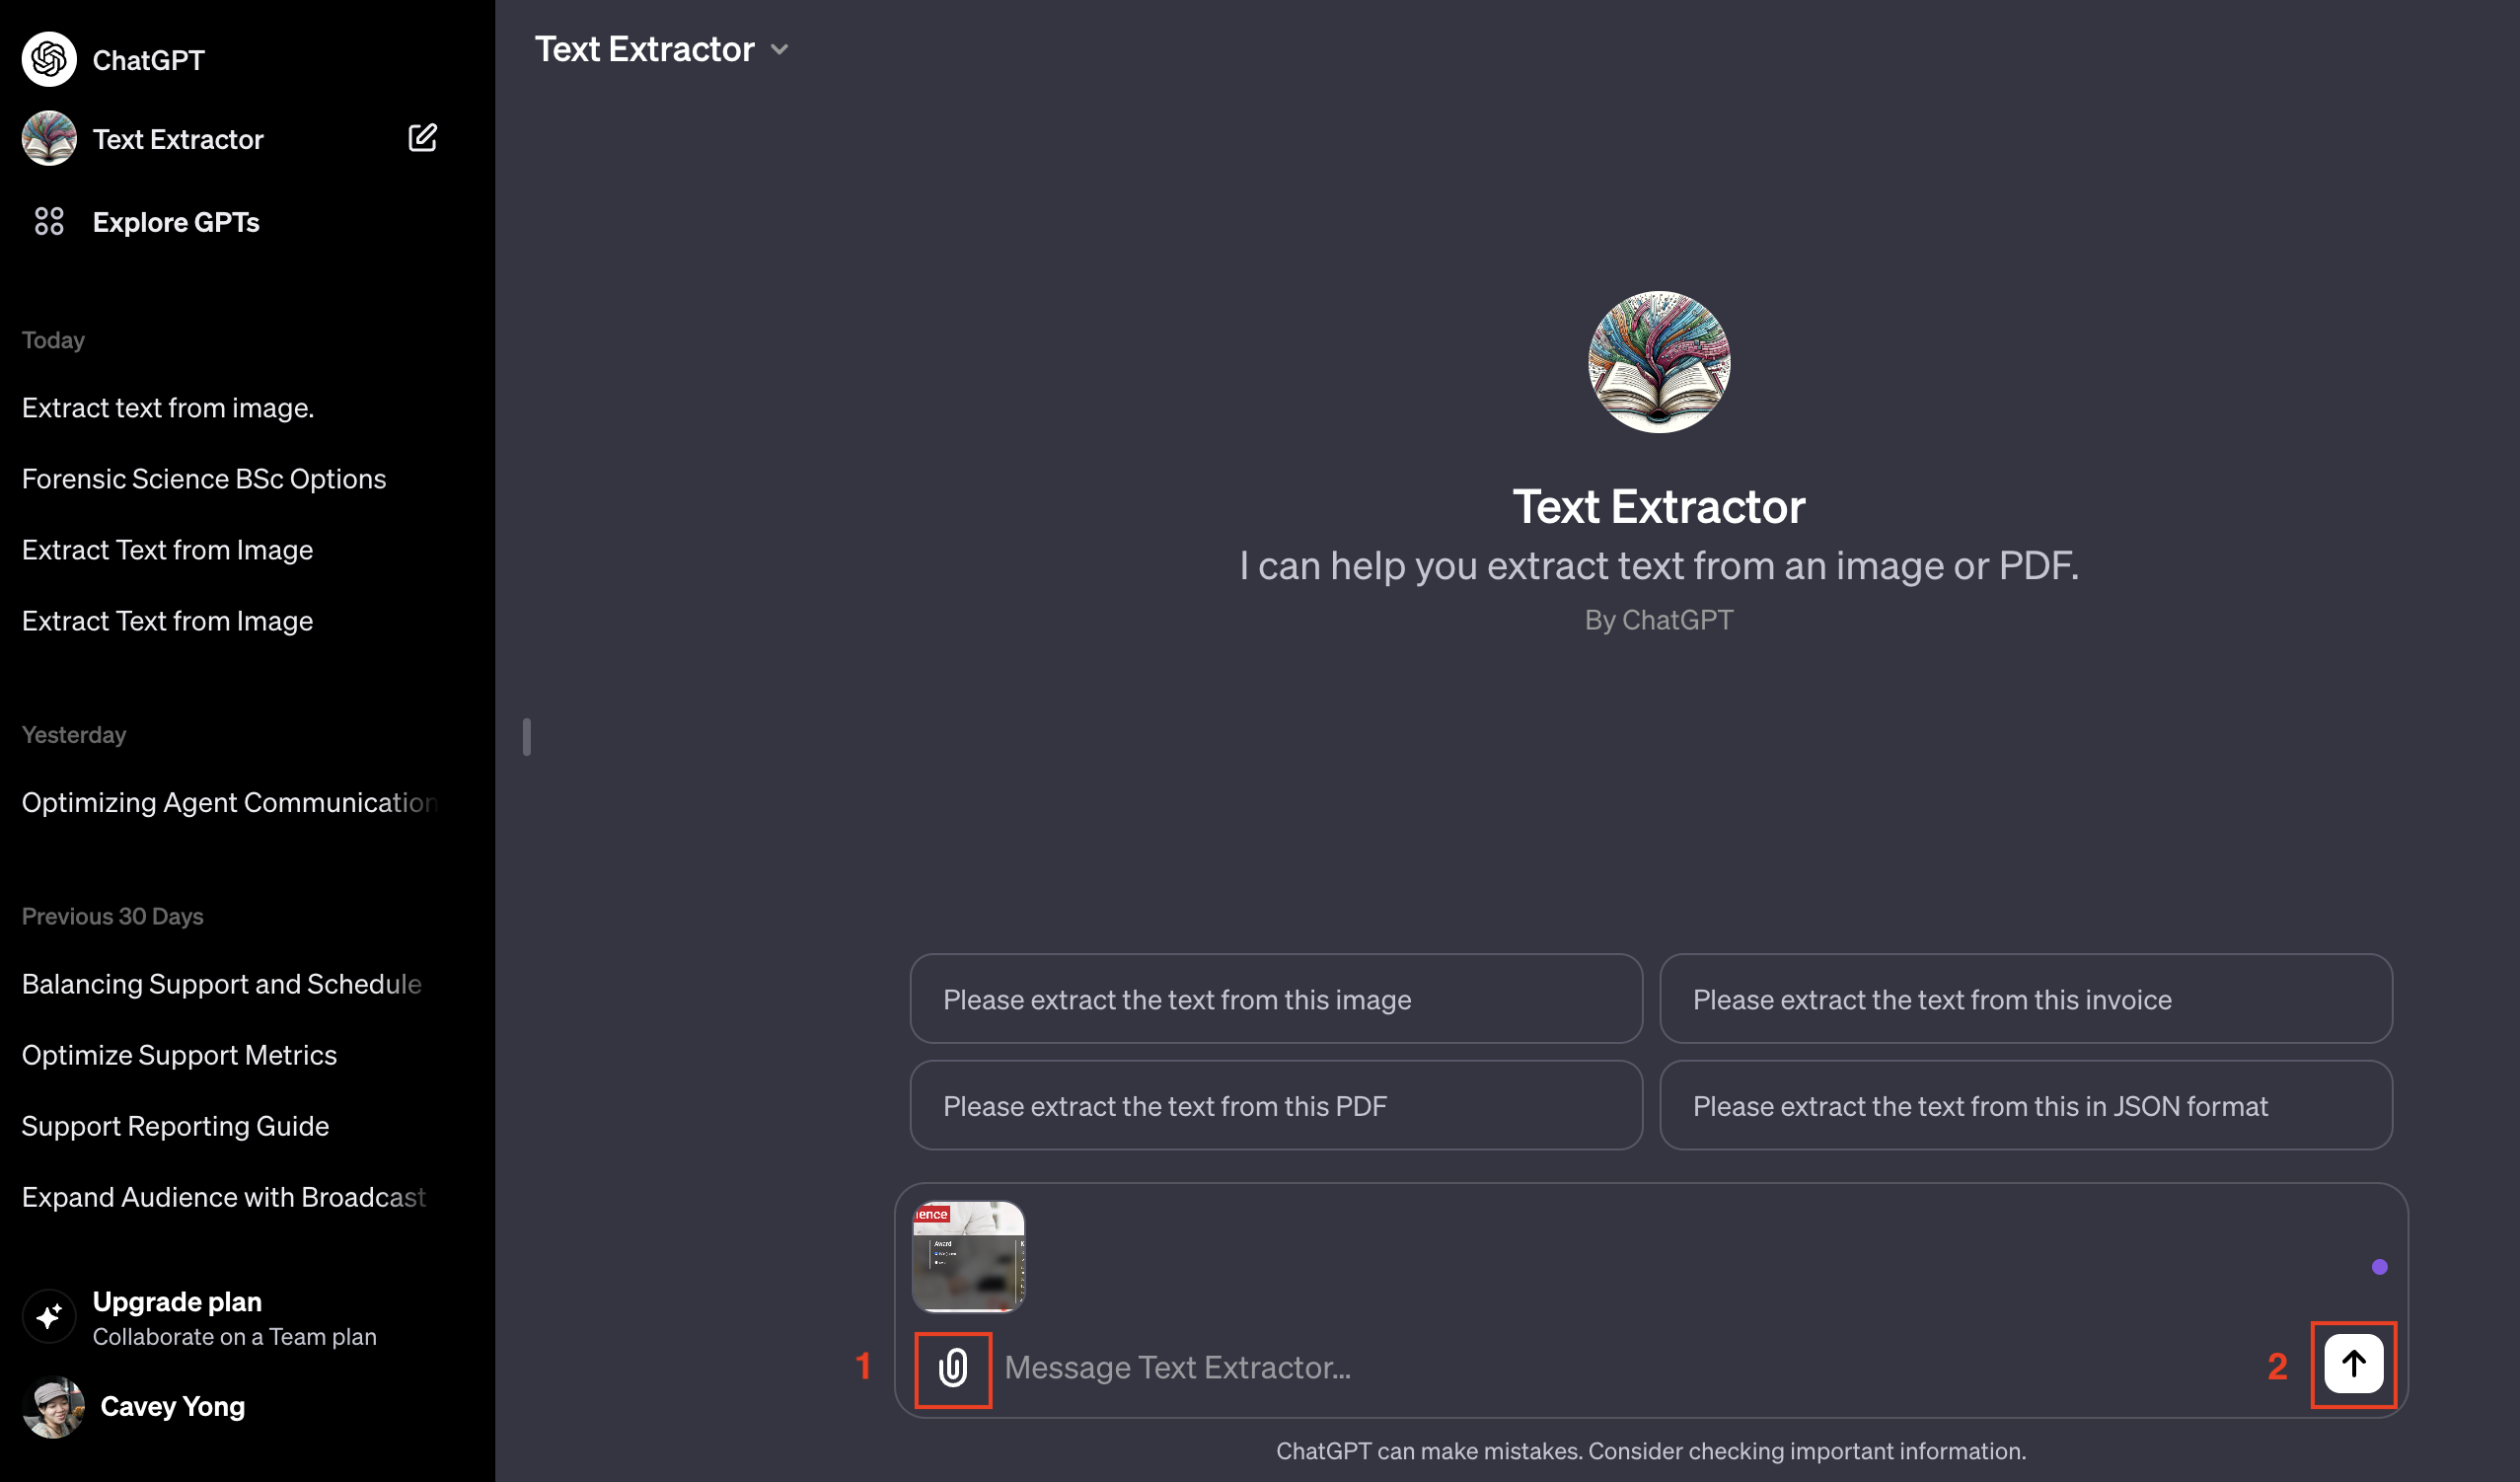
1. On **Text Extractor** in ChatGPT-4, click 📎 icon and upload your image. Ensure the file type is supported e.g. JPEG, PNG, BMP, TIFF or GIF.
{% hint style="info" %}
Read [here](#how_to_convert_image_to_text) for more tips on how to enhance the accuracy of the extraction process.
{% endhint %}
2. Once the image is uploaded, click the Up arrow icon to start the extraction process.
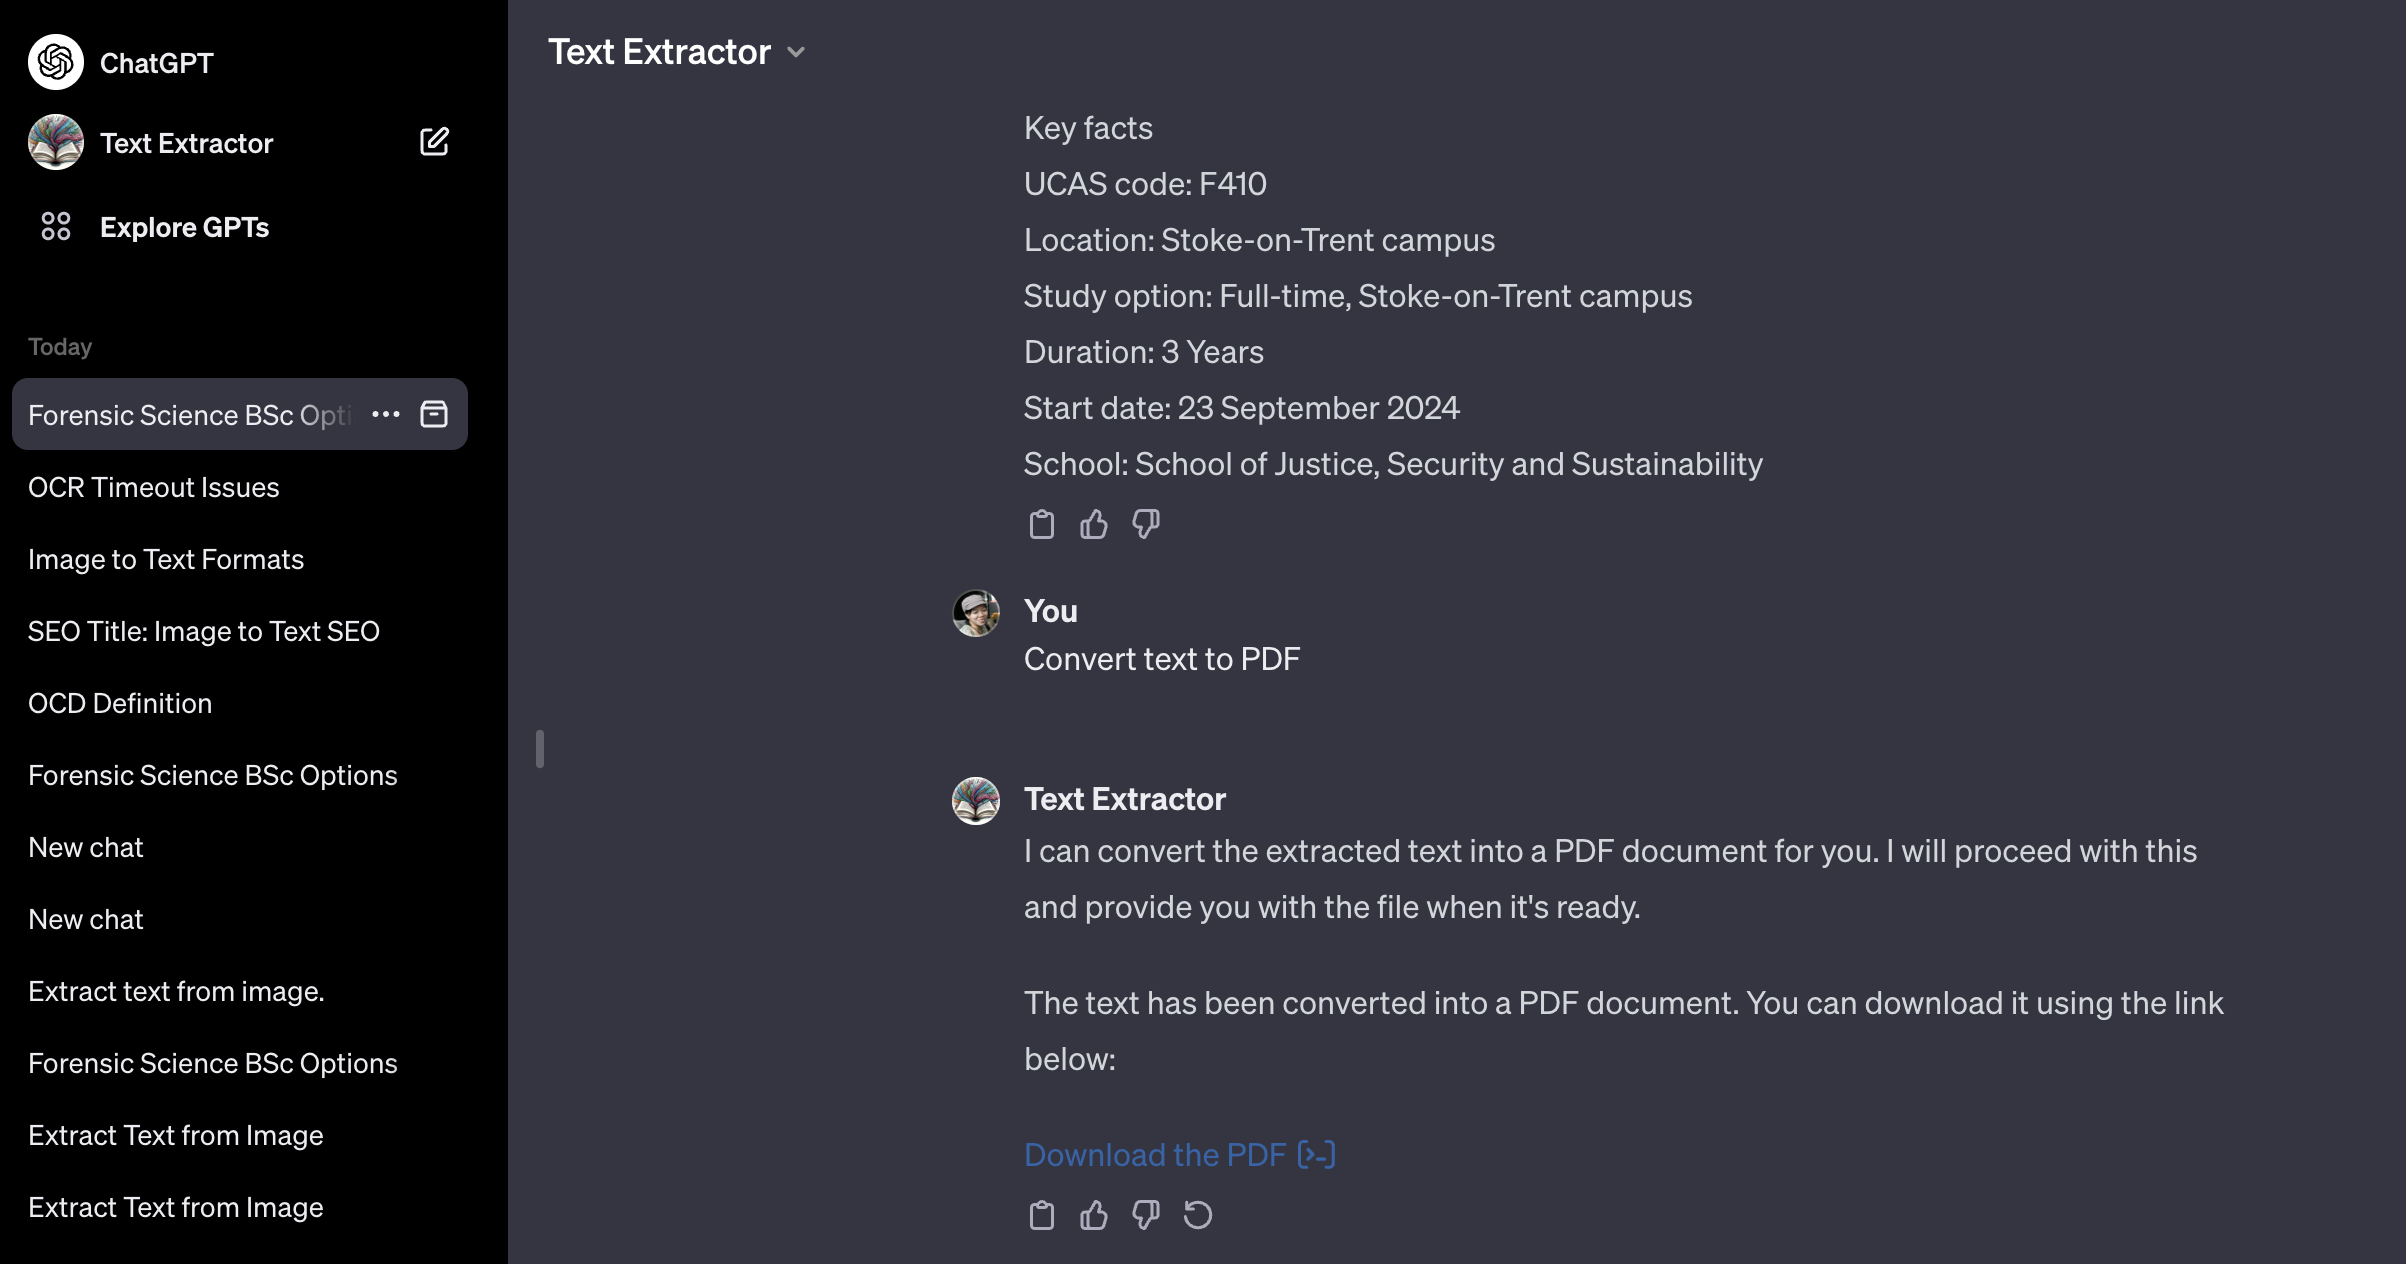
3. Once the extraction process is complete, the results will be displayed.
4. To upload the extracted text as a Knowledge Source, convert the text into a PDF file by providing an instruction to generate a PDF file based on the text. The following is an example of the instruction:
Convert text to PDF
5. Download the PDF file generated.
6. Then, refer to [this guide](/ismessenger/workspace-setting/respond-ai.md#knowledge_sources) to learn how to upload the PDF file as a Knowledge Source.
### Pro Tips
The effectiveness of the text extraction depends on the capabilities of the tool being used. To enhance the accuracy of text extraction from images, you may consider some of the key requirements listed as follows:
* Image quality: Use high-resolution and sharp images. Avoid low-resolution or pixelated images.
* Text legibility: Use image with clear and legible text.
* Minimal interference on background: Use image with text overlaid on simple backgrounds. Avoid image with text that blends into the background or that comes with watermark.
* Text orientation: Use images with text that are horizontally aligned. Text that are rotated at an angle may not produce the best results.
---
# Agent Instructions: Querying This Documentation
If you need additional information that is not directly available in this page, you can query the documentation dynamically by asking a question.
Perform an HTTP GET request on the current page URL with the `ask` query parameter:
```
GET https://docs.is-messenger.com/ismessenger/converse-with-customers/how-to-convert-image-to-text-using-ai.md?ask=
```
The question should be specific, self-contained, and written in natural language.
The response will contain a direct answer to the question and relevant excerpts and sources from the documentation.
Use this mechanism when the answer is not explicitly present in the current page, you need clarification or additional context, or you want to retrieve related documentation sections.