# How to Promptly Transfer Conversation Between Agents
{% hint style="success" %}
In this article, you’ll discover how to automatically transfer a customer conversation to a different agent if the initial agent does not respond within a defined time frame.
{% endhint %}
Prompt transfer of conversations when the initial agent is unable to respond within a specified time frame ensures that customer queries are addressed in a timely manner. This reduces response time and fosters a positive customer experience.
### Workflow Setup
Learn how to configure your Workflow to automatically route an open conversation to another agent if the first agent does not respond to the customer after a certain period of time.
{% hint style="success" %}
This setup is applicable only to the first assignment of an open conversation.
{% endhint %}
**Set up**:
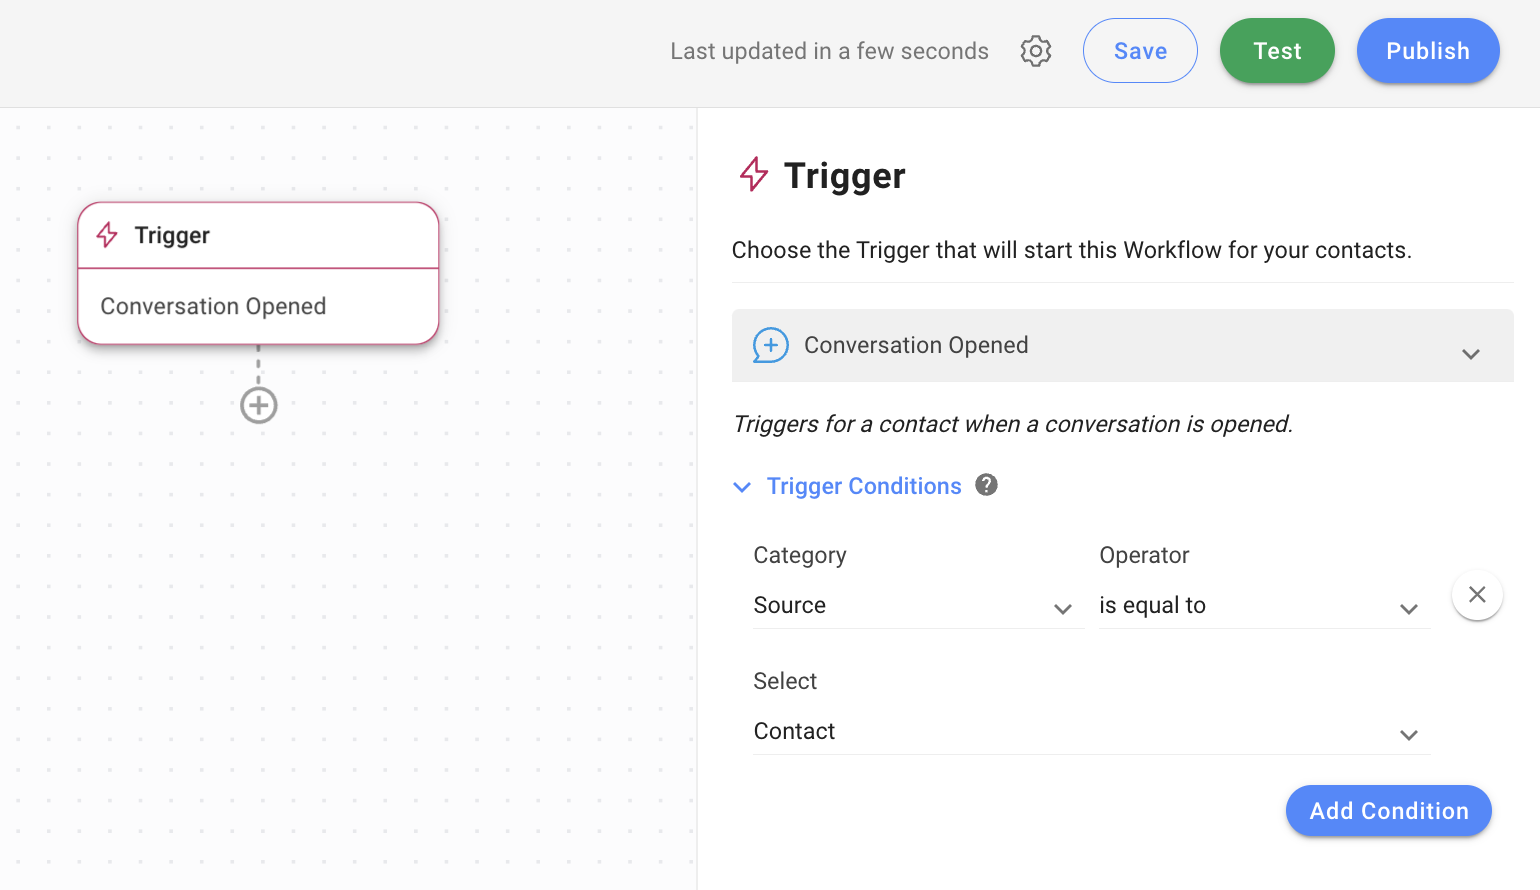
1. Set the Workflow to [trigger](/ismessenger/modules/workflow/triggers.md) when a conversation is opened by a Contact:
* *Trigger*: *Conversation Opened*
* *Category*: *Source*
* *Operator*: *is equal to*
* *Select*: *Contact*
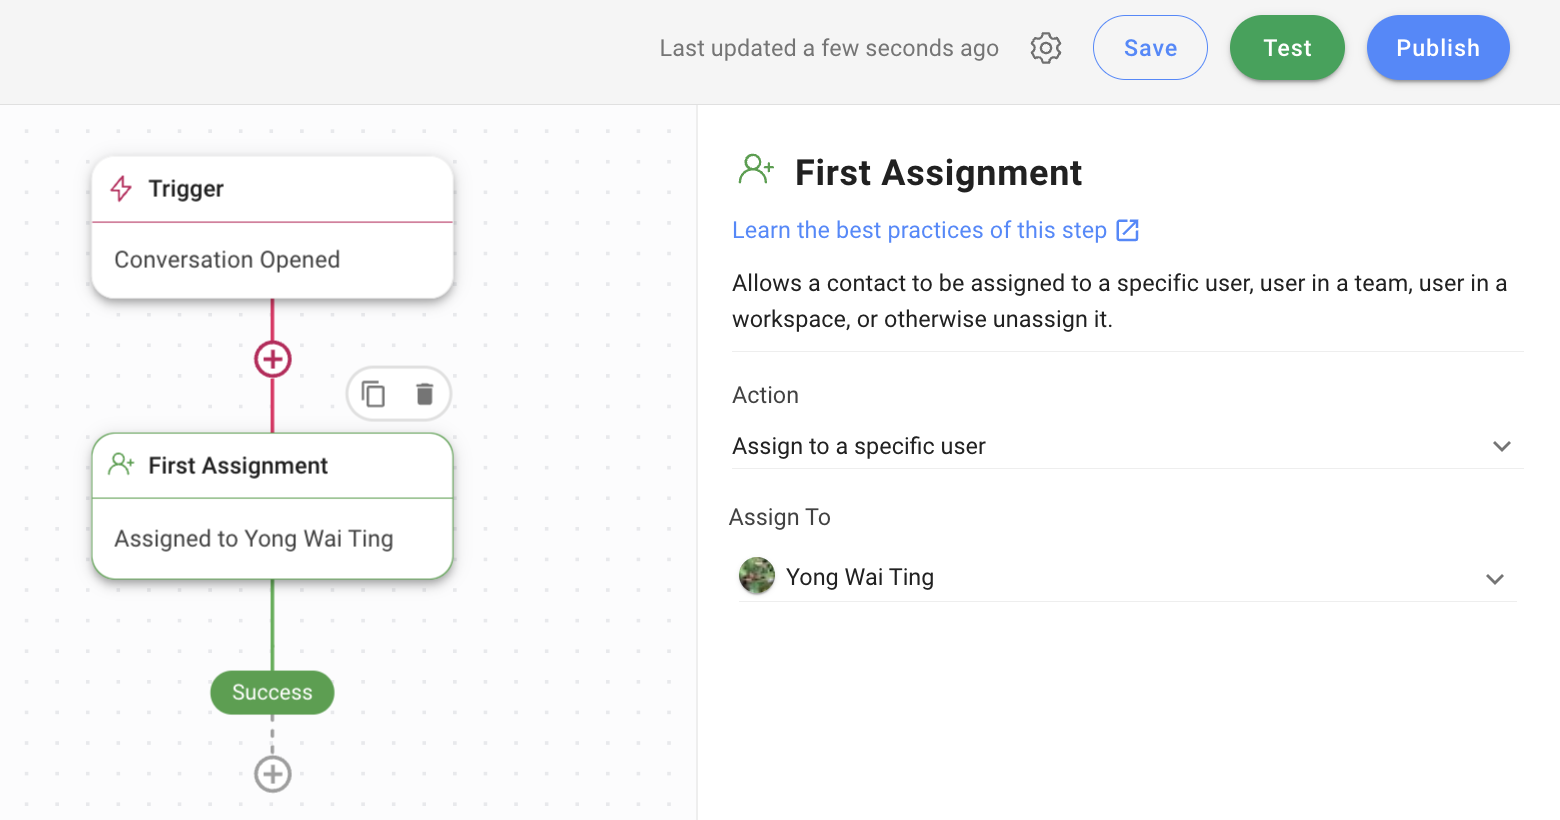
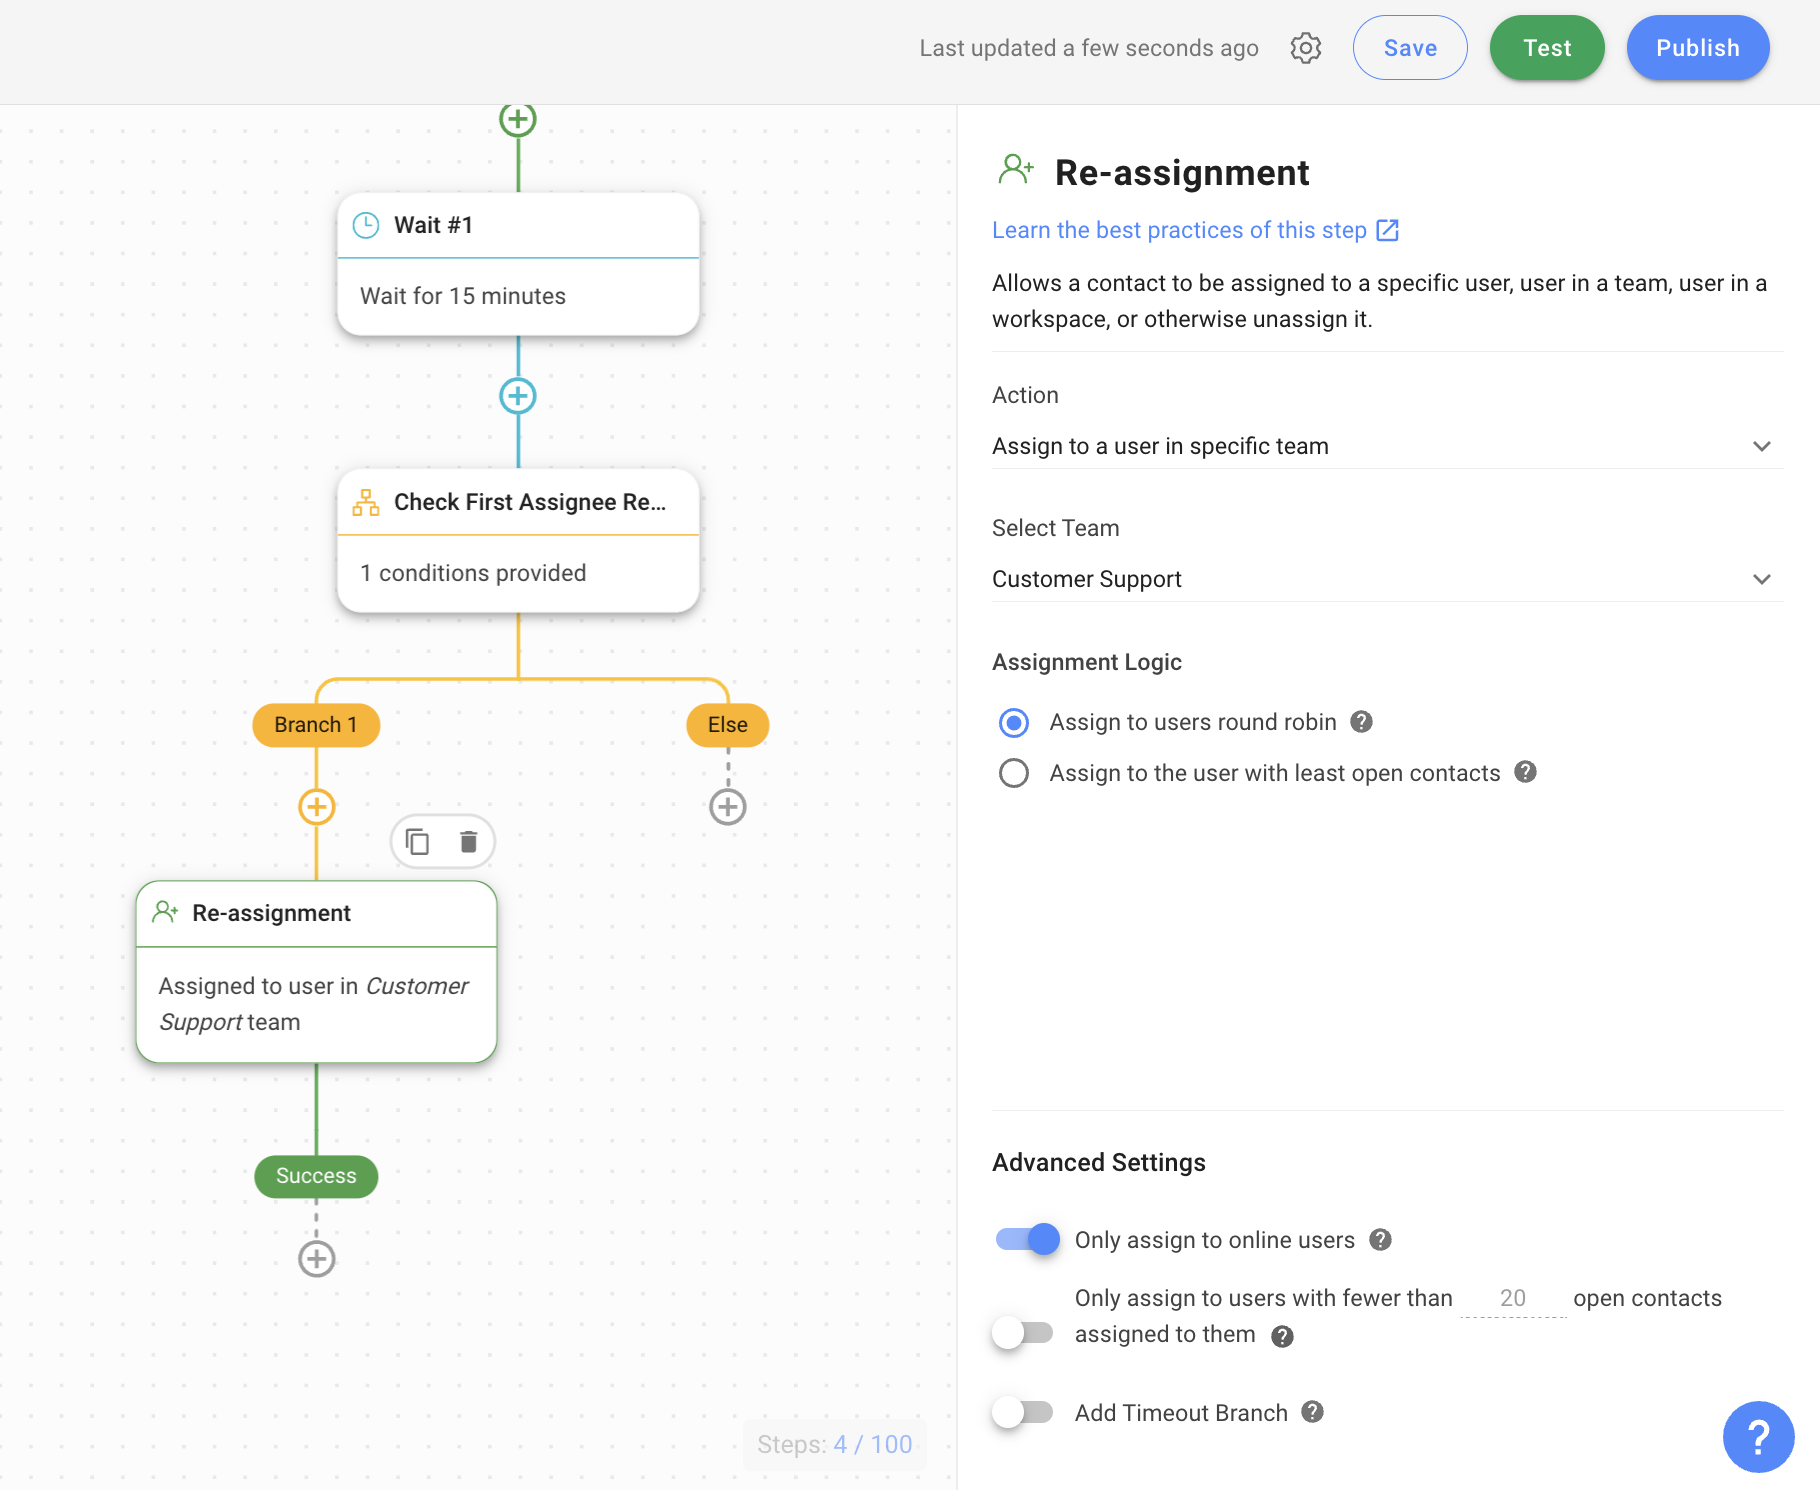
2. Add an [Assign To](/ismessenger/modules/workflow/workflow-step/step-assign-to.md) step to assign the conversation to a team or a specific agent based on your business needs. In this example, the Workflow is configured to assign to a specific agent.
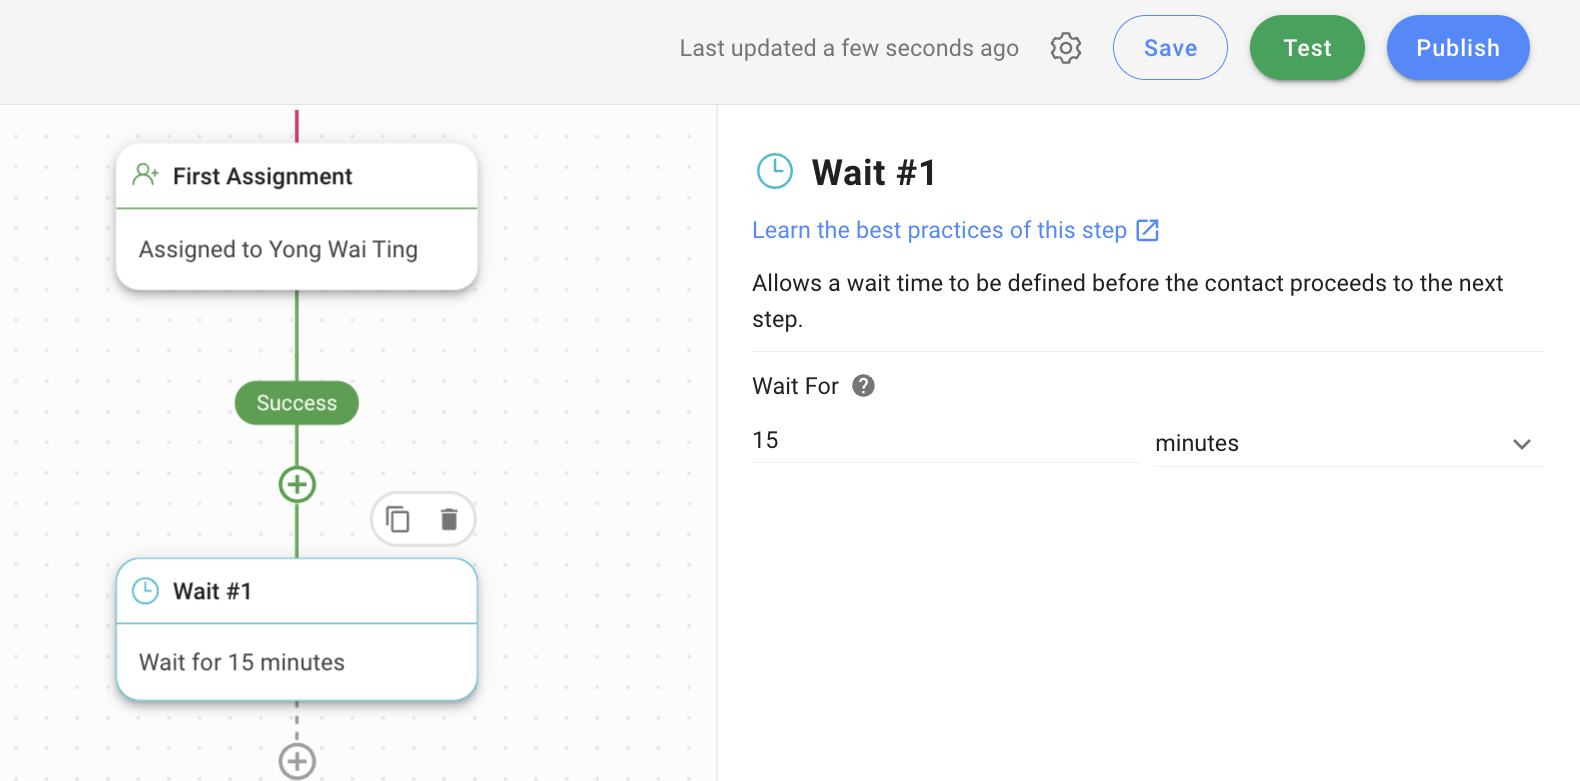
3. Then, add a [Wait](/ismessenger/modules/workflow/workflow-step/step-wait.md) step. You can set the duration for the reassignment of the conversation to another agent if the initial agent does not respond within the specified duration. In this example, the duration is set to 15 minutes.
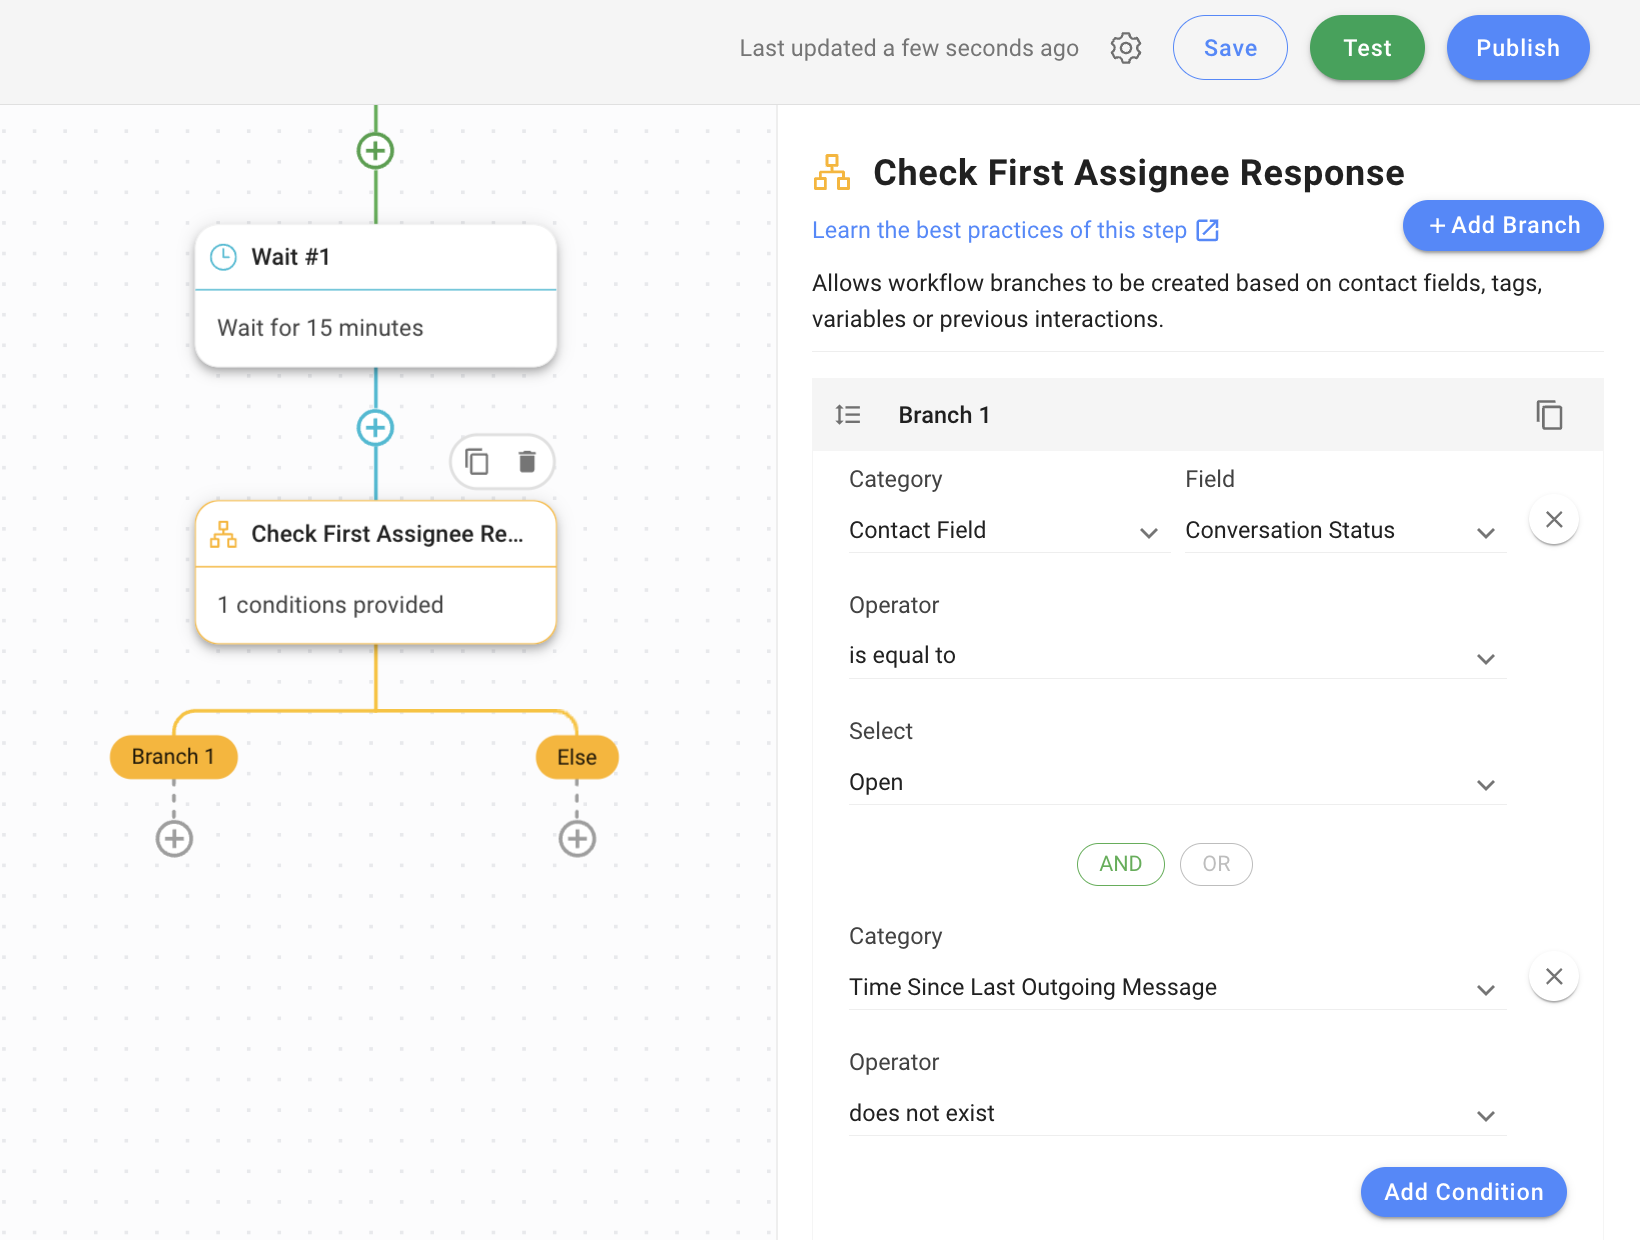
4. Add a [Branch](/ismessenger/modules/workflow/workflow-step/step-branch.md) step to define the conditions that must be met for the agent reassignment to occur. In this example, 2 conditions are configured:
*First condition*
* *Category*: *Contact Field*
* *Field*: *Conversation Status*
* *Operator*: *is equal to*
* *Select*: *Open*
AND *second* *condition*
* *Category*: *Time Since Last Outgoing Message*
* *Operator*: *does not exist*
5. If the conditions are met, add an [Assign To](/ismessenger/modules/workflow/workflow-step/step-assign-to.md) step to reassign the conversation to another team or a specific agent based on your business needs. In this example, the Workflow is configured to assign to an agent in a specific team.
{% hint style="info" %}
To ensure your customer is attended to in a timely manner, you may want to reassign the conversation only to agents who are currently online. For this, turn the *Only assign to online users* toggle on.
{% endhint %}
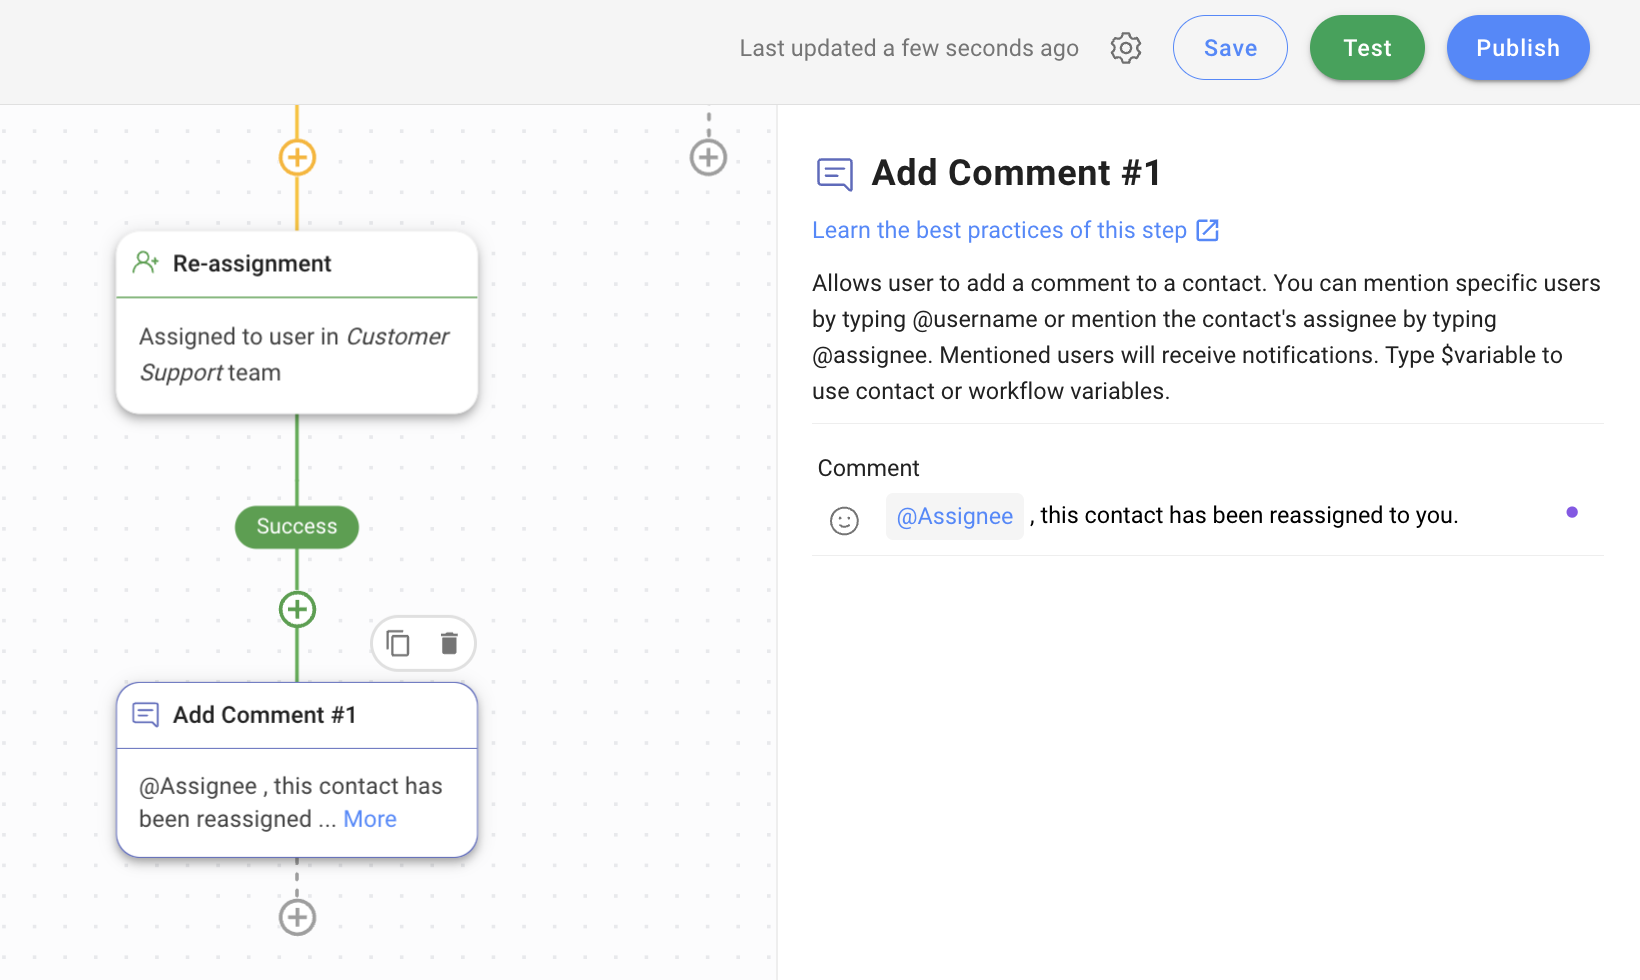
6. Optionally, you may add an [Add Comment](https://help.respond.io/workflows/step-add-comment) step to write a note about the Contact for internal reference or action. In this example, a comment will be sent to the second agent to inform of the Contact reassignment.
{% hint style="success" %}
Once you have completed the setup, click **Save** and **Publish** to activate the Workflow.
{% endhint %}
#### Pro Tips
1\. The examples of configurations provided for each step are intended solely as a guide for setting up the Workflow. You may opt to modify the configurations and/or add additional steps according to your needs.
2\. Understanding the Assignment logic:
* *Assign to users round robin* enables the system to distribute conversations with Contacts equally among agents.
* *Assign to user with least open contacts* enables the system to distribute conversations with Contacts among agents, starting with agents who have the lowest number of open Contacts.
3\. Continuous monitoring of the effectiveness of the Workflow is important to ensure the configurations remain relevant to your business needs.
---
# Agent Instructions: Querying This Documentation
If you need additional information that is not directly available in this page, you can query the documentation dynamically by asking a question.
Perform an HTTP GET request on the current page URL with the `ask` query parameter:
```
GET https://docs.is-messenger.com/ismessenger/how-to-promptly-transfer-conversation-between-agents.md?ask=
```
The question should be specific, self-contained, and written in natural language.
The response will contain a direct answer to the question and relevant excerpts and sources from the documentation.
Use this mechanism when the answer is not explicitly present in the current page, you need clarification or additional context, or you want to retrieve related documentation sections.