# How to Transfer Contacts to the Next Shift Automatically
{% hint style="success" %}
**Business Goal**: Enable agents to transfer open conversations to the next shift with a click of a button.
{% endhint %}
Businesses that rely on shift-based operations often face the challenge of ensuring smooth transitions and handovers when one agent's shift ends and another's begins. If your business has multiple working shifts, use this Workflow to allow your agents to transfer open conversations using a shortcut button to the next shift with a summary of the conversation.
#### Benefits of Transferring Contacts to the Next Shift Automatically
* Reduces downtime during shift transitions by providing the next-shift agents with some context about the open conversation.
* Streamlines the handover process from one agent to the next by automating the system when triggered.
* Improve communication between teams by ensuring important information is seamlessly transferred between shifts.
#### Workflow Setup
Learn how to use the Workflow Template to set up an automated conversation handover:
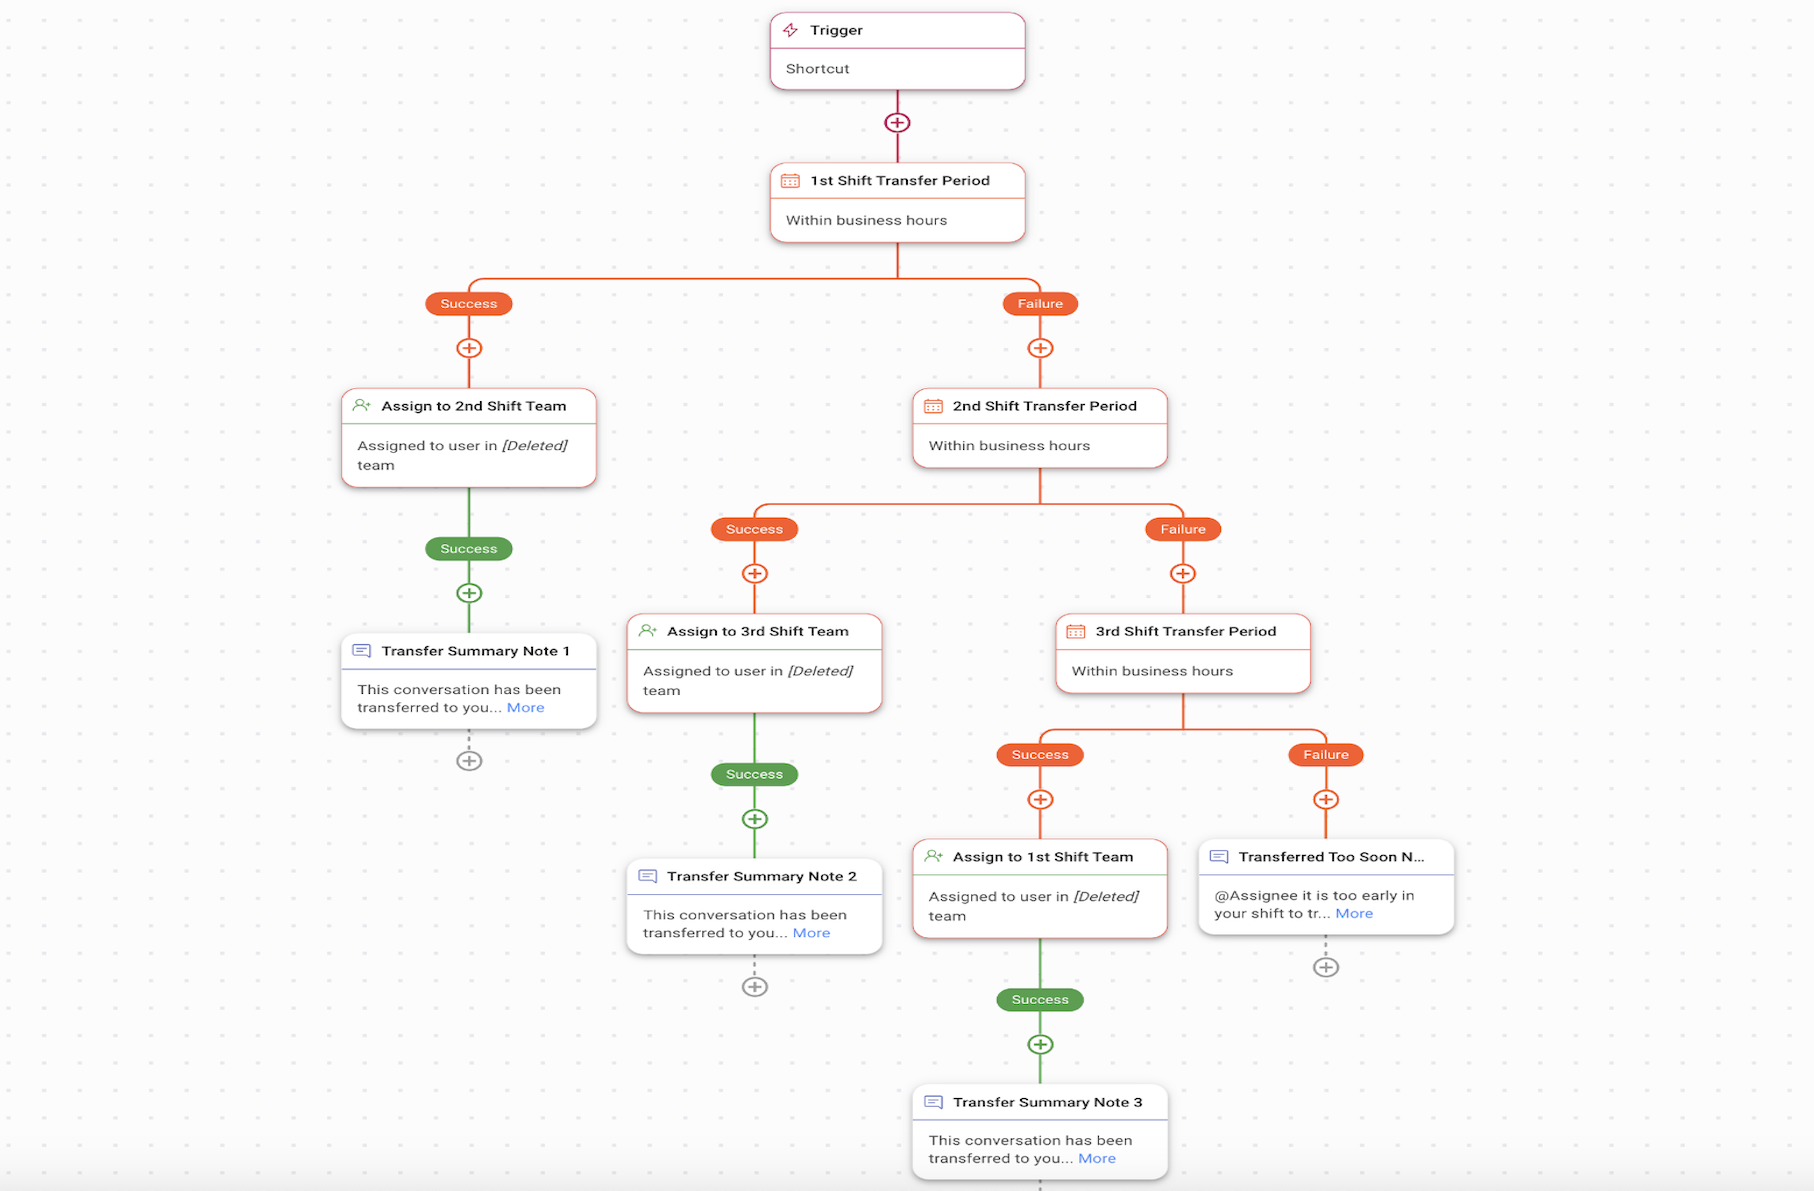
* Select the Shift Transfer Workflow Template and set up the shortcut configuration to trigger the workflow.
* Identifying the Shift Transfer period.
* Assign Contacts with open conversations to agents in the upcoming shift, along with a summary note.
* Shift Transfer Failure: Transferred to Soon Note.
**Select the Shift Transfer Workflow Template and set up the shortcut configuration to trigger the workflow**
In the **Workflows** module, click **+ Add Workflow** > Click **Shift Transfer** > Click **Use Template**.
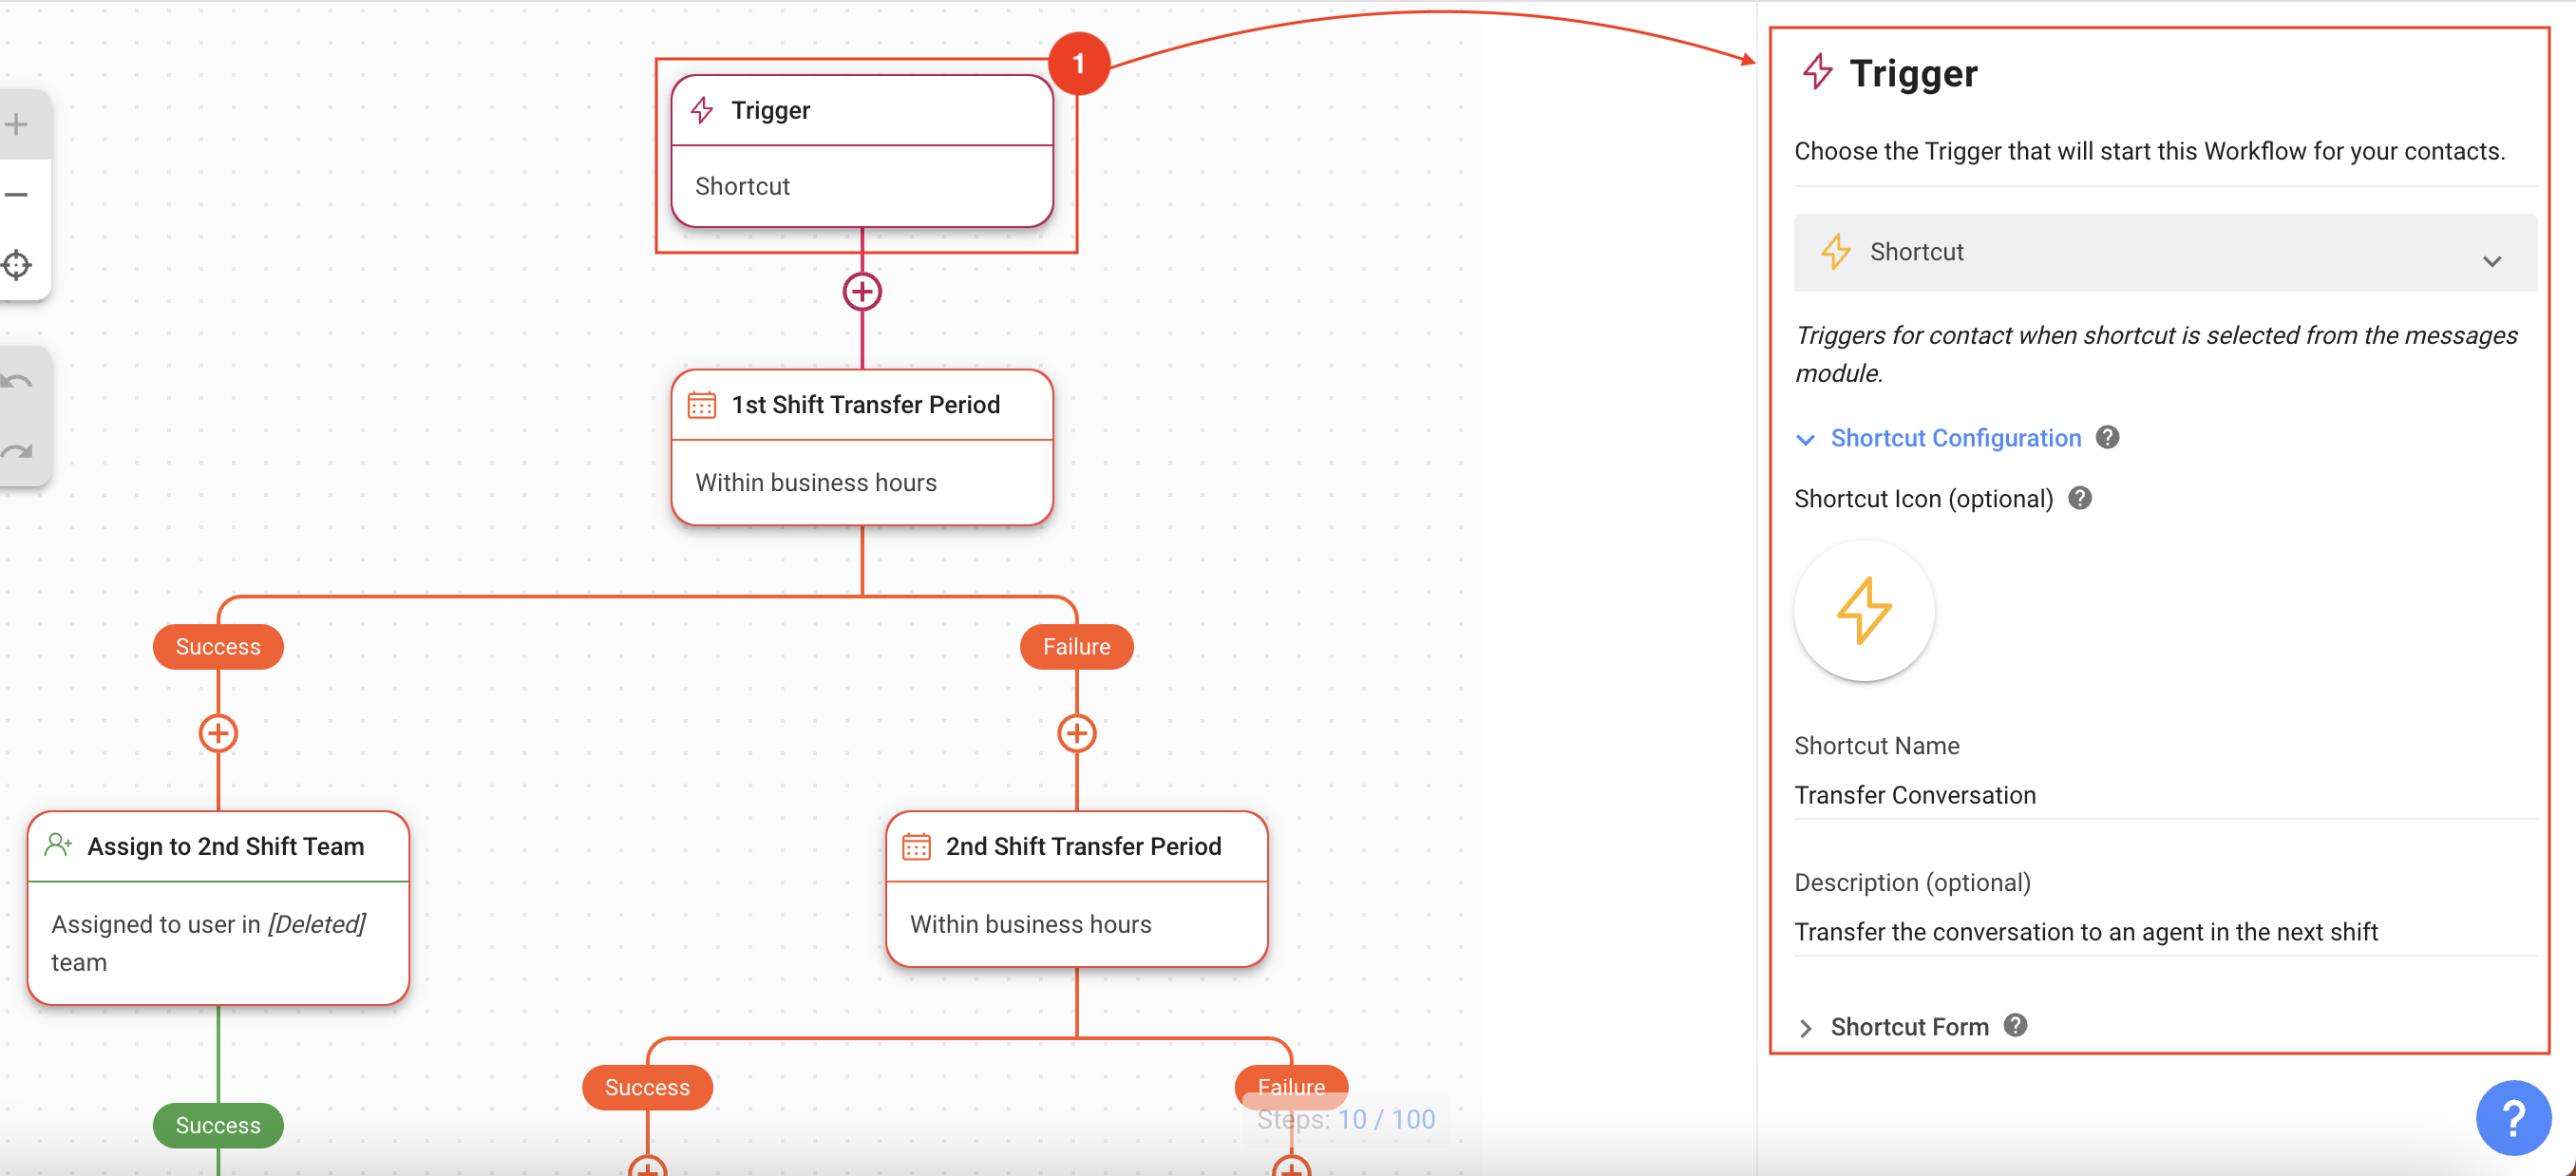
[**Trigger**](https://help.respond.io/workflows/workflow-triggers): The Workflow starts when an agent selects the **Shortcut** button.
Under *Shortcut Configuration*, provide the following information:
* **Shortcut Icon and Name**: Select an icon and provide a name to identify your Shift Transfer Shortcut.
* **Description**: Describe the purpose of the shortcut.
Under *Shortcut Form*, provide the following information:
* **Form Field**: The conversation summary goes here.
* **Field Type**: Select **Text** so that the agent can provide a summary of the open conversation to the next agent.
* [**Output Variable**](/ismessenger/contact-and-messages/untitled.md)**:** Provide a name for the variable that contains the summary.
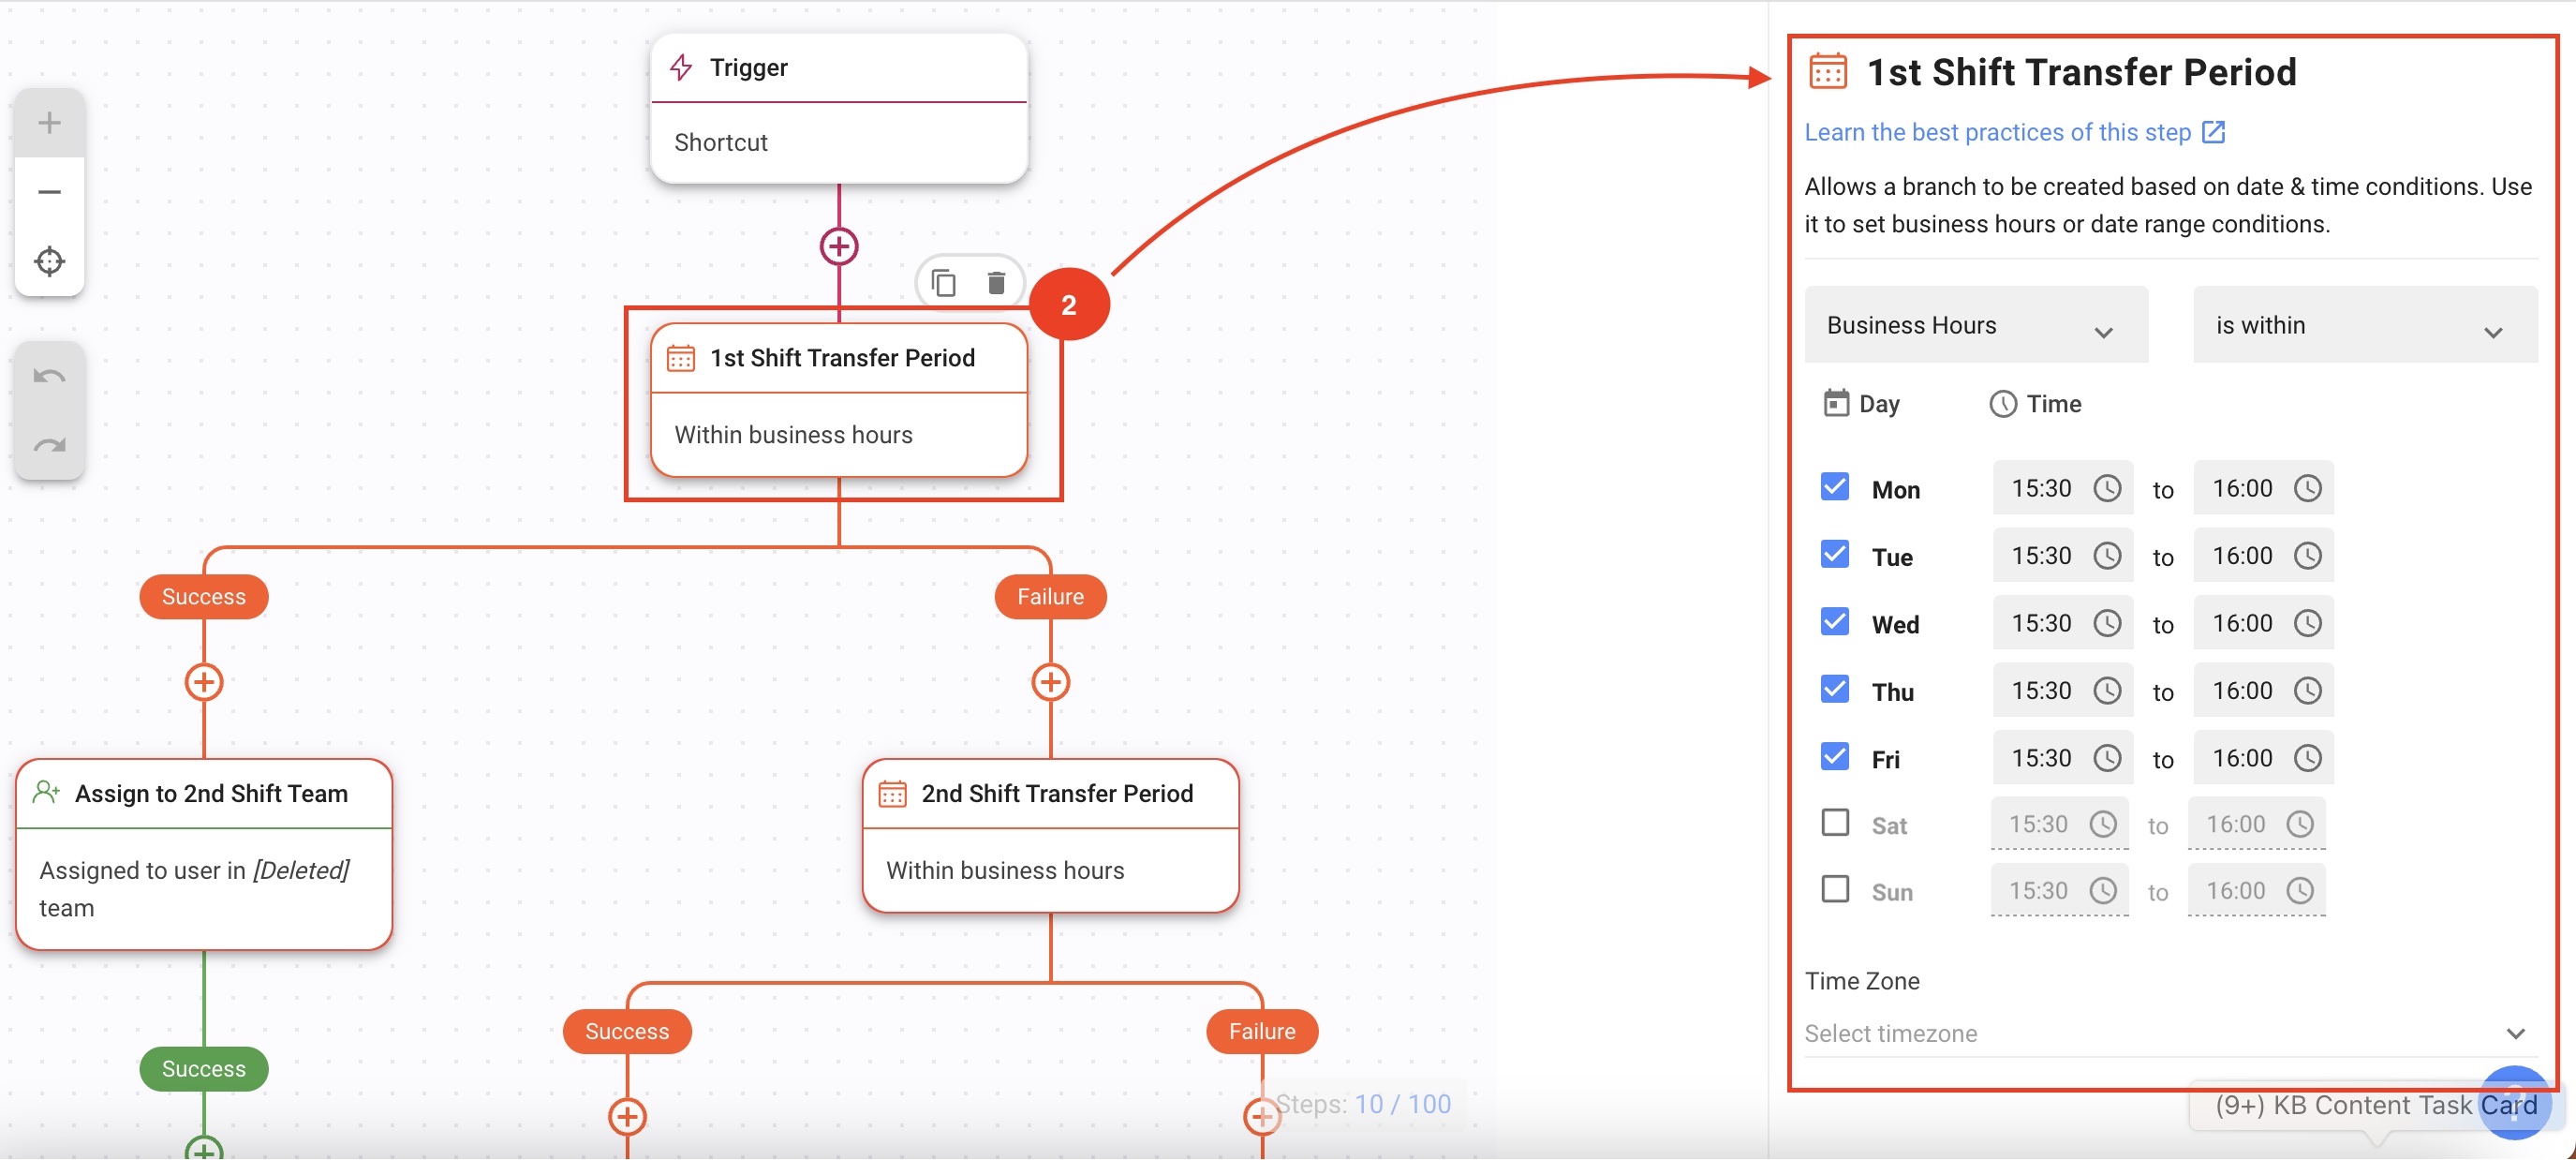
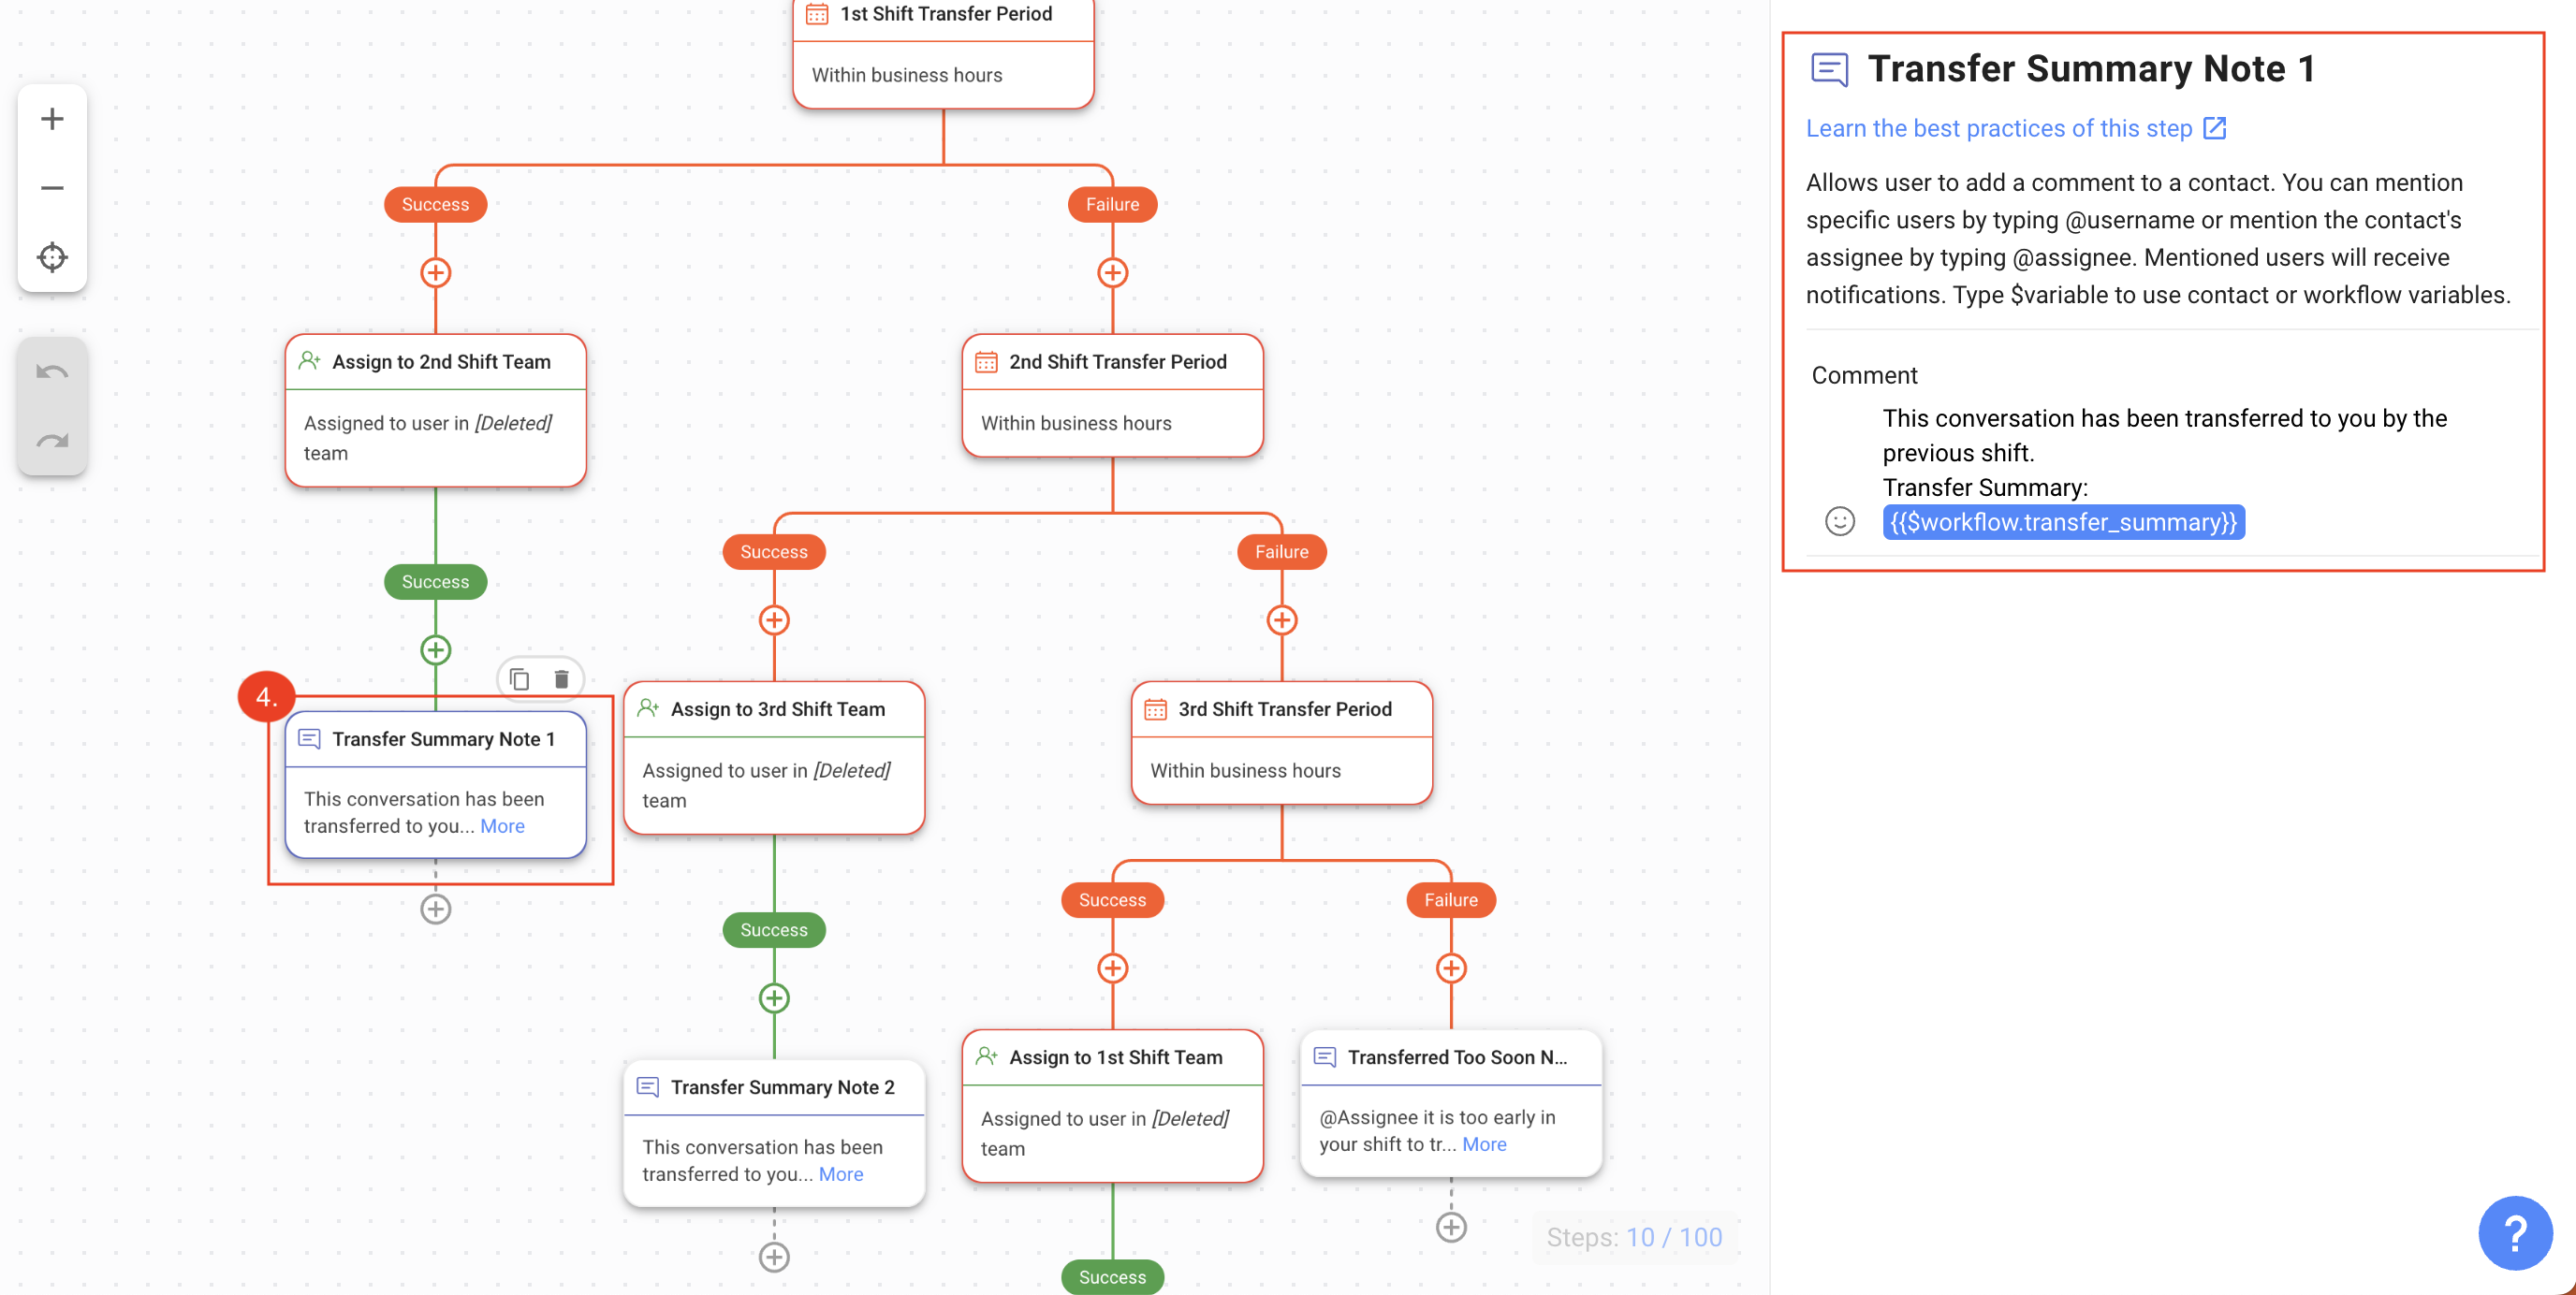
**Identifying the Shift Transfer period**
**1st / 2nd / 3rd Shift Transfer Period**: Specify the [operational days, business hours and time zone](/ismessenger/modules/workflow.md) of each shift. Then, provide the shift transfer window within which an agent can transfer the conversation to the next shift.
**Assign Contacts with open conversations to agents in the upcoming shift, along with a summary note**
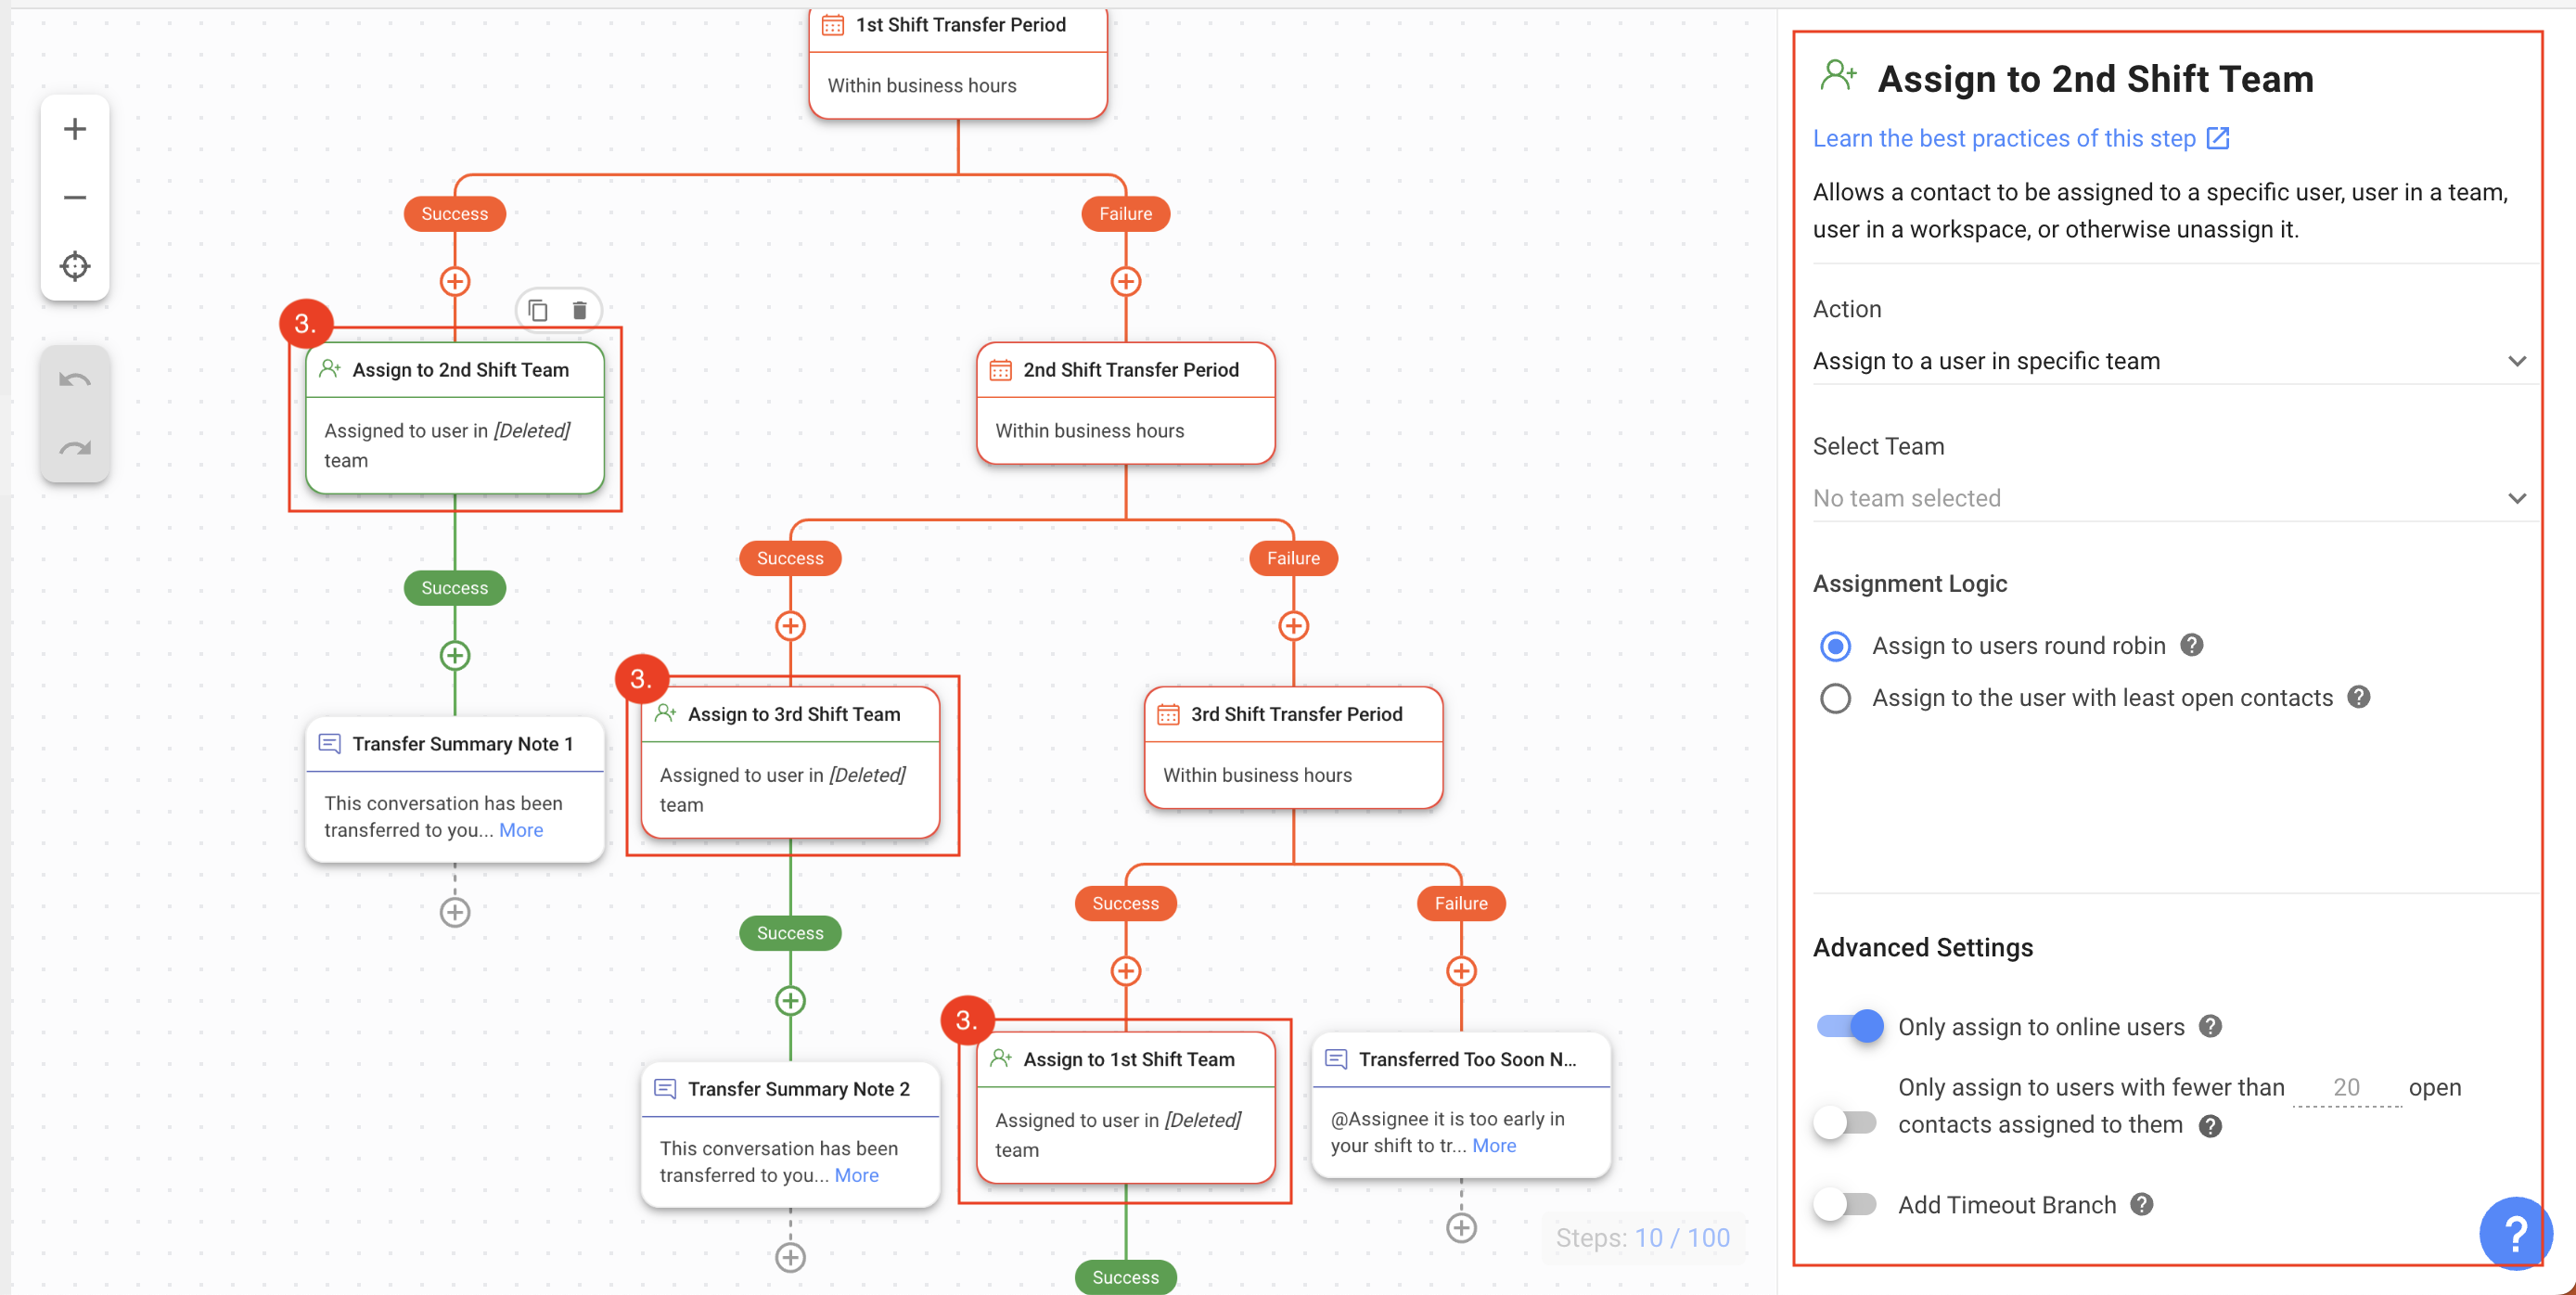
**Assign to 2nd / 3rd / 1st Shift Team**: Configure this [Assign To](/ismessenger/modules/workflow.md) step with a team based on your business needs. You can also set up the auto-assignment based on your [strategy preferences](/ismessenger/handling-inbound-conversations.md).
**Transfer Summary Note 1 / 2 / 3**: This is an [Add Comment](/ismessenger/modules/workflow.md) step where the transfer summary notes are sent to the agent who will be assigned to the Contact.
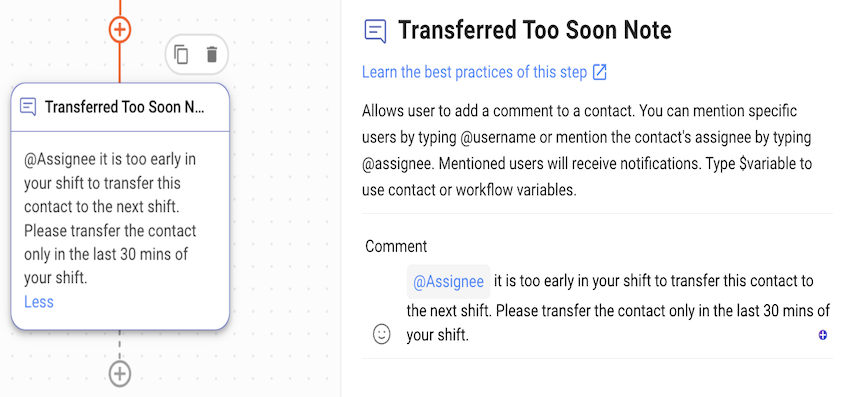
**Shift Transfer Failure: Transferred to Soon Note**
When an agent transfers the conversation before the stipulated time, the **Transferred Too Soon Note** is sent to the agent and the transfer is prevented.
In this Workflow Template, the date and time conditions have been set up to allow agents to transfer Contacts to the agent in the next shift in the last 30 minutes of the agent’s shift and not before that.
Once you have completed the configuration, click **Save** and **Publish** to activate the workflow.
#### How It Works: Shift Transfer Workflow
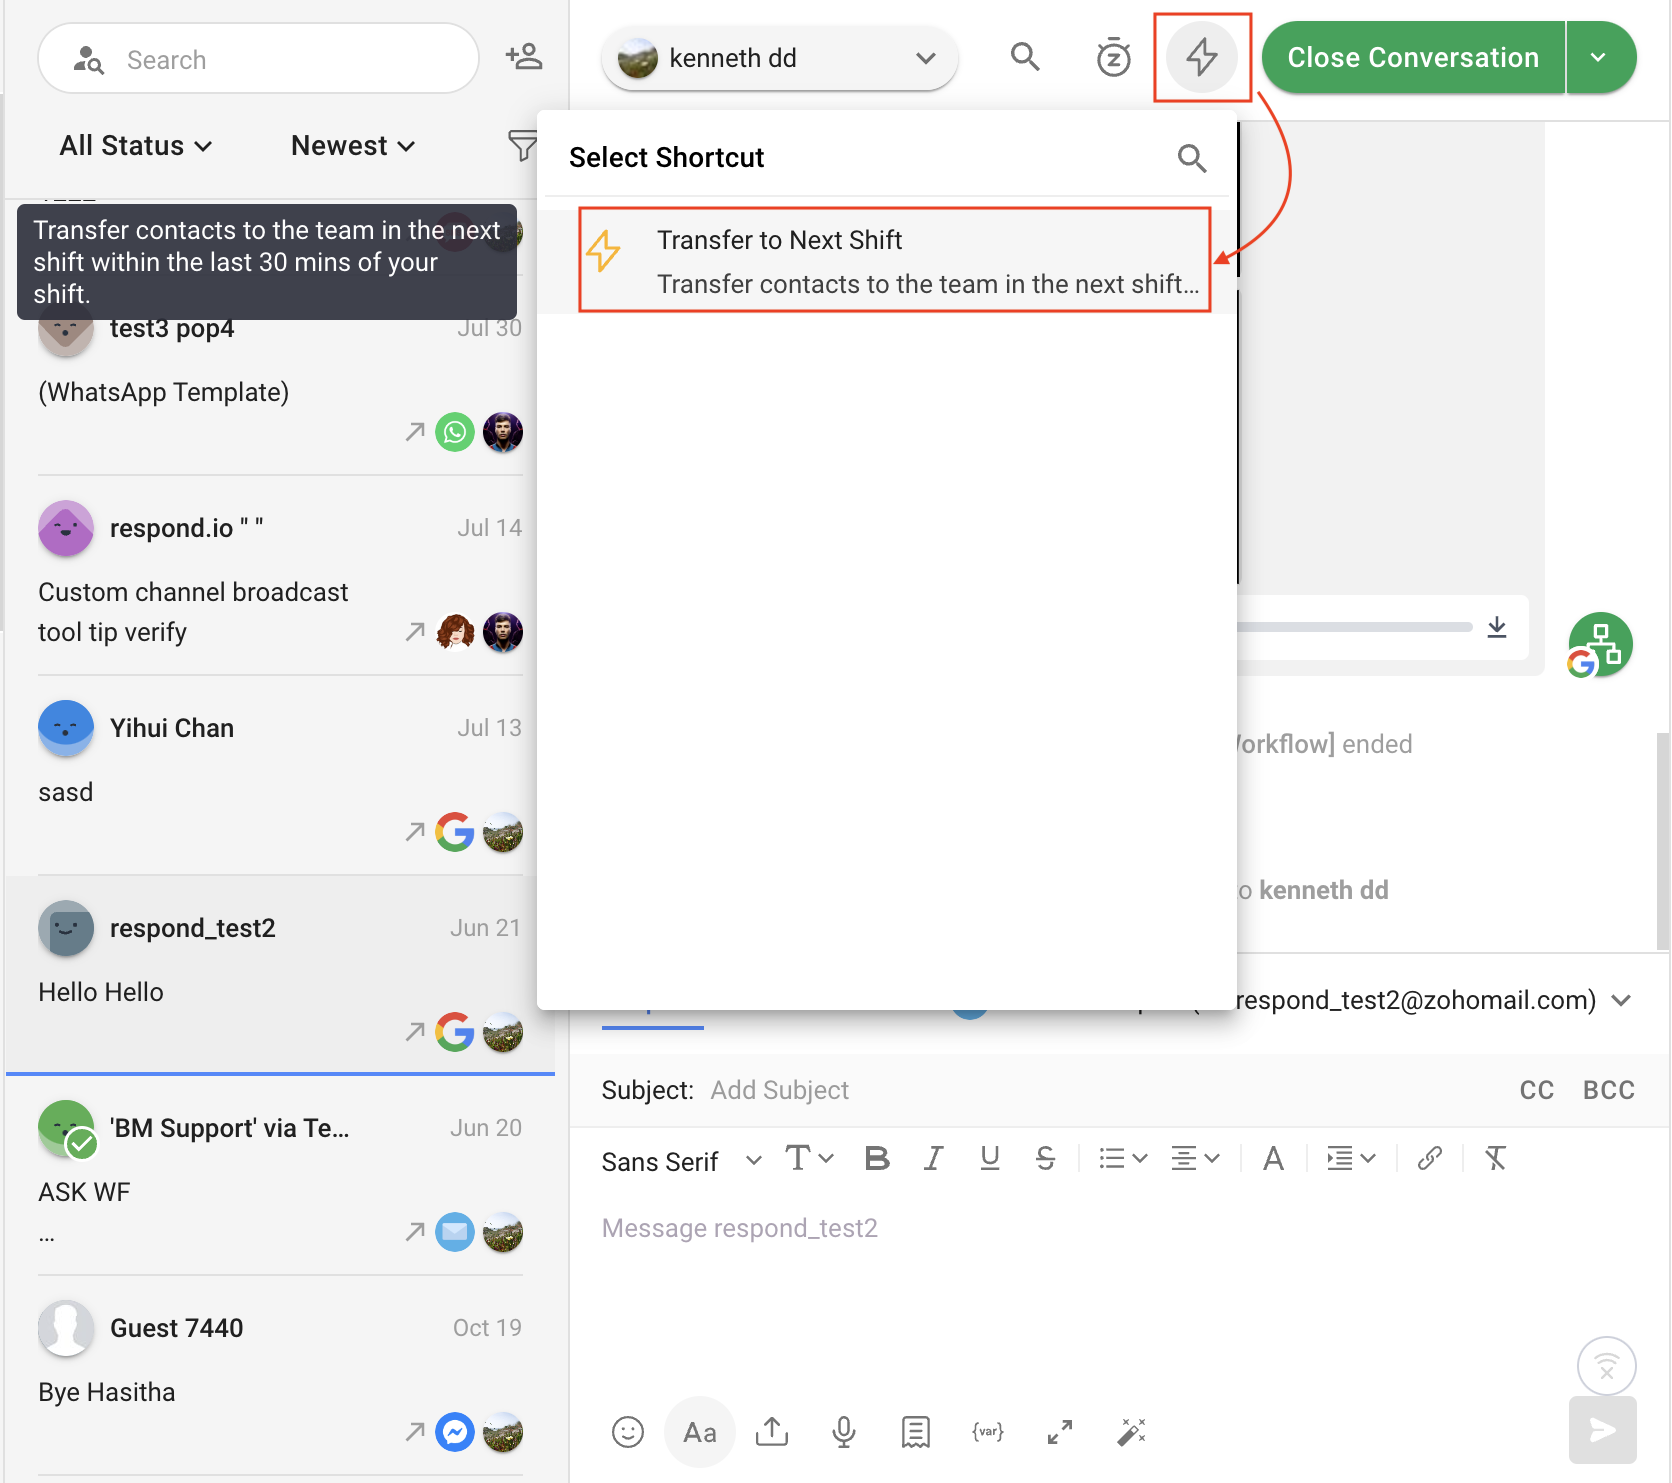
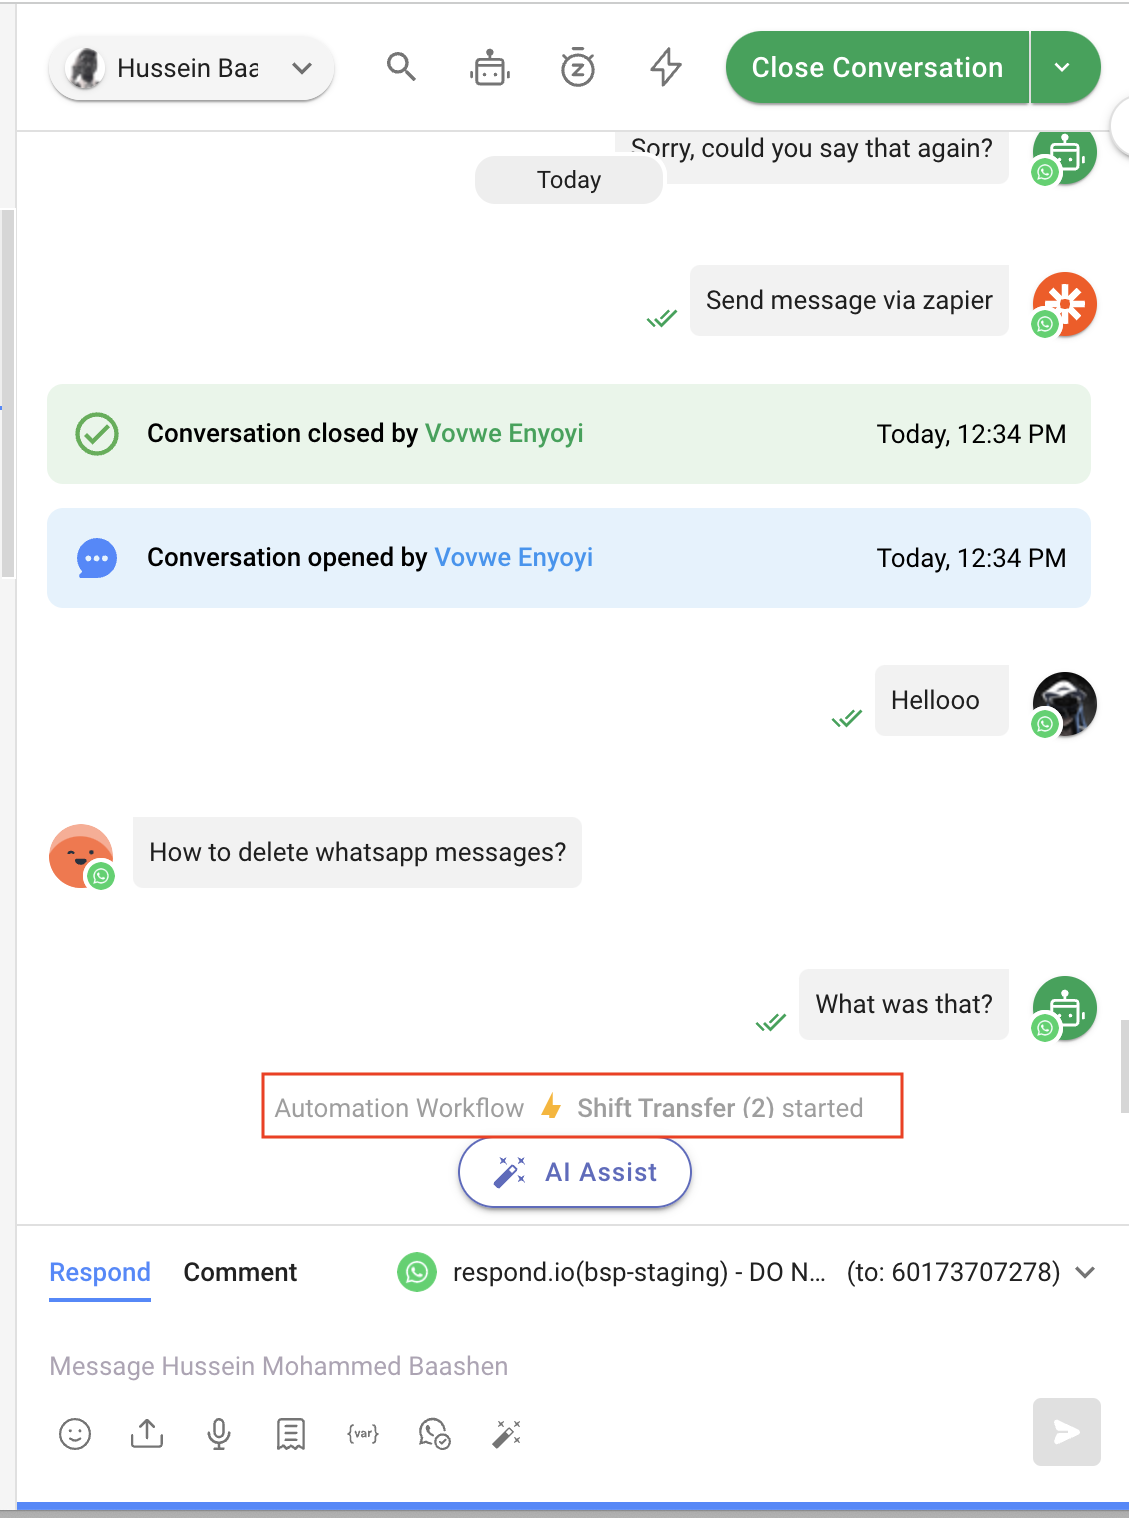
1. From the Messages Module, an agent clicks the **Shortcut** button > the **Transfer to Next Shift** shortcut to transfer the conversation to an agent in the next shift.
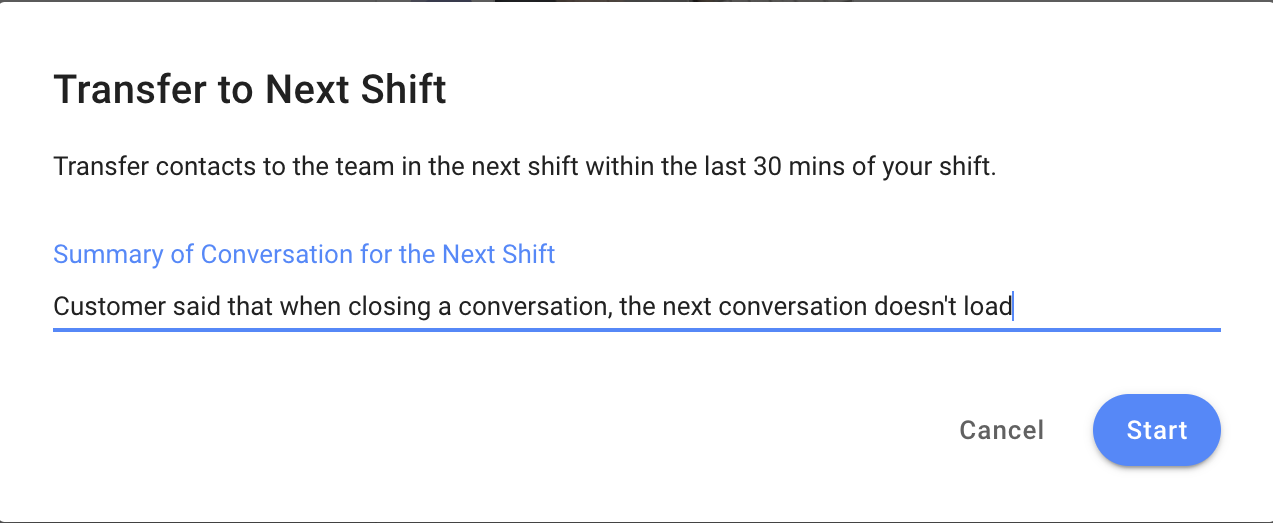
2. The agent provides a summary of the conversation on the **Transfer to Next Shift** dialog and clicks **Start**.
3. The Contact is either automatically routed to the agent available in the next shift or if it is too early, the agent is informed.
---
# Agent Instructions: Querying This Documentation
If you need additional information that is not directly available in this page, you can query the documentation dynamically by asking a question.
Perform an HTTP GET request on the current page URL with the `ask` query parameter:
```
GET https://docs.is-messenger.com/ismessenger/converse-with-customers/how-to-transfer-contacts-to-the-next-shift-automatically.md?ask=
```
The question should be specific, self-contained, and written in natural language.
The response will contain a direct answer to the question and relevant excerpts and sources from the documentation.
Use this mechanism when the answer is not explicitly present in the current page, you need clarification or additional context, or you want to retrieve related documentation sections.