# How to Simplify Customer Escalation with Automation
{% hint style="success" %}
**Business Goal**: Enable agents to initiate issue escalations to second-level support teams while engaging in customer conversations.
{% endhint %}
When more complex customer issues arise, this Workflow enables first-level agents to easily escalate issues using a Shortcut button. Customers will be routed to the selected second-level team, along with a summary of the issue. This helps second-level agents to quickly understand customer problems and improve resolution time.
#### Benefits of Simplifying Customer Escalation with Automation
* Streamline internal business processes by automating the routing system.
* Improve collaboration between teams by ensuring a smooth flow of information.
* Reduce customers downtime by routing more complex issues to specialized agents.
#### Workflow Setup
Learn how to use the Workflow Template to set up an automated issue escalation process:
* Select the Issue Escalation Workflow Template.
* Configure the Shortcut Trigger.
* Automatically route Contacts to the selected team and assign to an agent.
**Select the Issue Escalation Workflow Template**
In the **Workflows** module, click **+ Add Workflow** > Click **Issue Escalation** > Click **Use Template**.
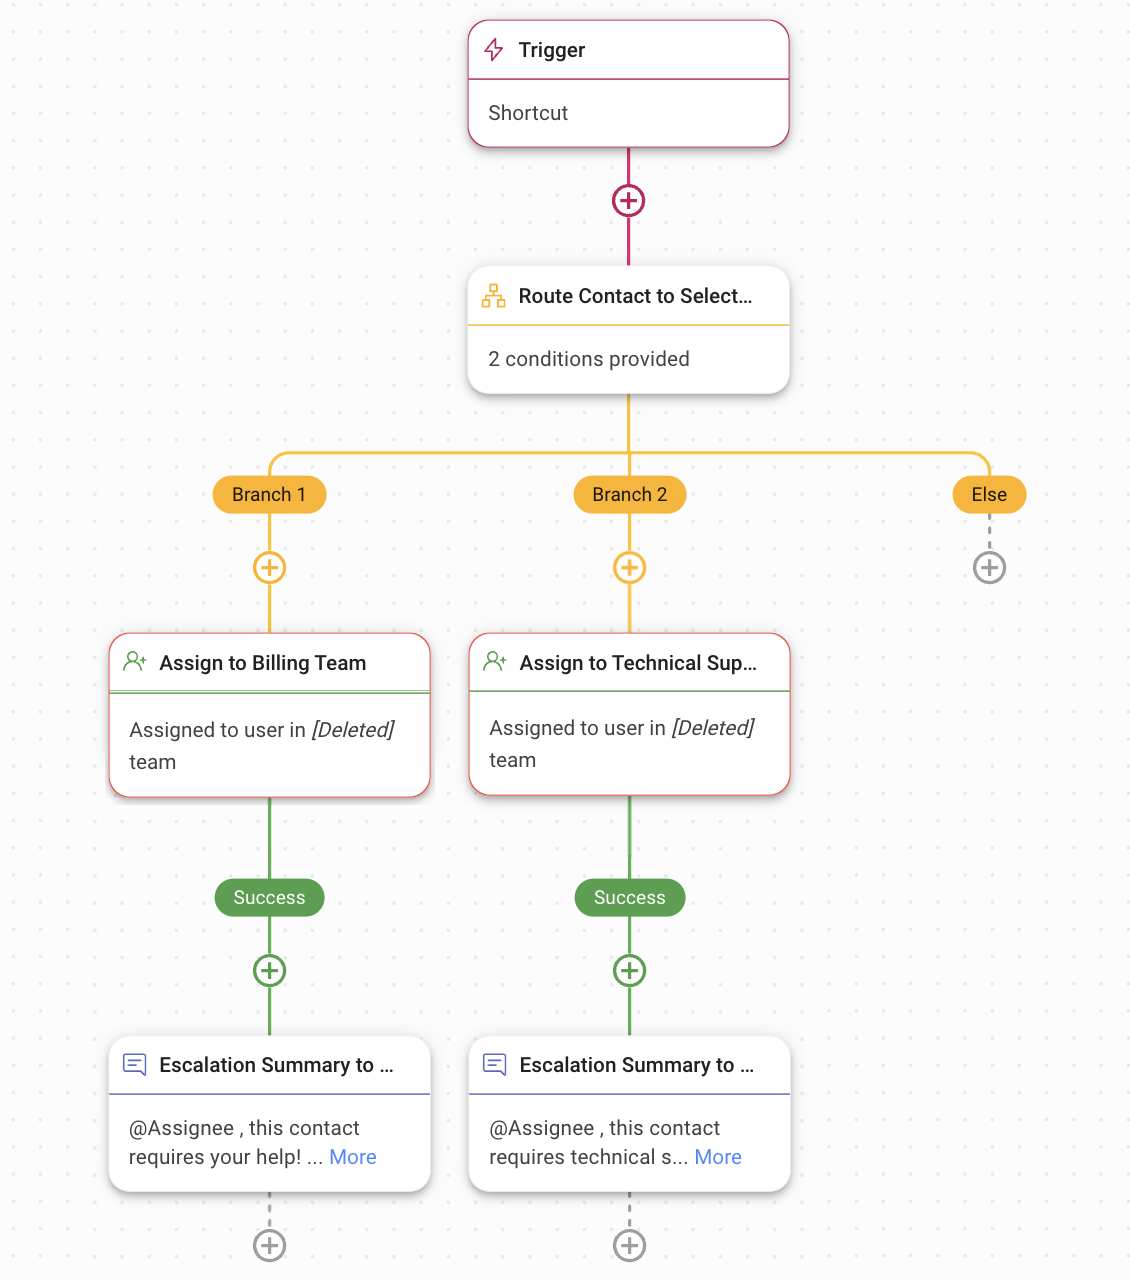
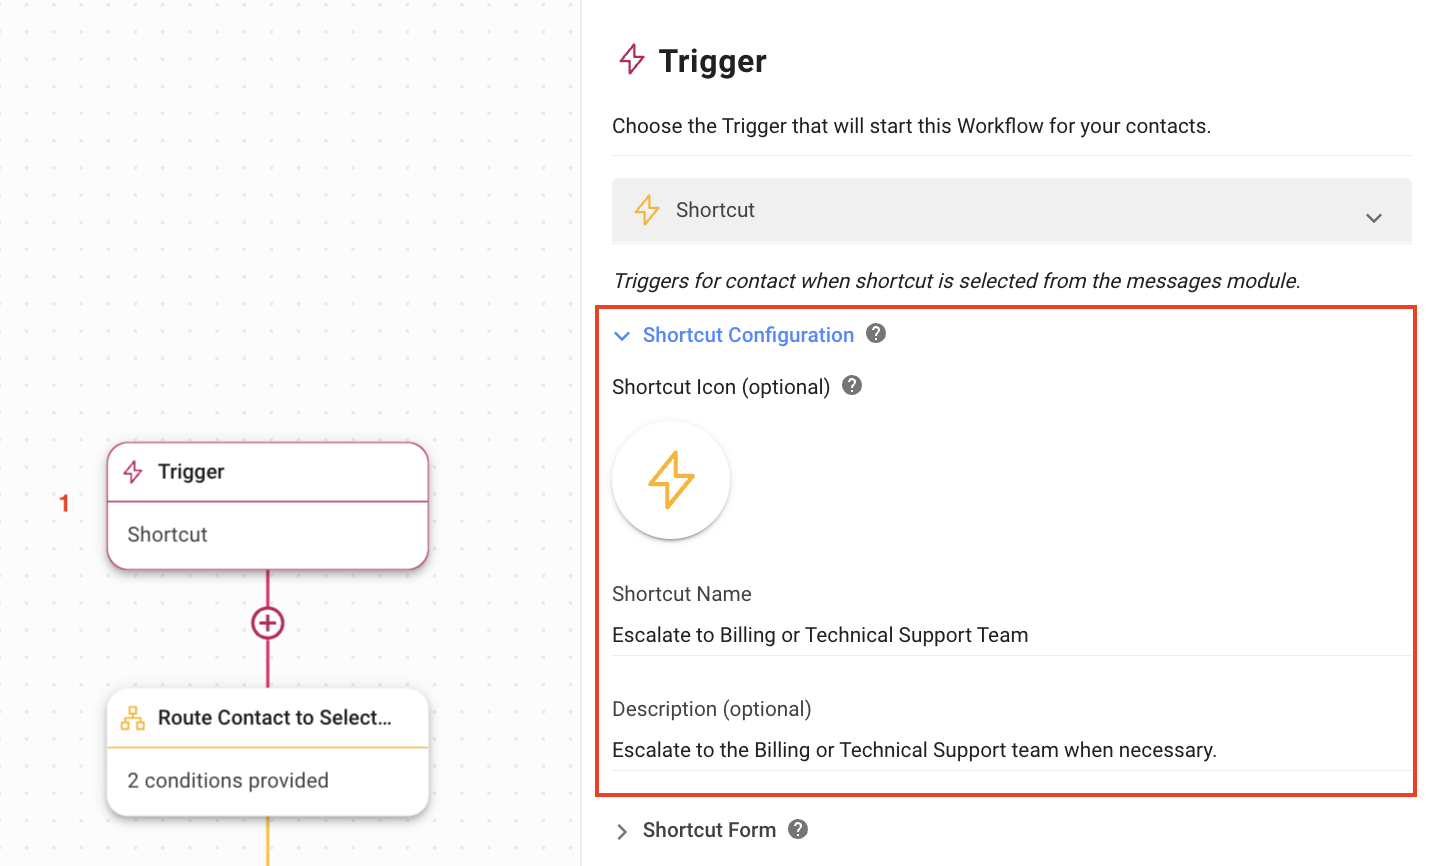
**1.** [**Trigger**](https://help.respond.io/workflows/workflow-triggers): The Workflow starts when the agent selects the Shortcut button from the Messages module.
Under *Shortcut Configuration*, the shortcut name and description can be edited.
Under *Shortcut Form*, you can set up the form that will be displayed when the agent selects the shortcut. In this template, the form allows the agent to select the second-level support team and fill in a summary of the issue.
In this example, we have added two teams:
* Billing
* Technical Support
{% hint style="info" %}
To speed up the resolution process, switch the **Required** toggle on for the *Summary of Escalation* so that the agent is required to provide a description of the issue before escalation. This summary gives the second-level agent a better understanding of the issue before continuing the conversation with the Contact.
{% endhint %}
**Automatically route Contacts to the selected team and assign to an agent**
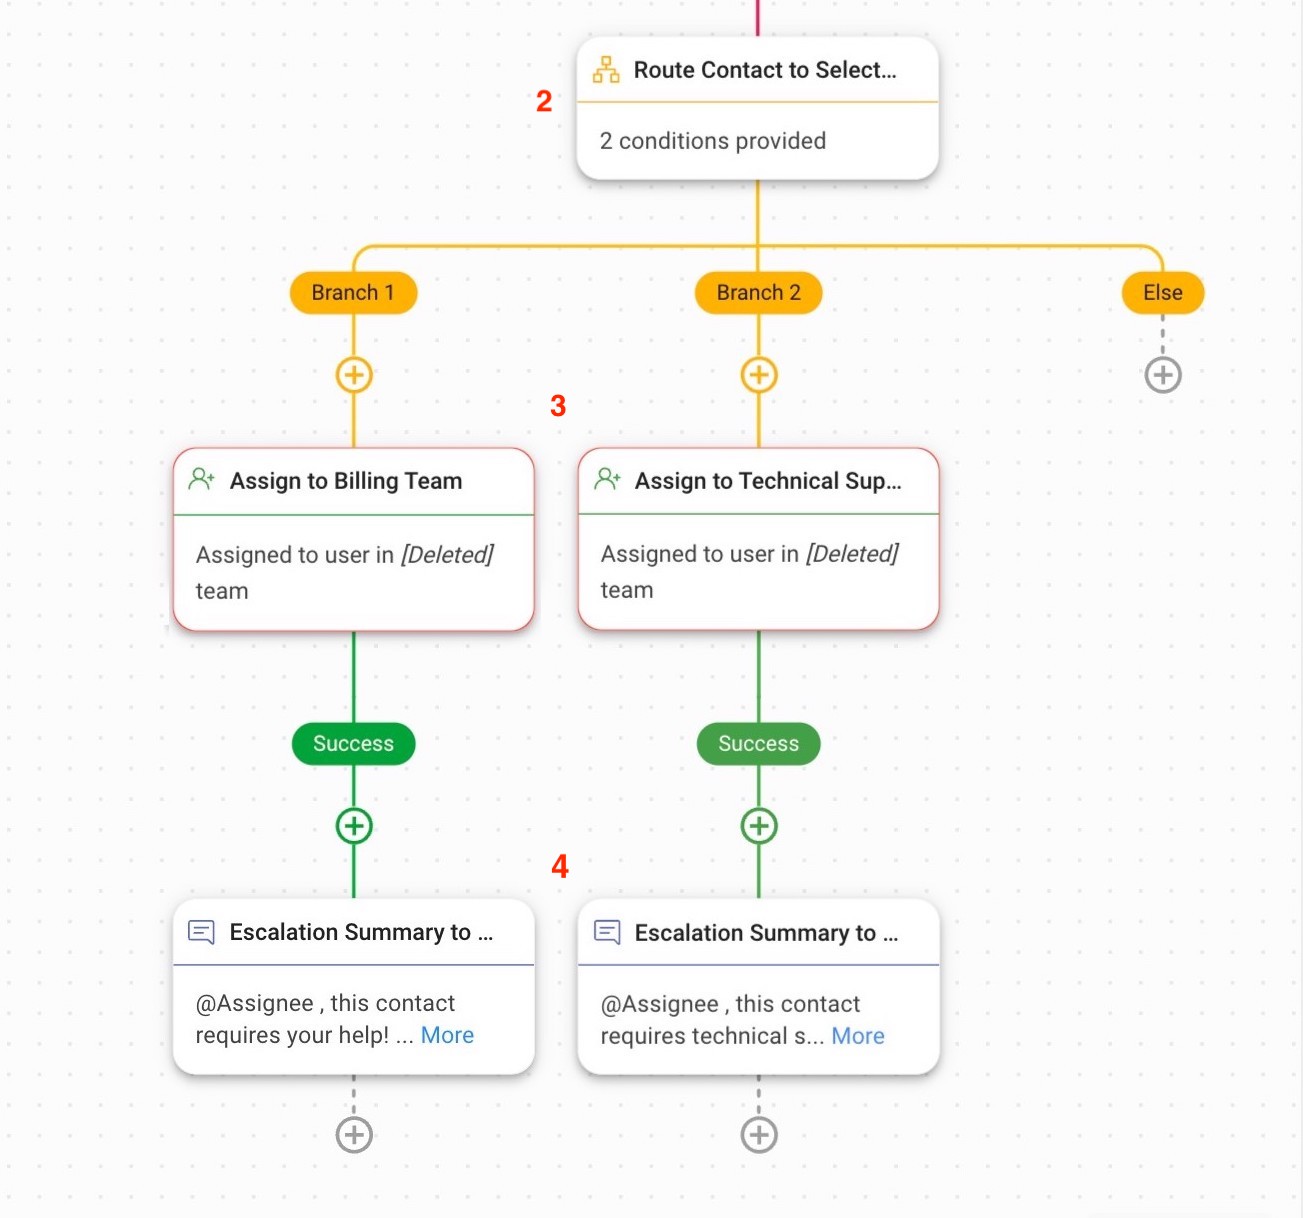
**2. Route Contact to Selected Team:** This is a [Branch](/ismessenger/modules/workflow.md) step to route Contact to the second-level support team that the agent has selected in the previous step. If the agent has selected the *Billing* or *Technical Support* team, the Contact will be routed to Branch 1 or Branch 2 respectively.
**3. Assign to Billing Team** or **Assign to Technical Support Team**: This is an [Assign To](/ismessenger/modules/workflow.md) step that allows you to set up the auto-assignment based on your [strategy preferences](/ismessenger/sales-use-cases/how-to-route-leads.md).
**4. Escalation Summary to Billing** or **Escalation Summary to Technical Support:** This is an [Add Comment](/ismessenger/modules/workflow.md) step where the second-level agent who is assigned to the Contact will receive a notification that includes the comment and the summary of the issue.
{% hint style="success" %}
Once you have completed the setup, click **Save** and **Publish** to activate the Workflow.
{% endhint %}
#### How It Works: Issue Escalation Workflow
First-level agent, Yong, is unable to solve a complex technical issue faced by a customer. Yong decides to escalate this issue to the right team for assistance.
1. From the Messages module, Yong clicks the **Shortcut** button > Selects the **Escalate to the Billing or Technical Support Team** Shortcut.
1. A form is displayed:
* *Escalate to Team*: In the dropdown, Yong selects **Technical Support**.
* *Summary of Escalation*: Yong provides a description of the issue.
1. Yong clicks **Start**. A notification is displayed to indicate that the workflow has been initiated and the Contact is transferred to the second-level agent in the Technical Support team.
---
# Agent Instructions: Querying This Documentation
If you need additional information that is not directly available in this page, you can query the documentation dynamically by asking a question.
Perform an HTTP GET request on the current page URL with the `ask` query parameter:
```
GET https://docs.is-messenger.com/ismessenger/converse-with-customers/how-to-simplify-customer-escalation-with-automation.md?ask=
```
The question should be specific, self-contained, and written in natural language.
The response will contain a direct answer to the question and relevant excerpts and sources from the documentation.
Use this mechanism when the answer is not explicitly present in the current page, you need clarification or additional context, or you want to retrieve related documentation sections.