# Channels
## Getting Here
{% hint style="warning" %}
This setting is accessible by Owner and Manager only!
{% endhint %}
This setting can be accessed from the **Settings** navigation menu under the menu item, **Channels.**

**In this setting, you can:**
* [Add a new channel](/ismessenger/workspace-setting/channels.md#adding-new-channels)
* [Manage existing channels](/ismessenger/workspace-setting/channels.md#managing-channels)
* [Delete a channel](/ismessenger/workspace-setting/channels.md#deleting-channel)
* [Generating a scan code](/ismessenger/workspace-setting/channels.md#generating-scannable-code)
* etc
## Channel Overview

The channels that are connected to this space will be listed in alphabetical order. Each listed channel has its own set of menu options.
{% hint style="info" %}
**Tips**: Use the 🔍 at the top to quickly find the channel that you are looking for.
{% endhint %}
## Adding New Channels
To add a new channel to your existing Space, press the blue **ADD CHANNEL** button on the top of this section. For more information on adding new channels, you can take a look at the [Messaging Channels page](/ismessenger/messaging-channels/channel-overview.md).

## Managing Channels
Each channel provides a different set of functions and the functions are as follows:
### Configure Channel
Press the blue **CONFIGURE** button to make changes to any of your existing channels.
You will be able to make changes to the Channel Name, which is how the channel is referred to internally on the platform. You will also be able to change the Greeting Message, which is an optional message that is shown to new contacts that first message you.
Additional options will also be available depending on the channel specific options.
### Deleting Channel
To delete an existing channel, press the **DELETE** button and follow the instructions on the screen. Doing so will completely remove the channel from your space. Contacts will not be deleted but they can no longer be contacted via the deleted channel.
{% hint style="danger" %}
Be careful when deleting a channel from your space. When a channel is deleted, all the configuration will be deleted. Deletion cannot be undone.
{% endhint %}
### Generating Scannable Code
If your channel supports scannable codes, URL and QR code, the scannable code can be generated by pressing the **SCAN CODE** button. Pressing this button will open the Code Generator menu.

Different Channels provide different input fields that are either compulsory or optional to generate the code. Here is the list of the fields that are provided for each channel.
| Channel | Field |
| ------------------ | ---------------------------------------------------- |
| Facebook Messenger | Reference (optional) |
| WhatsApp |
Phone Number
Pre-Filled Text (optional)
|
| LINE |
LINE ID
Pre-Filled Text (optional)
|
| Telegram | NA |
| Twitter | Pre-Filled Text (optional) |
| Viber | Pre-Filled Text (optional) |
| WeChat | Reference |
| Web Chat |
Domain
Reference (optional)
|
| Skype | NA |
| SMS |
Phone Number
Pre-Filled Text (optional)
|
{% hint style="success" %}
The Reference appears in Messages of selected Contact as an in-line event, while Pre-Filled Text is an input suggestion when a contact starts a conversation.
{% endhint %}
Once you are ready, press the blue **DOWNLOAD** button and select your desired pixel dimensions to download your scannable code.
{% hint style="danger" %}
Due to recent changes implemented by Facebook for pages and users in the European Union, the event reference will not be passed to our platform reliably by Facebook. Therefore, automation that requires an event reference as a trigger will not work as expected.
{% endhint %}
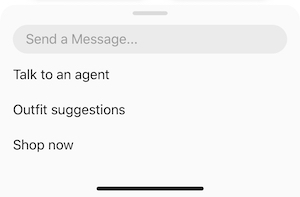
### Creating a Chat Menu
If your channel supports the [Chat Menu](/ismessenger/workspace-setting/channels/chat-menus.md) feature, you can create your own chat menu by pressing the **CHAT MENU** button. Pressing this button will open the Chat Menu Creator.
A chat menu can be set on some Channels, such as Messenger and WeChat, to help people discover and easily access your functionality during a conversation.
Persistent Chat Menus are always available to Contacts and allow them to discover more content, visit websites, etc. They will automatically appear in a thread if the Contact returns after being away for a certain period of time.
If your Channel supports the Chat Menu feature, you can create your own chat menu by pressing the CHAT MENU button. Pressing this button will open the Chat Menu Creator.

Under the Chat Menu Creator, you can press the blue ADD BUTTON to start adding buttons to build your own chat menu.
| **Button Type** | **Description** |
| --------------- | ------------------------------------------------------------------------------------------------------------------------------------------------------------------------------------------------------------------------------------------------------- |
| Payload | A payload button will directly send a message with the button name as the message text. On the IS-Messenger platform, the specified payload value will be received instead. The payload value is useful for creating specific Triggers for Automations. |
| URL | A URL button will send the contact to the specified URL field when pressed. The webpage will be opened in a new tab. |
| Submenu | A submenu button leads to a list of additional buttons. The submenu cannot be left empty. Follow Step 4 on how to add submenu options. |
{% hint style="info" %}
**Tip:** You can always rearrange buttons by clicking and dragging them around using the rearrange icon button on the left. To delete unwanted buttons, simply press the delete button 🗑 on the right.
{% endhint %}
{% hint style="warning" %}
Please take note that some Channels limit the number of buttons that can be displayed. Once the limit for the selected Channel has been reached, you will no longer be able to add more buttons.
{% endhint %}
### **Allowing User Input**
Some Channels have an option to disable user input. If you wish to restrict users to only using the chat menu options to interact with you, uncheck the **Allow User Input** option.
Unchecking this option will remove the chat message bar and prevent your audience from composing and sending their own messages.
{% hint style="warning" %}
It is recommended that you keep "Allow User Input" turned on, as disabling it restricts interaction with your audience.
{% endhint %}
### Acquiring Contacts from Post Comments
On Facebook Messenger, you can set up comment tracking for your Facebook Page or Ad campaign in order to convert users into messaging contacts.

{% hint style="info" %}
**Tip:** Learn more about [acquiring Contacts from Facebook comments here](/ismessenger/messaging-channels/facebook-messenger.md).
{% endhint %}
### API Token
API tokens are used to authenticate requests to the IS-Messenger API. \
\
Each API token is specific to one channel and can be used to programmatically create and update contacts, custom fields, tags and etc.
To retrieve your channel API token, press on the **API** button of the channel.

Press the blue **GENERATE API TOKEN** to generate an API token.

{% hint style="info" %}
If there is a need to change API Token, it can be refreshed here and the platform will then generate a different API token.
{% endhint %}
### Troubleshooting
If you are having issues with the channels on the platform e.g., no incoming messages even channel is connected.
Press on the **TROUBLESHOOT** button of the channel and follow the instructions provided.

{% hint style="warning" %}
Issues with channels like Facebook and WeChat can be resolved quickly by just pressing **REFRESH PERMISSION** in the channel Troubleshooting.
{% endhint %}
Find out more information in messaging channels with the link below:
{% content-ref url="/pages/-McZJPoFnvYBd0H5xjGe" %}
[MESSAGING CHANNELS](/ismessenger/messaging-channels/channel-overview.md)
{% endcontent-ref %}
---
# Agent Instructions: Querying This Documentation
If you need additional information that is not directly available in this page, you can query the documentation dynamically by asking a question.
Perform an HTTP GET request on the current page URL with the `ask` query parameter:
```
GET https://docs.is-messenger.com/ismessenger/workspace-setting/channels.md?ask=
```
The question should be specific, self-contained, and written in natural language.
The response will contain a direct answer to the question and relevant excerpts and sources from the documentation.
Use this mechanism when the answer is not explicitly present in the current page, you need clarification or additional context, or you want to retrieve related documentation sections.