# How to Optimize Customer Onboarding with Automated & Customized Welcome Messages
{% hint style="success" %}
In this article, you’ll discover how to automatically send customized welcome messages to Contacts coming from various messaging channels and assign them to relevant agents with whom they have interacted earlier.
{% endhint %}
If Contacts are reaching out to you via various messaging channels, you can respond by promptly sending tailored messages to them and guiding them to agents they have talked to previously using the **Welcome Message: Channel Specific** Workflow Template.
### Benefits of Seamless Transition to Agents
Seamlessly transition customers to agents to:
* Tailored welcome messages and automated agent assignments streamline lead capturing and set the tone right from the start.
* Allow customers to experience quick and efficient handling of inquiries, leading to higher satisfaction and increased customer loyalty.
### Workflow Setup
To use the **Welcome Message: Channel Specific** workflow template, click **+ Add Workflow** > Click **Welcome Message: Channel Specific** > **Use Template** in the **Workflows** module.
1. [**Trigger**](/ismessenger/modules/workflow/triggers.md): The Workflow starts when a conversation is opened by the Contact.
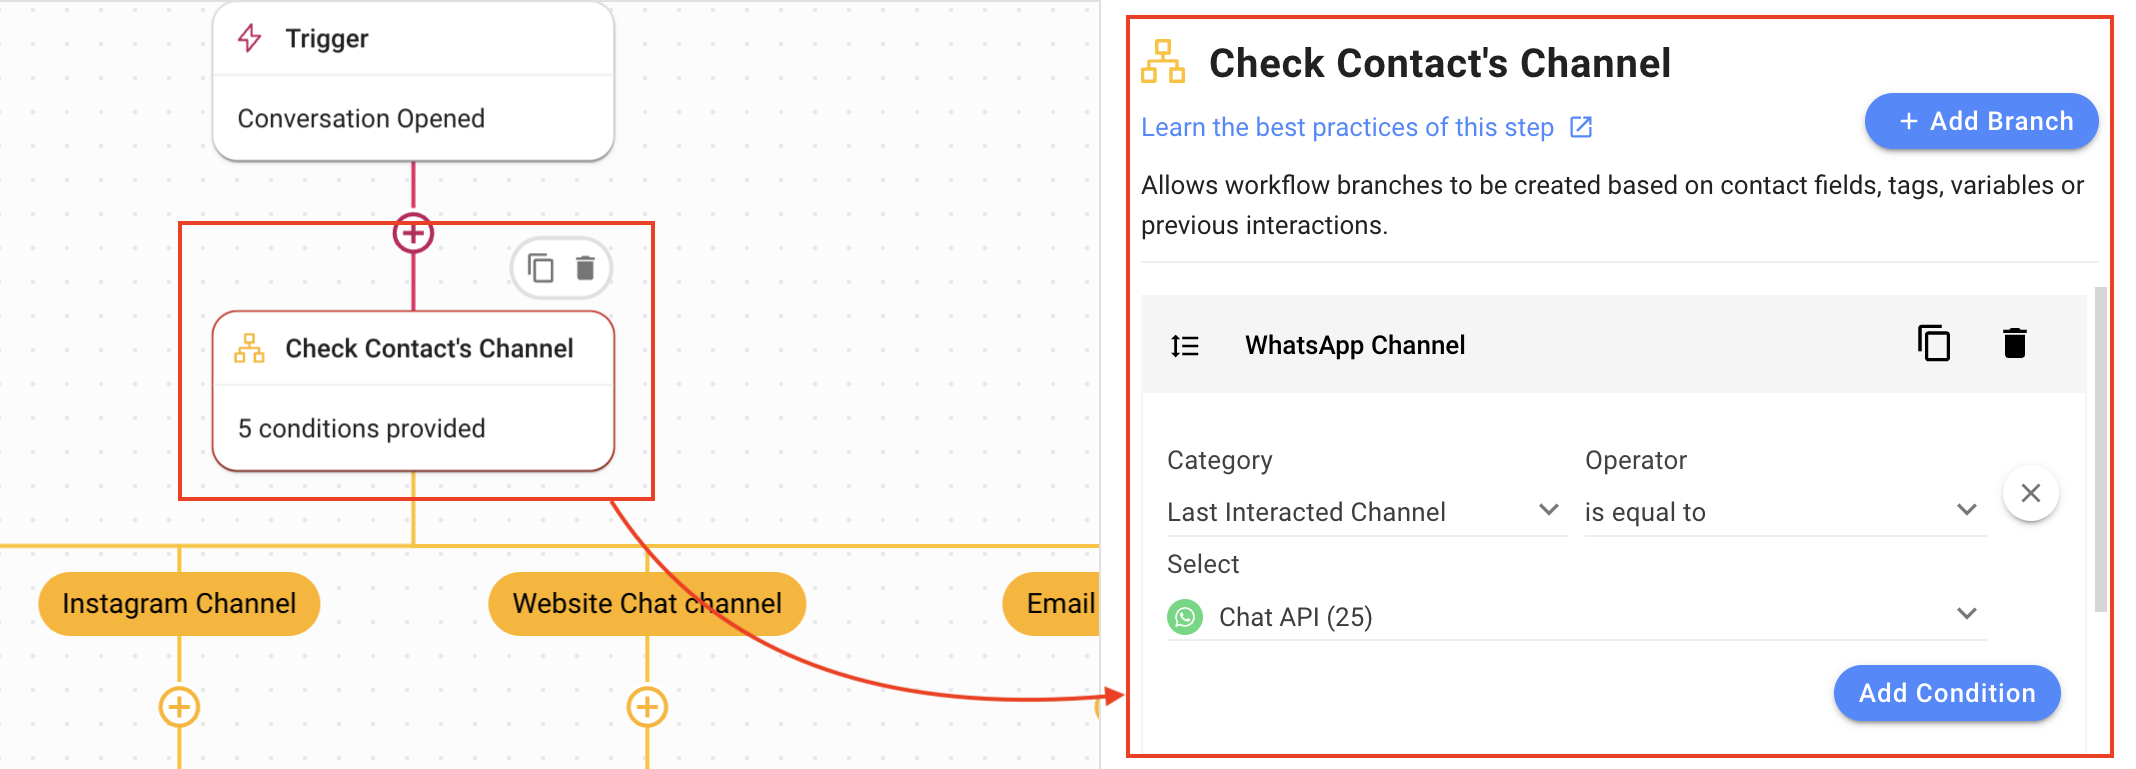
2. **Check Contact’s Channel**: Check which channel the Contact is coming from using the **Branch** Step. Each channel has a separate branch. The following settings are used to create branches for various channels:
* **Category**: **Last Interacted Channel**, to check what the last interacted channel was.
* **Operator**: **Is equal to**.
* **Select**: The required channel.
Add as many branches as needed using the **Add Branch** button.
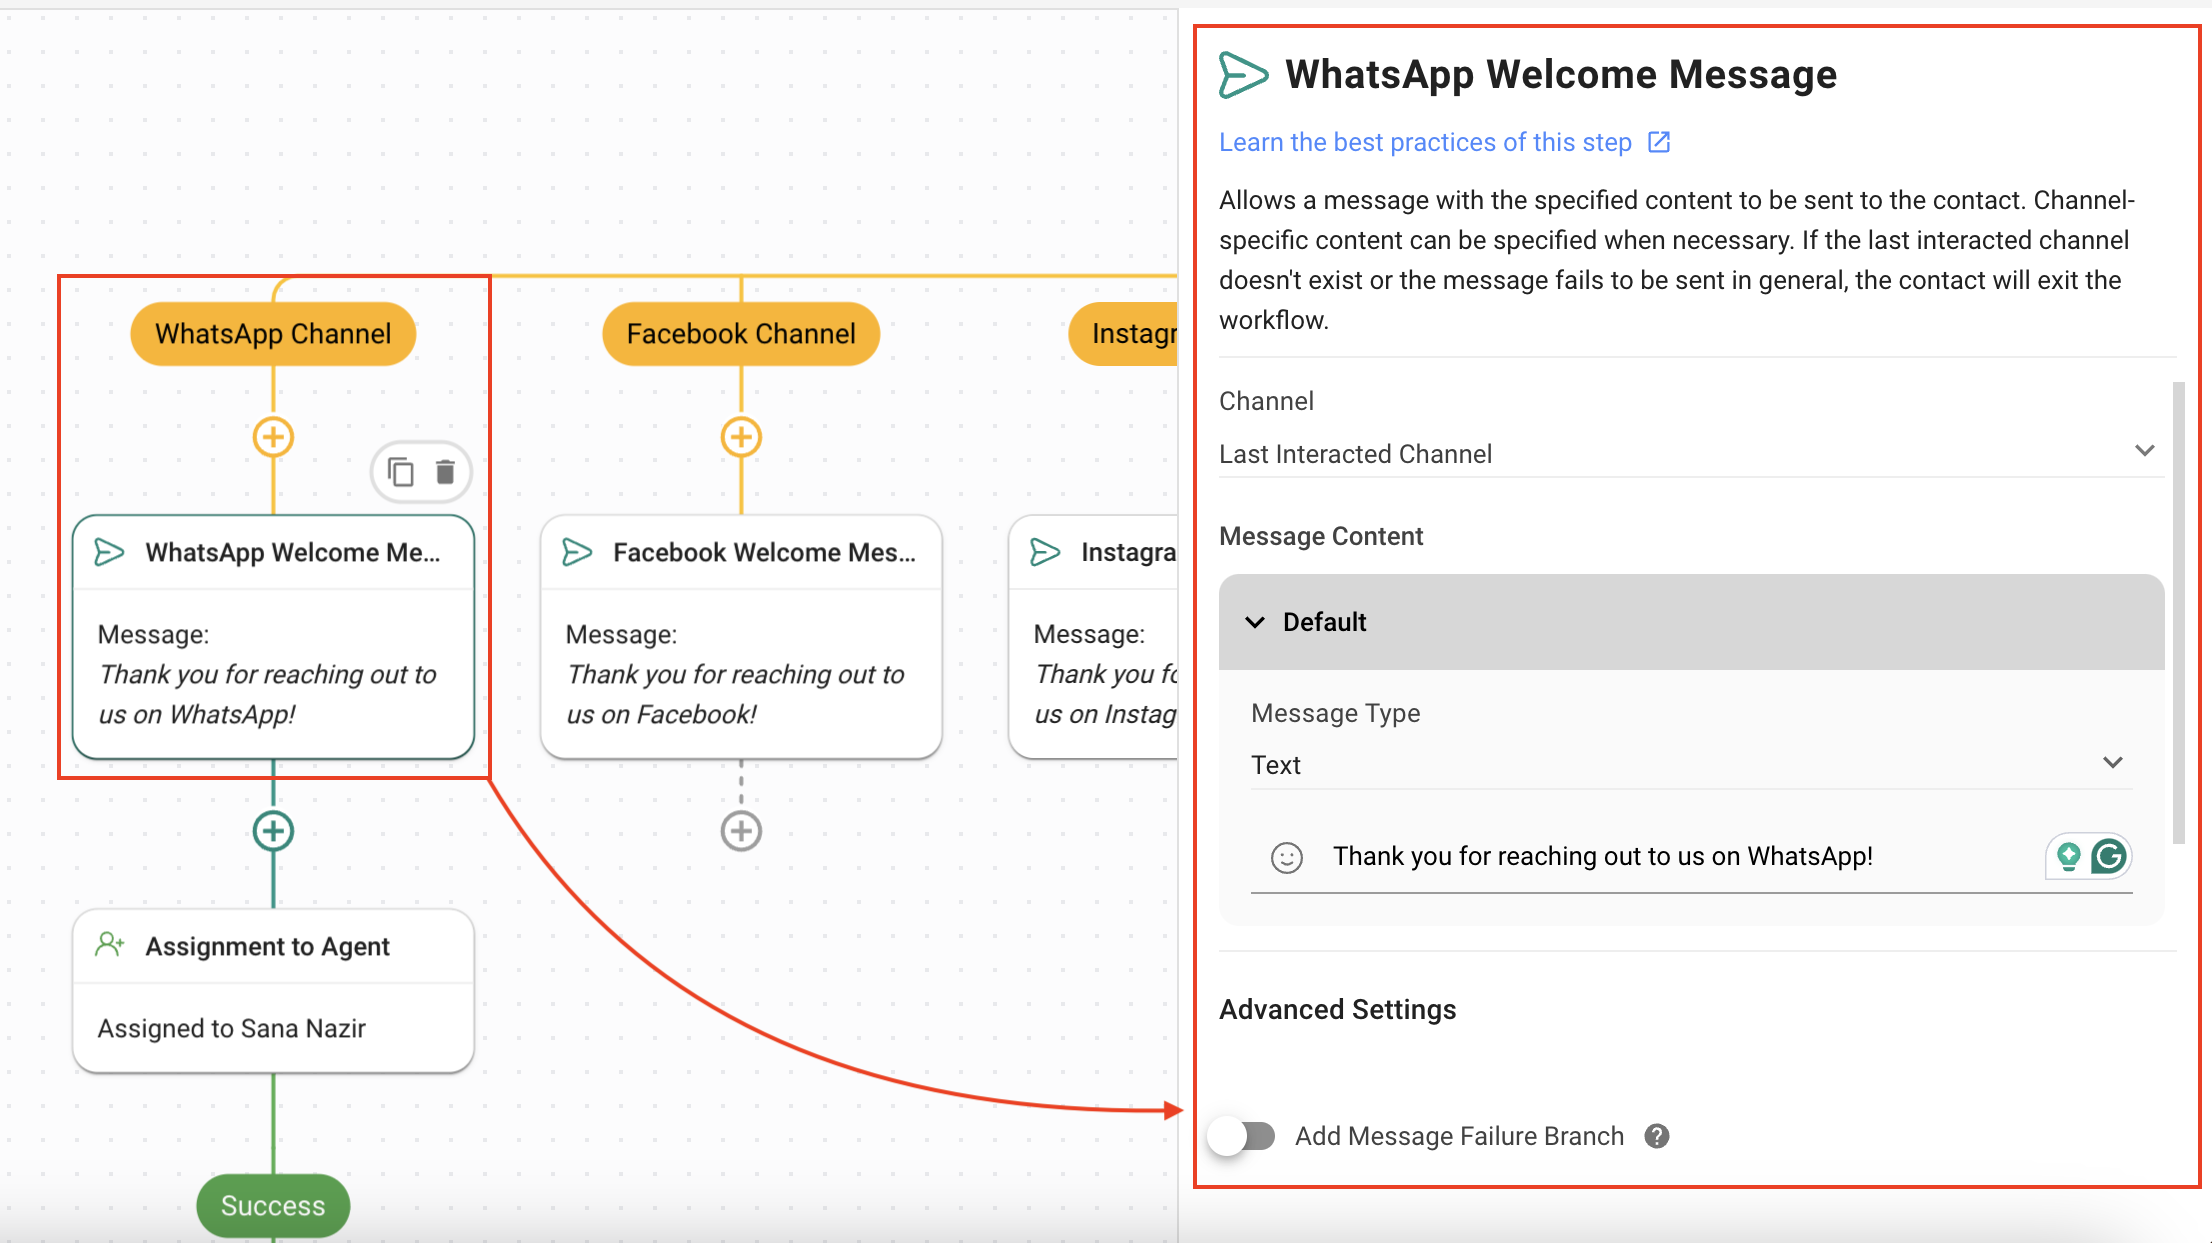
3. Channel Specific **Welcome Message**: Provide a customized greeting as a prompt response to your Contact using the **Send a Message** Step:
* **Channel** = **Last interacted channel**, so the message is sent to the same channel the Contact is using.
* **Message type** = **Text** has been set.
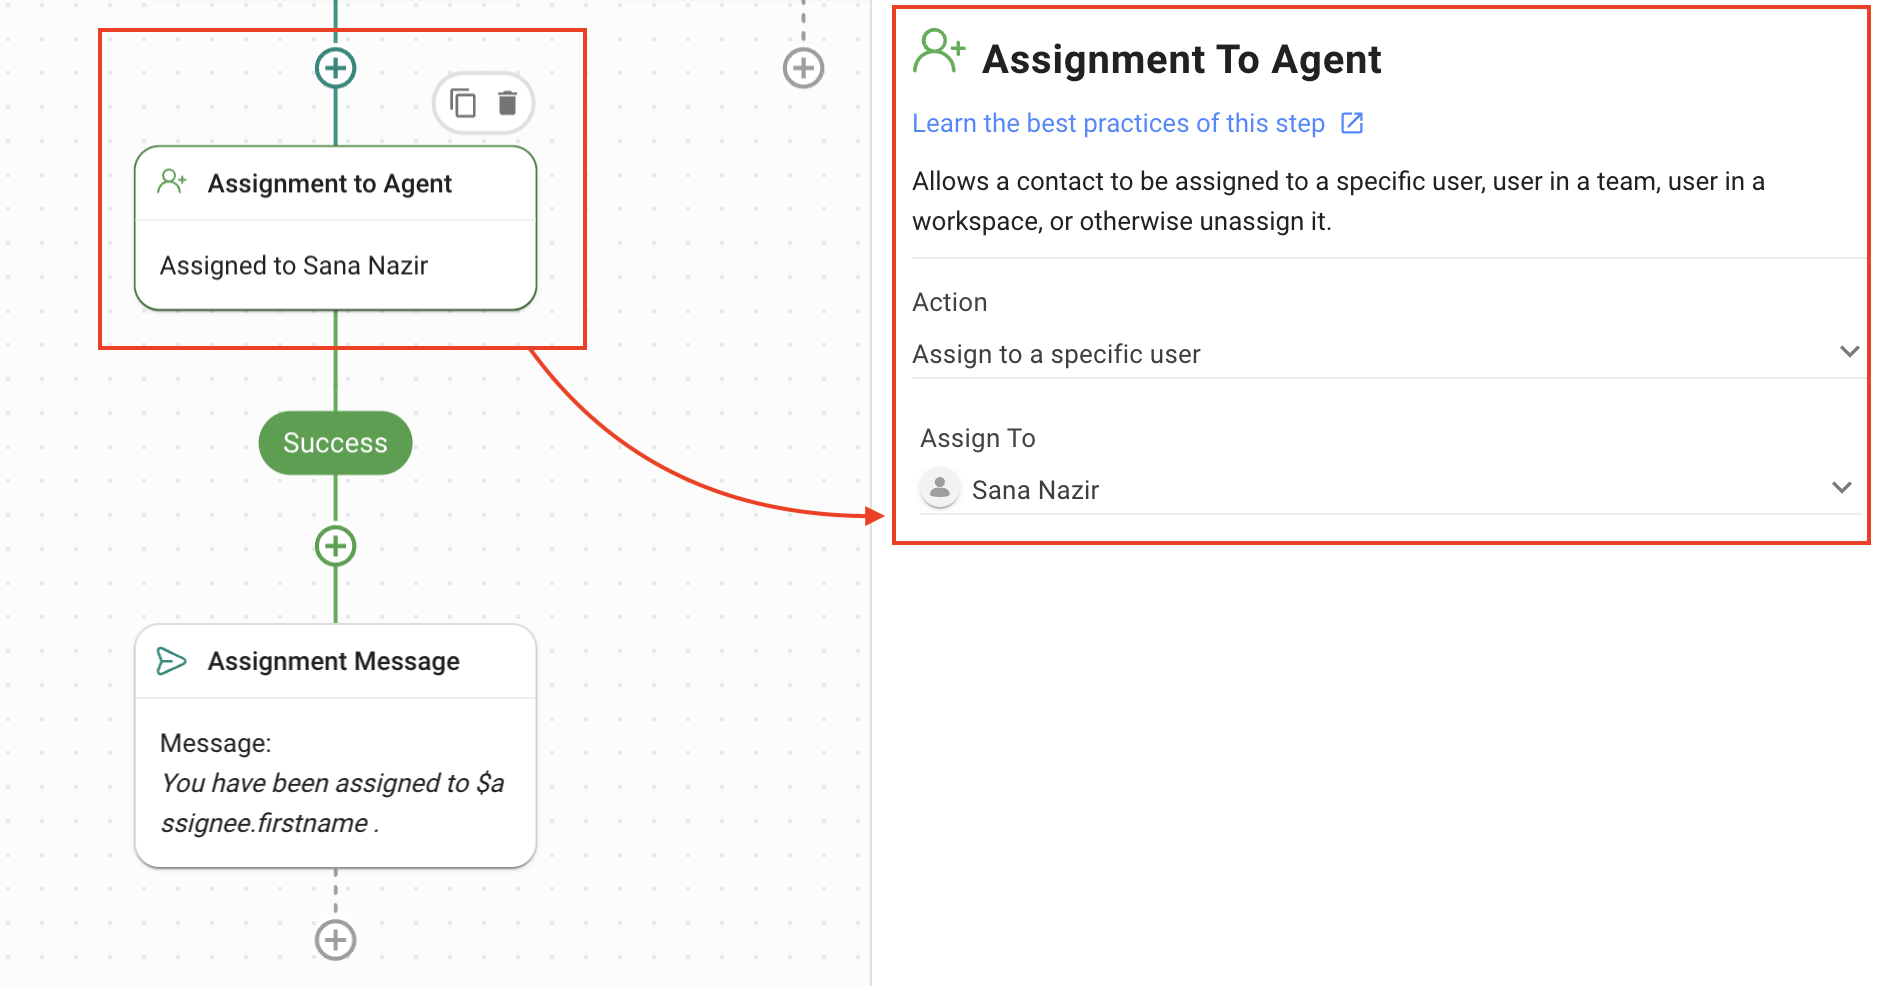
4. **Assign to Team**: Assign the Contact to an agent dedicated to the channel using the **Assign to** Step:
* **Action** = **Assign to a user in specific user** to assign the Contact to a dedicated agent.
* **Assigned to** = Select the relevant agent.
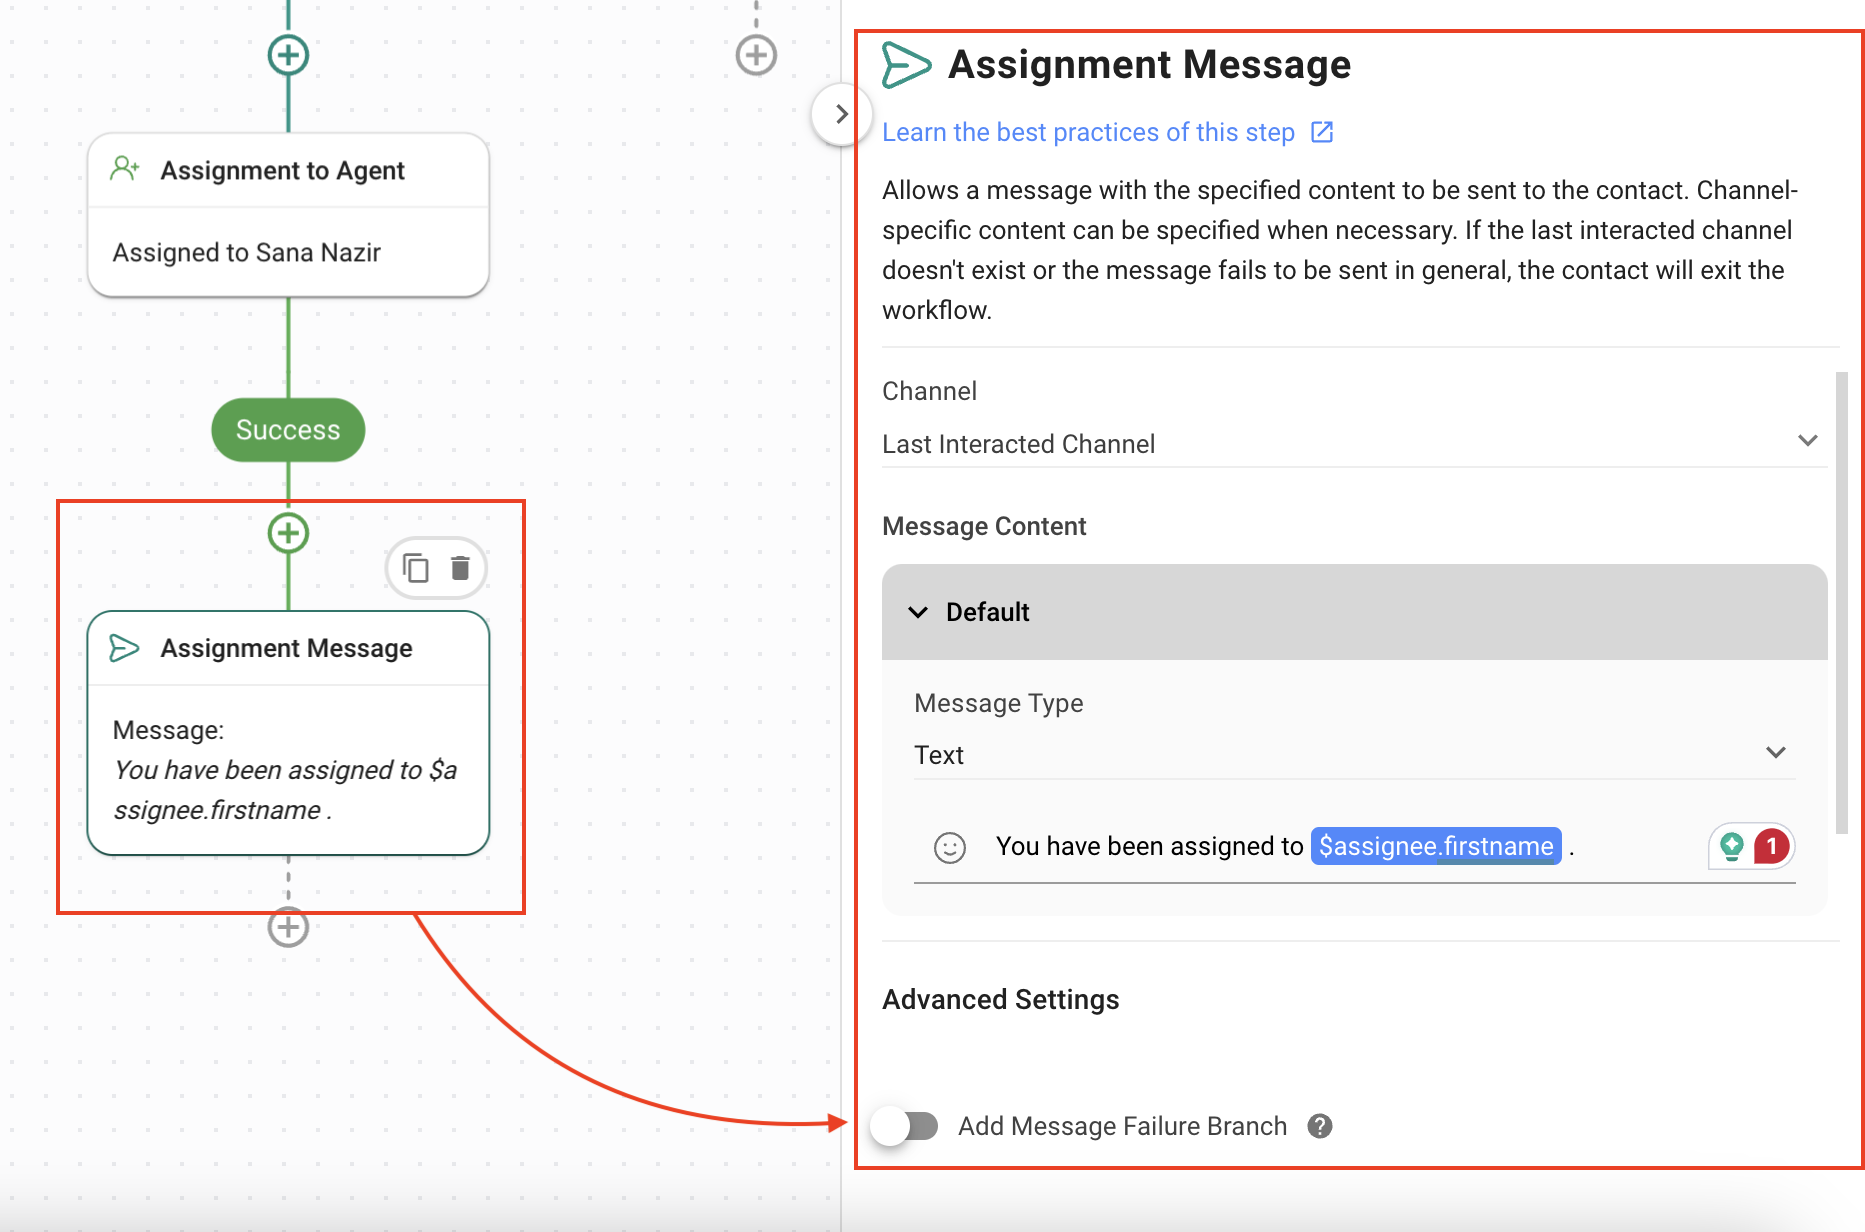
5. **Assignment Message**: Sends the Contact a message specifying the agent that has been assigned to them. To achieve this, the following values have been set in the **Send a Message** Step:
* **Channel** = **Last interacted channel** so the message is sent to the same channel.
* **Message type** = **Text** has been set.
{% hint style="success" %}
Contacts coming from various digital channels are sent customized messages and assigned to dedicated agents.
{% endhint %}
---
# Agent Instructions: Querying This Documentation
If you need additional information that is not directly available in this page, you can query the documentation dynamically by asking a question.
Perform an HTTP GET request on the current page URL with the `ask` query parameter:
```
GET https://docs.is-messenger.com/ismessenger/how-to-optimize-customer-onboarding-with-automated-and-customized-welcome-messages.md?ask=
```
The question should be specific, self-contained, and written in natural language.
The response will contain a direct answer to the question and relevant excerpts and sources from the documentation.
Use this mechanism when the answer is not explicitly present in the current page, you need clarification or additional context, or you want to retrieve related documentation sections.