# How to Automate Contact Information Collection with AI
{% hint style="success" %}
In this article, you’ll discover how to automatically collect Contact information i.e., email address or phone number, using AI Agent. You can accomplish this by using or customizing the **Collect Contact Phone Number with AI** or **Collect Contact Email with AI** Workflow Templates.
{% endhint %}
### Benefits of Automated Collection of Information
Collect Contact information via AI Agent because:
* AI driven data collection is highly efficient and less prone to errors compared to manual data entry. Quick processing and validation of information from various sources, ensures that Contact data is accurate and up-to-date without any human intervention.
### Workflow Setup
To use the **Collect Contact Phone Number with AI** or **Collect Contact Email with AI** workflow template, click **+ Add Workflow** > Click **Collect Contact Phone Number with AI** or **Collect Contact Email with AI** > **Use Template** in the **Workflows** module.
1. [**Trigger**](https://help.respond.io/l/en/workflows/workflow-triggers): The Workflow starts when a conversation is opened by the Contact.
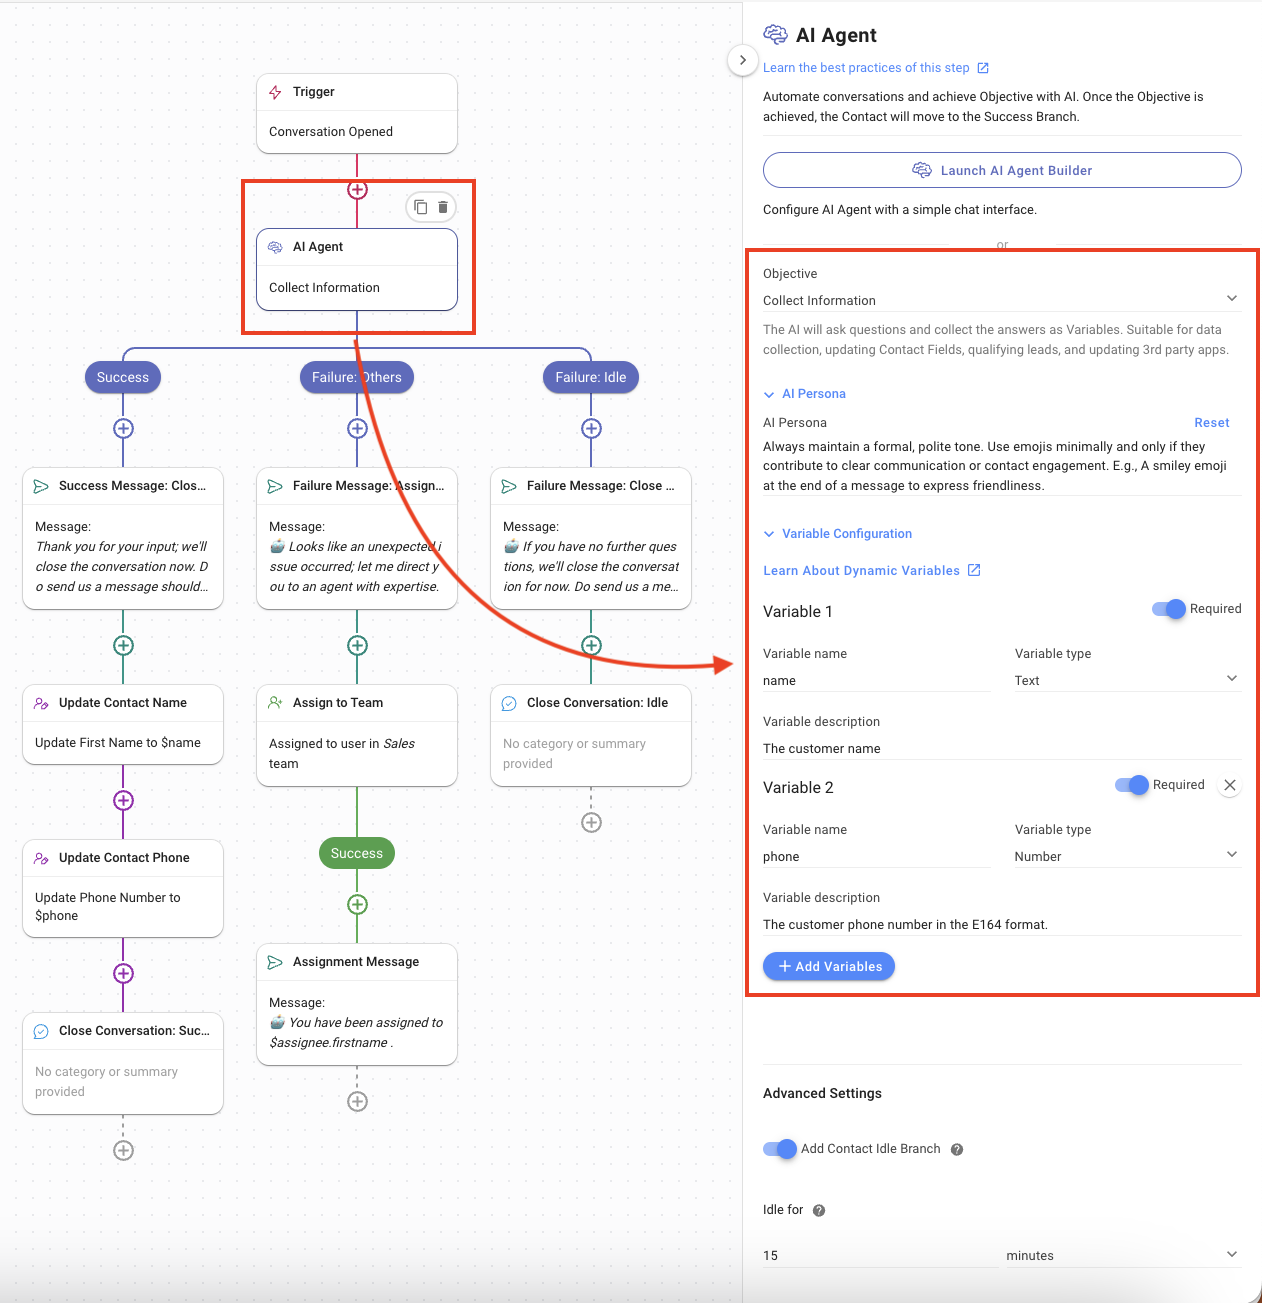
2. **AI Agent**: The **AI Agent** Step is used to collect information from the Contact and verify it. The following settings have been used.
3. **Objective**: **Collect Information**, to ask for and collect the Contact’s information.
4. **AI Persona**: The default persona was used with any additional information required.
5. **Variable Configuration**: The information collected by AI is saved as variables. In this template:
| Variable 1 |
Variable Name: name
Variable type: Text
Variable description: a description of the variable.
Variable description: a description of the variable. This template also ensures that the phone number is in the E164 format.
|
| Variable 2 - Email |
Variable Name: email
Variable type: email
Variable description: a description of the variable. This template also ensures that the email address format is correct.
|
{% hint style="info" %}
You can add more variables using the **Add Variable** button.
{% endhint %}
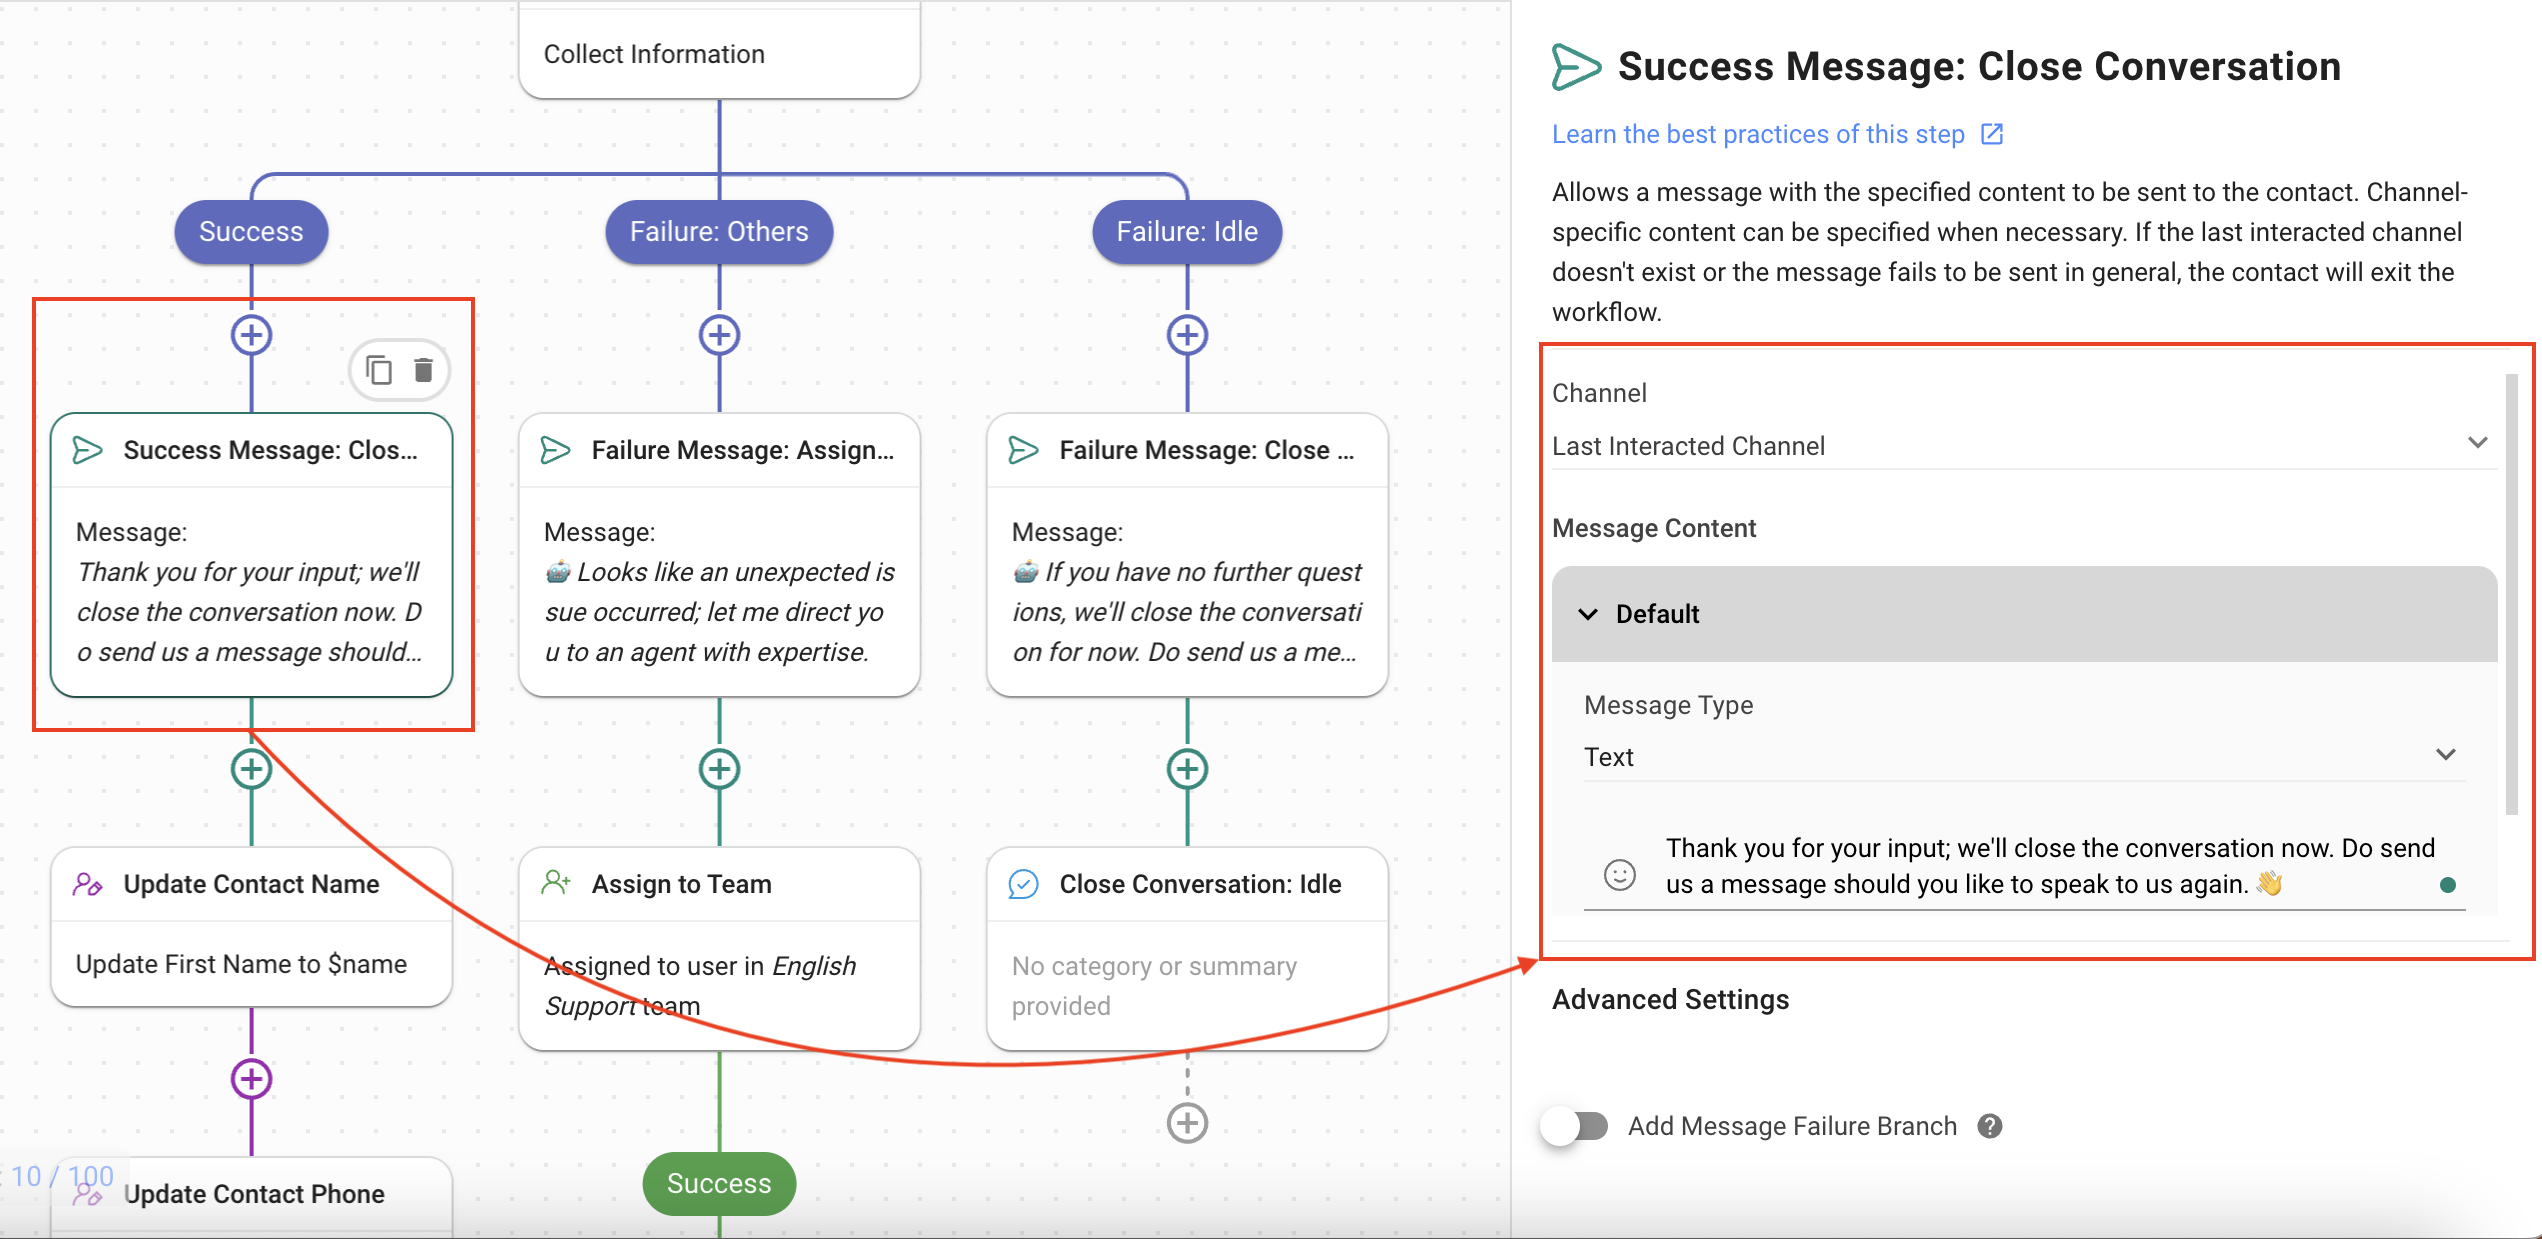
6. **Success**: When the AI Agent has collected all the information successfully, this is the branch the Contact’s journey follows.
7. **Success Message: Close Conversation**: The Contact is informed that the conversation is being closed after collection of data using the **Send a Message** Step. The following settings have been used:
* **Channel**: Last Interacted Channel, to send the message to the channel the Contact is using.
* **Message Type**: Text
* The message informs the user that the conversation is closing after success.
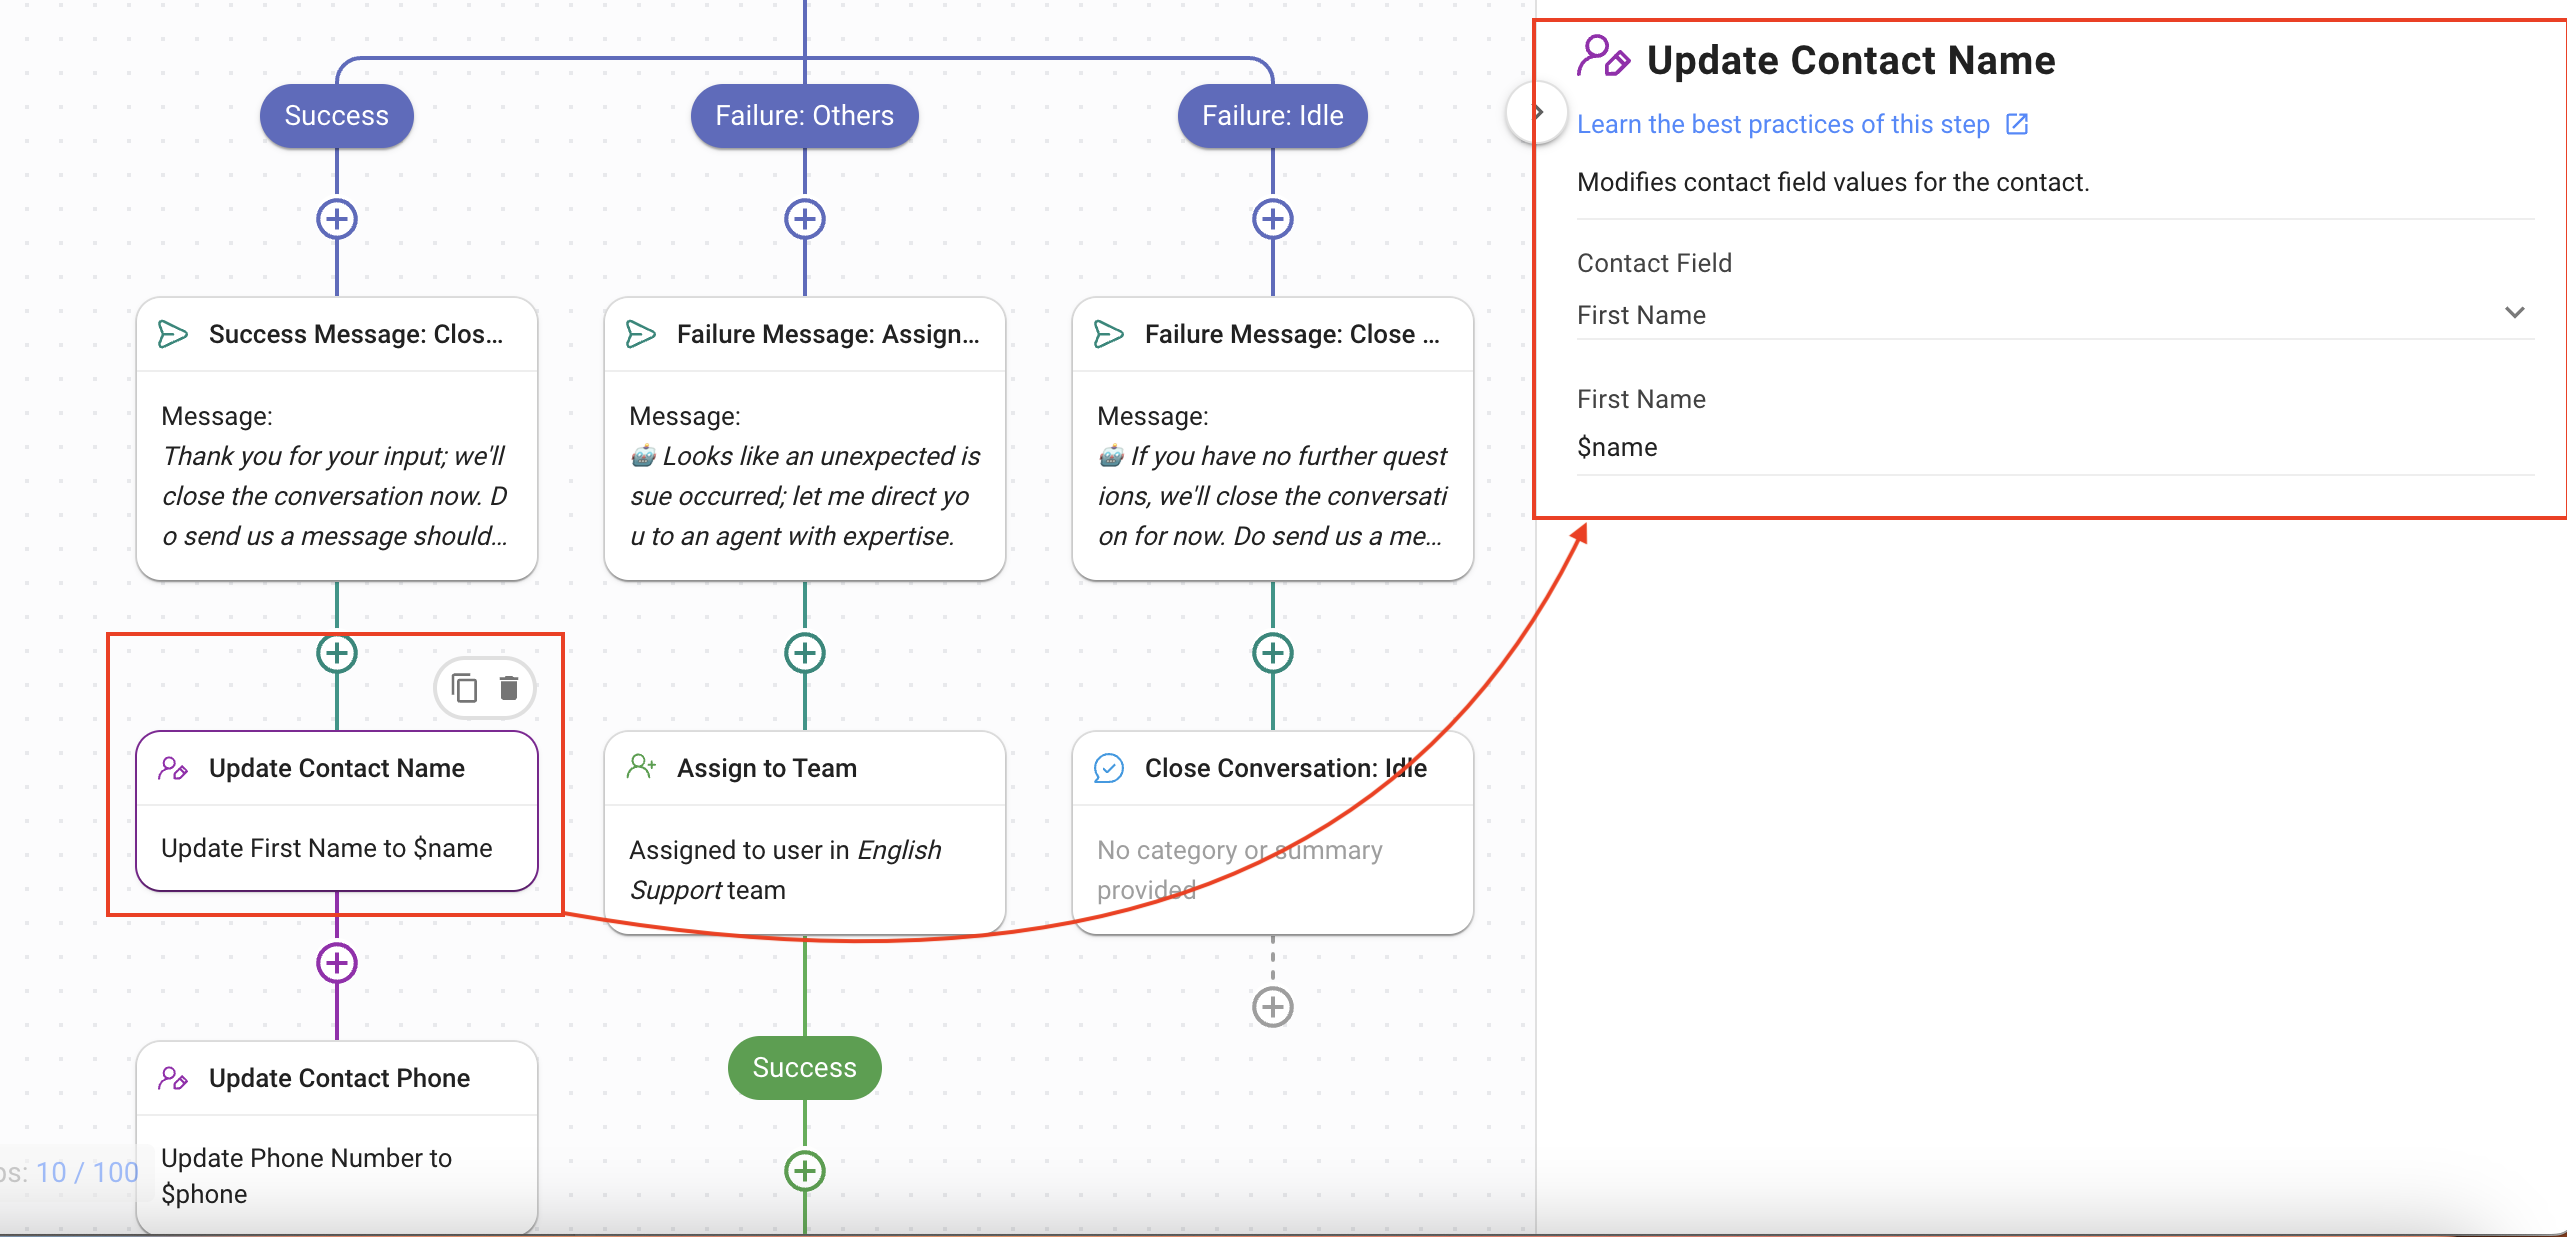
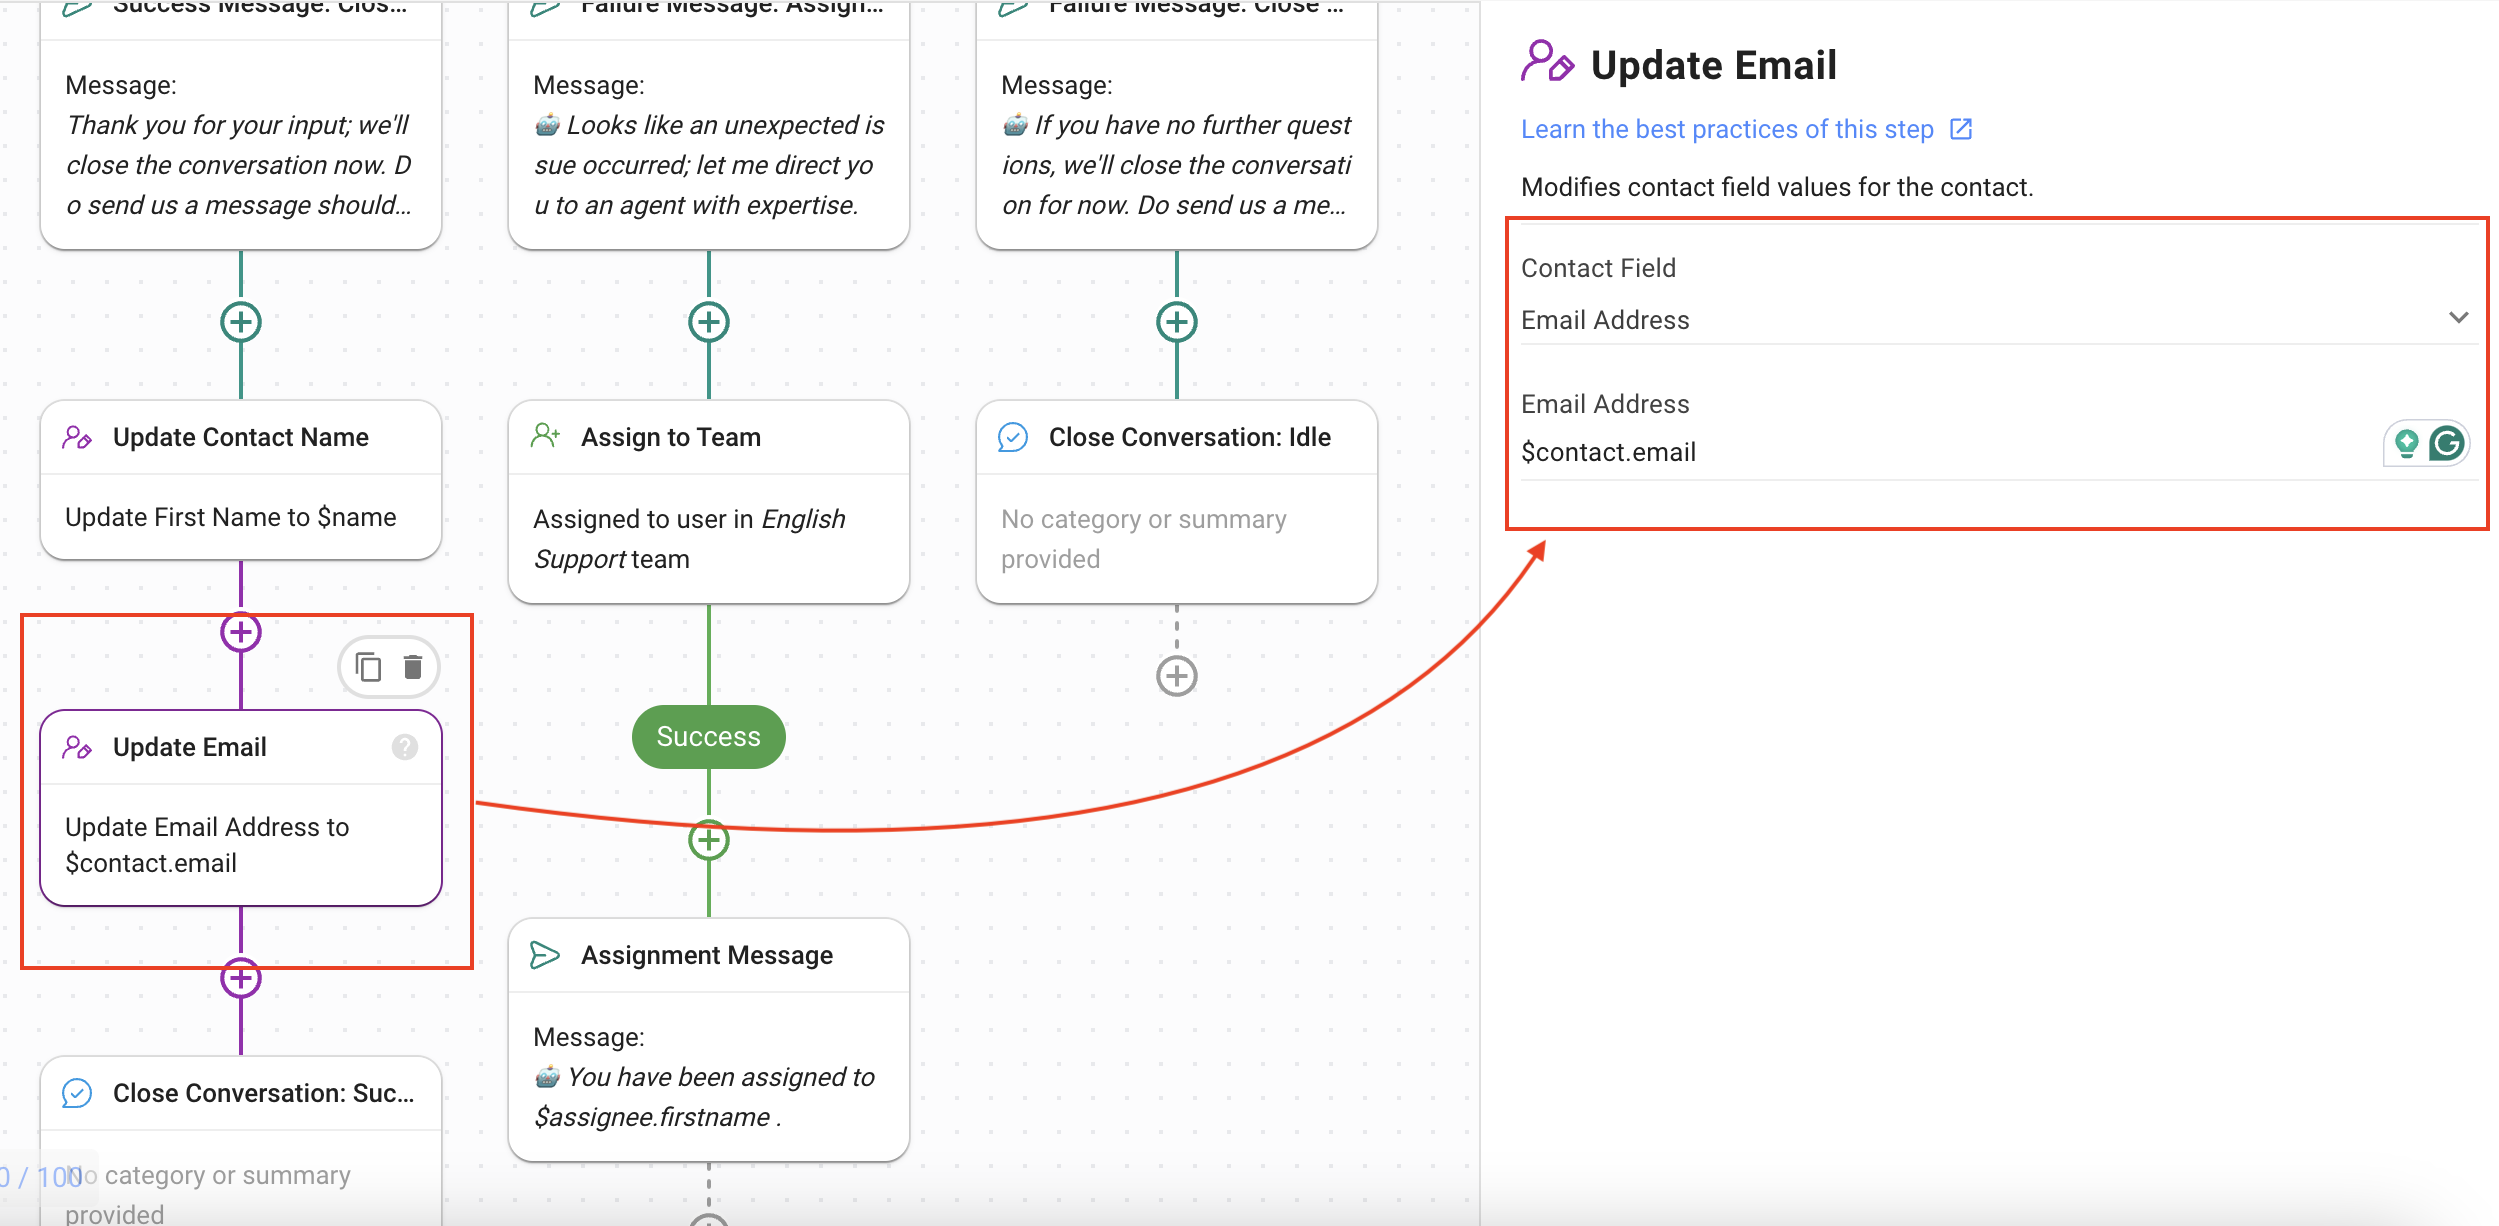
8. **Update Contact Name**: The Contact’s name is updated on the platform. The following settings have been used:
* **Contact Field**: The **First Name** or field has been selected so that the Contact’s first name can be updated.
* **First Name**: The variable **$name** containing the name provided by the Contact
{% hint style="info" %}
$ is used to refer to variables created while defining the **AI Agent** Step.
{% endhint %}
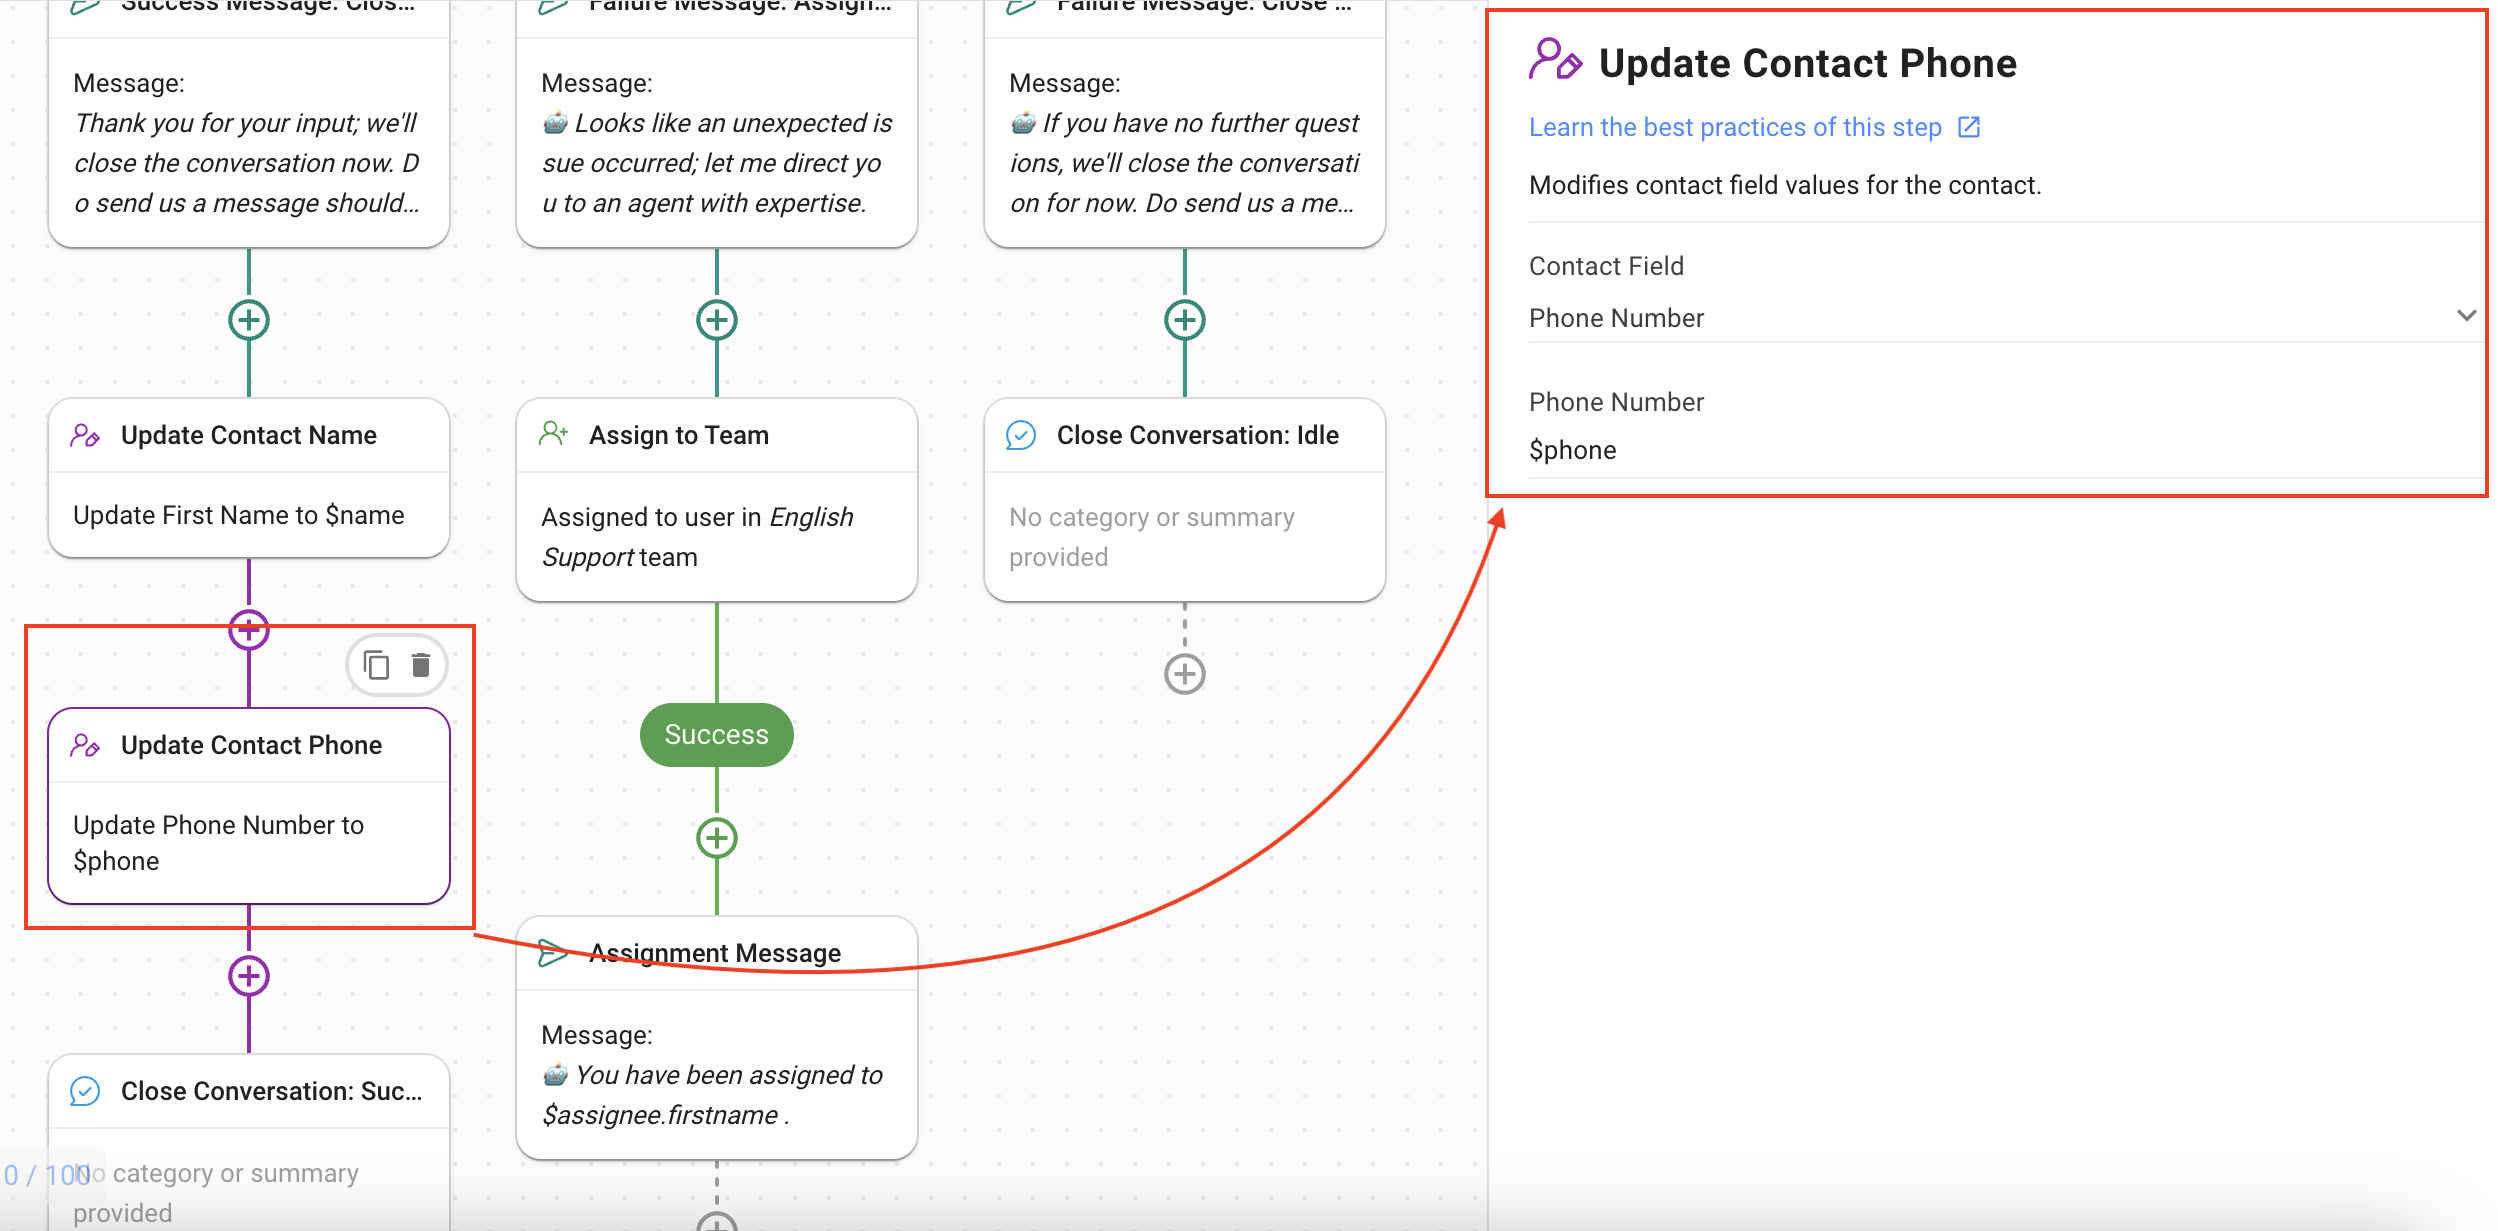
9. **Update Contact Phone**/**Email**: The Contact’s phone number/email is updated on the platform. The following settings have been used:
10. **Contact Field**: The **Phone Number**/**Email** field has been selected so that the Contact’s phone or email can be updated.
11. **Phone Number/Email**: The variable **$phone** or **$email** containing the phone number or email provided by the Contact.
12. **Close Conversation: Success**: This Step closes the conversation using the **Close Conversation** Step.
13. **Failure: Others**: In case a technical failure occurs, this is the branch the Contact’s journey follows.
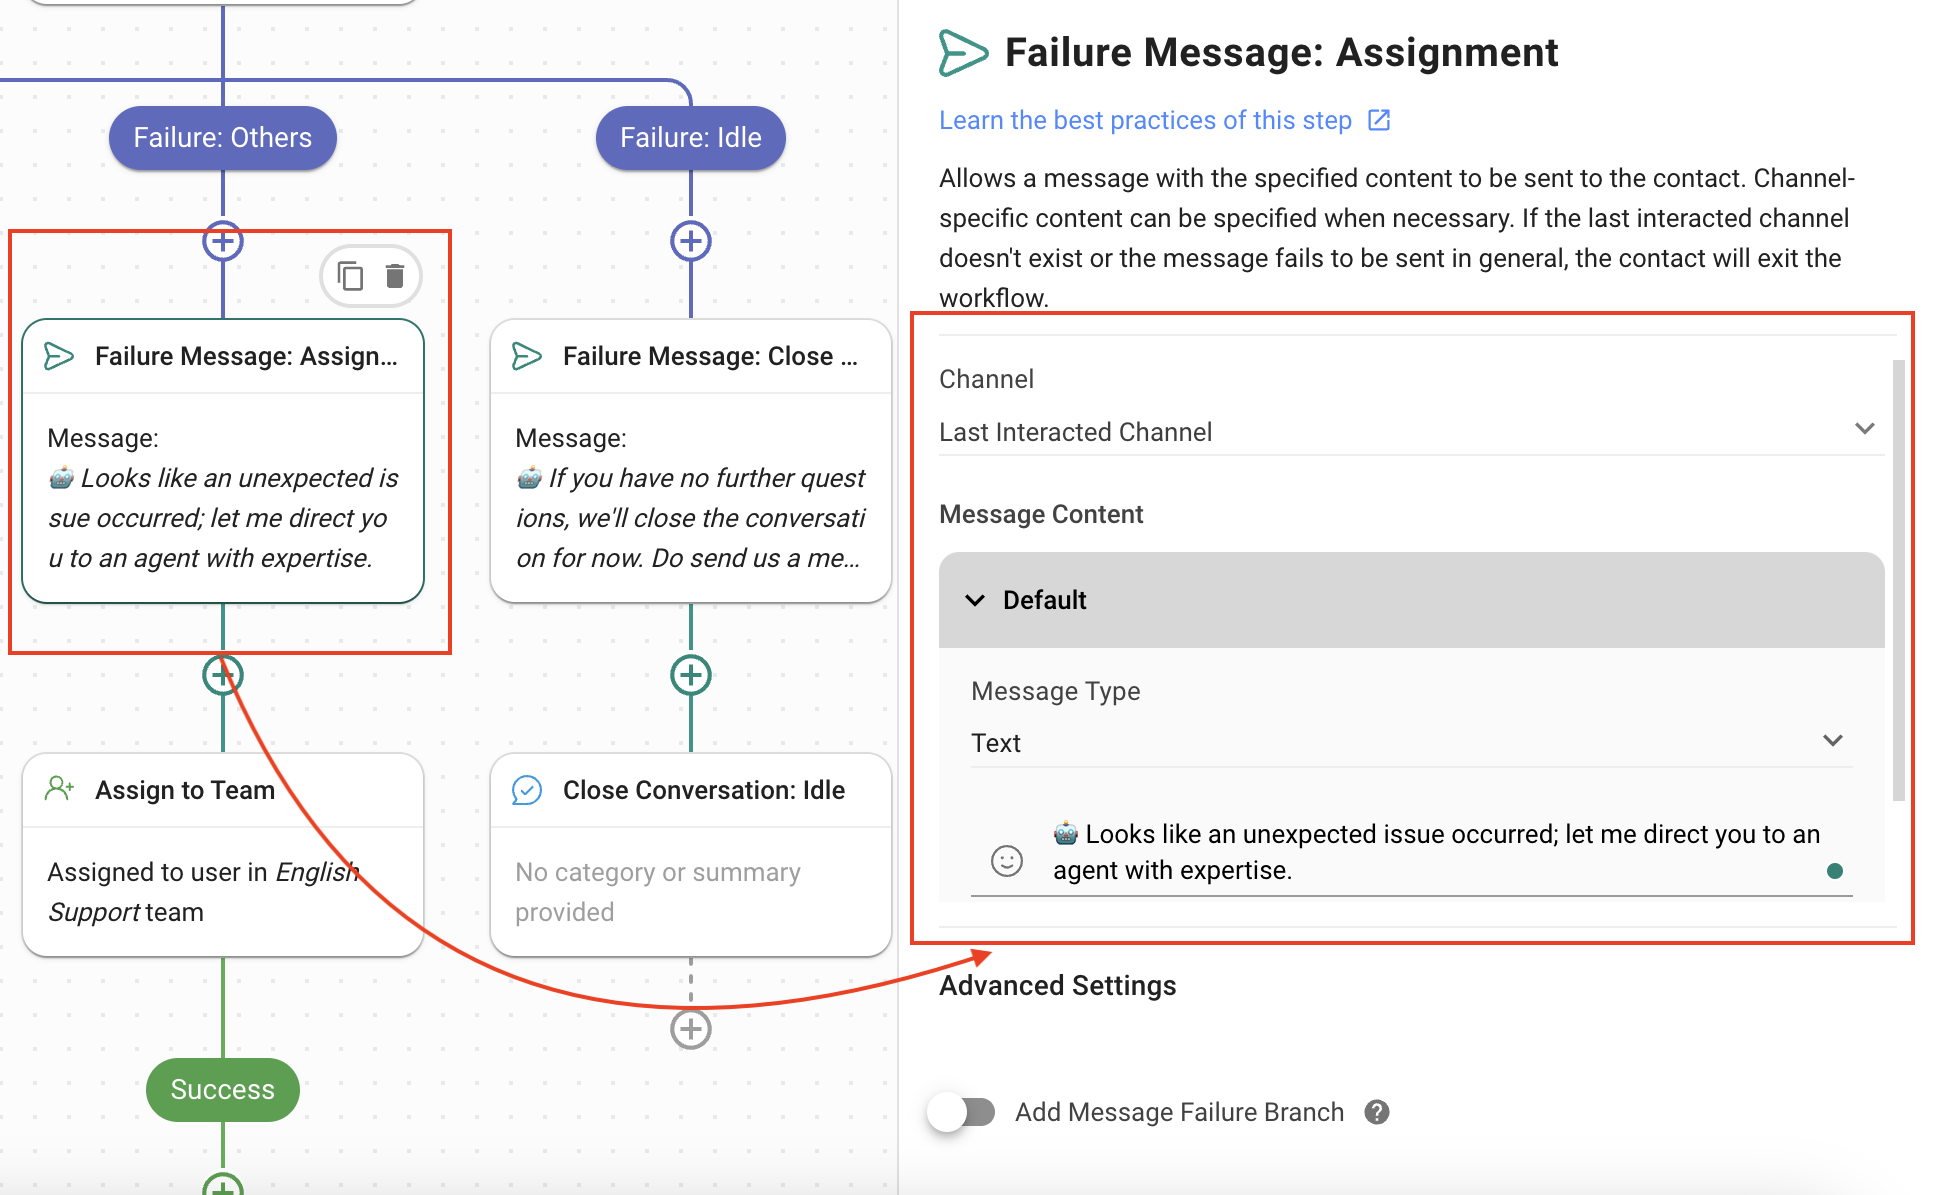
14. **Failure Message: Assignmen**t: This Step informs the Contact that an error occurred and they will be assigned to an agent soon using the **Send a Message** Step.
* **Channel**: Last Interacted Channel, to send the message to the channel the Contact is using.
* **Message Type**: Text
* The message informing the user that the conversation is being sent to an Agent.
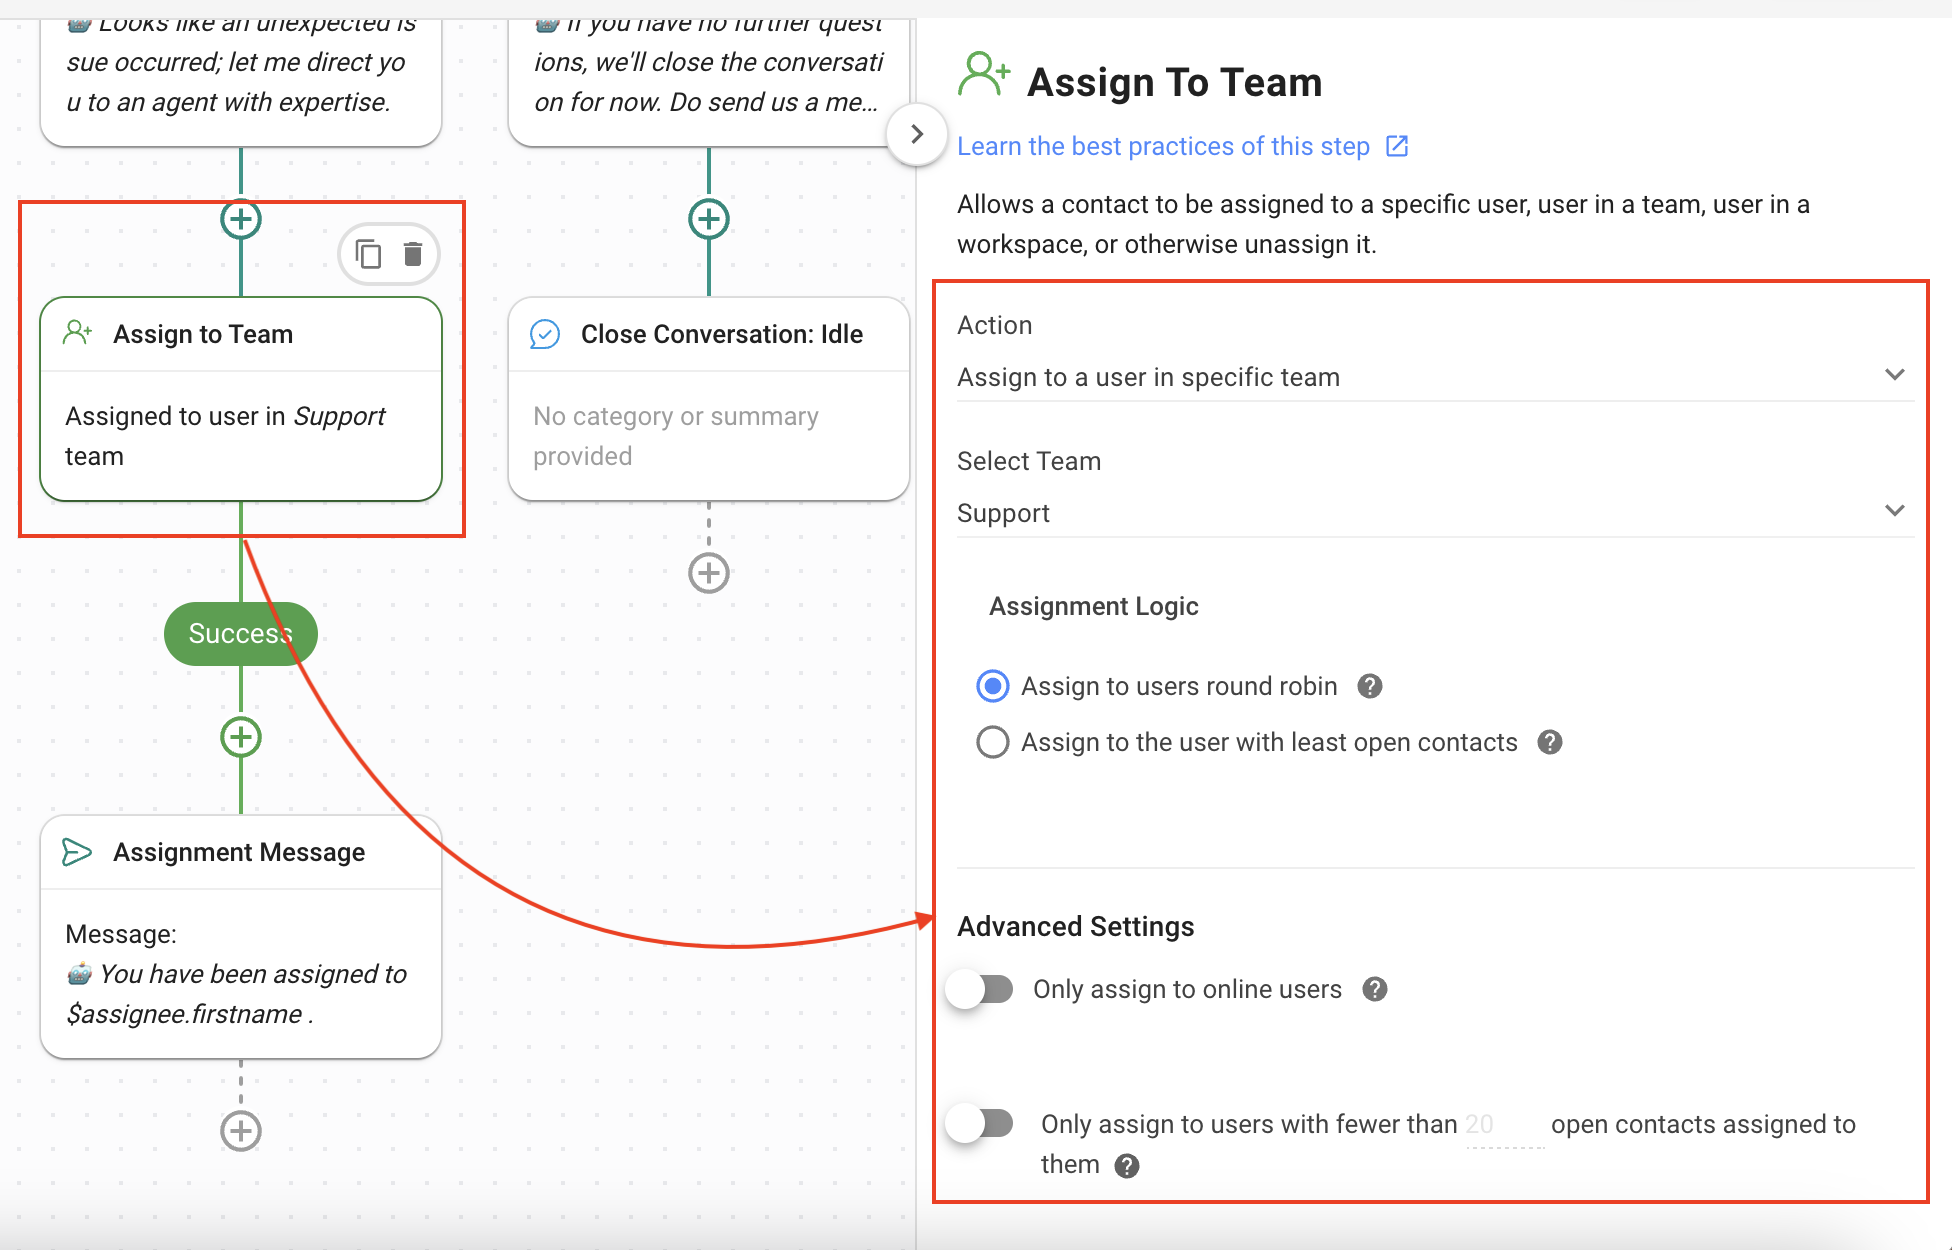
15. **Assign to Team**: Assigns the Contact to a team of agents using the **Assign to** Step.
* **Action**: **Assign to a user in a specific team**.
* **Select Team**: Select the team that can provide the best support to the Contact.
* Assignment Logic: **Assign to users round robin**.
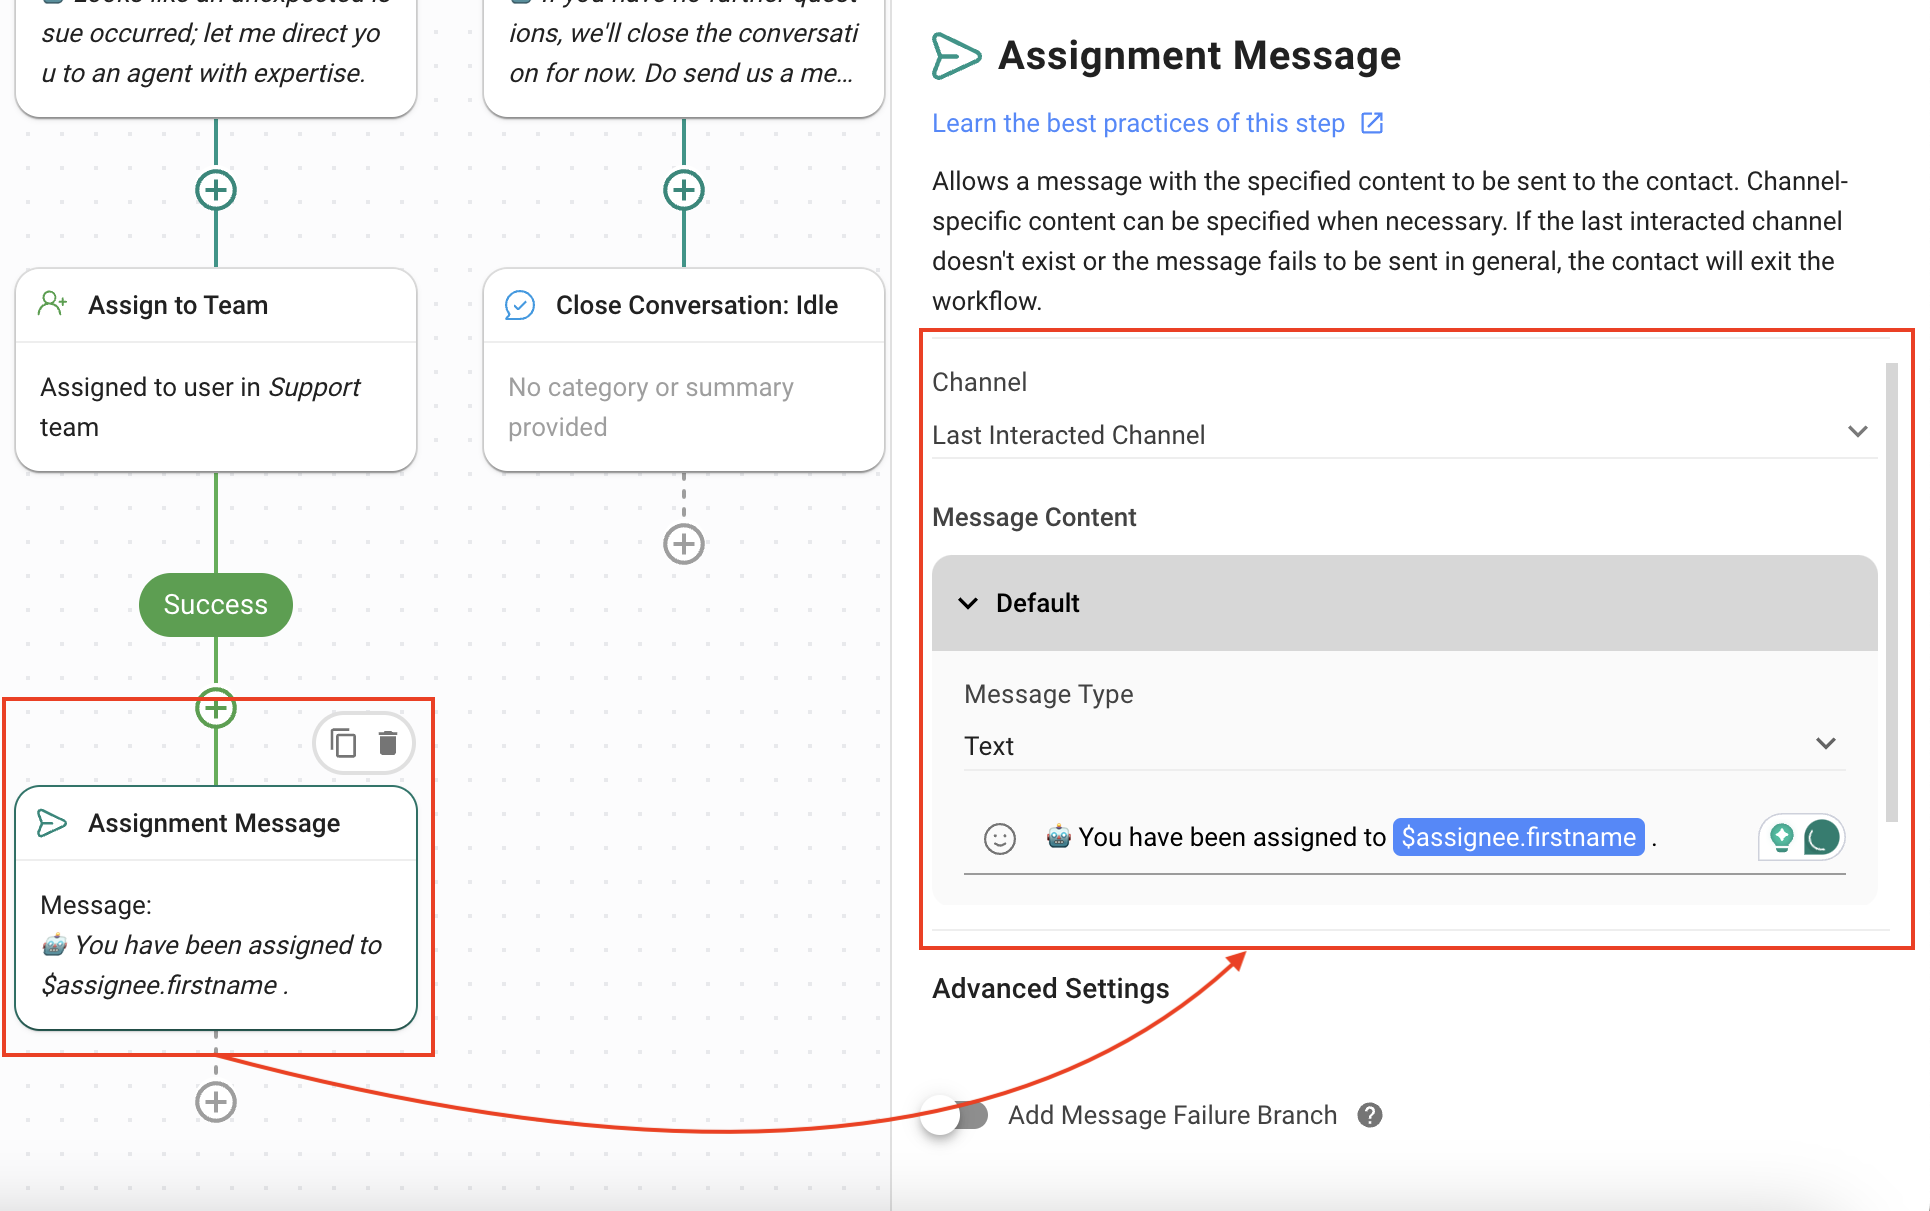
16. **Assignment Message**: The Contact is informed that they are assigned to an agent using the **Send a Message** Step.
* **Channel**: Last Interacted Channel, to send the message to the channel the Contact is using.
* **Message Type**: Text
* The message informs the user that the conversation is being sent to an Agent.
17. **Failure: Idle**: In case the Contact does not respond to queries and the conversation has been idle for more than 15 minutes, this is the branch the Contact’s journey follows.
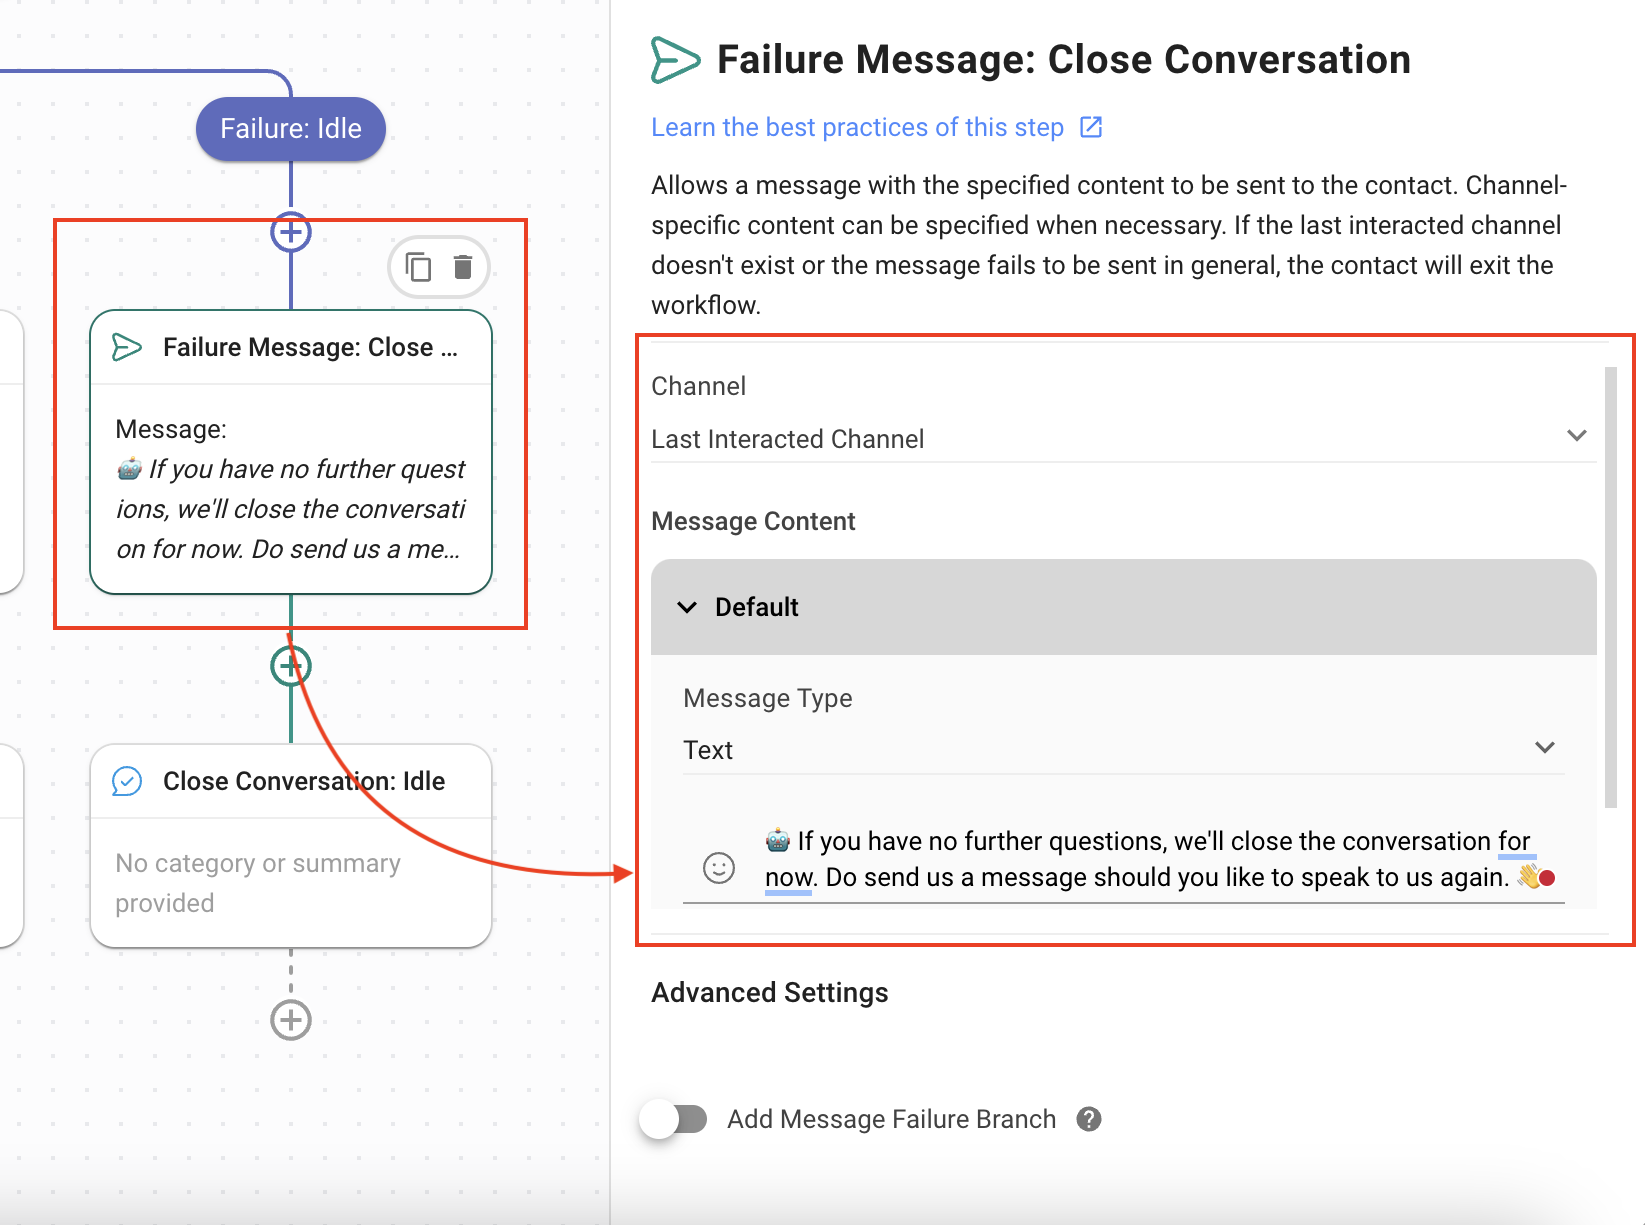
18. **Failure Message: Close Conversation**: This Step informs the Contact that the conversation is being closed using the **Send a Message** Step.
* **Channel**: Last Interacted Channel, to send the message to the channel the Contact is using.
* **Message Type**: Text
* The message informs the user that the conversation is being closed.
19. **Close Conversation: Idle**: This Step closes the conversation using the **Close Conversation** Step.
{% hint style="info" %}
The AI Agent collects the Contact’s name and phone number/email information.
{% endhint %}
---
# Agent Instructions: Querying This Documentation
If you need additional information that is not directly available in this page, you can query the documentation dynamically by asking a question.
Perform an HTTP GET request on the current page URL with the `ask` query parameter:
```
GET https://docs.is-messenger.com/ismessenger/automate-conversations/how-to-automate-contact-information-collection-with-ai.md?ask=
```
The question should be specific, self-contained, and written in natural language.
The response will contain a direct answer to the question and relevant excerpts and sources from the documentation.
Use this mechanism when the answer is not explicitly present in the current page, you need clarification or additional context, or you want to retrieve related documentation sections.