# Install Website Chat Widget on Shopify
Adding a web chat widget to your Shopify store is a quick and easy process. It does not require any coding skills or technical knowledge.
#### Setting Up for Installation
In order to install a web chat widget on Shopify, you will need the following:
* Access to your [Shopify account](https://accounts.shopify.com/store-login).
* A code snippet for your web chat widget.
If you don't have a code snippet already, you will generate one when creating an IS-Messenger [Website Chat Widget](/ismessenger/messaging-channels/website-chat-widget.md) or using the [Facebook Chat Plugin](/ismessenger/messaging-channels/facebook-messenger/facebook-chat-plugin.md) for [Facebook Messenger](/ismessenger/messaging-channels/facebook-messenger.md).
{% hint style="success" %}
If you have the channels already connected on the IS-Messenger platform and you need to retrieve the generated code snippet, follow the [instructions here](/ismessenger/messaging-channels/website-chat-widget.md).
{% endhint %}
**Step 1: Log in to Shopify**
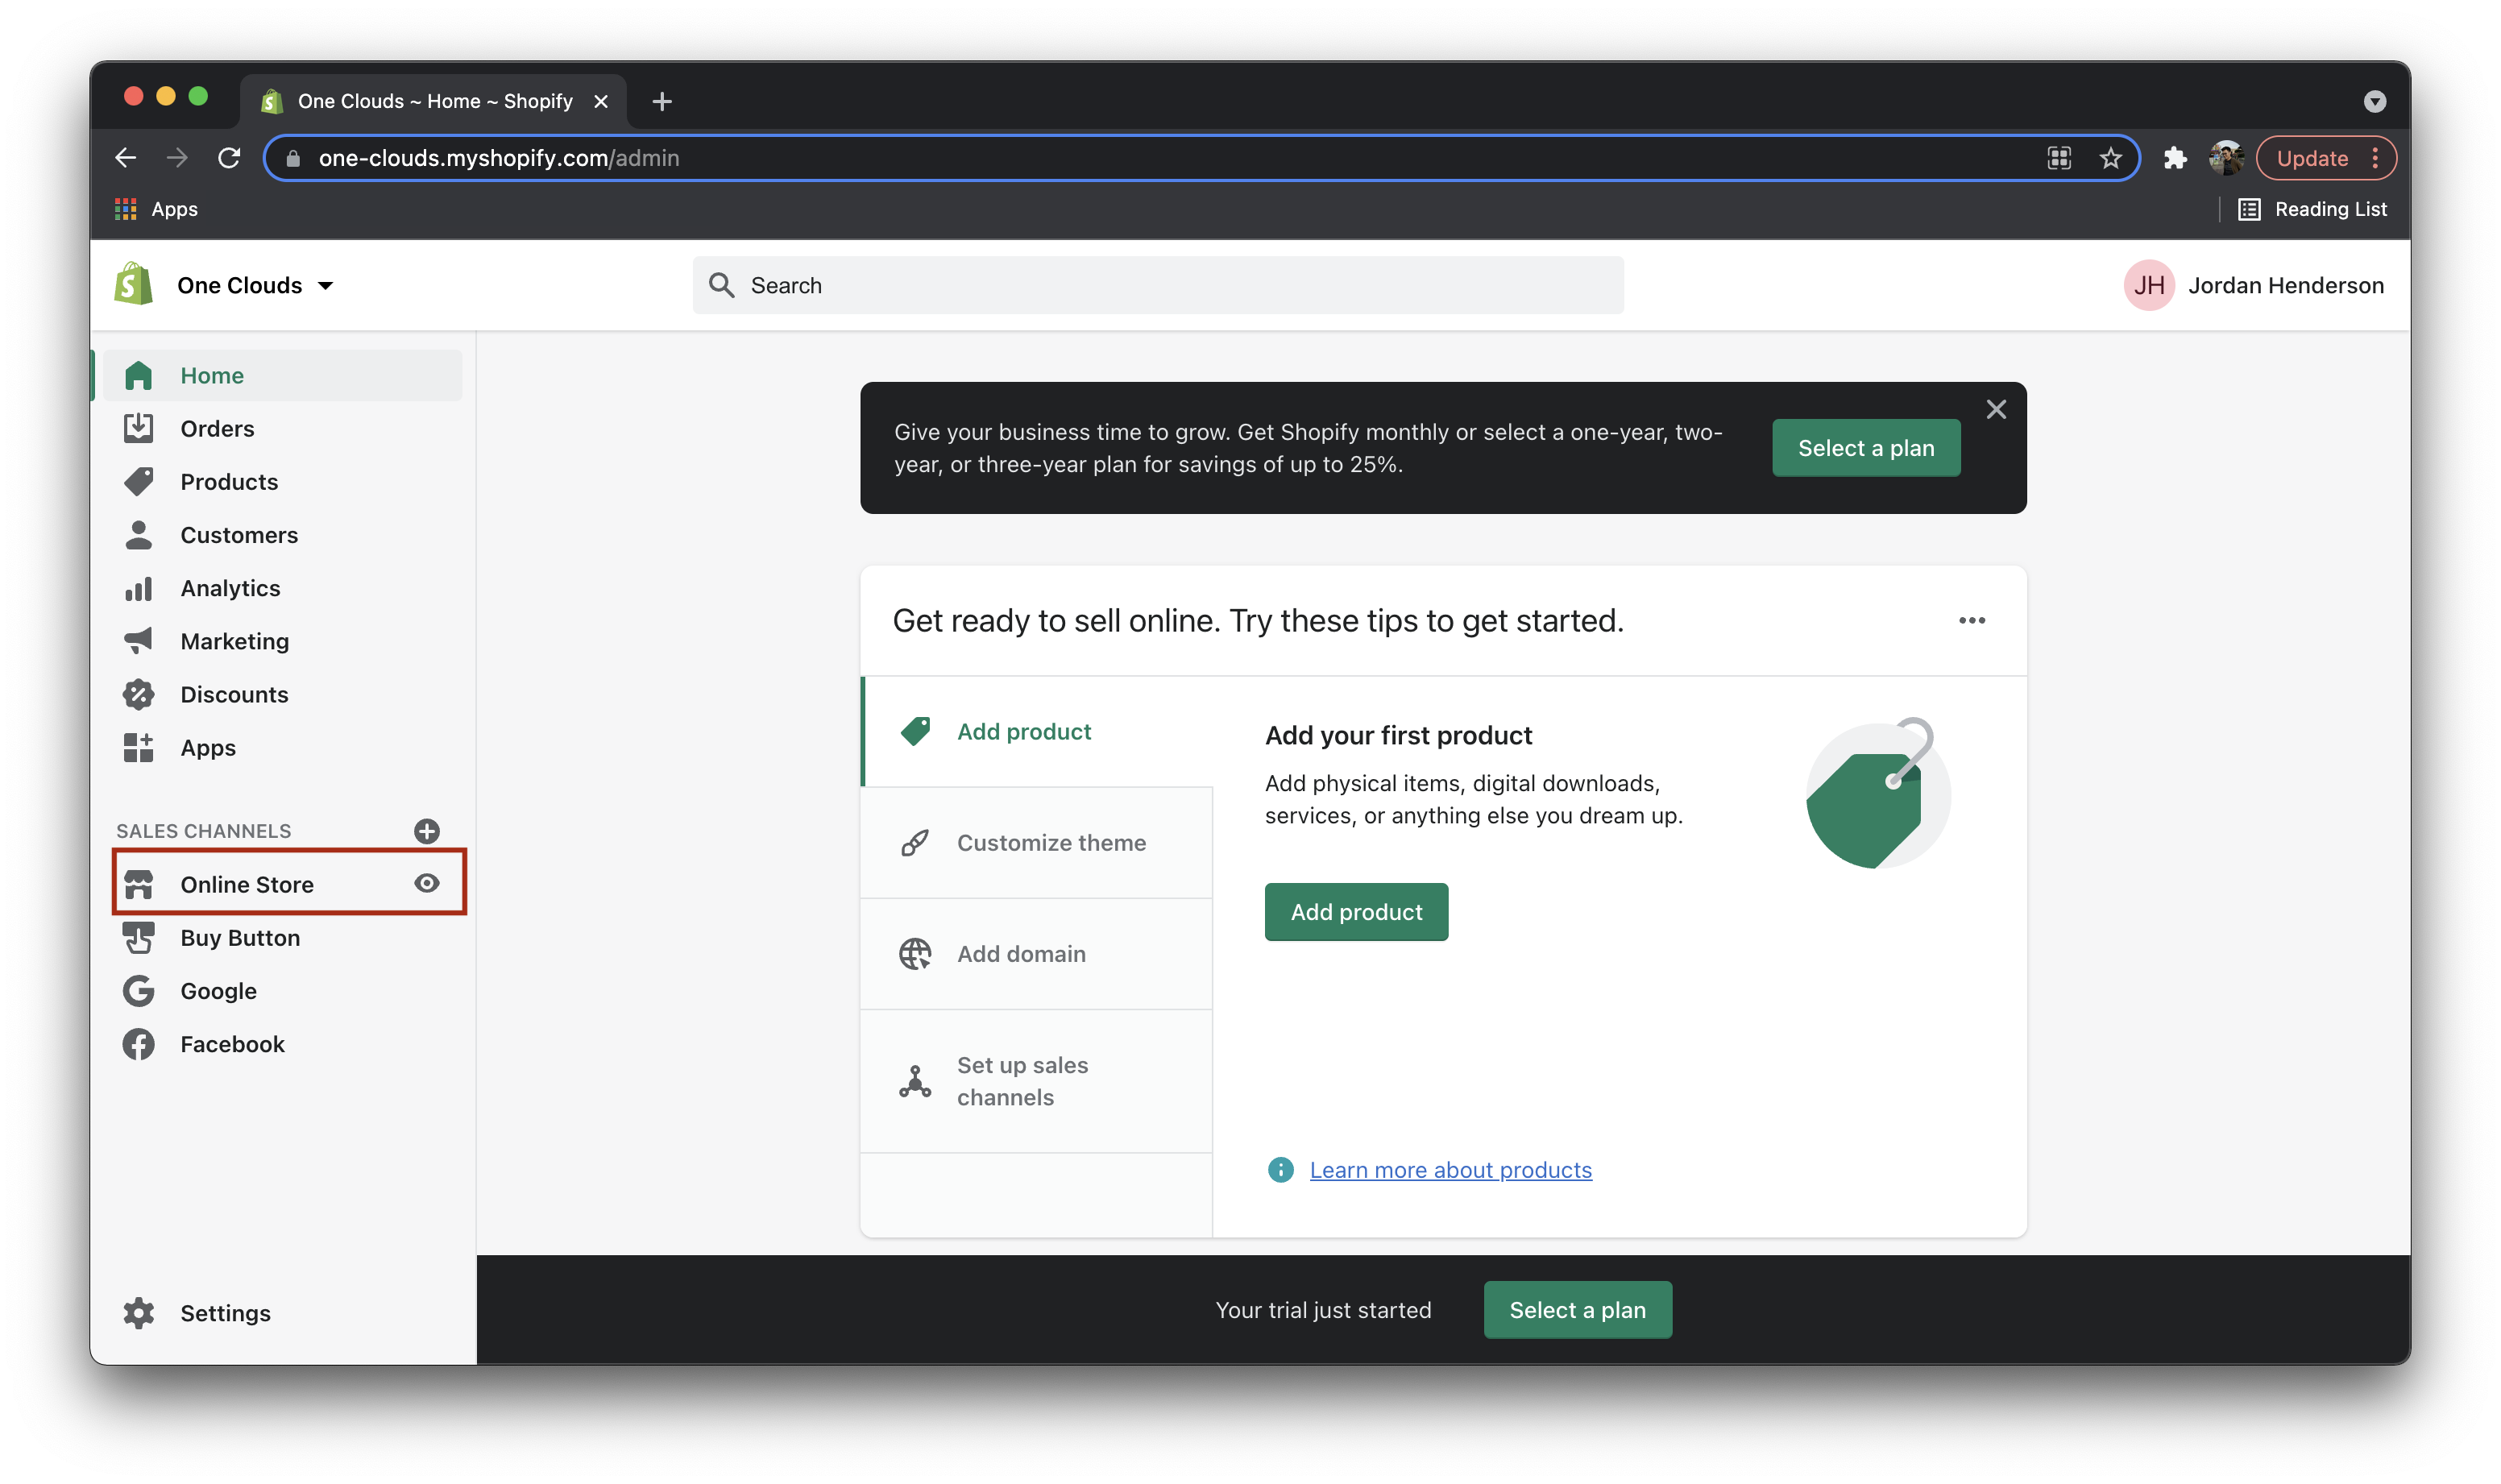
Log in to your [Shopify account](https://accounts.shopify.com/store-login) and click on "Online Store" on the navigation bar.
**Step 2: Click on Edit Code**
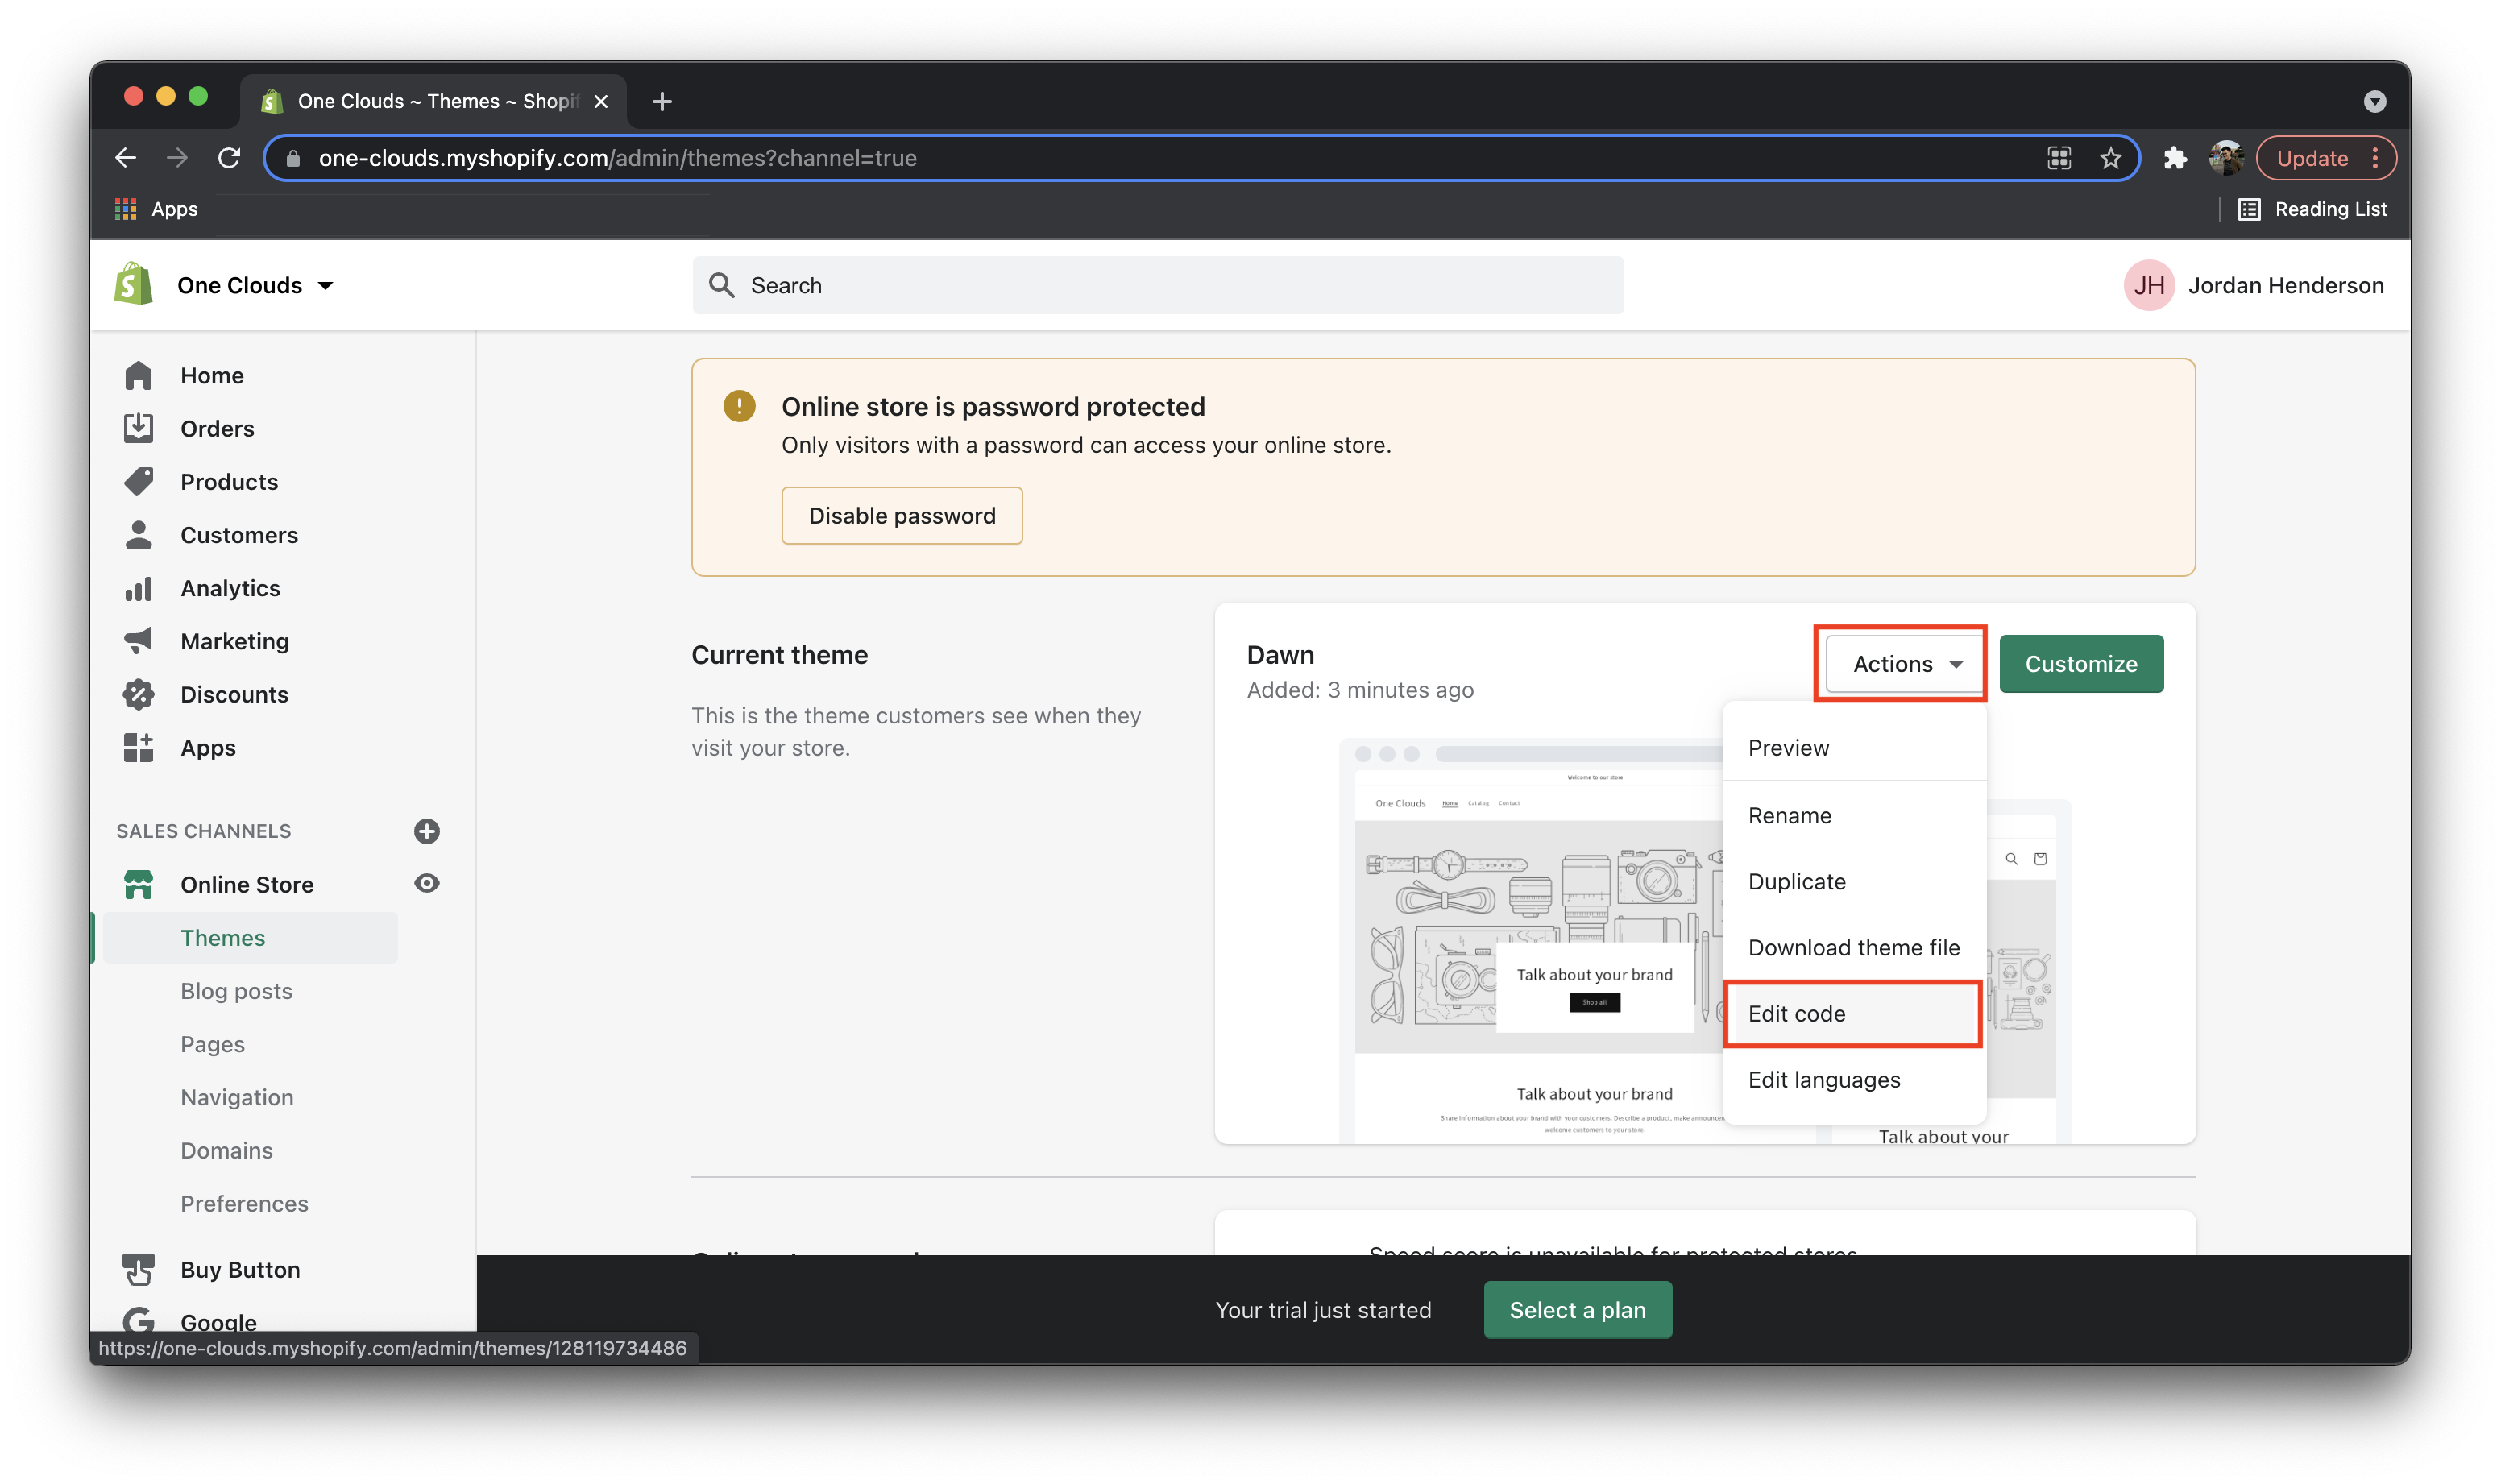
Navigate to the Themes section. Here, click on the Actions dropdown menu and select the Edit Code option.
**Step 3: Paste the Script**
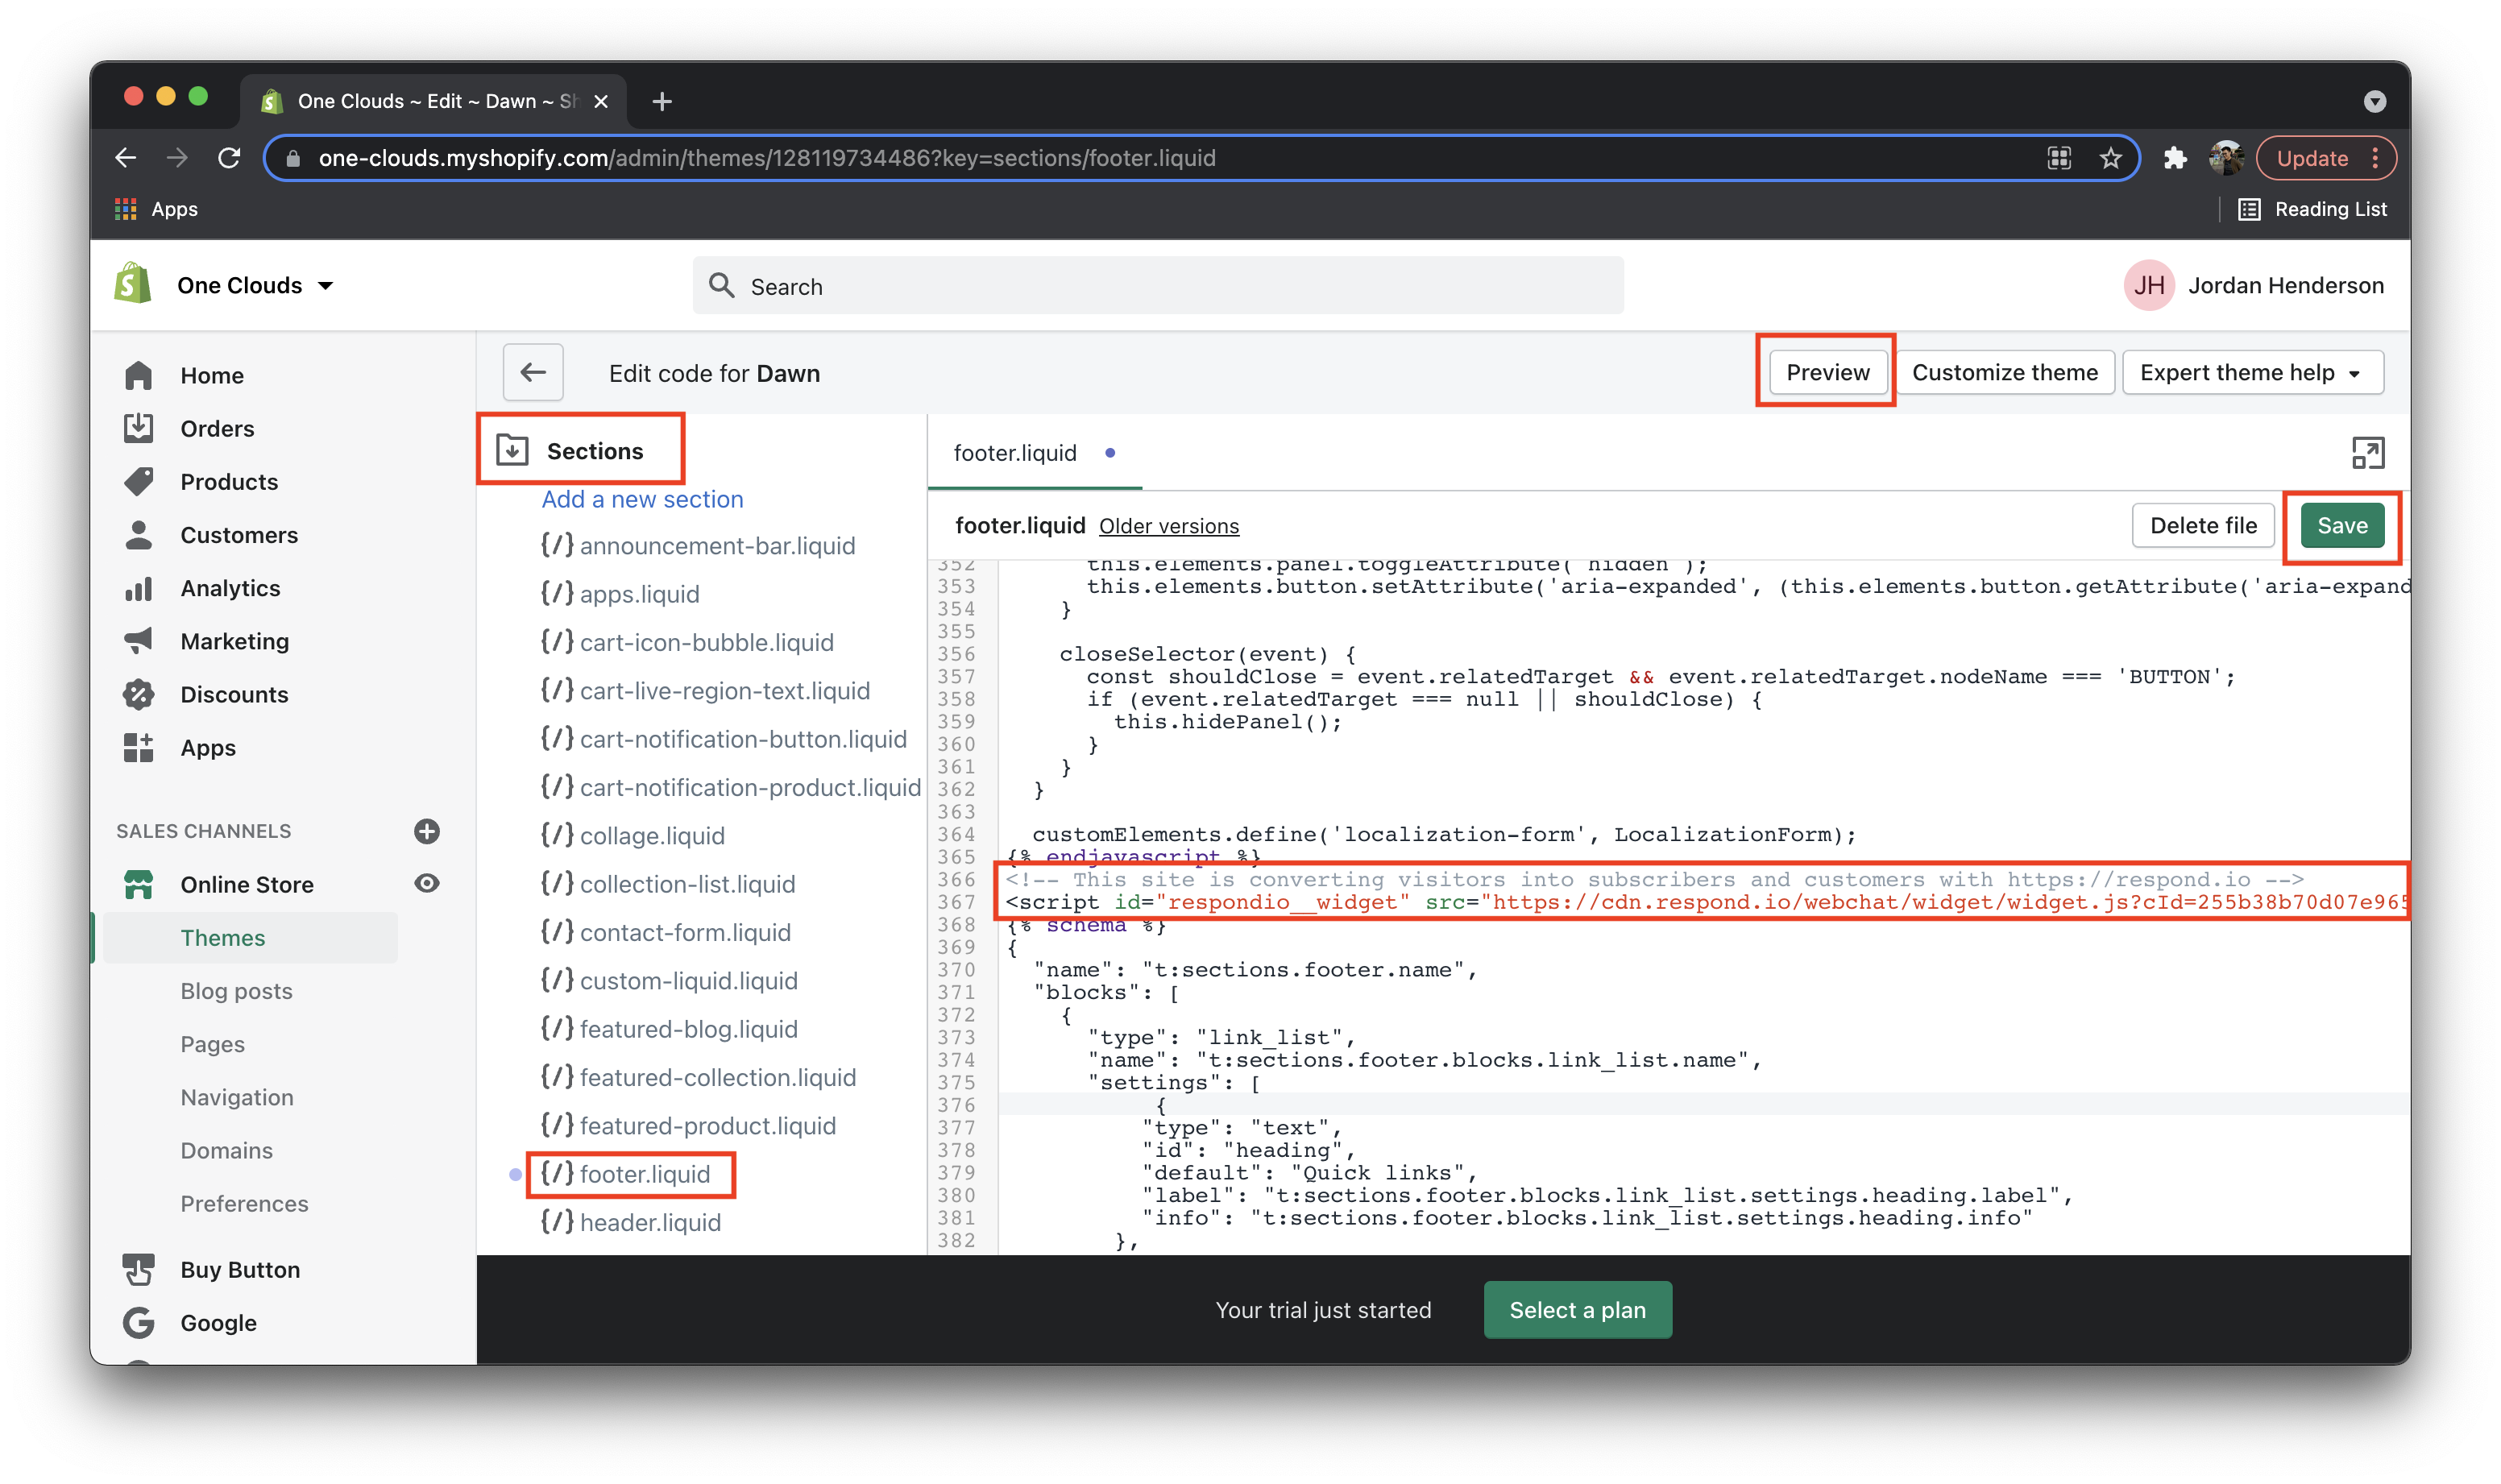
Copy your plugin script from the IS-Messenger platform. On the left panel of the Edit Code Page, click the **Sections** folder to expand it. Press the **footer.liquid** section and paste the chat plugin script.
Once you have pasted the script into the appropriate section, press the purple **Save** button on the top left.
**Done!**
Open the website and check out the chat plugin. You will find it in the bottom-right corner. Now your website visitors can chat effortlessly with you. If you used the code snippets generated from the IS-Messenger platform, you will be able to manage the conversations and update the appearance of the widget from the Platform.
{% hint style="success" %}
The chat widget is now active on your website.
{% endhint %}
{% hint style="info" %}
**Note**: If you are using an external theme and the widget is not working, please try embedding the website code under the **theme.liquid** section before ``
{% endhint %}
---
# Agent Instructions: Querying This Documentation
If you need additional information that is not directly available in this page, you can query the documentation dynamically by asking a question.
Perform an HTTP GET request on the current page URL with the `ask` query parameter:
```
GET https://docs.is-messenger.com/ismessenger/workspace-setting/growth-widgets/install-website-chat-widget-on-shopify.md?ask=