> For the complete documentation index, see [llms.txt](https://docs.is-messenger.com/ismessenger/llms.txt). Markdown versions of documentation pages are available by appending `.md` to page URLs; this page is available as [Markdown](https://docs.is-messenger.com/ismessenger/automate-conversations/how-to-create-automated-chat-menus.md).
# How to Create Automated Chat Menus
{% hint style="success" %}
In this use case article, you’ll discover how to automate repetitive or common inquiries and route customers to an agent when needed
{% endhint %}
#### Benefits of Using Automated Chat Menus
Use automated Chat Menus to:
* offer self-service options that allows customers to find answers quickly and independently.
* improve support availability by offering 24/7 access to information about your business that’s accurate and consistent.
* automate repetitive inquiries and free up online agents' time to focus on more complex queries or specialized tasks.
#### Workflow Setup
Learn how to use the Workflow Template to set up an automated Chat Menu:
* Select the Chat Menu Workflow Template and set up menu options.
* Set up responses for answer options that can be automated and live agent option.
* Route Contacts to other responses automatically.
* Set up response for invalid answers from Contacts.
**Select the Chat Menu Workflow Template and set up menu options**
In the **Workflows** module, click **+ Add Workflow** > Click **Chat Menu** > Click **Use Template**.
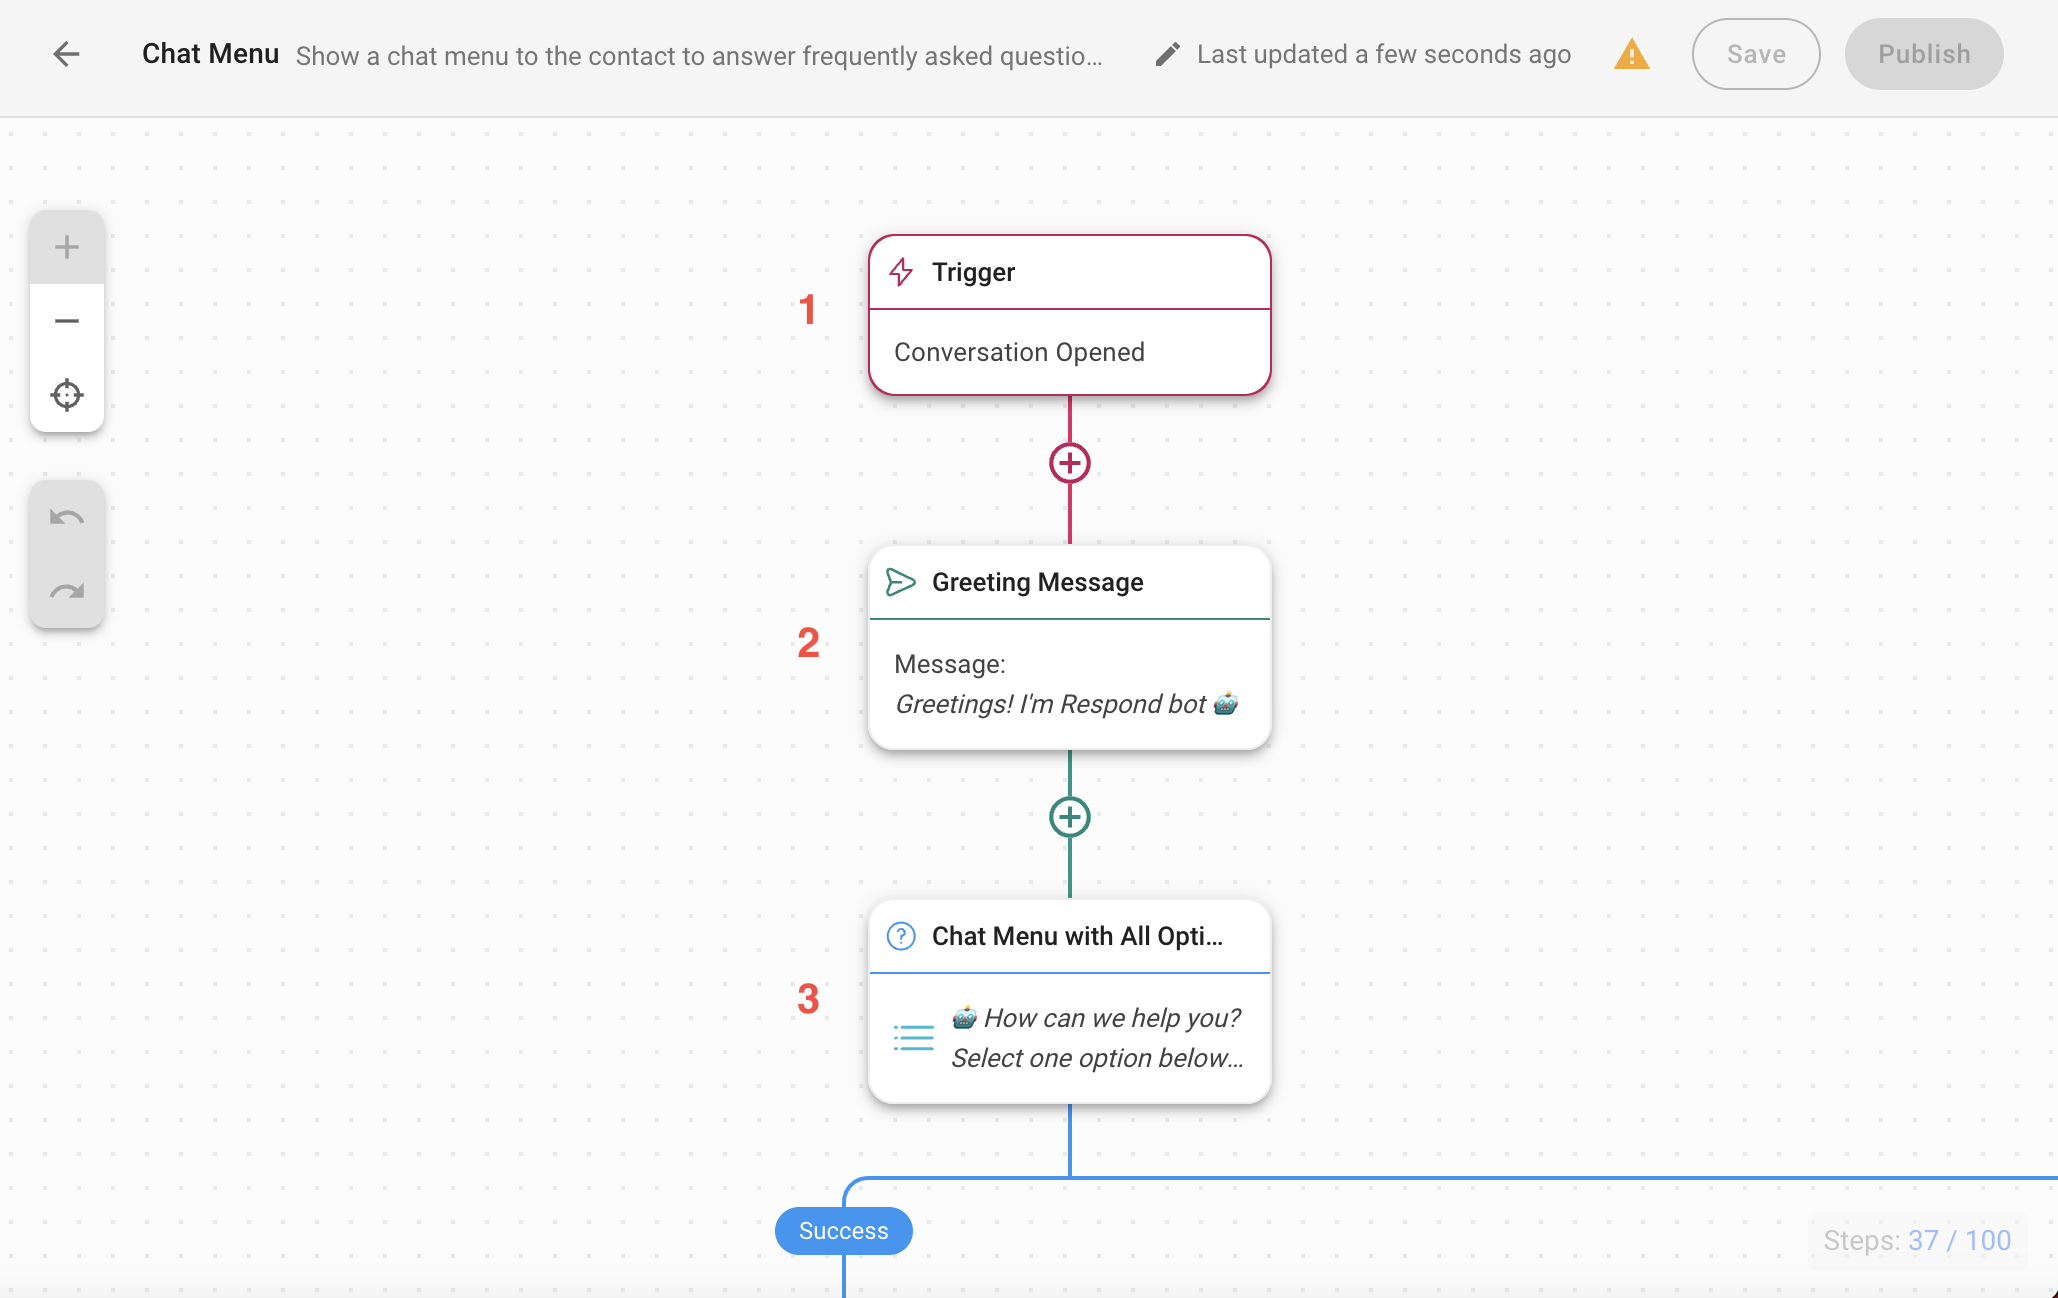
**1.** [**Trigger**](/ismessenger/modules/workflow/triggers.md): The Workflow starts when a conversation is opened by a Contact.
**2. Greeting Message**: Provides a standard greeting that acts as an immediate response to your Contact. This [greeting message](#workflow_setup) can be edited.
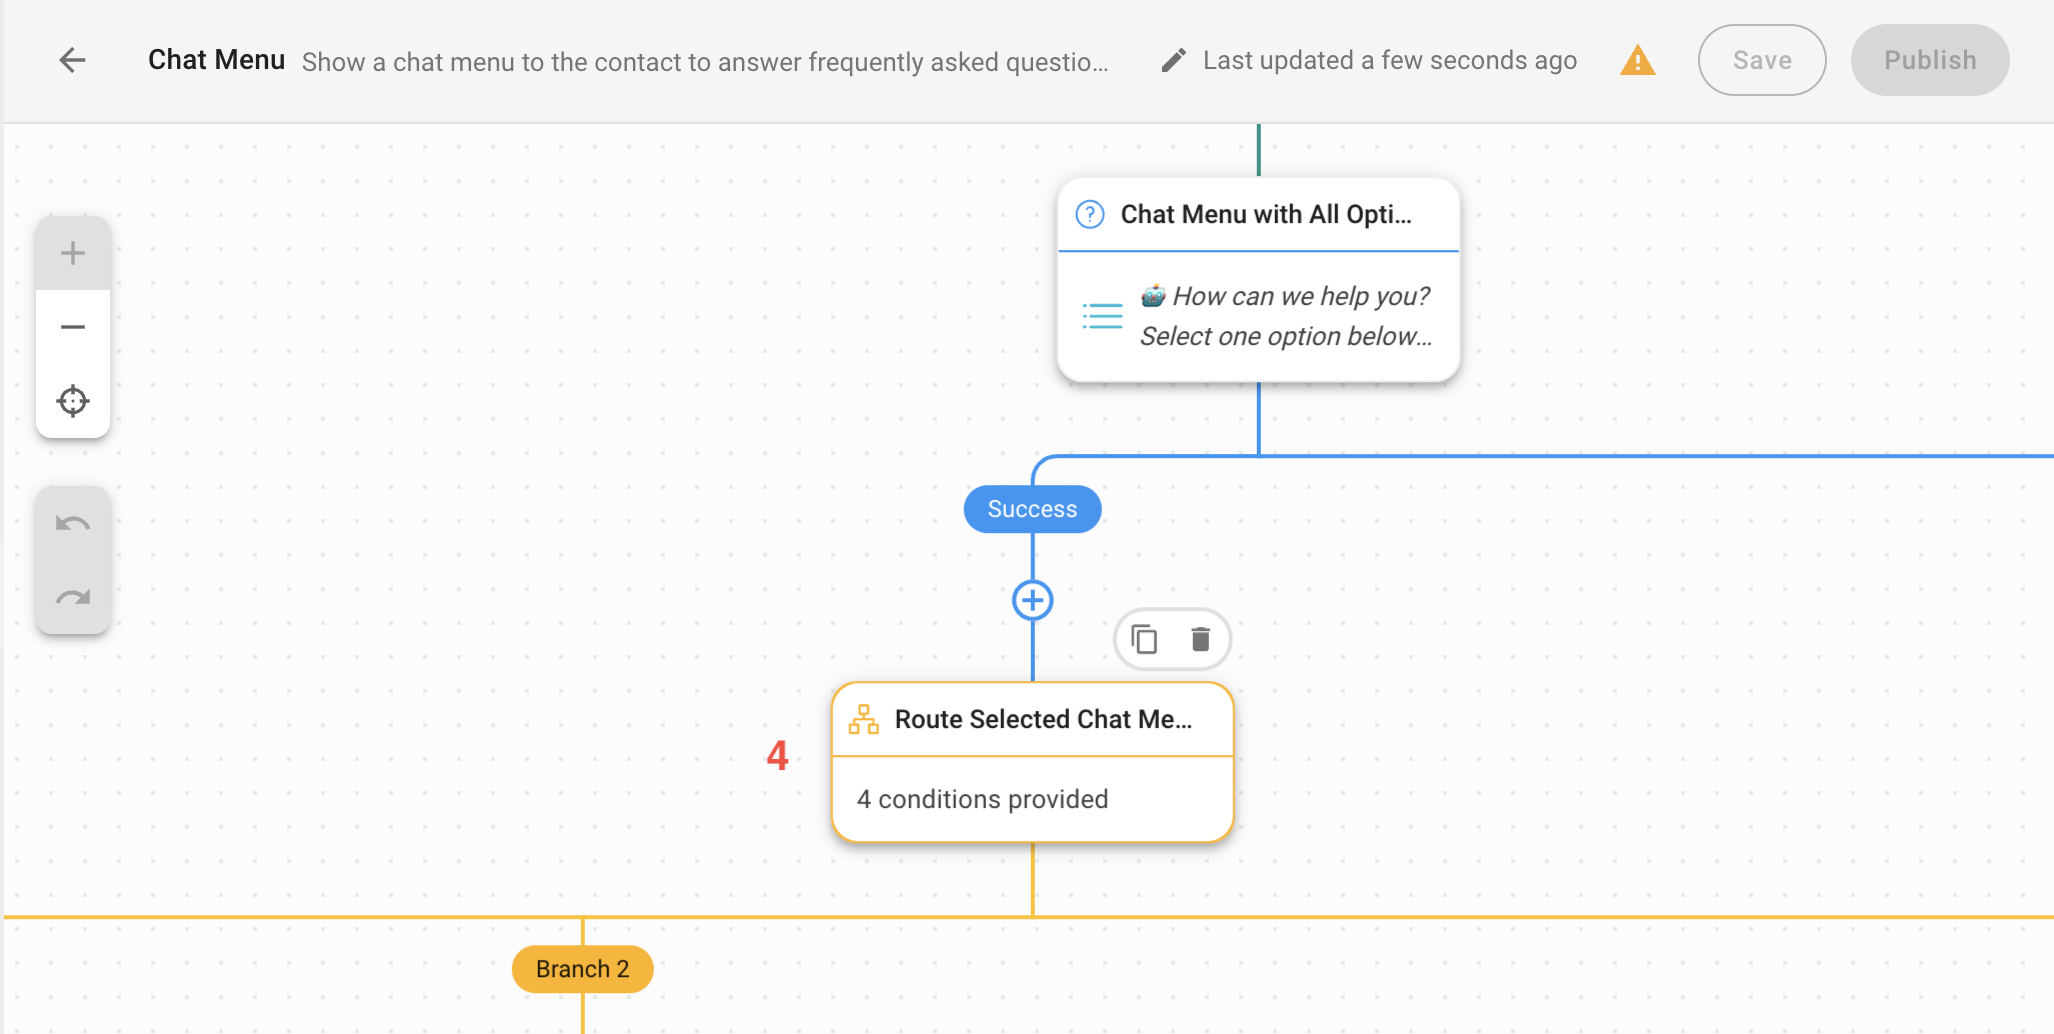
**3.** **Chat Menu with All Options**: This step asks the Contact question and provide a list of answer options. The answers will be saved as a variable to be used in the following branch steps. You can configure the answers of these steps based on your business needs. In this Workflow Template example, we have prepared answer options as follows:
* Product A
* Service B
* About Us
* Talk to Sales
**Set up responses for answer options that can be automated and live agent option**
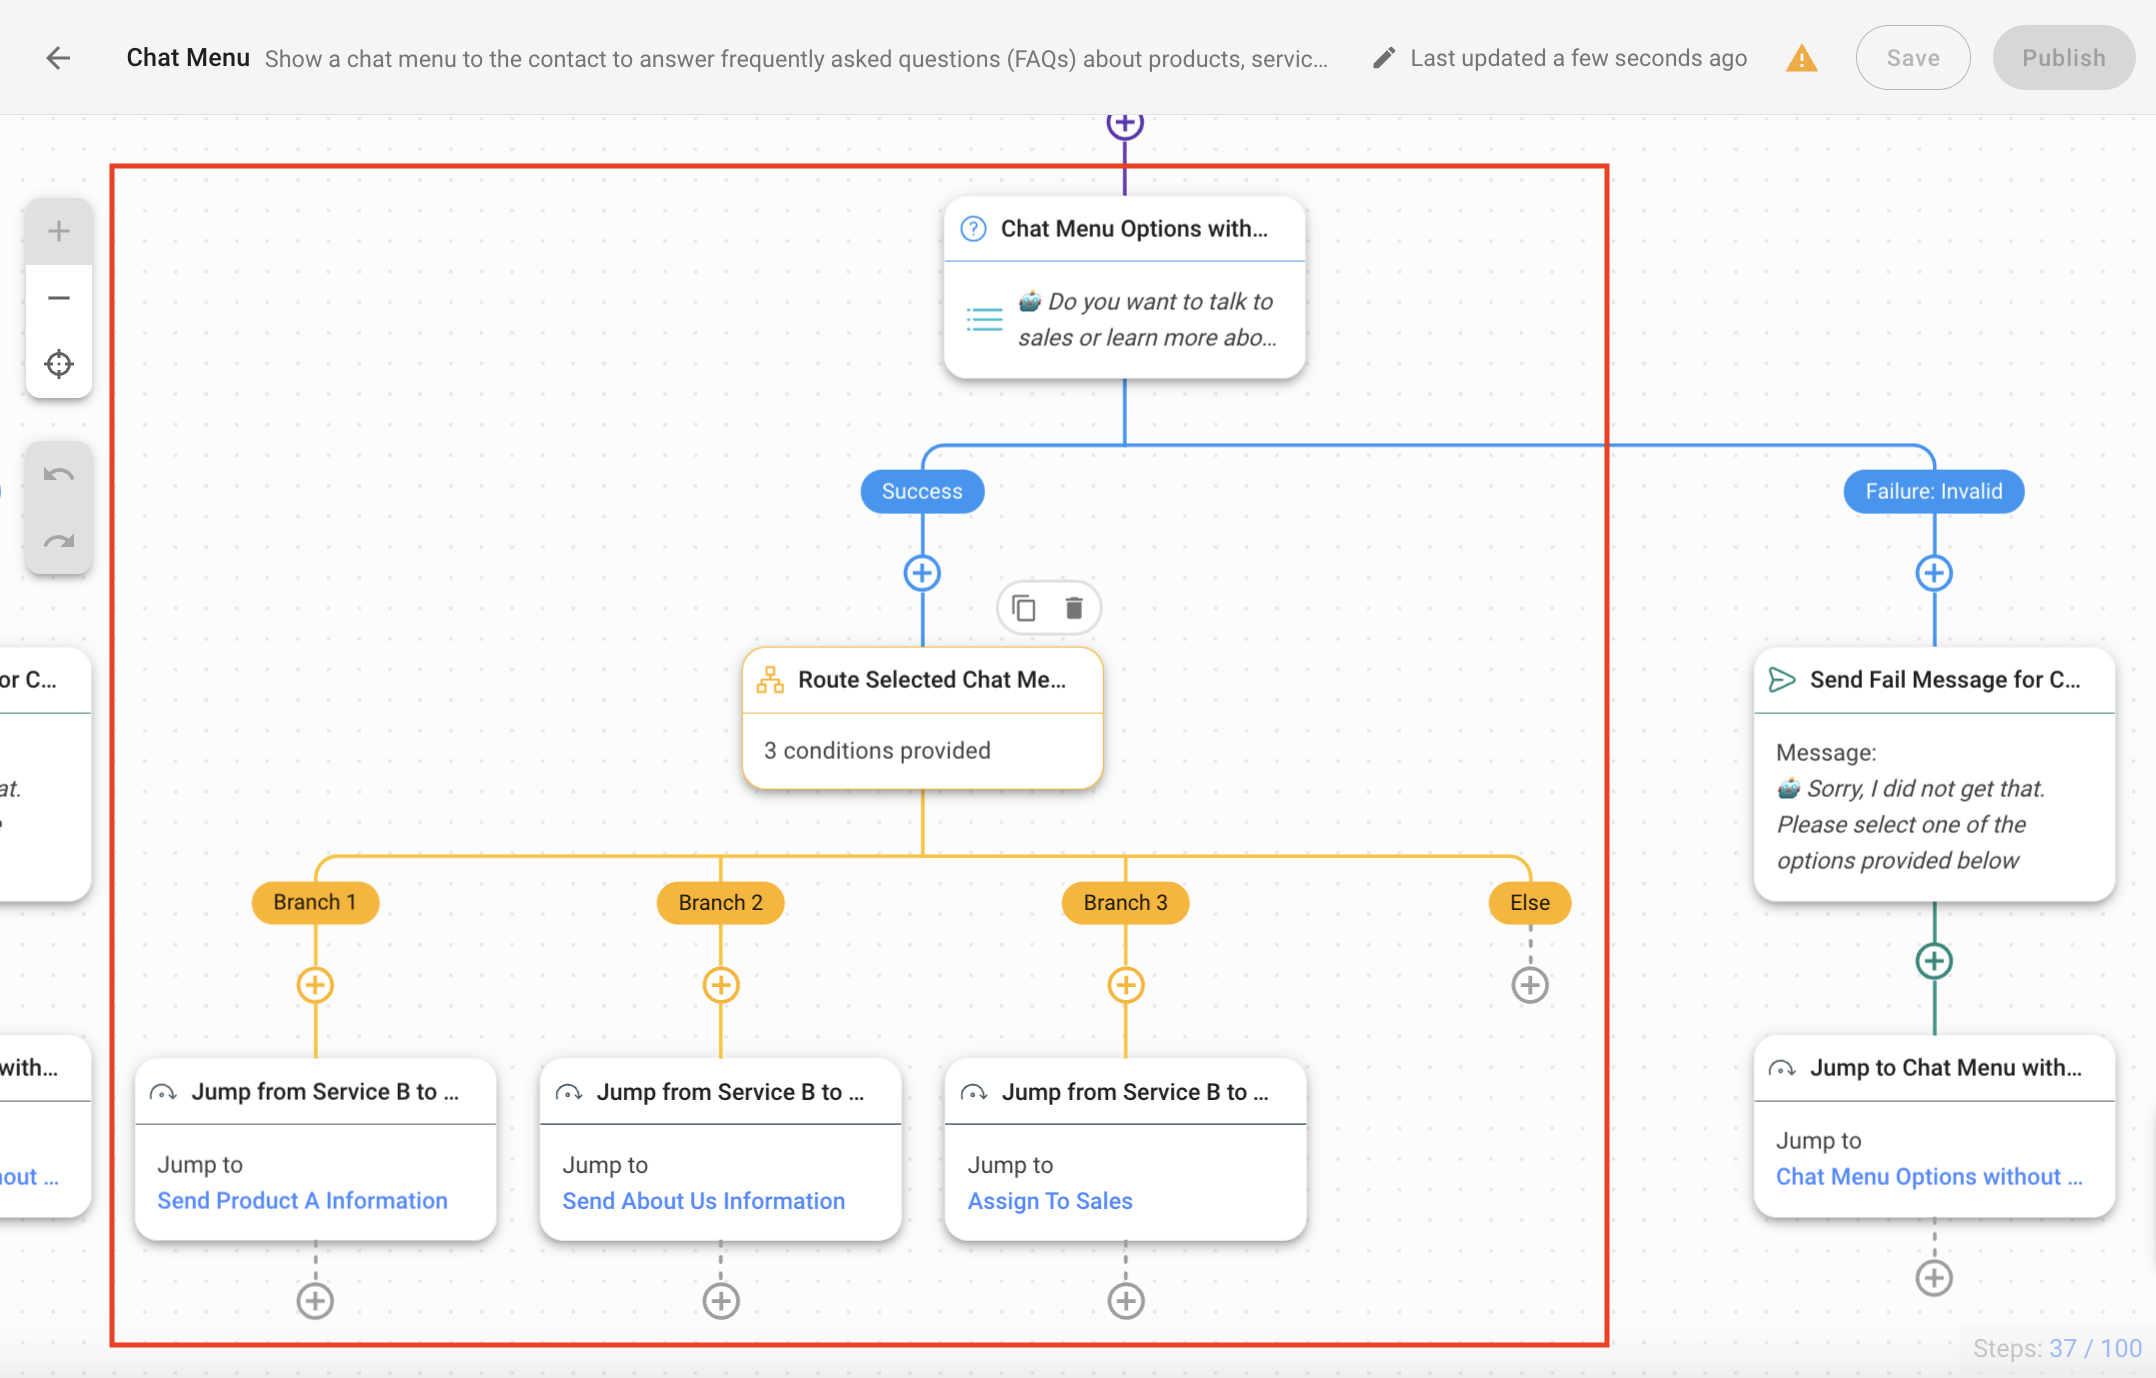
**4. Route Selected Chat Menu Option**: This step routes Contacts based on their responses. In this template, branches are created for four answers. If you have more answers, [add more branches](/ismessenger/modules/workflow/workflow-step/step-branch.md) accordingly.
If you changed the answers options from the previous **Chat Menu with All Options** step, e.g. *Product A*, *Service B*, do replace the sample values in this branch step.
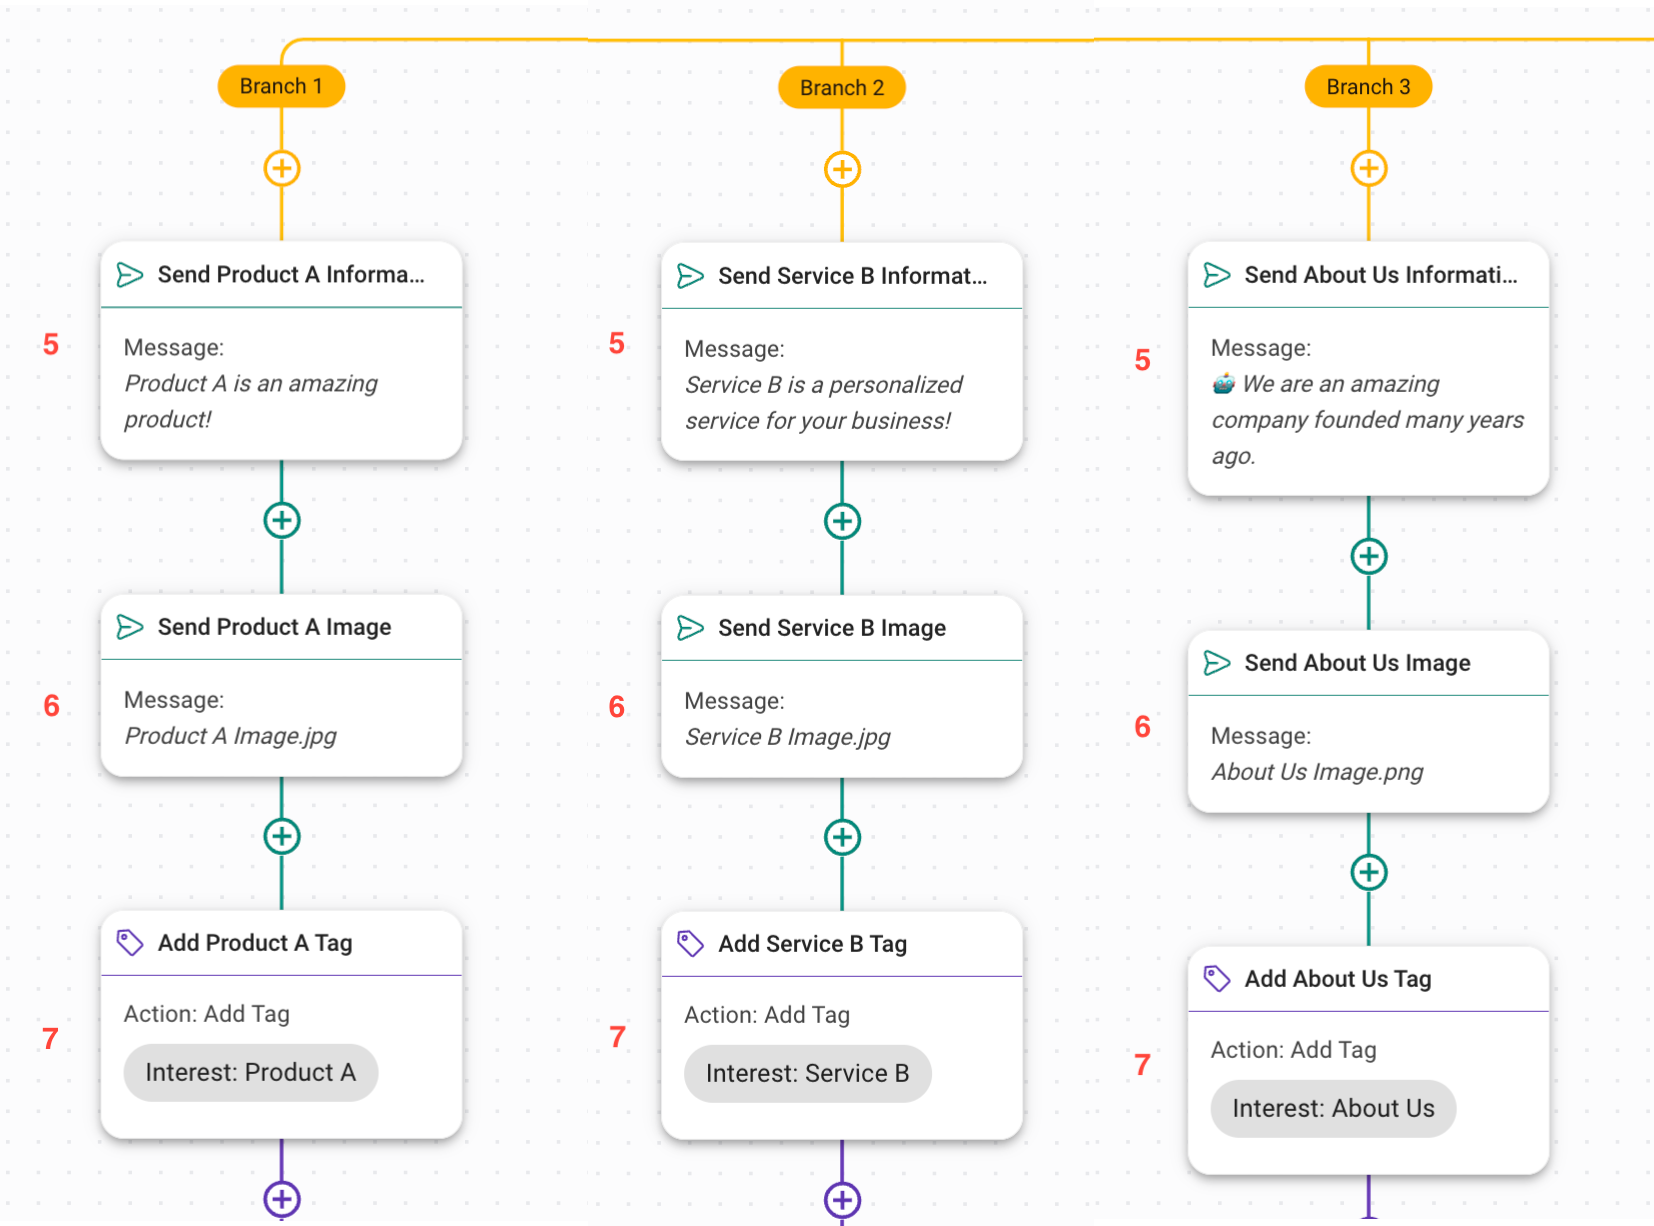
If the Contact selects the answer option *Product A*, *Service B* or *About Us*, the Contact will be routed to Branch 1, Branch 2 or Branch 3 respectively. These branches provide an example of how you can share information with Contacts and keep a record of their responses automatically.
**5. Send Information:** Sends a message with text.
**6. Send Image:** Sends a message with image.
**7. Add Tag:** [Adds a tag](/ismessenger/messaging-channels/facebook-messenger/message-tag.md) to keep a record of Contacts responses. It can be used to [segment Contacts](/ismessenger/modules/contacts.md) for broadcasts.
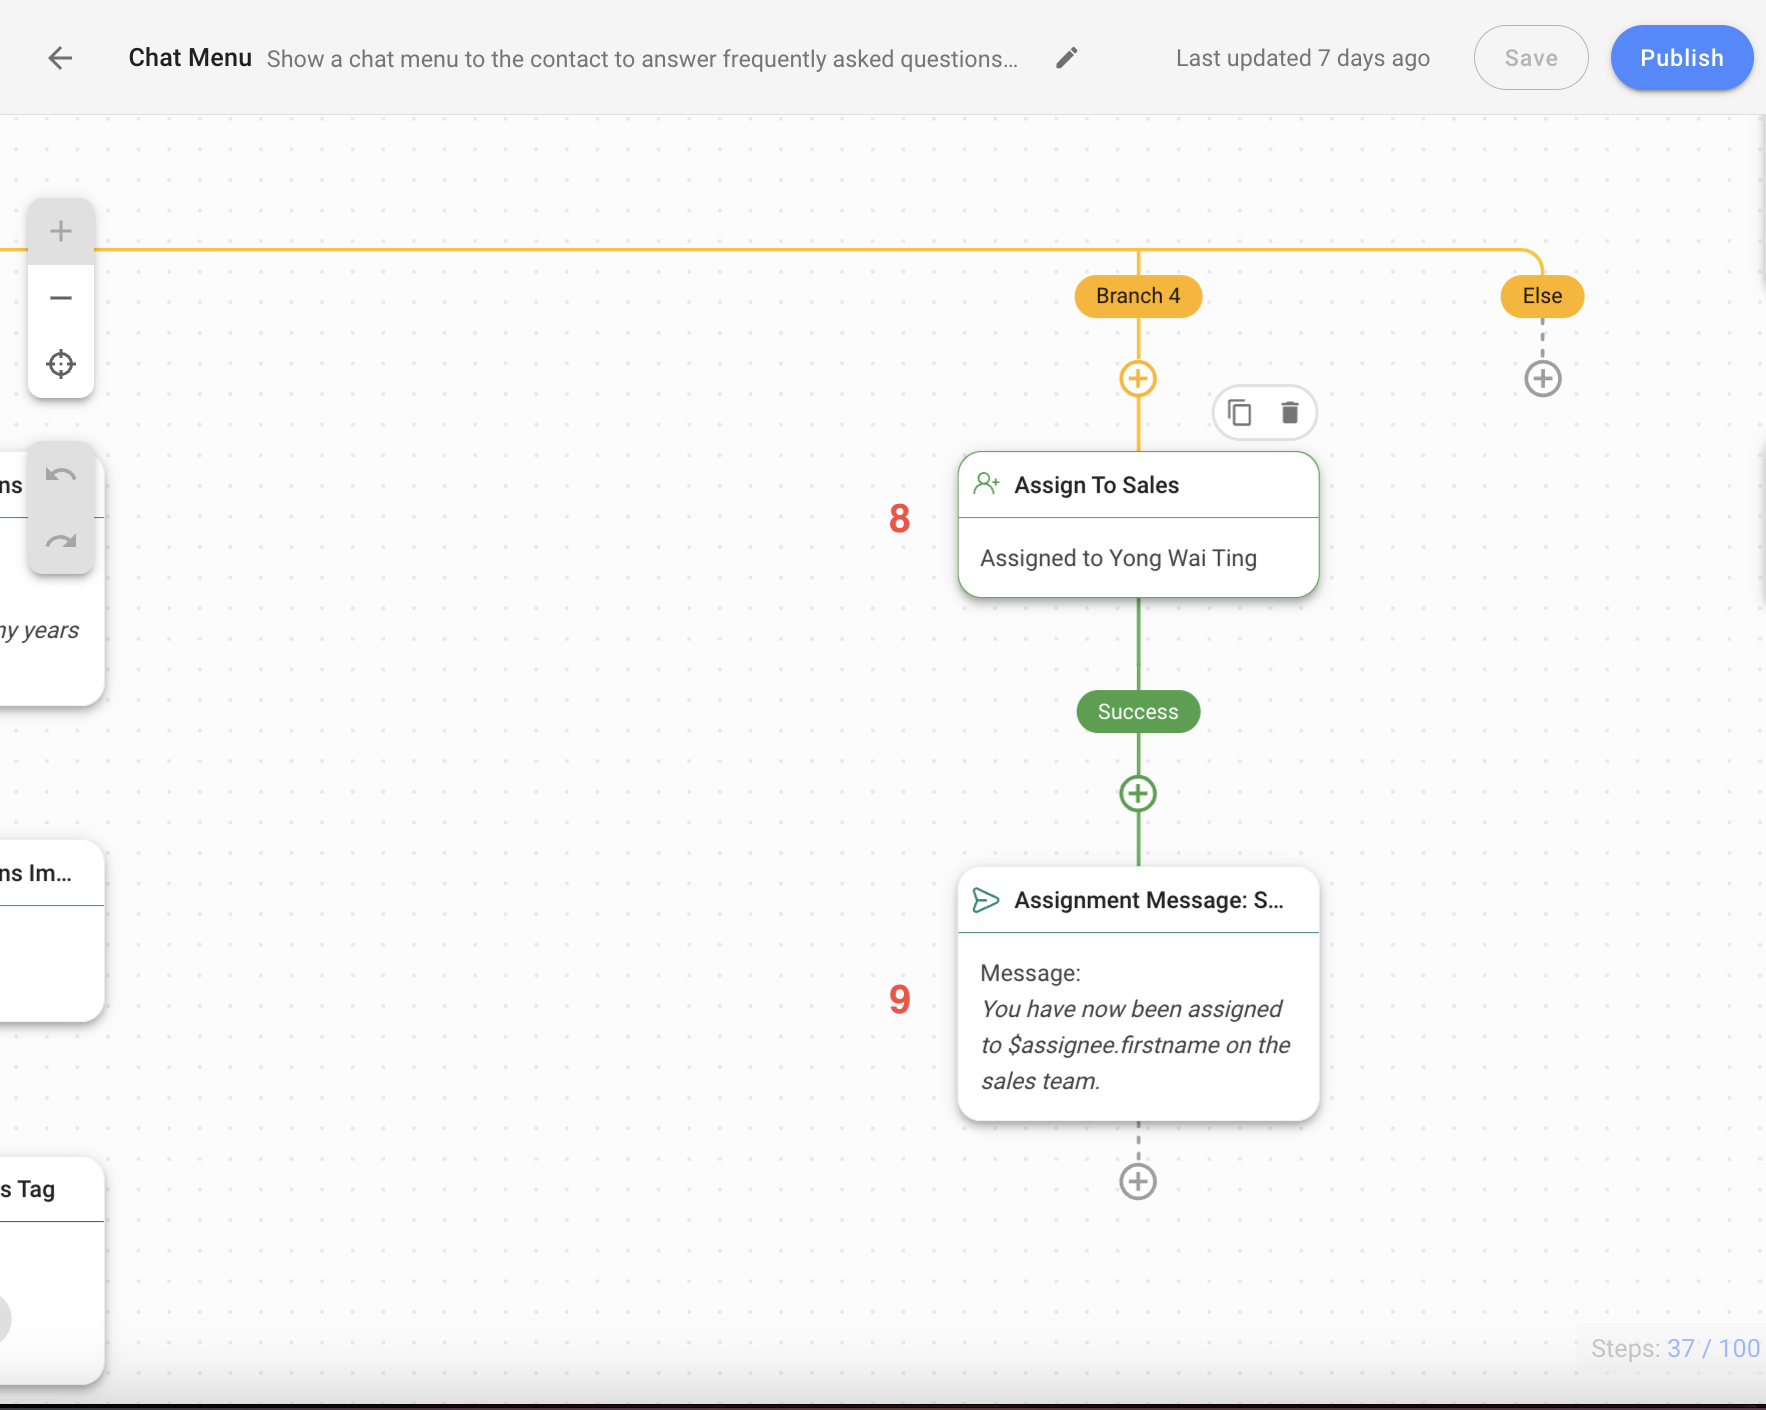
If the Contact selects the answer option *Talk to Sales*, the Contact will be routed to Branch 4. This Branch will assign the Contact to a live agent and inform the Contact about the assignment by sending a message. You can configure and customize these steps as needed.
**8. Assign to Sales**: Configure this [Assign To](/ismessenger/modules/workflow.md) step with a team or a specific agent based on your business needs.
**9. Assignment Message**: Sends a message to inform Contact about their assignment status.
**Route Contacts to other responses automatically**
For Branch 1, Branch 2 and Branch 3, the automation will continue by showing Contact the Chat Menu again and route Contact to other responses using [Jump](/ismessenger/modules/workflow.md) steps.
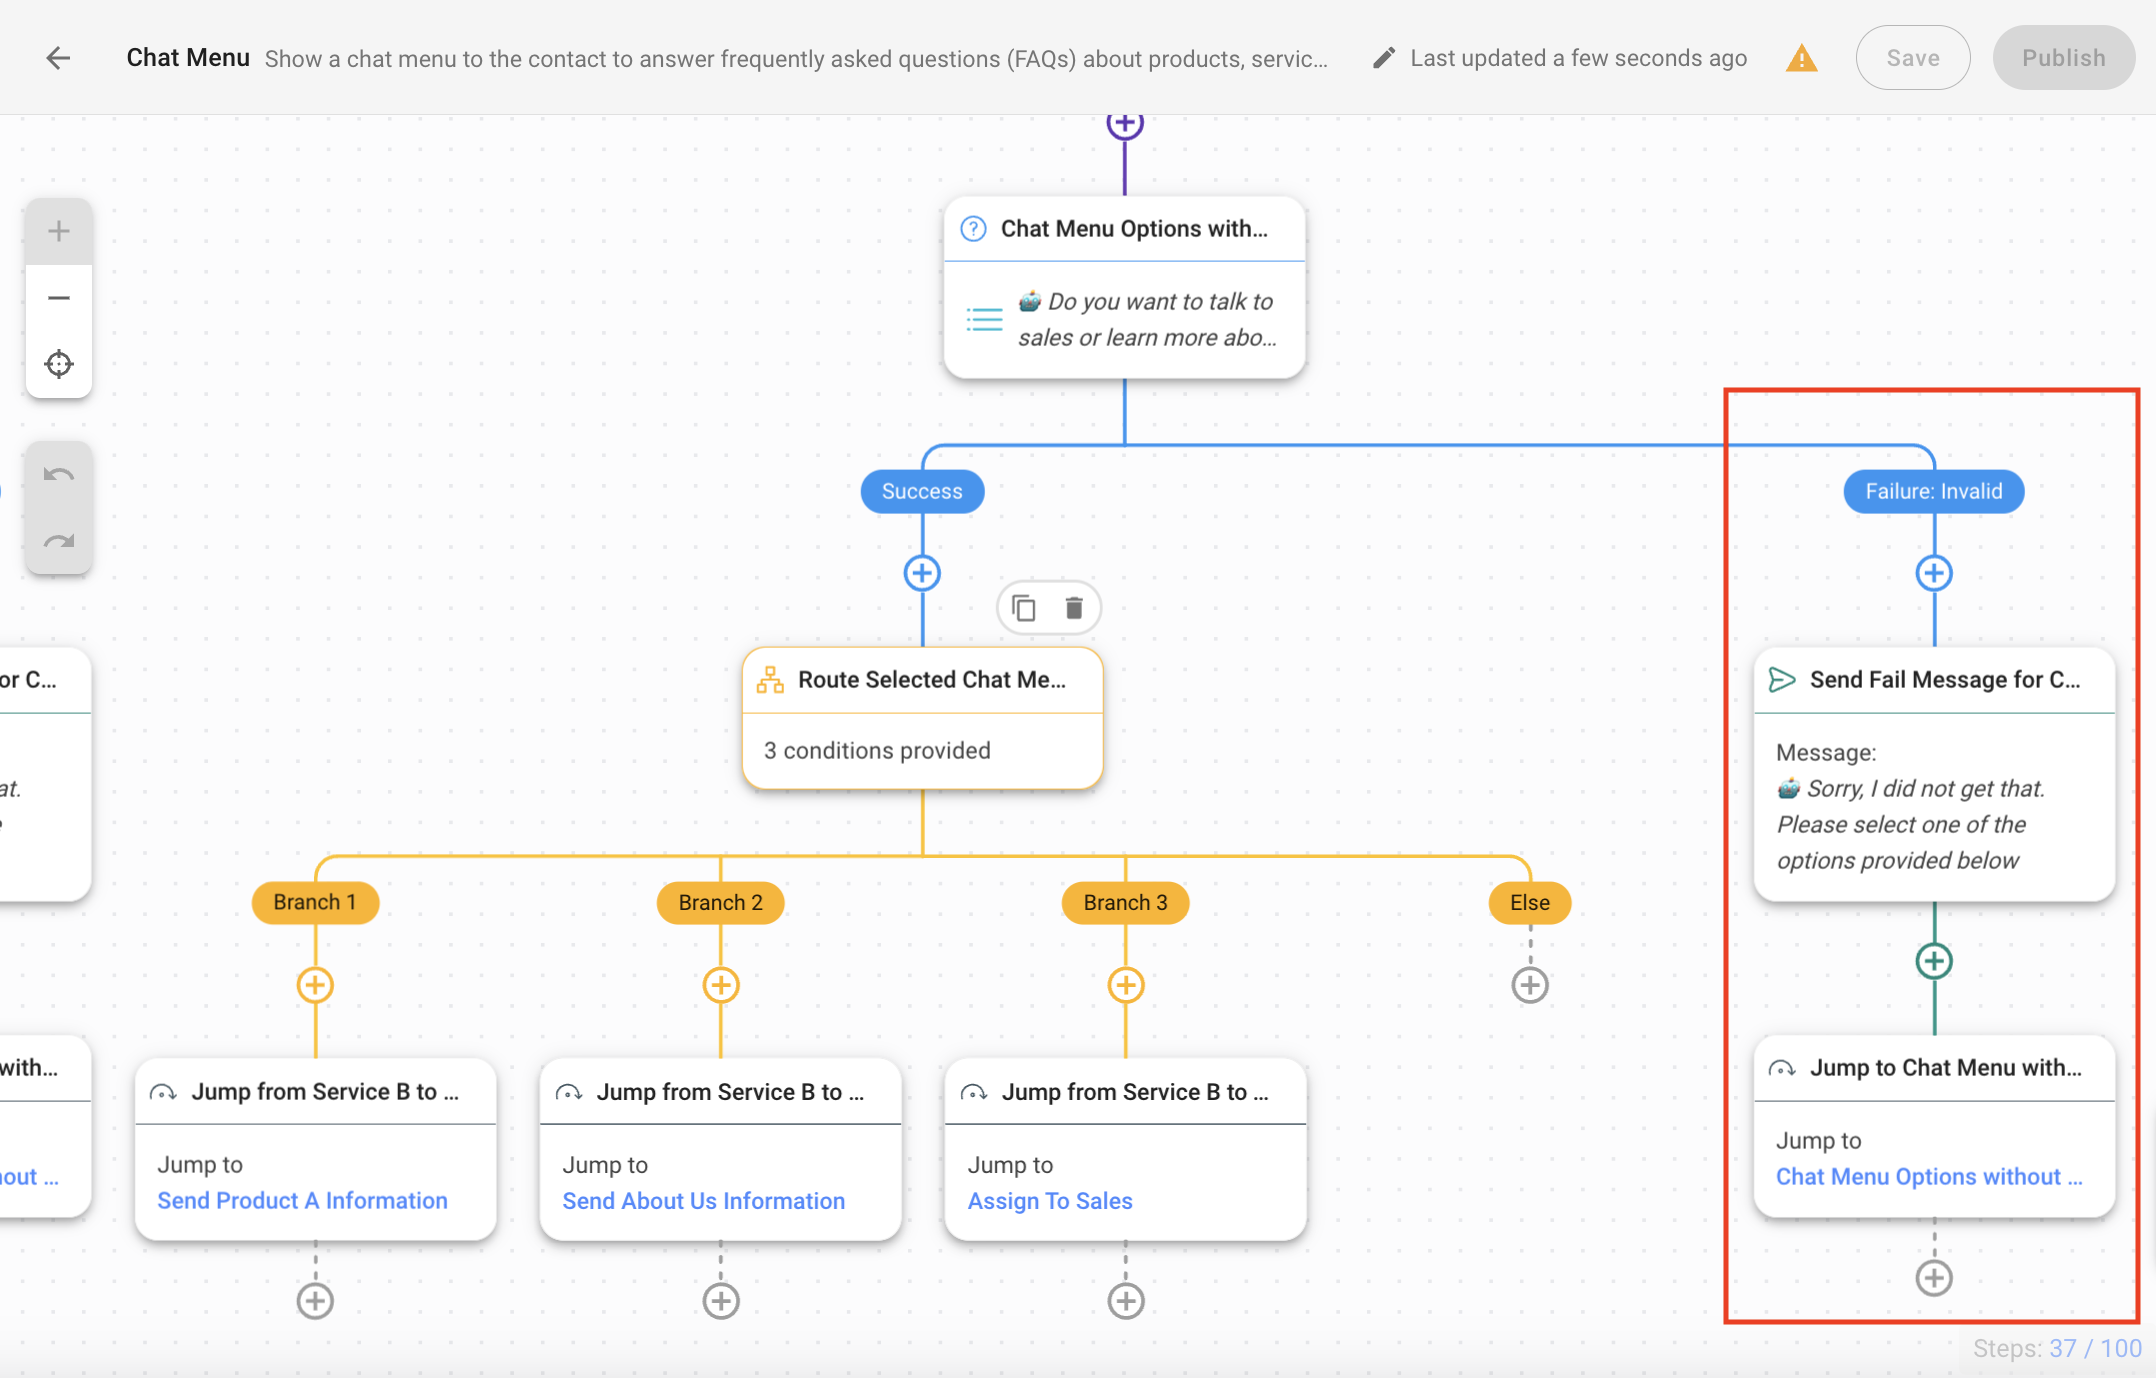
**Set up response for invalid answers from Contacts**
The Contact will be routed to the Failure Branch if they do not select a response and attempt to type a different answer. This Branch will inform the Contacts of their invalid response by sending a message and has a [Jump](/ismessenger/modules/workflow.md) step for the Contact to go back to the menu options. You can configure and customize these steps as needed.
The Jump step has a maximum of 3 jumps. If the Contact insists on providing an invalid response, here are 3 suggestions to manage this situation:
1. Add Assign To step: To attend to the Contact with specific problems by assigning the Contact to a support team or a manager based on your business needs.
2. Add a Jump to Assign Sales step: To avoid losing out on a business deal by assigning the Contact to the Sales team.
3. Add Send Message step and Close Conversation step: To inform Contact that you’ll be closing the conversation and Contact can send a message again to chat. This will then end with the **Close Conversation** step to close the Contact’s conversation.
{% hint style="info" %}
Once you have completed the setup, click **Save** and **Publish** to activate the Workflow.
{% endhint %}
---
# Agent Instructions
This documentation is published with GitBook. GitBook is the documentation platform designed so that both humans and AI agents can read, navigate, and reason over technical content effectively. Learn more at gitbook.com.
## Querying This Documentation
If you need additional information that is not directly available in this page, you can query the documentation dynamically by asking a question.
Perform an HTTP GET request on the current page URL with the `ask` query parameter:
```
GET https://docs.is-messenger.com/ismessenger/automate-conversations/how-to-create-automated-chat-menus.md?ask=
```
The question should be specific, self-contained, and written in natural language.
The response will contain a direct answer to the question and relevant excerpts and sources from the documentation.
Use this mechanism when the answer is not explicitly present in the current page, you need clarification or additional context, or you want to retrieve related documentation sections.