Make (formerly Integromat)
Connect IS-Messenger to Make (formerly Integromat) and unlock the possibilities of 1300+ integrations.
You can integrate your Contact information from the IS-Messenger platform to thousands of CRMs, email providers, CMS, analytics tools, ads, and more. Let's have a quick look at this integration.
Getting Started
In order to get started with the IS-Messenger - Make integration, you will need the following:
A IS-Messenger account
A Make account
For most scenarios (same as Zaps in Zapier), you’ll need to use a contact identifier, either email or phone number. If you don't have a record of a Contact’s email or phone number in IS-Messenger, you may not be able to complete a scenario.
Creating Scenarios
There are two ways you can create scenarios:
Create a Scenario from Template
Templates are predefined scenarios that you can expand and customize to create scenarios. We have created some templates connecting IS-Messenger to some popular CRM and e-commerce platforms. You can then share these with friends and colleagues.
To use a scenario template, follow these steps:
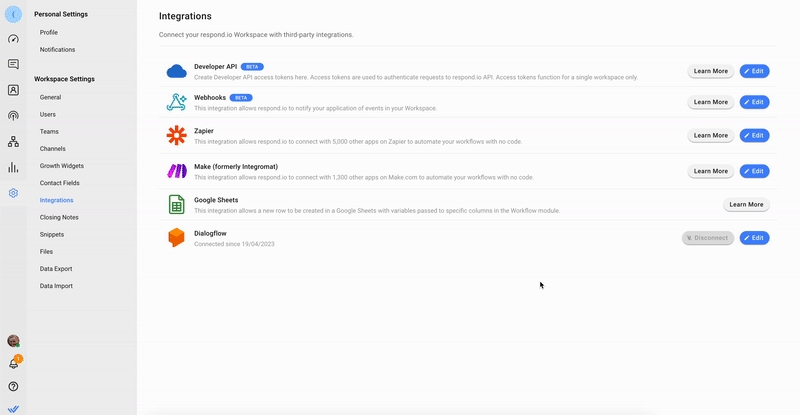
Step 1: Log in to IS-Messenger > go to the Settings module > click Integrations.
Step 2: Click Edit next to the Make (formerly Integromat) option > select a template from the list.

Create a Scenario from Scratch
To create a scenario from scratch, follow these steps:
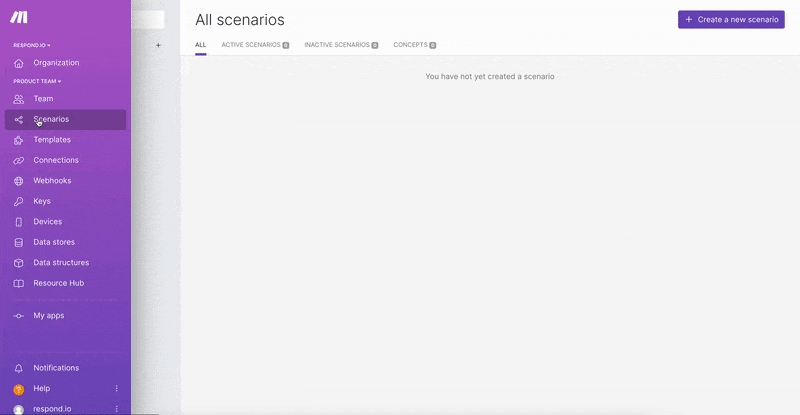
Step 1: From your Make account, click Scenario on the left menu > click + Create a new scenario.
Step 2: Our integration with Make requires the usage of 3 modules: Triggers, Actions and Searches.
A major difference between Make and Zapier is that the Actions module in Make can also be used at the beginning of a scenario. This means the whole scenario can run without a trigger. A scenario can also have an unlimited number of Actions or Searches modules. Learn more about the modules here

Choose your trigger or action app: The scenario will be triggered by an event that occurs or has occurred in this app. If you’re using IS-Messenger as the trigger, click on the big plus sign > search IS-Messenger in the search bar > select the IS-Messenger app.
Select your event: This will be the event that occurs or has occurred in the selected app that triggers the scenario.
View the full list of trigger events available for IS-Messenger here.
Select or connect your app account: Select or connect the specific app account to use in the Scenario trigger or action.
To connect IS-Messenger in Make, follow the instructions here.
Set up and test your trigger: Set up the options to fit your needs and test your trigger to see if it pulls in the right data.
Learn more about setting up your scenario trigger or action here.
Step 3: Follow these steps to add and set up an Actions module:
Choose your action app: The scenario will perform an action in this app when it is triggered. To use IS-Messenger for the action, click + add another module > search IS-Messenger in the search bar > select the IS-Messenger.
Select your event: This will be the event that the scenario will perform in the selected app when the trigger app sends data to the action app to proceed.
View the full list of action events available for IS-Messenger here.
Select or connect your app account: To connect IS-Messenger to Make, follow the instructions here.
Set up and test your action module: Set up the data that you want to send over to your action app and test if it's working as expected.
Learn more about setting up your scenario action here.
Step 4: When your scenario is ready, you can do the following:
Schedule your scenario to run: Schedule the time interval in which a scenario should run by clicking Scheduling settings and making your desired changes.
Note that only trigger modules that are instant triggers can run immediately.
Rename your scenario: If required, rename your scenario by clicking the scenario's name at the top left.
Activate your scenario: Exit the scenario editor by hitting the arrow icon at the top left > switch the toggle to ON.

Scenarios can have an unlimited amount of actions and the process is the same as adding a single new action.
Connect IS-Messenger to Make

When connecting IS-Messenger app in Make for the first time, you are required to sign in and add an API Key. Follow the steps below:
Step 1: Log in to the IS-Messenger Workspace you wish to connect > go to the Settings module > click Integrations under Workspace Settings > click Connect next to Make (formerly Integromat) option. You will be directed to the Make page in IS-Messenger.

Step 2: To copy the API Key, click the unhide icon > click the API Key.

Step 3: On Make.com, click the IS-Messenger module > click Add in the Connection drop-down menu > paste the API Key in the Channel Token field > click Save.
If required, you can change the connection name.

You will only need to do this for your first scenario with IS-Messenger. For all the following scenarios, you can simply choose your connected account from the drop-down menu in the scenario setup. However, if you create a new team, you have to connect your account again when setting up a scenario for the new team.
FAQ and Troubleshooting
Why can’t I connect my account to the IS-Messenger module (HTTP Status → 401 error)?
Your API Token is invalid or not correct. Make sure your API Token is correct or you can regenerate it.
What happens if a trigger fails to run?
When a trigger fails, we will wait a certain amount of time before we attempt a retry. The waiting time will gradually increase between retries.
We will attempt a total of 3 retries on a failed trigger, with a waiting time of 30 seconds before the first retry, 60 seconds before the second retry, and 90 seconds before the third retry. After the 3rd retry, the trigger will not be invoked to Make.com.
Last updated