# How to Route Contacts to Preferred AI Agent
{% hint style="info" %}
In this use case article, you’ll discover how to automatically ask incoming Contacts if they want to talk to a Sales or a Support AI Agents and divert the Contact to the AI Agent of their choice.
{% endhint %}
Businesses can boost sales and support engagement by integrating an AI Agent chatbot into their team. This chatbot efficiently assists customers by providing basic product information, answering queries and offering support in customer service. The AI Agent guides customers through the purchase process, reducing the workload on human agents.
{% hint style="info" %}
Learn more about the **Respond with AI** Step and AI Agents [here](https://help.respond.io/l/en/workflows/step-respond-with-ai)
{% endhint %}
#### Benefits
* AI Agents operate round the clock, offering continuous services outside regular business hours, catering to a global audience.
* Businesses can increase customer satisfaction, improve lead management, and, ultimately, higher sales conversions with the addition of the AI Agent.
* By automating routine queries, AI Agents reduce human agents' workload.
* Support AI Agents provide consistent and accurate information, minimize the risk of human error and ensure uniform support across interactions.
* AI Agents can handle many interactions simultaneously, ensuring scalability to meet increasing user demands.
#### Workflow Setup
To use the **Assignment: AI Agent** workflow template, select **Workflows** > click **+ Add Workflow** > select **Assignment: Sales and Support AI Agents** > click **Use Template**.
Workflow Steps and their functions:
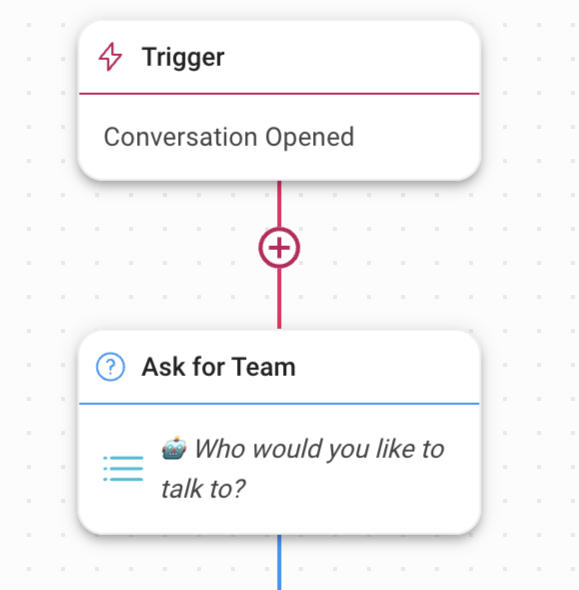
1. **Trigger:** The Workflow starts whenever a Contact opens a conversation.
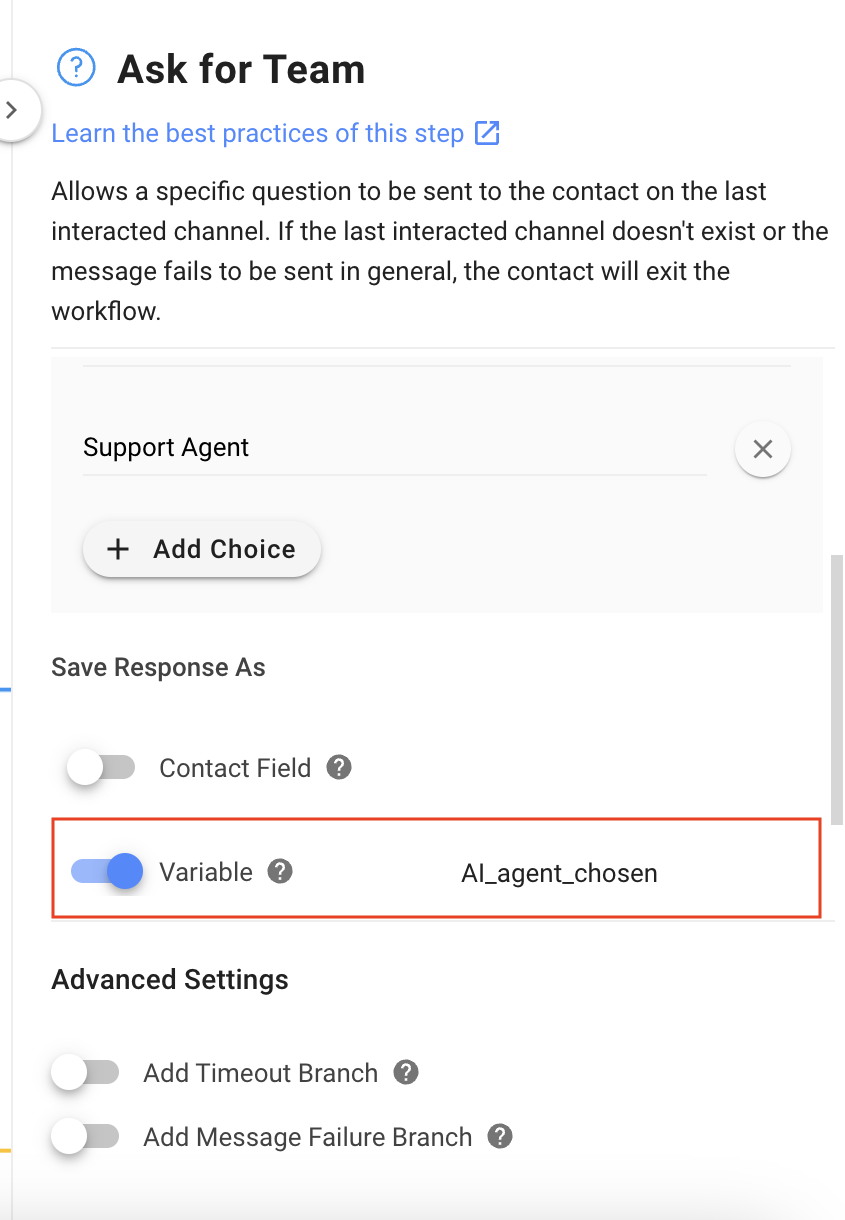
2. **Ask for Team**: The Workflow asks the Contact if they want to talk to a Support Agent or a Sales Agent using the **Ask** Step.
In this template, two options have been created by selecting **Multiple Choice** as the **Question Type** whereas the listed options are **Sales Agent** and **Support Agent**. The Contact’s response is saved as a variable called **AI\_agent\_chosen**.
1. **Sales or Support Branch**: This step routes Contacts based on their selection in the last Step, i.e., Ask for Team. In this template, the following two branches have been created:
* **Talk to Sales Agent**: With the following options selected:
* **Category**: Variable
* **Field**: AI\_agent\_chosen
* **Operator**: is equal to
* **Select**: Talk to Sales Agent
* **Talk to Support Agent**: With the following options selected:
* **Category**: Variable
* **Field**: AI\_agent\_chosen
* **Operator**: is equal to
* **Select**: Talk to Support Agent
2. Next, the Contact decides whether to speak to the Sales or Support AI Agent by selecting an option. The value of the **AI\_agent\_chosen** variable is checked.
3. If the Contact wants to talk to sales, the value of the **AI\_agent\_chosen** variable is **Sales Agent**. The **Talk to Sales Agent** branch handles this.
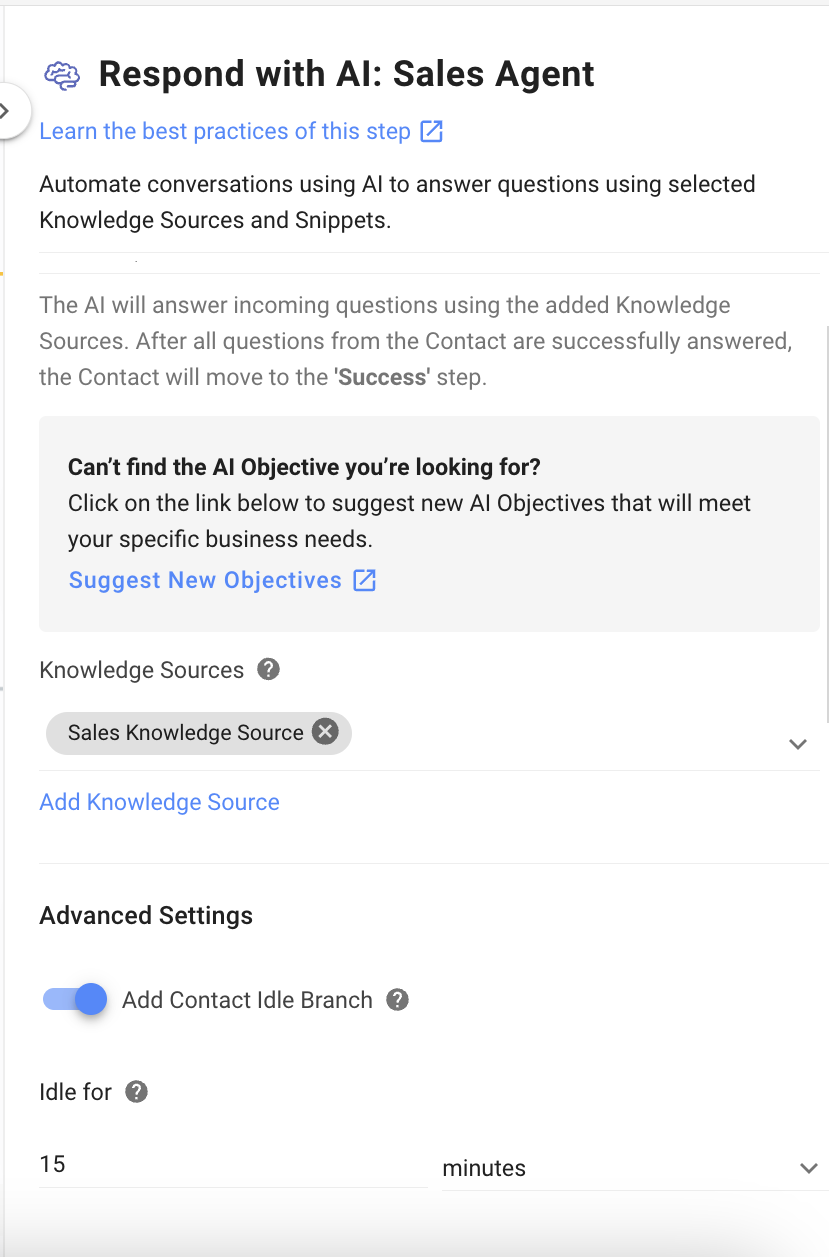
* **Respond with AI: Sales Agent**: This Step allows the Sales AI Agent to take over the conversation.
The following values have been set in the fields:
* **Objective**: **Answer Questions** has been set as the AI Agent’s objective for the conversation with the Contact.
* **Knowledge Sources**: From the **Knowledge Sources** dropdown list, select a Knowledge Source suitable for the Sales AI Agent to respond to the Contact’s query or add a new Knowledge Source using the **Add Knowledge Source** link.
* **Advanced Settings**: The **Add Contact Idle Branch** toggle has been enabled, and the default time of 15 minutes has not been changed. Turning this toggle on adds another branch called **Failure: Idle branch,** which closes the conversation after 15 minutes of inactivity.Before closing the conversation, the Workflow sends a message to the Contact that the conversation can be opened again by sending a message.
1. If the Contact wants to talk to support, the value of the **AI\_agent\_chosen** variable is **Support Agent**. The **Talk to Support Agent** branch handles this
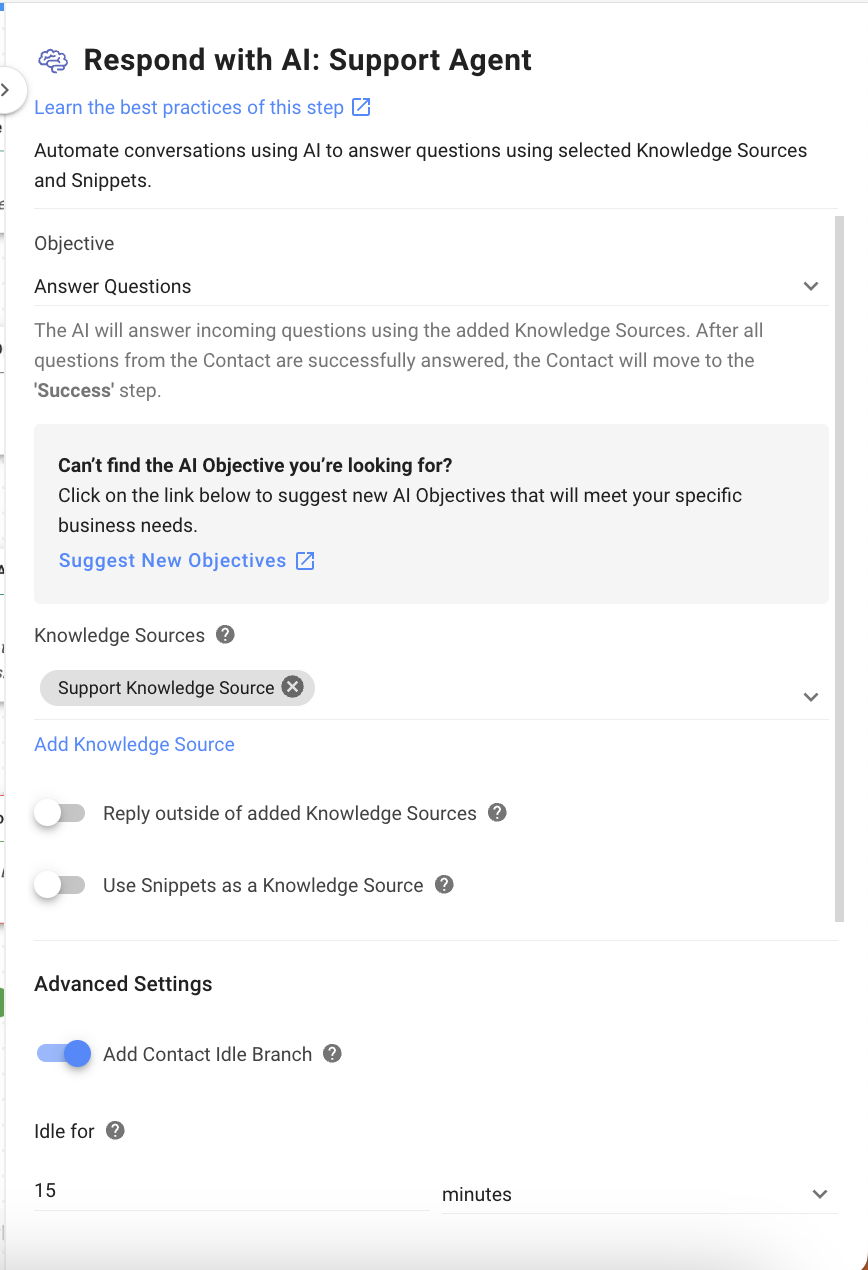
* **Respond with AI: Support Agent:** This Step allows the Support AI Agent to take over the conversation.
The following values have been set in the fields:
* **Objective**: **Answer Questions** has been set as the AI Agent’s objective for the conversation with the Contact.
* **Knowledge Sources**: From the **Knowledge Sources** dropdown list, select a Knowledge Source suitable for the Support AI Agent to respond to the Contact’s query or add a new Knowledge Source using the **Add Knowledge Source** link.
* **Advanced Settings**: The **Add Contact Idle Branch** toggle has been enabled, and the default time of 15 minutes has not been changed. Turning this toggle on adds another branch called **Failure: Idle branch,** which closes the conversation after 15 minutes of inactivity.Before closing the conversation, the Workflow sends a message to the Contact that the conversation can be opened again by sending a message.
1. The next step depends on how the AI Agent and Contact conversation proceeds. The following three branches handle the possible outcomes of the conversation between the AI Agent and the Contact:
* **Close Conversation Support/Sales**: When the AI Agent has successfully answered all the Contact's queries, the conversation is closed.
* **Failure Message: Assignment Support/Sales**: When a technical issue occurs or the AI Agent does not have the expertise to respond to all the queries adequately, the conversation is routed to a human agent. A message is sent to the Contact by the Workflow letting them know that they are being assigned to a human agent.
* **Failure Message: Close Conversation Support/Sales**: When the conversation has been idle for more than 15 minutes, the Workflow sends a message to the Contact informing them that it is closing the conversation and the conversation can be opened by sending a message.
{% hint style="info" %}
Once you have provided the appropriate Knowledge Sources for the Support and Sales AI Agents, you can save and publish your Workflow so that the AI Agents can converse with the Contacts.
{% endhint %}
---
# Agent Instructions: Querying This Documentation
If you need additional information that is not directly available in this page, you can query the documentation dynamically by asking a question.
Perform an HTTP GET request on the current page URL with the `ask` query parameter:
```
GET https://docs.is-messenger.com/ismessenger/automate-conversations/how-to-route-contacts-to-preferred-ai-agent.md?ask=
```
The question should be specific, self-contained, and written in natural language.
The response will contain a direct answer to the question and relevant excerpts and sources from the documentation.
Use this mechanism when the answer is not explicitly present in the current page, you need clarification or additional context, or you want to retrieve related documentation sections.