# How to Sending a Simple Broadcast
{% hint style="warning" %}
Trial plan users are not allowed to send broadcasts.
{% endhint %}
#### Creating a New Broadcast
{% hint style="info" %}
Refer [here](/ismessenger/workspace-setting/channels.md) for the list of Channels that support broadcasts.
{% endhint %}
**Step 1:** From the side navigation menu, select the **Broadcasts** module.
**Step 2:** Click **+ Add Broadcast**.
**Step 3:** Enter your Broadcast Name and Labels > Click **Create**.
{% hint style="info" %}
Labels can be useful for analytics purposes in the future.
{% endhint %}
{% hint style="success" %}
A new draft Broadcast will be created and the broadcast builder will be opened.
{% endhint %}
### Configuring a Broadcast
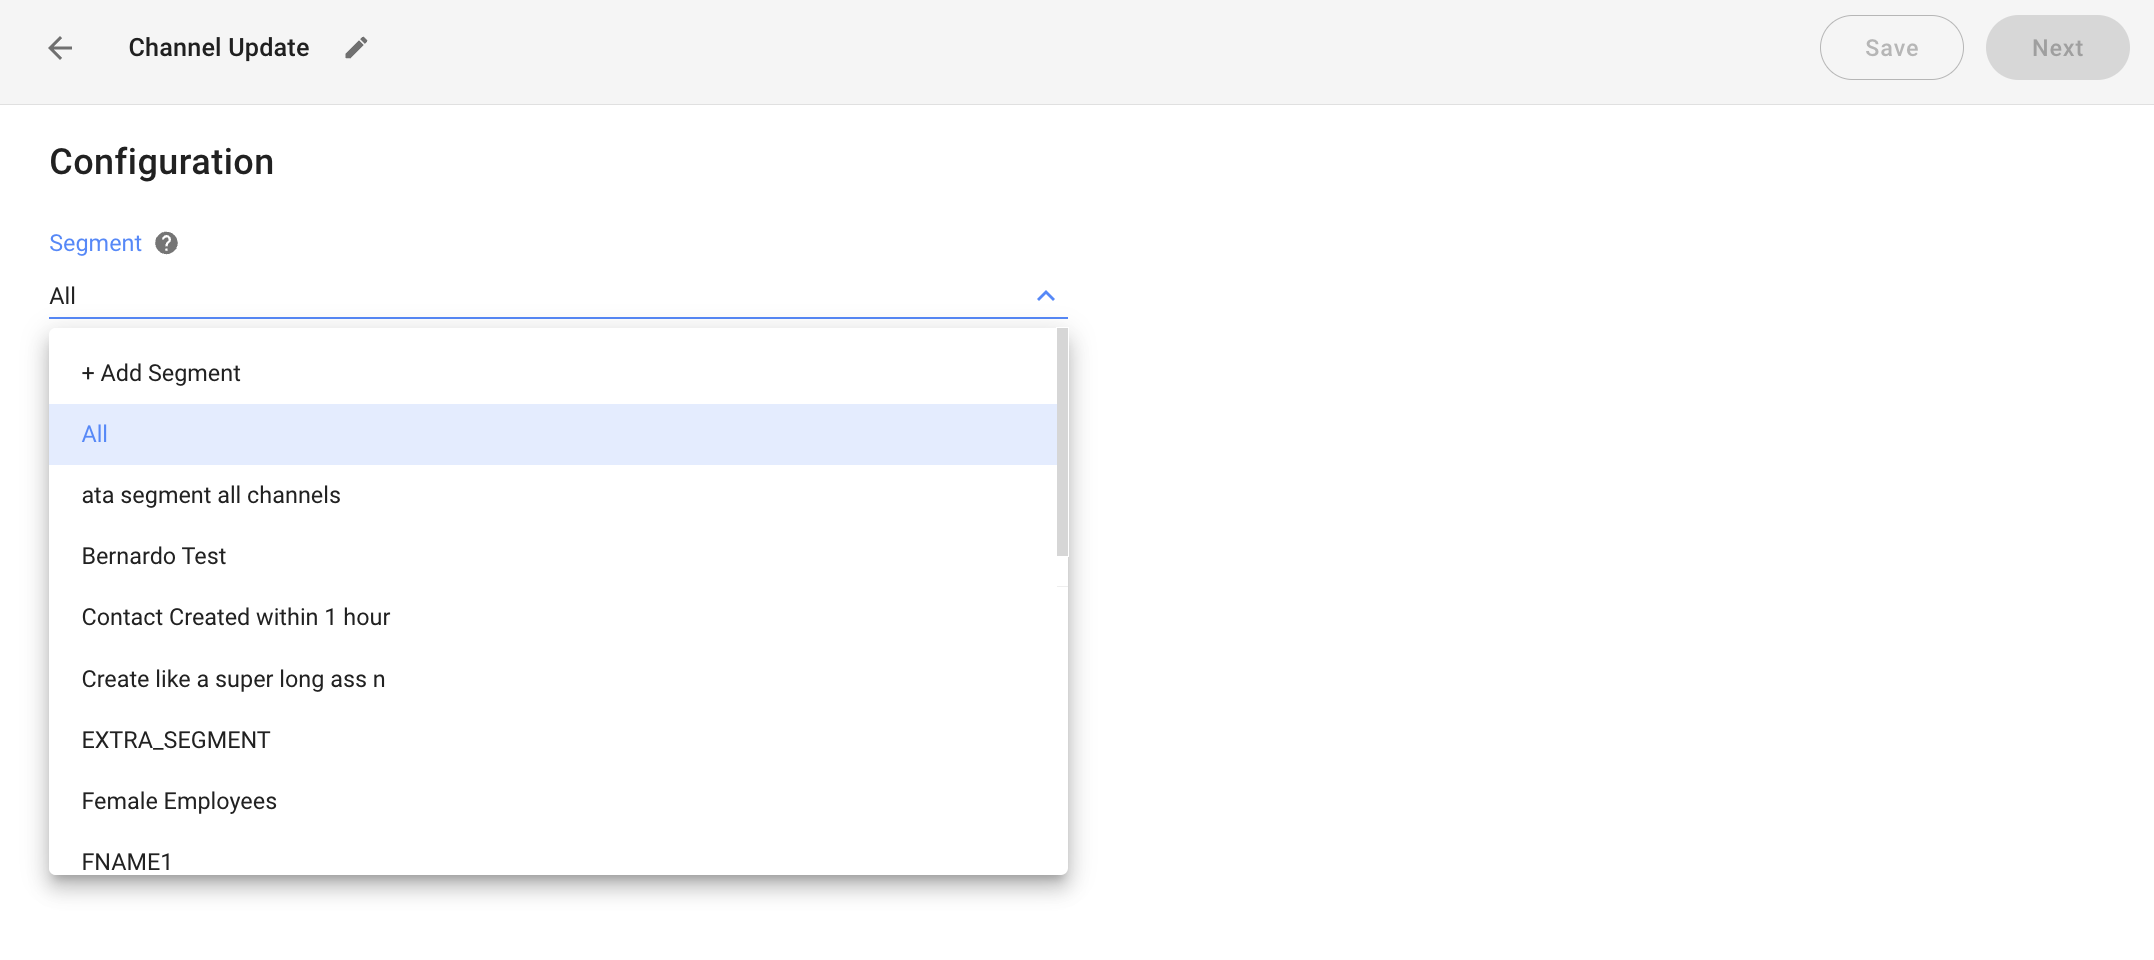
**Step 4:** Select a Segment to target specific group(s) for your broadcasts by clicking the drop-down menu:
To use an existing Segment, select the Segment.
To create a Segment:
1. Click the drop-down menu > Click **+ Add Segment**.
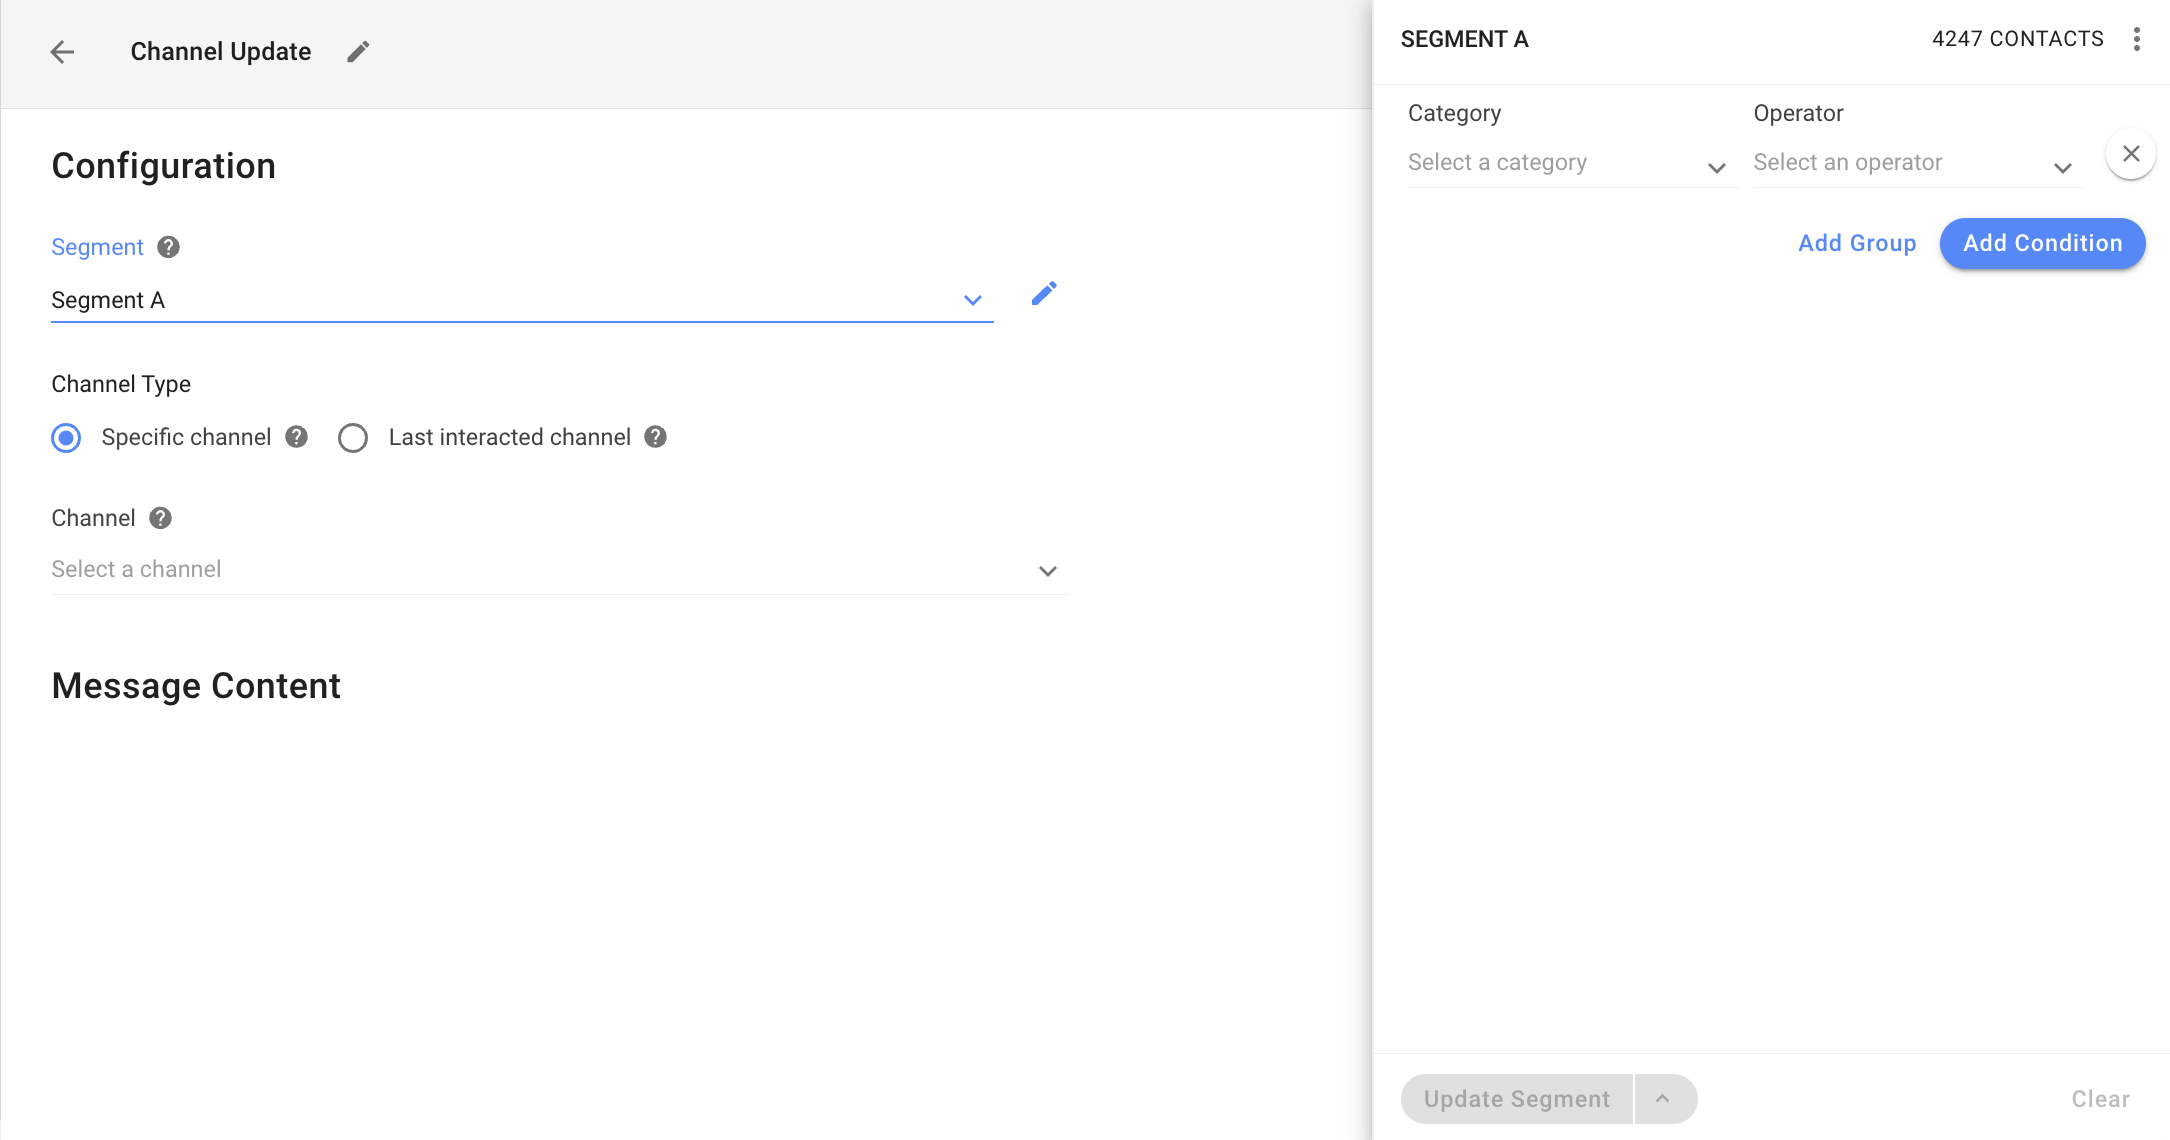
2. Enter a name for your new Segment > Click **Save**.
3. Filter your Segment by adding conditions or groups. Use **Category** and **Operator** fields based on your criteria. Contacts that fulfill the criteria will appear in the Contact list.
4. Click **Update Segment** to save the segment.
**Step 5:** Select a Channel Type and Channel to send your broadcast:
* **Specific Channel:** This allows you to send the broadcast to Contacts in that Channel. Any Contacts in your selected Segment without that Channel will be excluded from the broadcast.
* **Last interacted Channel:** This allows you to send the broadcast to the Contacts’ Last Interacted Channel with the platform.
{% hint style="warning" %}
Note that channels such as Email, Instagram, Google Business messages and Website Chat are [not supported for Broadcasts](/ismessenger/workspace-setting/channels.md).
{% endhint %}
{% hint style="info" %}
Sending a broadcast will not change a Contact’s Last Interacted Channel.
{% endhint %}
**Step 6:** Configure your broadcast messages.
### **Sending a broadcast to a Specific Channel**
The content you want to broadcast should be added based on the requirements of the chosen Channel.
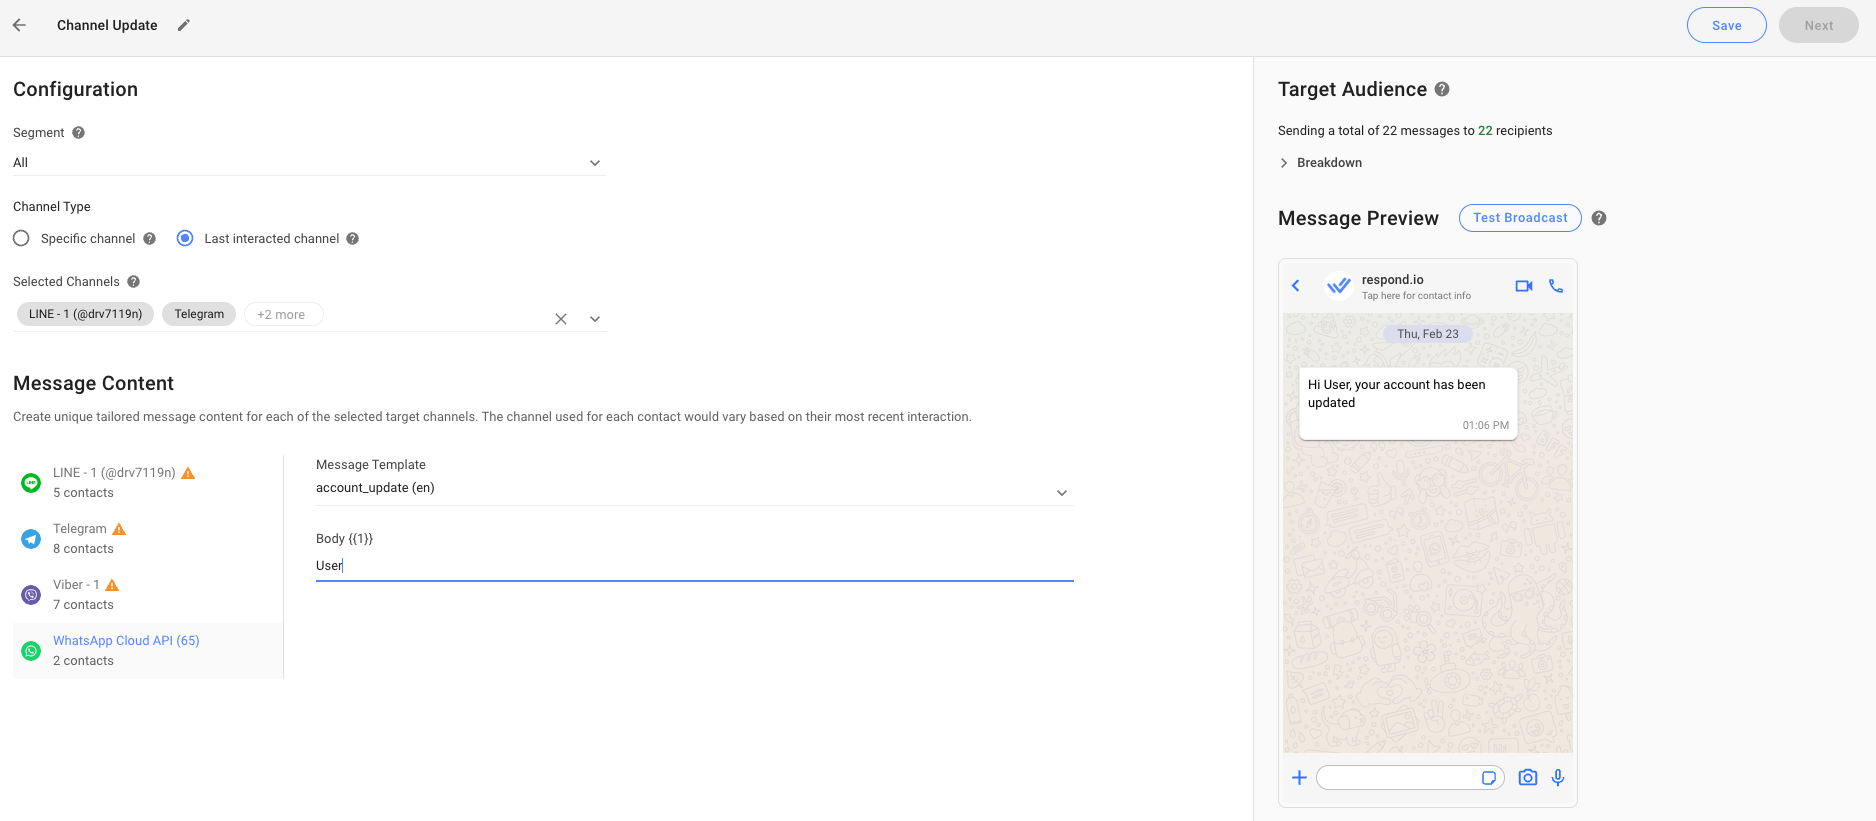
### **Sending a broadcast to Contacts’ Last Interacted Channel**
You need to define message content for each Channel, as each Channel has its own limitations for the broadcast content.
By default, all Channels that are supported for broadcasts will be selected in the **Selected Channels** section. If you want to exclude certain Channels from the broadcast, simply deselect them from the list. Deselecting a Channel means the Contacts associated with it will not receive the broadcast message.
{% hint style="danger" %}
**Important**: Depending on your plan, your monthly [number of broadcasts may be limited](/ismessenger/modules/broadcast/broadcast.md).
{% endhint %}
### Preview and Send a Test Broadcast
**Step 7:** Preview your Messages in the **Message Preview** section before sending them.
**Step 8:** [Send a test broadcast](/ismessenger/modules/broadcast/broadcast.md) before sending the actual broadcast. Check how your content will appear to your Contacts. Search for a Contact by name or phone number to receive the test broadcast content. You can search for a Contact as long as they have the Channel available.
{% hint style="info" %}
Check and verify the content before sending the broadcast.
{% endhint %}
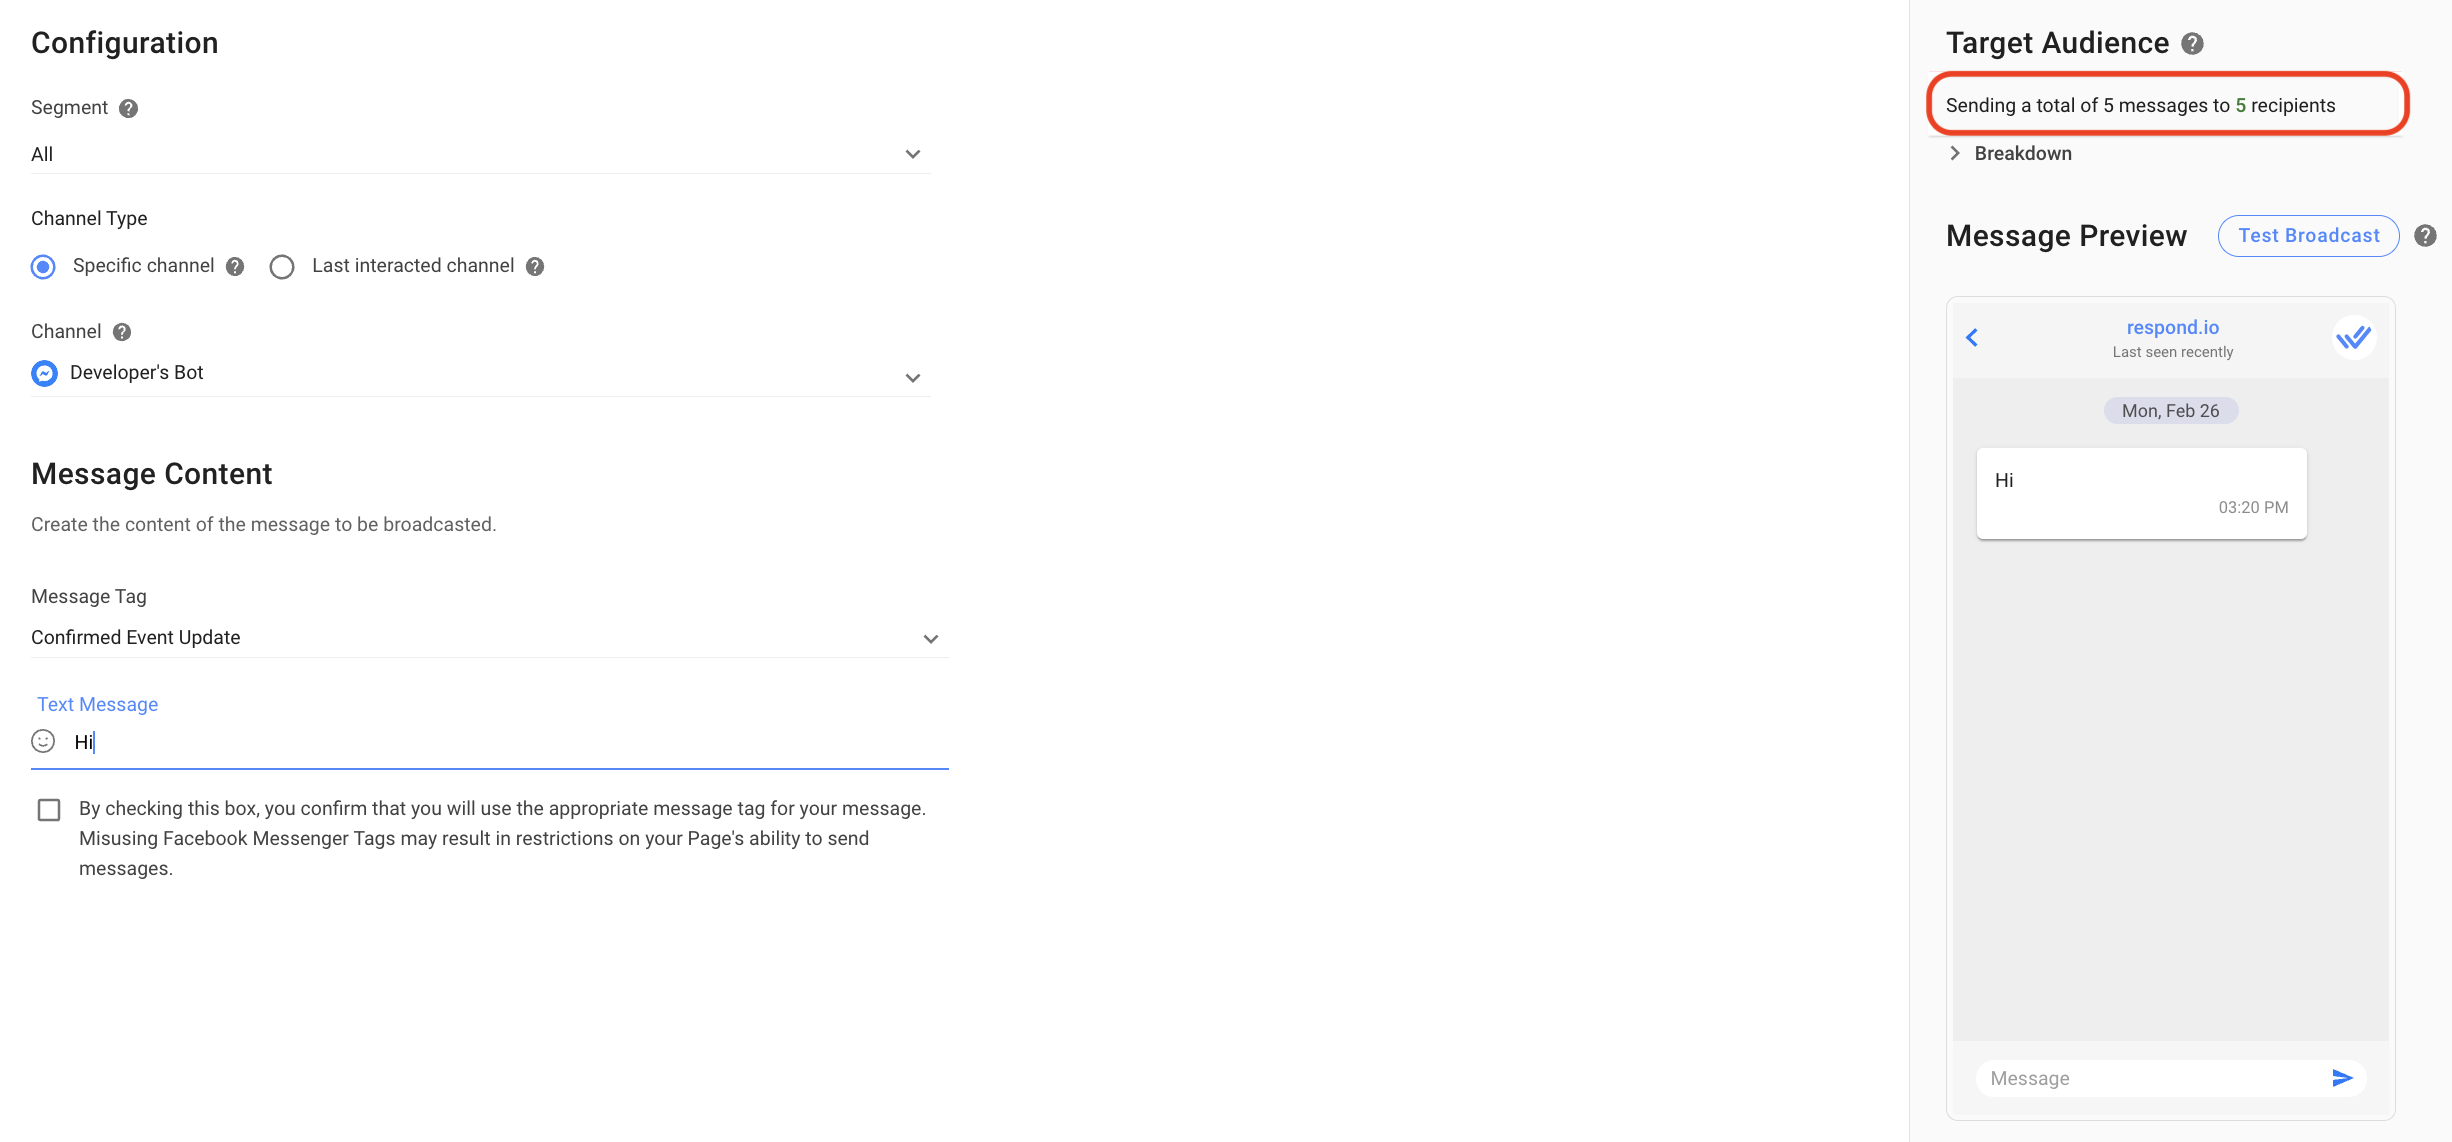
### Check Target Audience for a Broadcast
**Step 9:** Check the Target Audience to see the breakdown of the number of messages being sent and the number of recipients who will receive the broadcast.
{% hint style="info" %}
The number of messages may differ from the number of recipients. For example, if you are sending 2 broadcast messages each to 10 recipients, the breakdown shows “*Sending a total of 20 messages to 10 recipients*”.
{% endhint %}
### **Target Audience Breakdowns for different Channels**
### **Facebook, LINE, Viber, Telegram and Twitter**
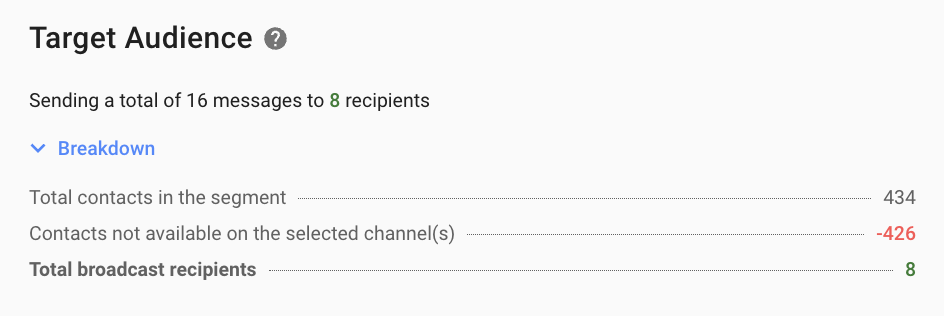
Here are the details of the Target Audience Breakdown for Facebook, Line, Viber, Telegram, and Twitter.
| **Item** | **Description** |
| ------------------------------------------------- | ---------------------------------------------------------------------------------------------------------------------------------------------------------------------------------- |
| Total Contacts in the Segment | The number of Contacts that are currently in the selected Segment. |
| Contacts not available on the selected Channel(s) | The number of Contacts in the selected Segment who do not have the selected Channel. |
| Total broadcast recipients | The total number of Contacts that this broadcast will be sent to. *Total broadcast recipients = Total Contacts in the Segment - Contacts not available on the selected Channel(s)* |
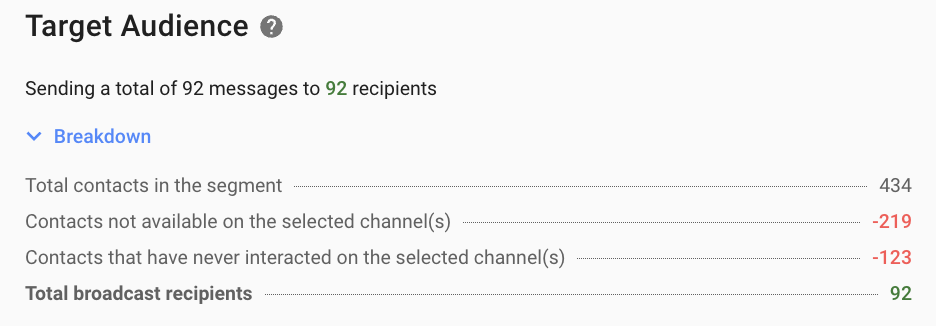
### **WhatsApp, SMS and Custom Channel**
Toggle ON: Send message only to Contacts who have previously interacted with this channel
When this toggle is enabled, the broadcast will send messages to Contacts who have interacted on the selected Channel.\
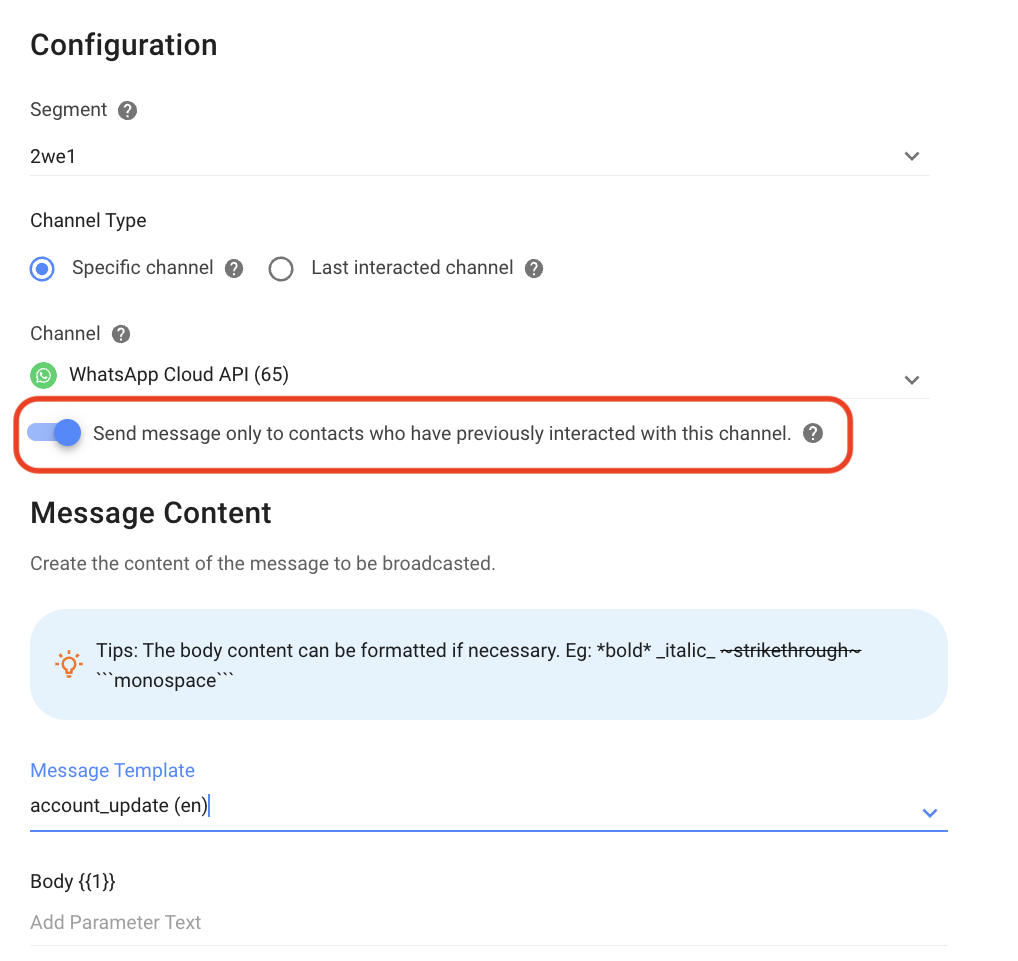
Here are the details displayed in the Target Audience Breakdown for WhatsApp, SMS and Custom Channel when the Toggle is ON.
| **Item** | **Description** |
| -------------------------------------------------------------- | ----------------------------------------------------------------------------------------------------------------------------------------------------------------------------------------------------------------------------------------- |
| Total Contacts in the Segment | The number of Contacts that are currently in the selected Segment. |
| Contacts not available on the selected Channel(s) | The number of Contacts that are in the selected Segment who do not have the selected Channel(s). |
| Contacts that have never interacted on the selected Channel(s) | The number of Contacts in the Segment who have never interacted with the selected Channel(s). |
| Total broadcast recipients | Total number of Contacts that this broadcast will be sent to. *Total broadcast recipients = Total Contacts in the Segment - Contacts not available on the selected Channel(s) - Contacts that never interacted with the selected Channel* |
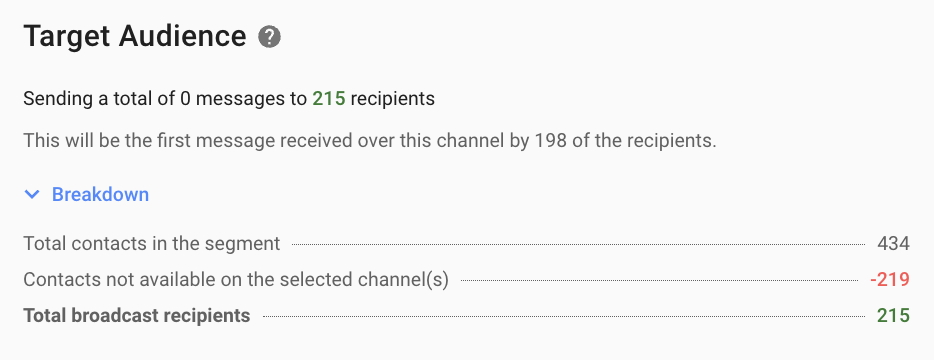
Toggle OFF: Send message only to Contacts who have previously interacted with this Channel
When this toggle is disabled, the broadcast will send messages to Contacts who have interacted on the selected Channel AND Contacts that have access to the Channel but have not had any interactions yet.\
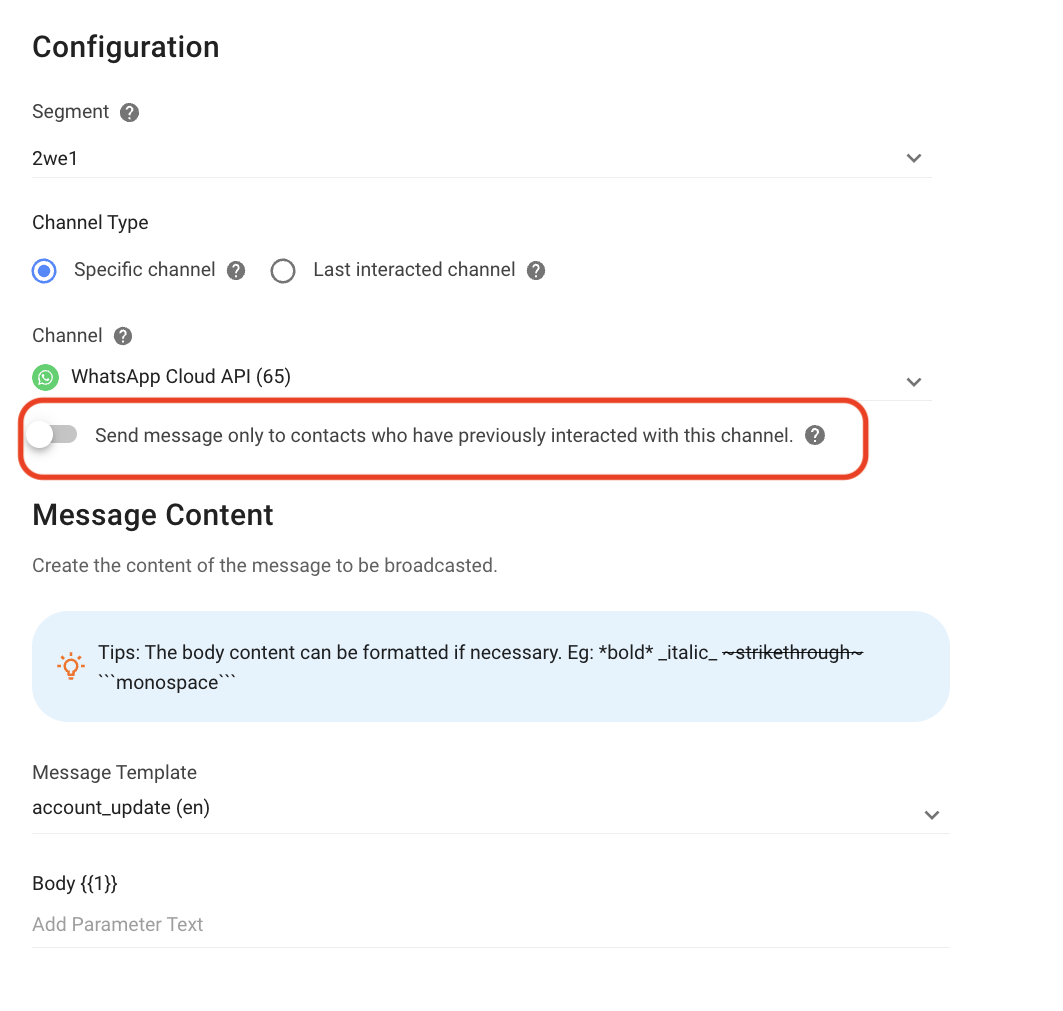
Here are the details displayed in the Target Audience Breakdown for WhatsApp, SMS and Custom Channel when the Toggle is OFF.
| **Item** | **Description** |
| ------------------------------------------------------------------------------------- | ----------------------------------------------------------------------------------------------------------------------------------------------------------------------------------- |
| This will be the first message received over this Channel by *{n}* of the recipients. | The number of Contacts that will receive this broadcast as their first message. |
| Total Contacts in the Segment | The number of Contacts that are currently in the selected Segment. |
| Contacts not available on the selected Channel(s) | The number of Contacts that are in the selected Segment who do not have the selected Channel(s). |
| Total broadcast recipients | The total number of Contacts that this broadcast will be sent to. *Total broadcast recipients = Total Contacts in the Segment - Contacts not available on the selected Channel(s).* |
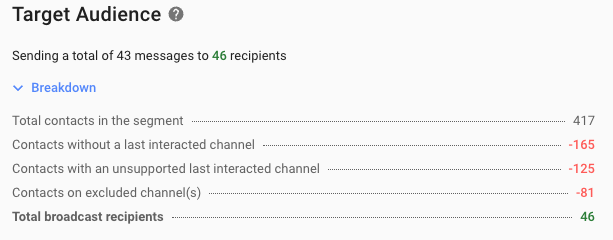
### **Last Interacted Channel**
Here are the details displayed in the Target Audience Breakdown for Last Interacted Channel.
| **Item** | **Description** |
| ---------------------------------------------------- | -------------------------------------------------------------------------------------------------------------------------------------------------------------------------------------------------------------- |
| Total Contacts in the Segment | The number of Contacts that are currently in the selected Segment. |
| Contacts without a Last Interacted Channel | The number of Contacts who never send or receive a message. |
| Contacts with an unsupported Last Interacted Channel | The number of Contacts who the Last Interacted Channel does not support Broadcasts (for e.g. email). |
| Contacts on excluded Channel(s) | The number of Contacts in the Last Interacted Channel that have been excluded from the Selected Channels. |
| Total broadcast recipients | The total number of Contacts that this broadcast will be sent to. *Total broadcast recipients = Total Contacts in the Segment - Contacts without a Last Interacted Channel - Contacts on excluded Channel(s).* |
{% hint style="warning" %}
Make sure that your Contacts have valid phone numbers and are expecting messages from your business. If you receive too many spam reports, your account may be flagged.
{% endhint %}
### Schedule Broadcast and Customize Send Rates
**Step 10:** Decide when to send the broadcast. You may send a broadcast immediately, or schedule it for a later date and time.
**Step 11:** You may customize your send rate based on a maximum limit of the total number of messages sent per second, minute, or hour. However, the rate to send messages cannot exceed 7 days. Should the speed exceed the channel limit, broadcast messages may fail to send, as the channels may block them, which counts towards broadcast usage.
{% hint style="info" %}
\- Custom Send Rates are only available as an add-on. Contact Sales for more information.\
\- If send rate is not configured or not available, the broadcast will be sent as soon as possible with a limit for each Channel.
{% endhint %}
### Send Broadcast
**Step 12:** Confirm and verify the recipients and broadcast content > click **Send Broadcast**.
{% hint style="info" %}
Scheduled broadcasts will be sent at the specified date and time and will appear in the "Scheduled" status.
{% endhint %}
---
# Agent Instructions: Querying This Documentation
If you need additional information that is not directly available in this page, you can query the documentation dynamically by asking a question.
Perform an HTTP GET request on the current page URL with the `ask` query parameter:
```
GET https://docs.is-messenger.com/ismessenger/broadcasts-use-cases/how-to-sending-a-simple-broadcast.md?ask=
```
The question should be specific, self-contained, and written in natural language.
The response will contain a direct answer to the question and relevant excerpts and sources from the documentation.
Use this mechanism when the answer is not explicitly present in the current page, you need clarification or additional context, or you want to retrieve related documentation sections.