# How to Auto-Assign Leads to Sales Agents
### Benefits of Automatic Assignment
Use auto-assignment to:
* Ensure all leads have an owner.
* Distribute leads among agents fairly to prevent conflict over who gets leads.
### Methods for Automatic Assignment
1. Auto-assign leads to sales agents round robin to distribute leads equally.
2. Auto-assign leads based on agent availability to respond to leads faster.
### **Auto-assign leads to sales agents round robin to distribute leads equally**
{% hint style="success" %}
**Use this method** when you want to assign leads to agents round robin.
{% endhint %}
**Method objective**
* Select a Workflow Template and customize steps if needed
* Automatically assign leads to sales agents round robin & notify leads
**Workflow Setup**
There are workflow templates set up by our team that you can use immediately. These templates can be edited to fit your business needs.
{% hint style="info" %}
Learn more about [Workflow Templates here](/ismessenger/modules/workflow.md).
{% endhint %}
### **Select a Workflow Template and customize steps if needed**
On the IS-Messenger platform menu, click **Workflows** > **+ Add Workflow**. Then, click **Assignment: Round Robin** > **Use Template**
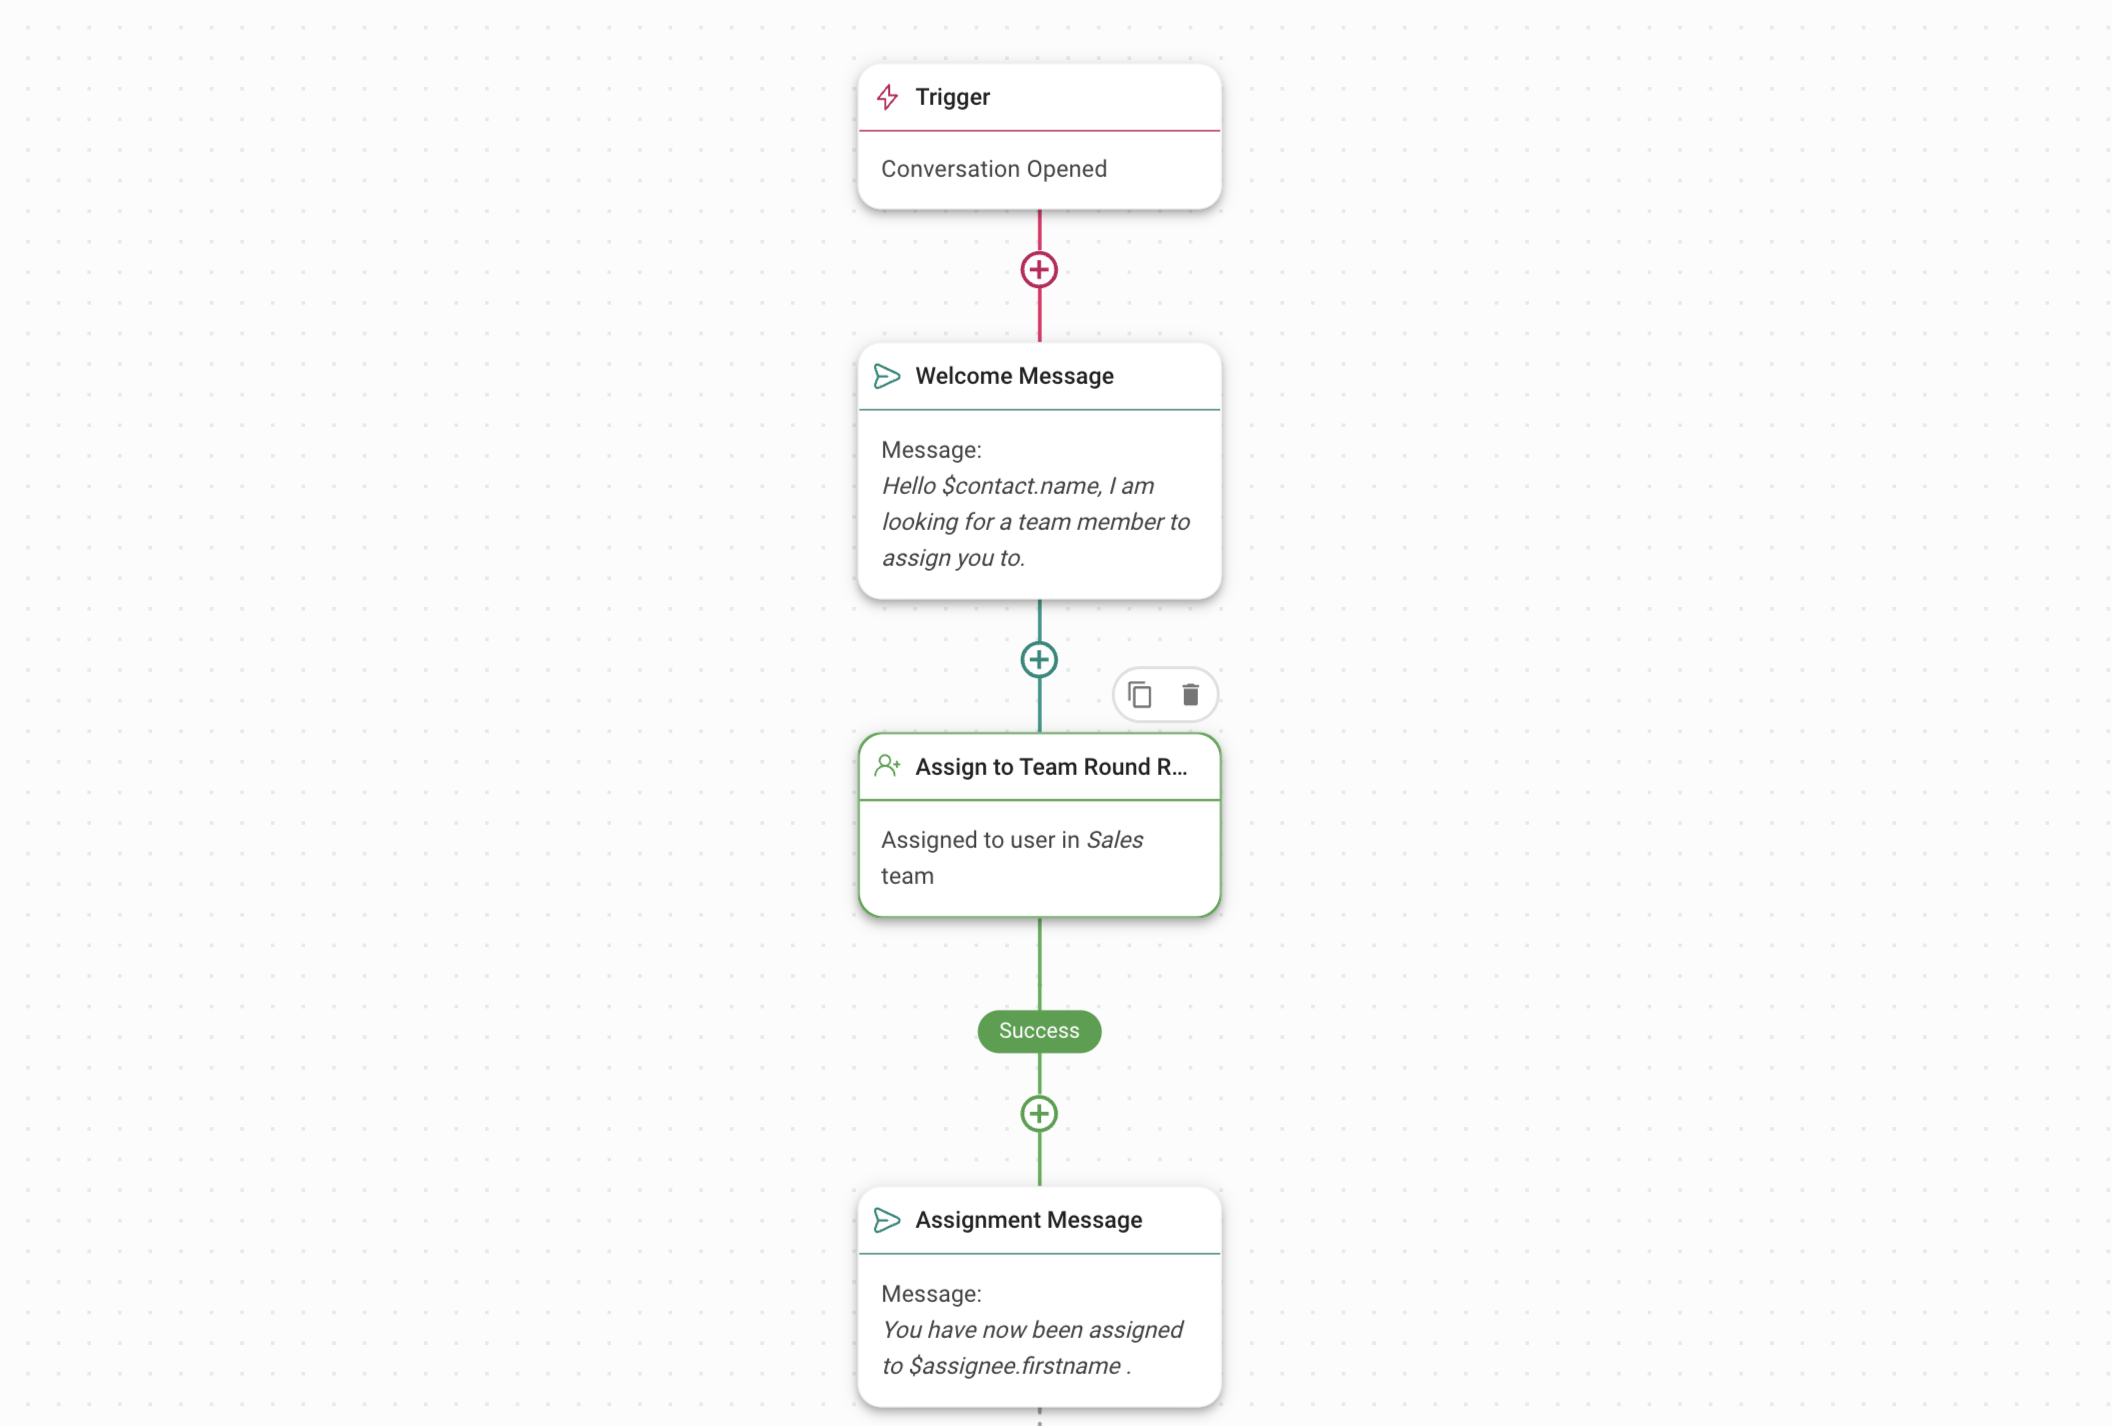
The workflow template is set up with an Assign To Step when a conversation is opened to assign leads to the sales team in a round robin sequence.
Customize your [welcome message](/ismessenger/getting-started/quick-start.md) as desired.
{% hint style="info" %}
**Tip:** If you have multiple sales teams, use [routing](/ismessenger/sales-use-cases/how-to-route-leads.md) to assign to the correct team. Then consider using round robin assignment within the team.
{% endhint %}
### **Automatically assign leads to sales agents round robin & notify leads**
{% hint style="info" %}
**Tip:** There are best practices for the [Assign To Step](/ismessenger/modules/workflow.md) here.
{% endhint %}
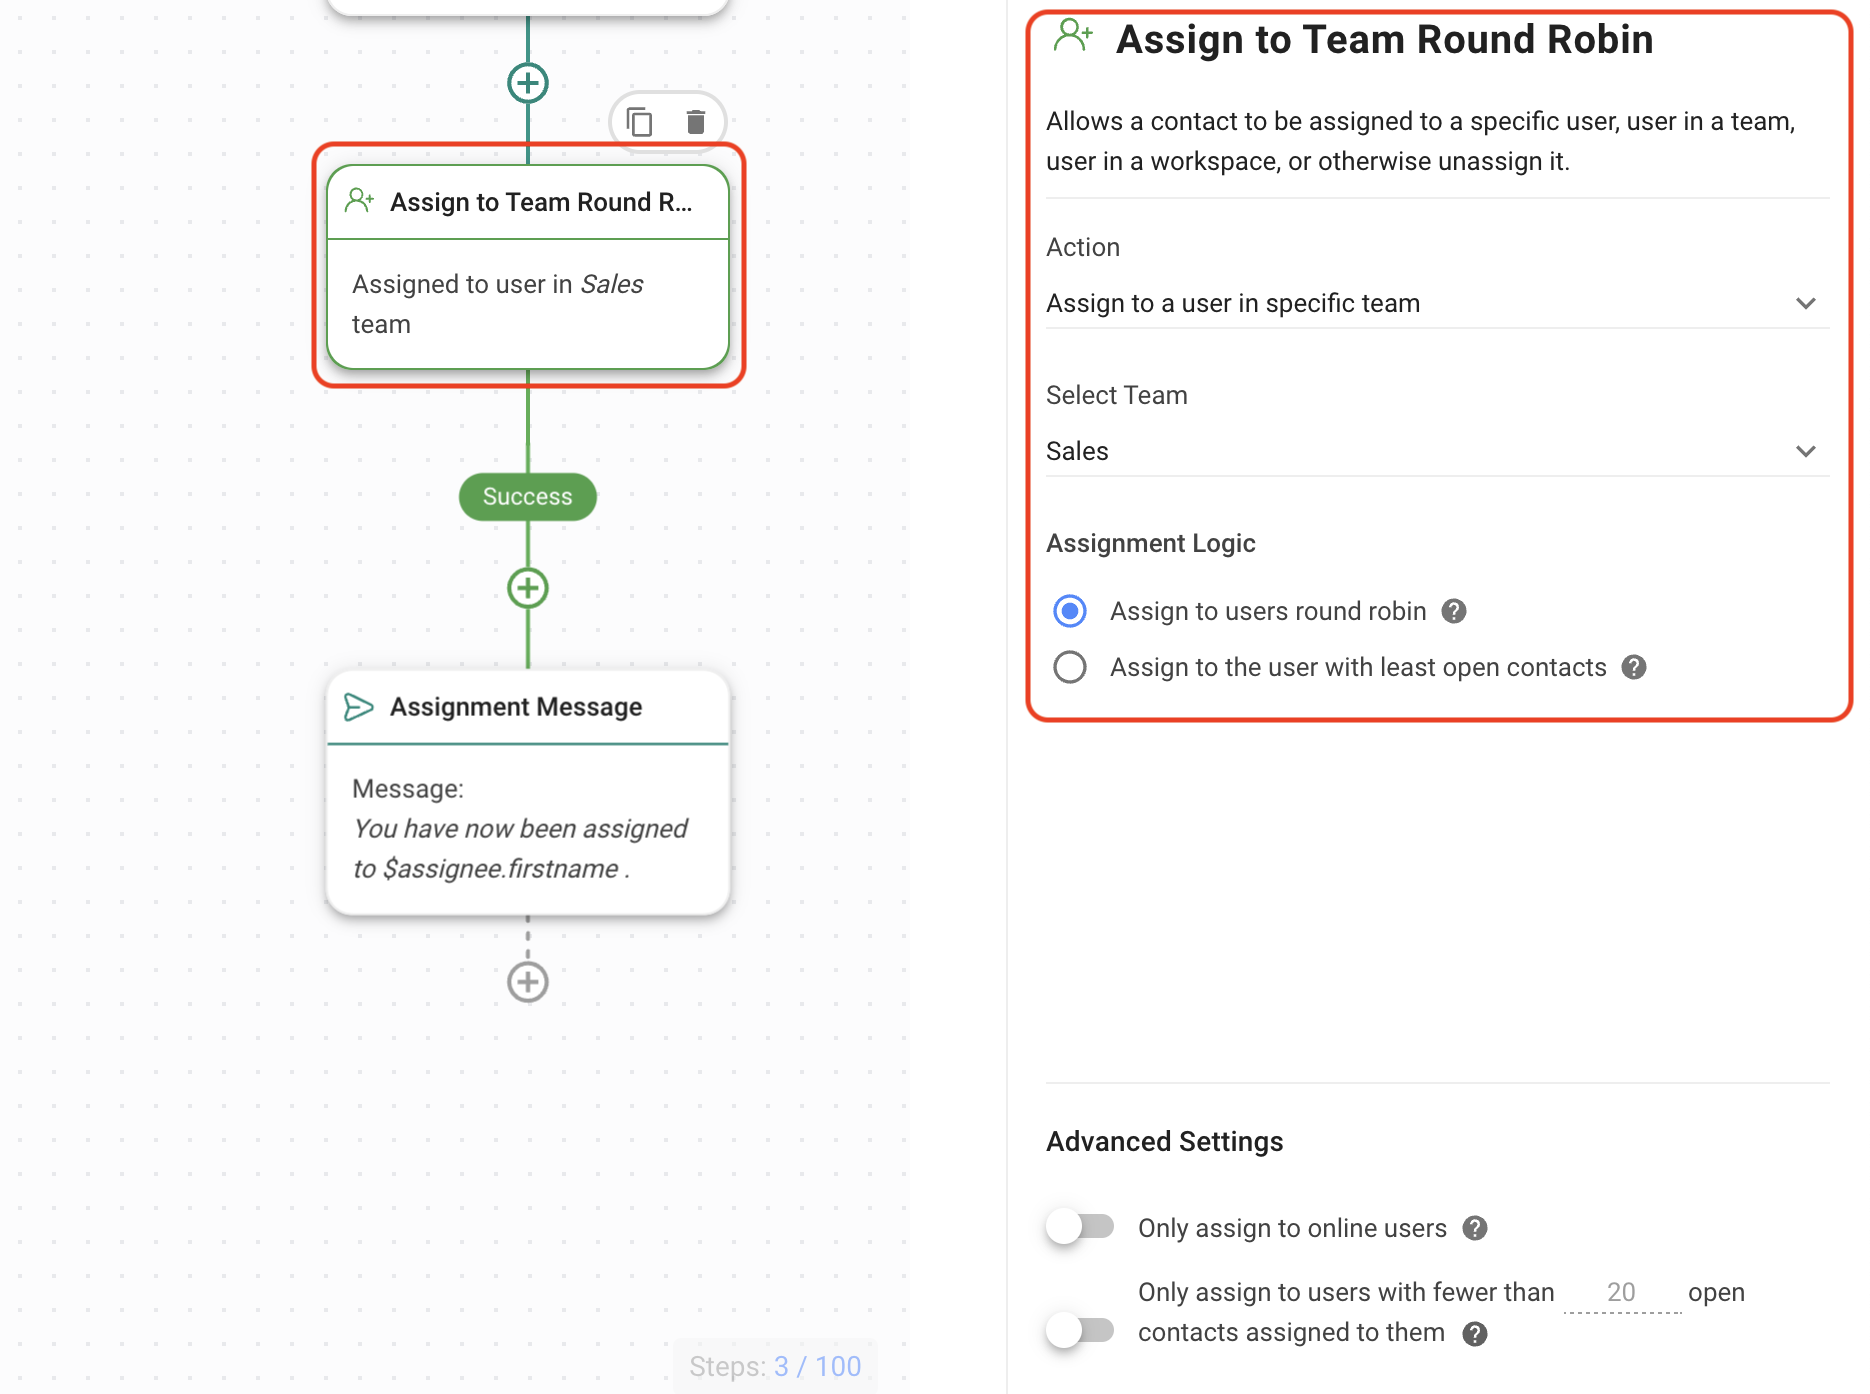
Configure your Assign To step by selecting the team you want to assign to. With these settings, leads will be assigned to agents round robin regardless of how many open Conversations they have.
Then, customize the assignment message if needed.
{% hint style="success" %}
Complete the setup by clicking on **Save and Publish** to activate the Workflow.
{% endhint %}
### **Auto-assign leads based on agent availability to respond to leads faster**
{% hint style="success" %}
**Use this method** when you want to reply to leads as quickly as possible.
{% endhint %}
**Method Objective**
* Select a Workflow Template and customize steps if needed
* Distribute agent workload based on availability & notify leads
**Workflow Setup**
**Select a Workflow Template and customize steps if needed**
On the IS-Messenger platform menu, click **Workflows** > **+ Add Workflow**. Then, click **Assignment: Round Robin + Online Only** > **Use Template**
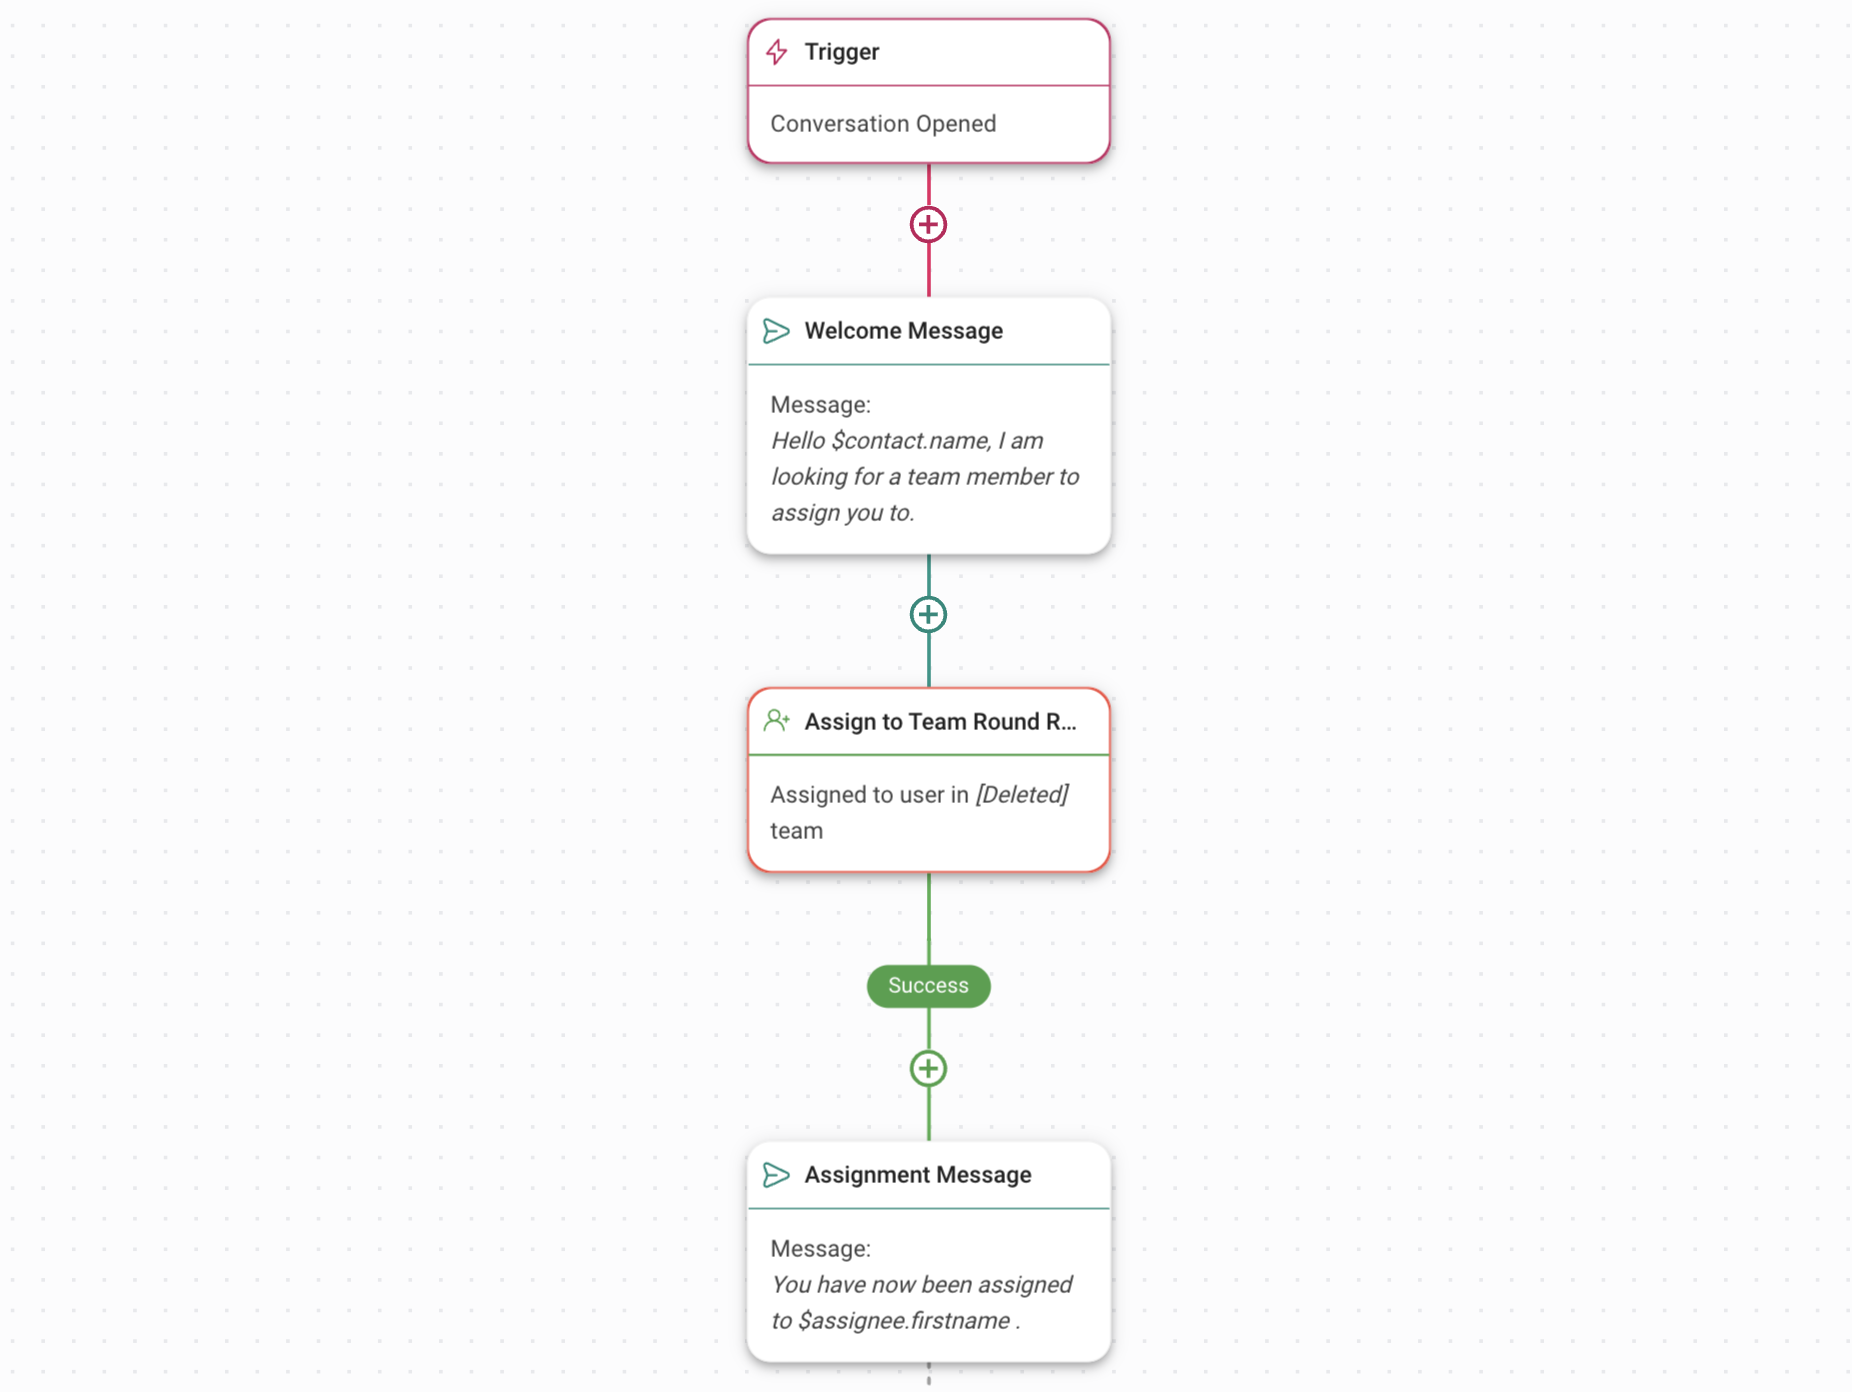
The workflow template is set up with an Assign To Step when a conversation is opened to assign leads only to online agents in the sales team in a round robin sequence.
Customize your [welcome message](/ismessenger/getting-started/quick-start.md) as desired.
{% hint style="info" %}
**Tip:** If you have multiple sales teams, use [routing](/ismessenger/sales-use-cases/how-to-route-leads.md) to assign to the correct team. Then consider using round robin assignment within the team.
{% endhint %}
### **Distribute agent workload based on availability and notify leads**
{% hint style="info" %}
**Tip:** There are best practices for the [Assign To Step](/ismessenger/modules/workflow.md) here.
{% endhint %}
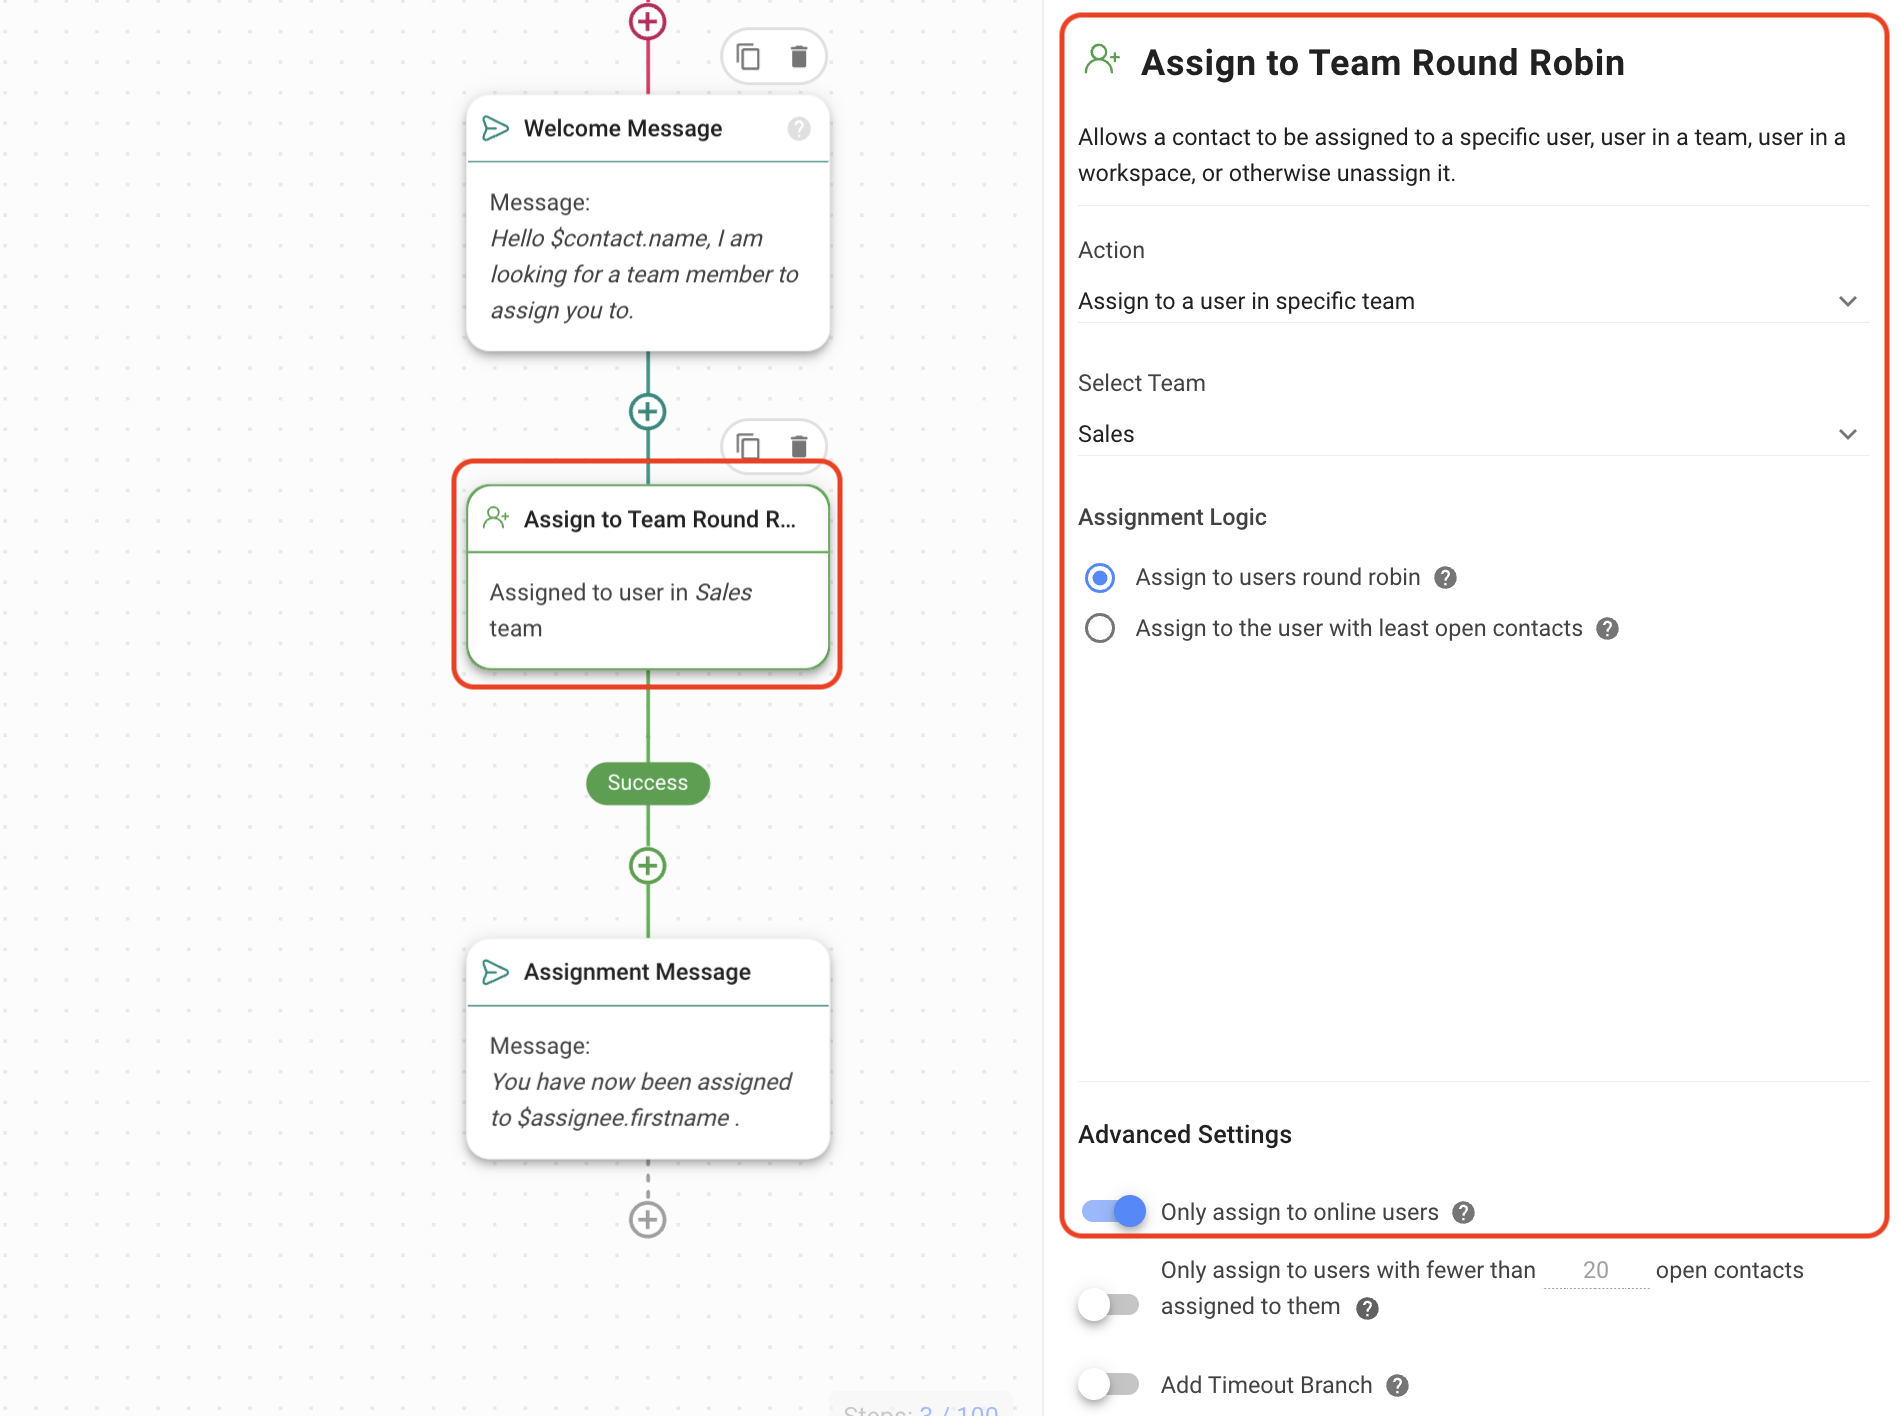
Configure your Assign to step by selecting the team you want to assign to. With these settings, leads will be assigned to only online agents round robin.
Then, customize the assignment message if needed.
{% hint style="success" %}
Complete the setup by clicking on **Save and Publish** to activate the Workflow.
{% endhint %}
---
# Agent Instructions: Querying This Documentation
If you need additional information that is not directly available in this page, you can query the documentation dynamically by asking a question.
Perform an HTTP GET request on the current page URL with the `ask` query parameter:
```
GET https://docs.is-messenger.com/ismessenger/sales-use-cases/how-to-auto-assign-leads-to-sales-agents.md?ask=
```
The question should be specific, self-contained, and written in natural language.
The response will contain a direct answer to the question and relevant excerpts and sources from the documentation.
Use this mechanism when the answer is not explicitly present in the current page, you need clarification or additional context, or you want to retrieve related documentation sections.