# Get Contacts’ Consent for Personal Data Collection
It is important for businesses to get consent from Contacts before collecting their personal data in order to respect their privacy choice and be compliant with local data protection regulations.
### Benefits of Getting Contacts’ Consent for Personal Data Collection
Get consent from Contacts for personal data collection to:
* demonstrate respect for privacy by transparently informing Contacts about data collection, usage and storage practices.
* safeguard your business from legal liabilities by ensuring prior consent is received before using personal data from Contacts.
### Workflow Setup
Learn how to use the Workflow Template to get consent from Contacts to collect their personal data.
* Send Contacts policy link and ask for consent
* Route Contacts based on response
### **Send Contacts policy link and ask for consent**
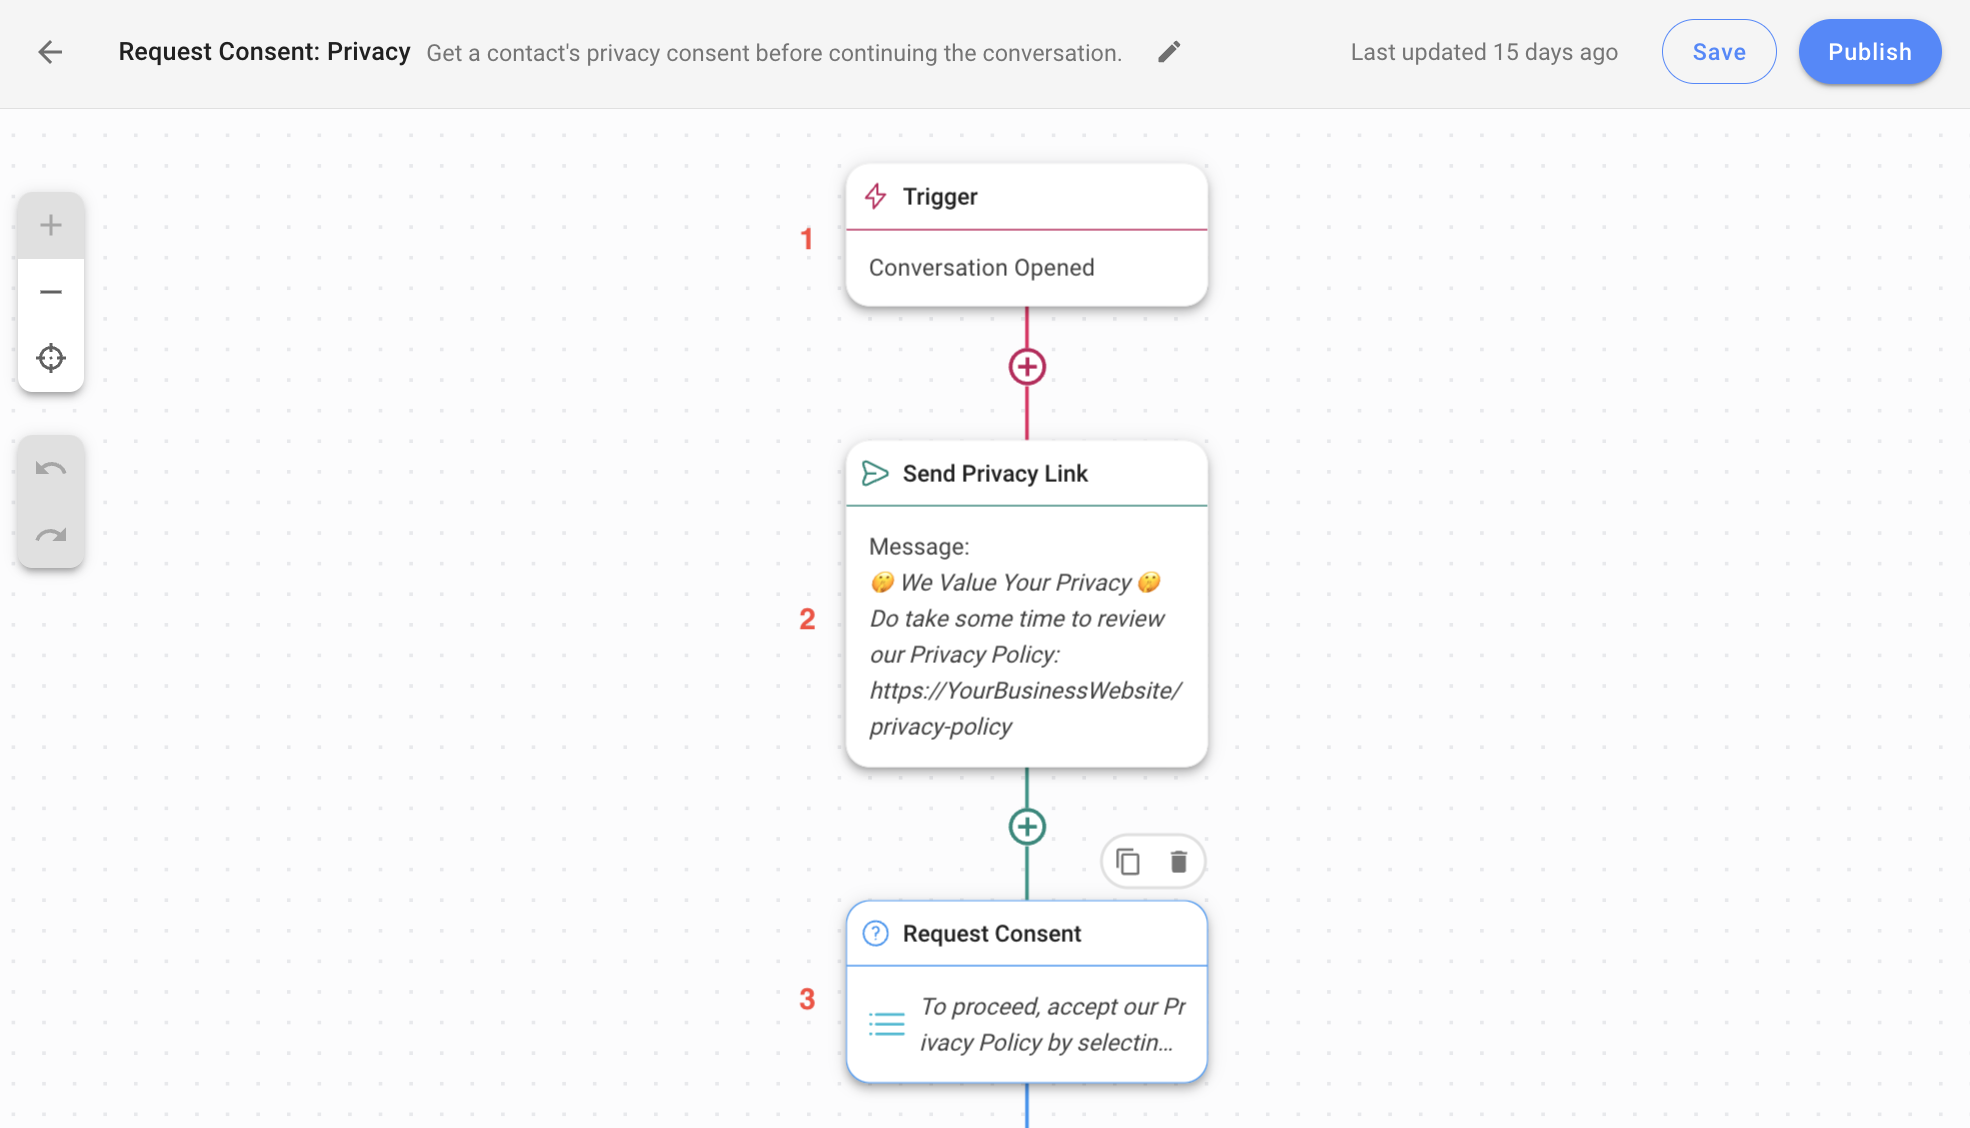
In the **Workflows** module, click **+ Add Workflow** > Select **Request Consent: Privacy** > Click **Use Template**.
**1.** [**Trigger**](/ismessenger/modules/workflow.md): The Workflow starts when a conversation is opened by a Contact.
**2. Send Privacy Link**: [Sends a message](/ismessenger/modules/workflow.md) to ask your Contact to read your privacy policy. Click the step and ensure that you update the link to direct Contacts to your privacy policy.
**3. Request Consent**: This [Ask a Question](/ismessenger/modules/workflow.md) step provides an option for your Contact to accept the privacy policy before proceeding to the next step.
In this Workflow Template example, we have prepared the answer option *AGREE & PROCEED*. A default response timeout of 5 minutes is added to this step, whereby the Contact is given 5 minutes to respond.
### **Route Contacts based on response**
One of the three scenarios may occur at this point:
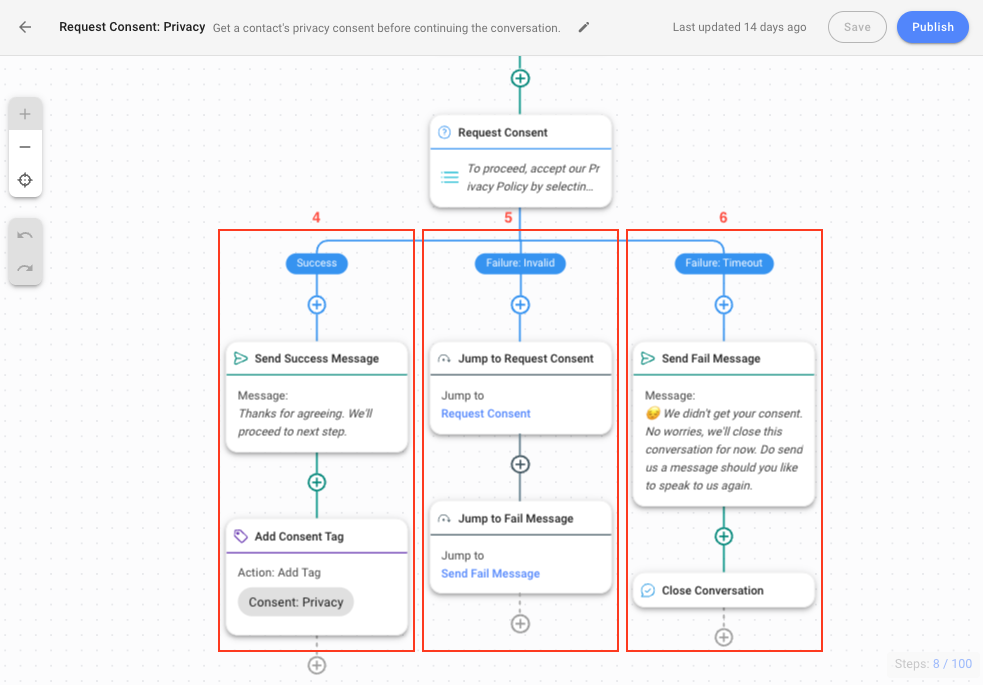
**4. Contacts accept the privacy policy**
If the Contact selects the answer option *AGREE & PROCEED*, an acknowledgment message is sent to inform the Contact of the status. The Contact will also be automatically tagged with “Consent: Privacy”. This tagging allows you to easily identify Contacts who have accepted your privacy policy and [segment these Contacts](https://help.respond.io/contacts/segments) for broadcasts.
**5. Contacts provide invalid response**
The Contact will be routed to the Failure: Invalid Branch if the Contact sends a different answer. This branch will start with the **Jump to Request Consent** step to route the Contact to the previous **Request Consent** step. This [Jump](https://help.respond.io/workflows/workflow-steps#step_jump_to) step has a maximum of 3 jumps. After the third attempt in providing an invalid response, the Contact will be routed to the **Send Fail Message** step.
**6. Contacts do not respond within the configured timeout**
The Contact will be routed to the Failure: Timeout Branch if the Contact does not respond within 5 minutes, which is the default timeout. This branch will start with the **Send Fail Message** step informing Contact of the failure in receiving consent, that you’ll be closing the conversation and Contact can send a message again to chat. This branch will then end with the **Close Conversation** step to close the Contact’s conversation.
{% hint style="success" %}
Once you have completed the setup, click **Save** and **Publish** to activate the
{% endhint %}
---
# Agent Instructions: Querying This Documentation
If you need additional information that is not directly available in this page, you can query the documentation dynamically by asking a question.
Perform an HTTP GET request on the current page URL with the `ask` query parameter:
```
GET https://docs.is-messenger.com/ismessenger/handling-inbound-conversations/get-contacts-consent-for-personal-data-collection.md?ask=
```
The question should be specific, self-contained, and written in natural language.
The response will contain a direct answer to the question and relevant excerpts and sources from the documentation.
Use this mechanism when the answer is not explicitly present in the current page, you need clarification or additional context, or you want to retrieve related documentation sections.