# Step: HTTP Request
This step allows HTTP Requests to be sent and their responses saved as variables
{% hint style="warning" %}
This step is available for Enterprise Plan only
{% endhint %}

### Configuration
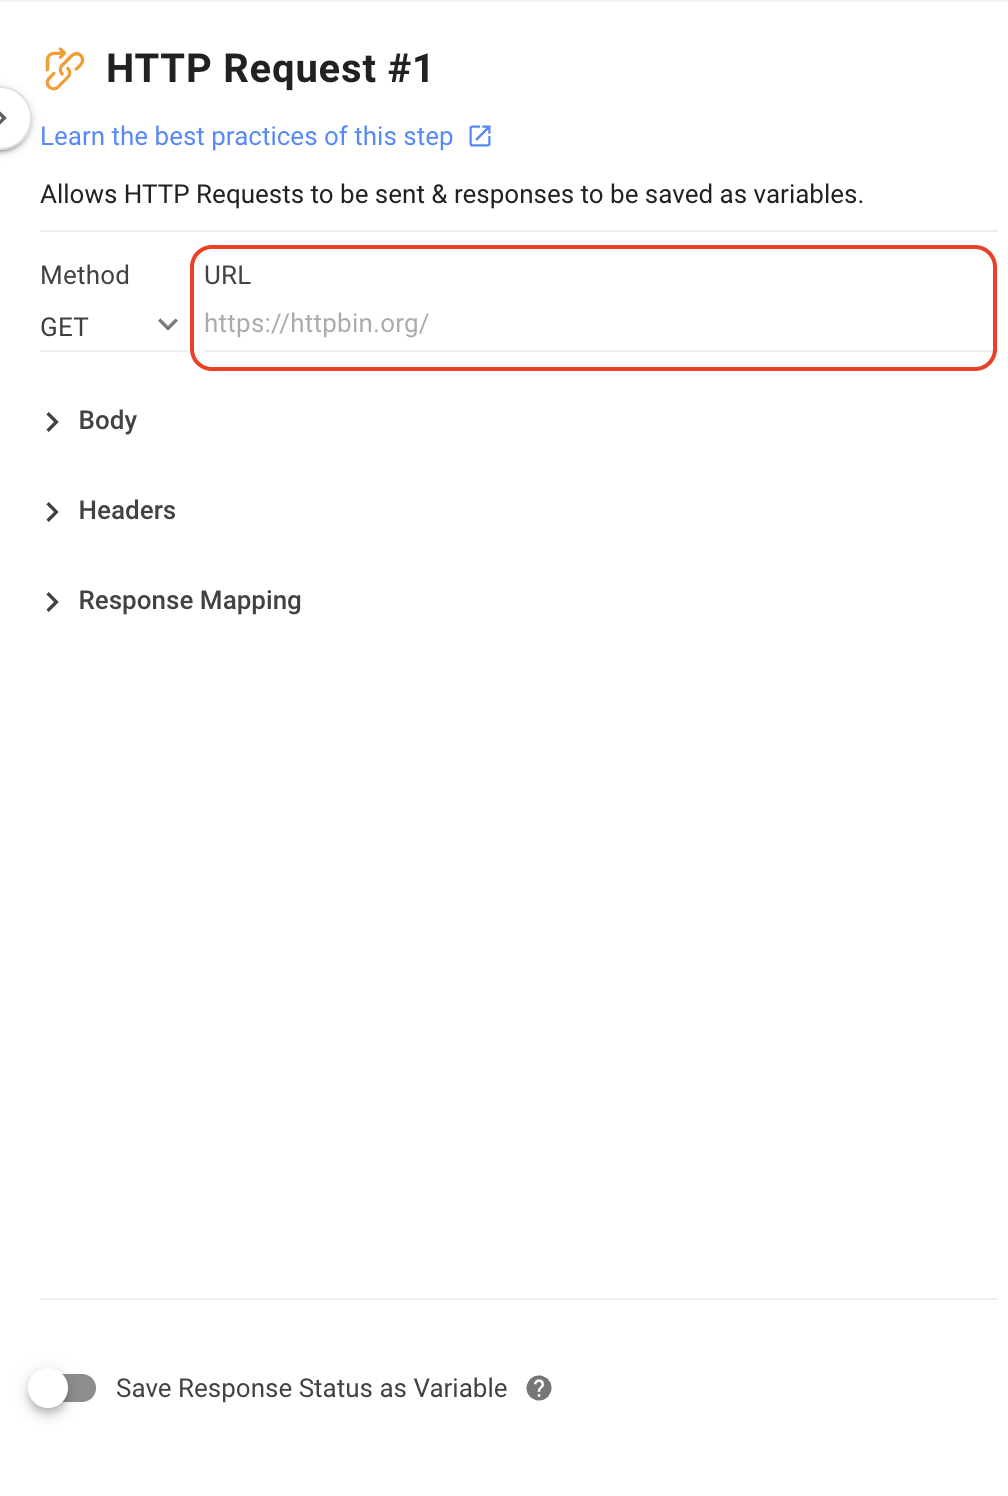
There are two key configurations in the HTTP Request step: HTTP request method and URL.
### HTTP Request Method
Refers to the specific method needed for the request to run. Select the applicable request method from the dropdown list.
**URL**
In the URL field, enter the URL endpoint of the external API to retrieve data. To include Variables, use the "$" prefix to support the interpolation of static text and Variables.
{% hint style="warning" %}
Please note that both IS-Messenger and white label domains are blacklisted. Sending an API call to these domains is not allowed, as it could cause looping issues.
{% endhint %}
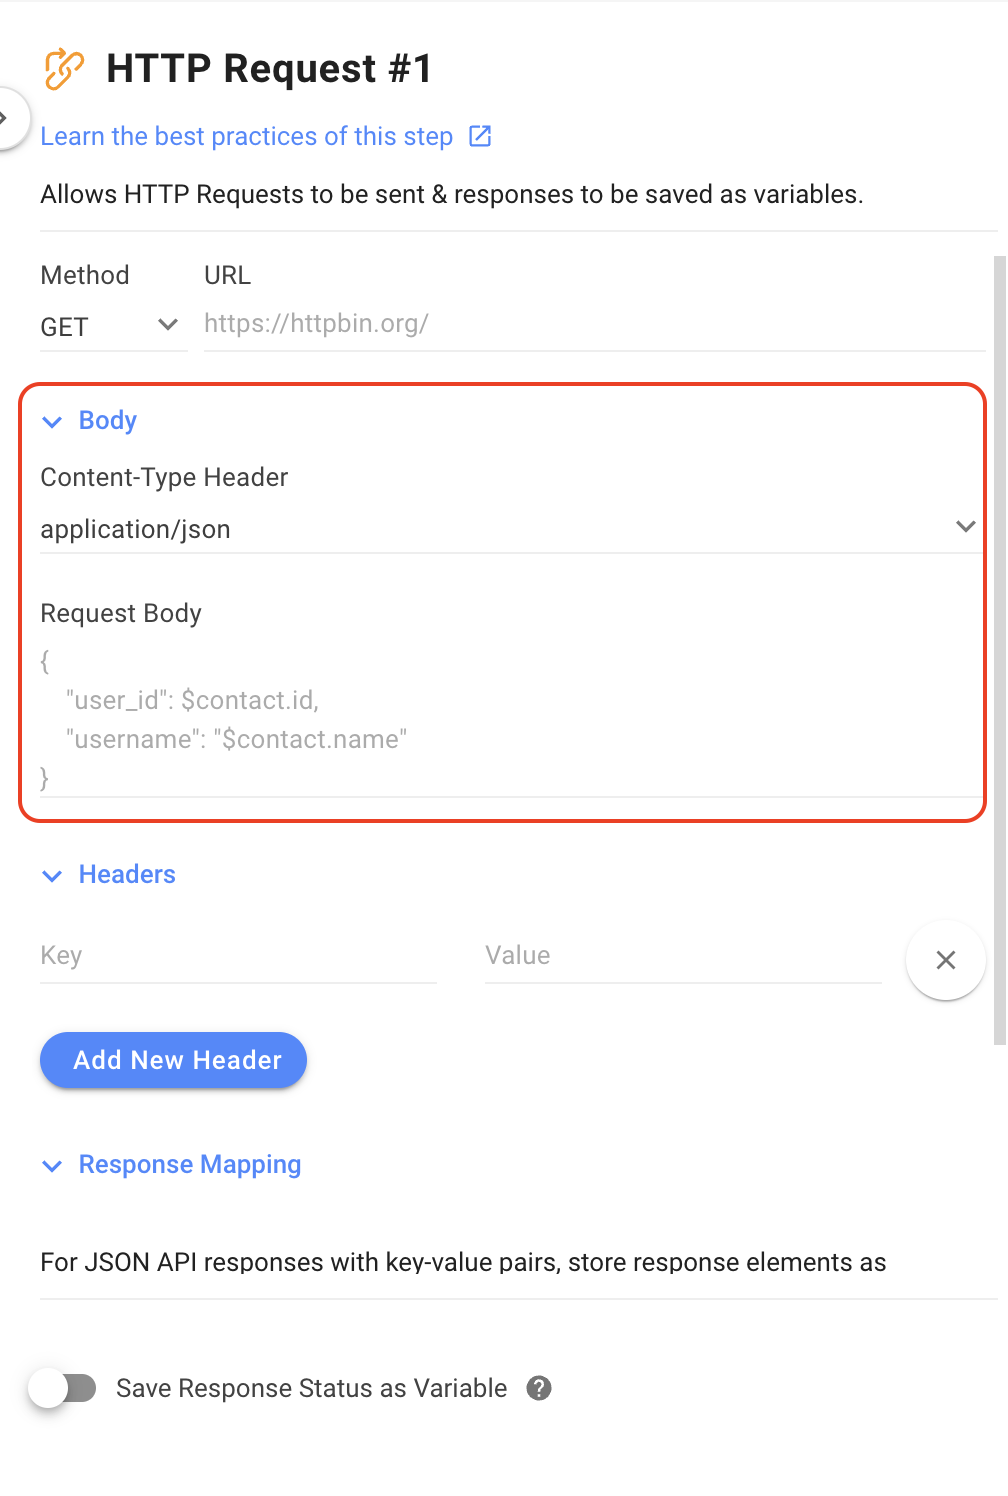
**Body**
To ensure correct decoding by the request recipient, expand the Body section and include a body along with the Content-Type Header.
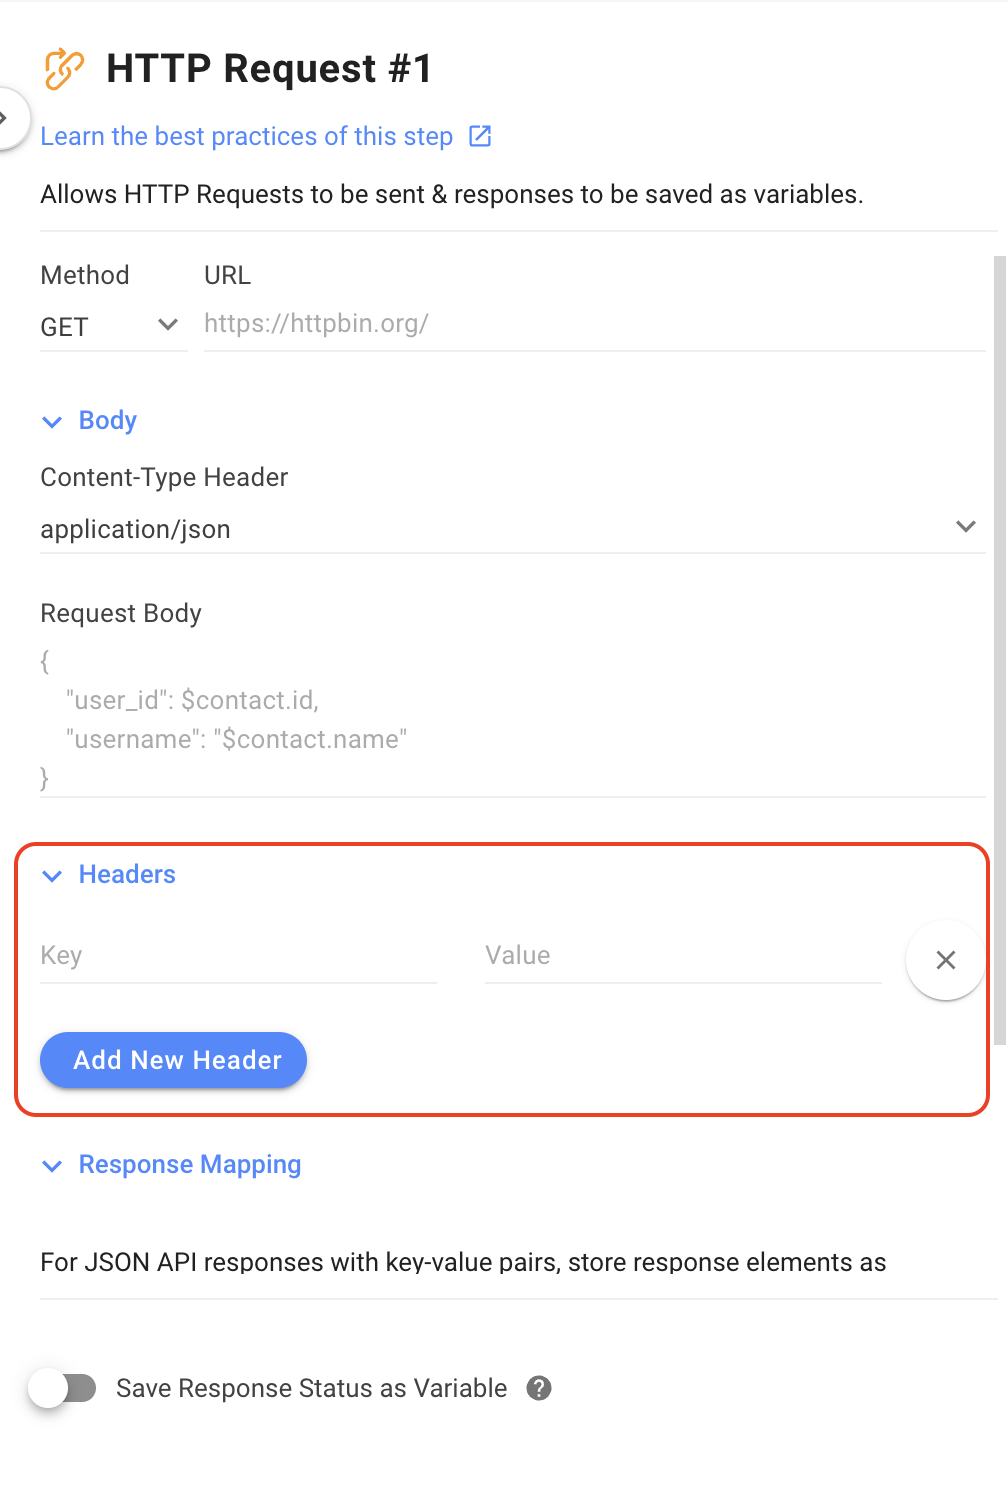
**Headers**
In the Header section, you can add headers to the HTTP request in pairs. The key represents the header name, and the value represents the header value. You can use Variables as headers by adding the prefix "$". However, remember that only up to 10 headers are allowed.
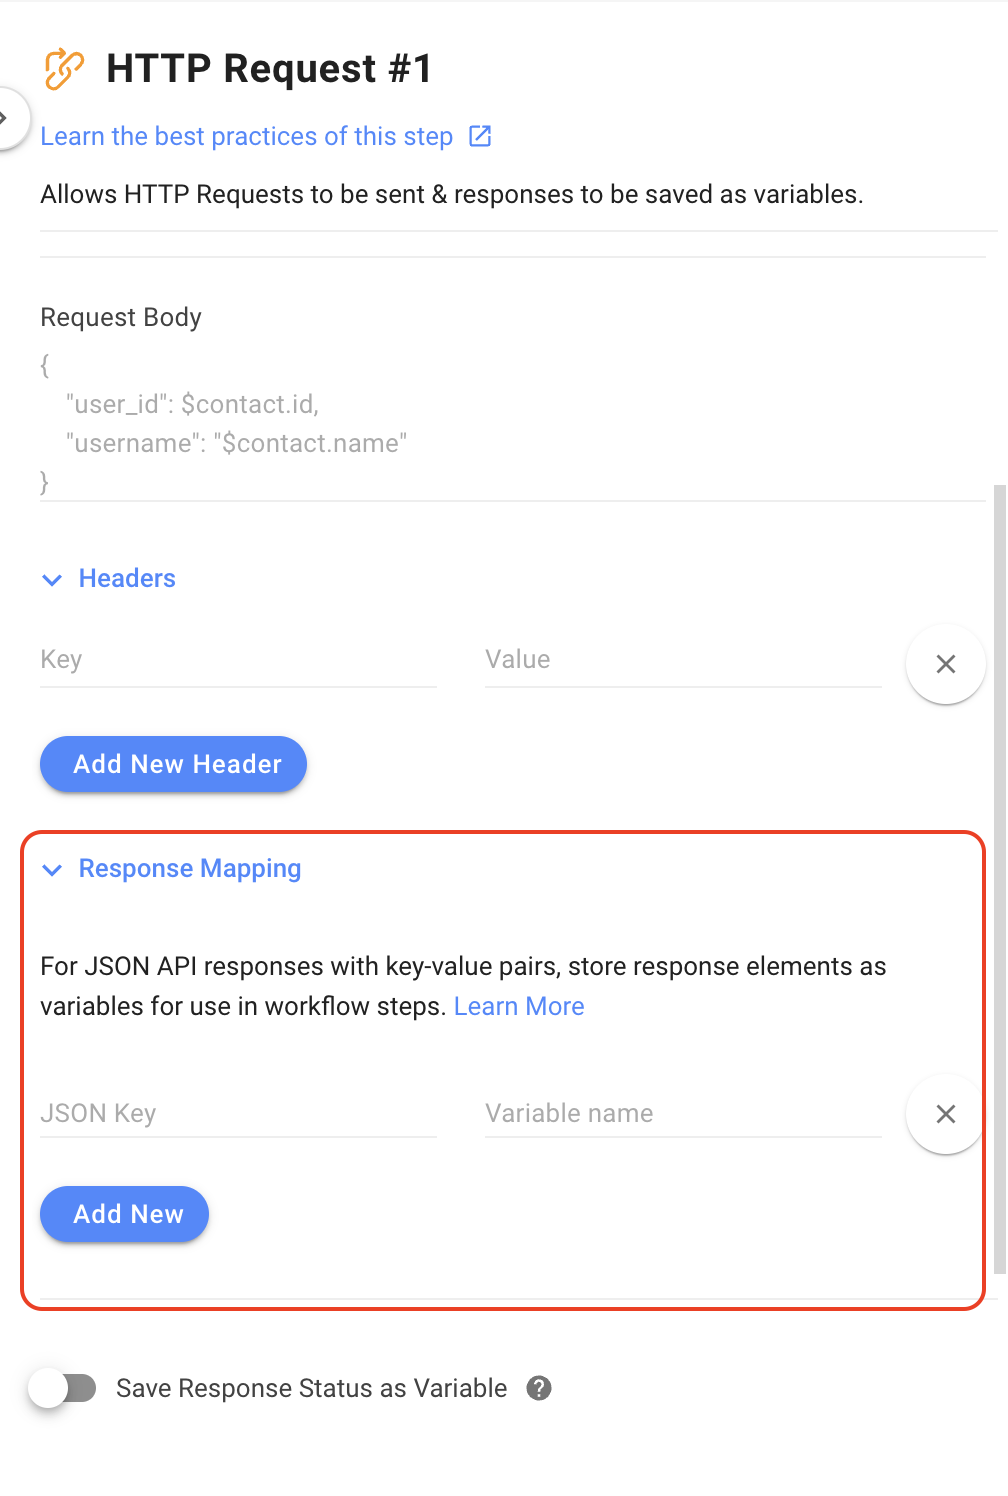
**Response Mapping**
For JSON API responses with key-value pairs, you can save specific response elements as Variables. In the Response Mapping section, input the key of the JSON object on the left and assign a name to the variable on the right. Keep in mind that only JSON responses can be saved, and you can have a maximum of 10 response mapping settings.
### Example
How to fill in the JSON key to save a response for different response formats:
```jsx
{
"name": "Jason",
"zip_codes": "12345",
"phone": "123123"
}
```
To save the phone number in the above response, use $.phone as the JSON key
```jsx
{
"custom_fields": {
"firstName": "John",
"lastName": "Doe",
"locale": "en_GB",
"timezone": "5",
"gender": "male",
"phone": "123123",
"email": "john@is-messenger.com",
"customerid": "1"
},
"created_at": 1575618542
}
```
To save the phone number in the above response, use $.custom\_fields.phone
```jsx
{
"data": {
"id":"1776025372480910",
"contacts" : [
{
"firstName":"John",
"lastName":"Doe",
"locale": "en_GB"
},
{
"firstName":"Jane",
"lastName":"Doe",
"locale": "en_GB"
}
]
}
}
```
### **Save Response Status as Variable**
To save the first name ‘Jane’ in the above response, use $.data.contacts\[1].firstName
Turn the Save Response Status as Variable toggle ON to save the response status from the HTTP request as a variable. Name the variable in the field below.

### How it works
When activated, this step will send an HTTP request to the specified URL, using the defined body and header.
You can guide the Workflow based on the response status. For instance, you can create a Branch for "status code is equal to 200". If any other response status code is received, a Jump Step could return Contacts to the HTTP Request Step. Alternatively, the Contact could be directed to the Failure Branch if the branch conditions are not met. If there are no steps set up under the Failure Branch, the Workflow will conclude.
### Potential Failure
To avoid potential failures in executing HTTP requests, ensure the following conditions are met:
* Use the correct HTTP method and Content-Type Header.
* Ensure the Content-Type is valid.
* Exclude the port number from the URL.
* Avoid using a self-signed certificate in the URL.
* Verify that the authorization is valid.
* Ensure our IP addresses (52.74.35.155, 18.138.31.163, 54.169.155.20) are not blocked.
If any of the above conditions are not met, the Contact will skip this step and proceed with the remaining journey.
{% hint style="info" %}
When verifying HTTP request outputs with dynamic variables, remember that Variables without a value will return as **null** and **undefined**.
{% endhint %}
### Best Practices
Here’s a best practice for this step you can follow to optimize your workflow:
**When the HTTP Request is Successful**
1. **Save Response Status as a Variable:**
1. Ensure the first step is to [save Response Status as Variable](/ismessenger/modules/workflow/workflow-step/step-http-request.md) for further actions.
2. **Branch Step:**
1. Add a Branch Step to evaluate the HTTP request status.
2. If the status is `200`, the request is successful.
3. If not, configure an alert to notify the manager about the unsuccessful request.
3. **Google Sheet** **for Monitoring:**
1. Record the Response Status in a Google Sheet for a clear visibility on the success or failure of requests.
4. **Comment:**
1. Add a comment in your workflow to document the Response Status. This will help you track and review errors more efficiently.
**When the HTTP Request Fails**
1. **Save Response Status as a Variable:**
1. Similar to the successful request, [save Response Status as Variable](/ismessenger/modules/workflow/workflow-step/step-http-request.md#configuration) for error handling.
2. **Use Wait or Jump Step for Retries**:
1. Implement the Wait Step to pause before retrying an unsuccessful request.
2. Alternatively, use the Jump Step to go back to the HTTP Request Step and attempt the request again.
3. **Comment**:
1. Document the error by creating a comment to record the HTTP Request error
2. Include Contact details and tag the person in charge.
4. **Google Sheet for Monitoring**:
1. Utilize the Google Sheet Step to log the Contact information and error details for monitoring and review.
5. **Task Assignment**:
1. Assign the task to a specific user to initiate another process within the workflow and try again
### Suggested Use Cases
Here are some ways you can use the HTTP Request Step:
* [Route VIP Contacts](/ismessenger/modules/inbox/custom-inboxes.md): Utilize the HTTP Request Step to fetch Contact details from a data warehouse like a CRM. This enables you to identify VIP Contacts, allowing for a personalized customer experience and distinguishing them from non-VIP Contacts.
---
# Agent Instructions: Querying This Documentation
If you need additional information that is not directly available in this page, you can query the documentation dynamically by asking a question.
Perform an HTTP GET request on the current page URL with the `ask` query parameter:
```
GET https://docs.is-messenger.com/ismessenger/modules/workflow/workflow-step/step-http-request.md?ask=
```
The question should be specific, self-contained, and written in natural language.
The response will contain a direct answer to the question and relevant excerpts and sources from the documentation.
Use this mechanism when the answer is not explicitly present in the current page, you need clarification or additional context, or you want to retrieve related documentation sections.