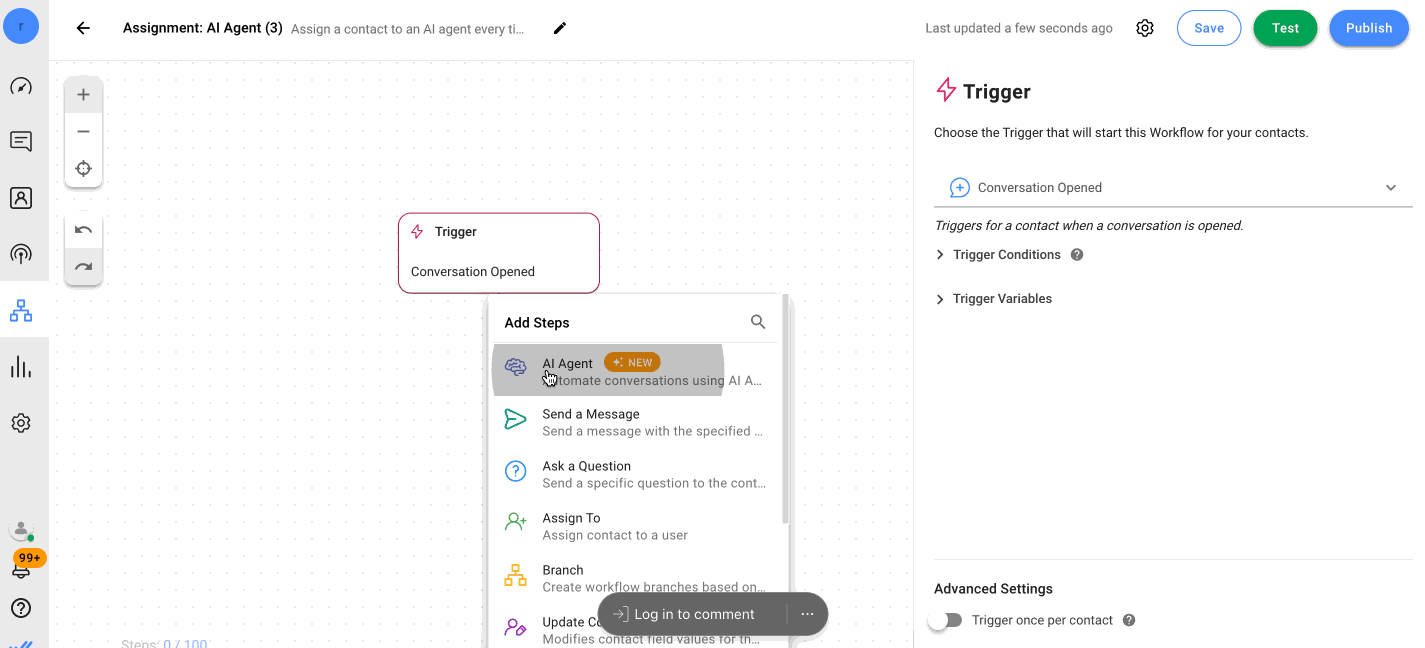
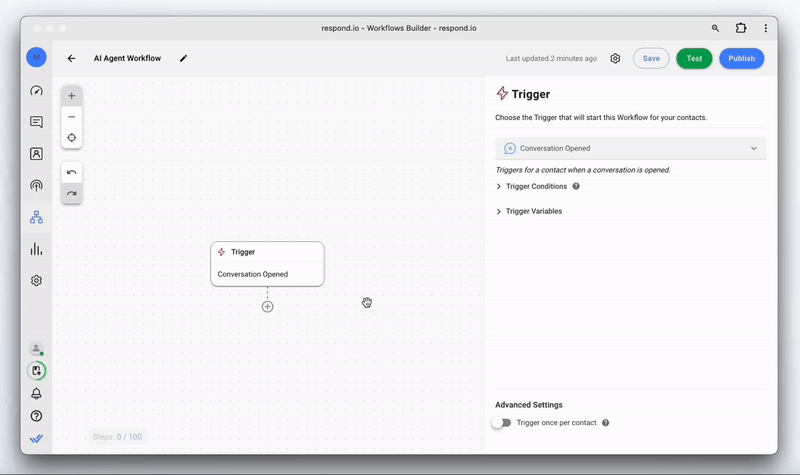
# Step: AI Agent
In a Workflow, the **AI Agent** Step automatically transfers the conversation to the Respond AI’s chatbot, **AI Agent**. The AI Agent interacts with the Contact without human intervention until the conversation concludes.
### Branches
Every AI Agent Step has the following five branches:
* Success (default, cannot be removed)
* Failure: Idle
* Failure: Speak to Human
* Failure: AI Can’t Answer
* Failure: Others (default, cannot be removed)
The Contact journeys into one of these branches depending on the conditions met by the Step:
| **Branch Name** | **Description** | **Configuration** |
| ---------------------------- | ------------------------------------------------------------------------------------------------------------------------------------------------------------------------------------------------------------------------------------------------------------------------------------------------------------------------------------------------------------------------------------------------------------------------------------------------------------------------------------------------------------------------------------------------------------------------------------------------------------------------------------------------------------------------------------------------------------------------- | -------------------------------------------------------------------------------------------------------- |
| Success |
The condition for this branch is determined by the option selected in the Objective field.
For the Answer Questions objective, i.e., the AI Agent answers incoming questions using the added Knowledge Sources, the condition for this branch is fulfilled after all questions from the Contact are successfully answered.
For the Collect Information objective, i.e., the AI Agent collects specific information from the Contact, the condition for this branch is fulfilled after all the information has been collected successfully.
| Enabled by default for all AI Agent Steps and cannot be removed. |
| Failure: Speak to a Human | This branch handles the situation when the Contact requests to speak to a human agent. | Enabled by selecting the **Contact Asks To Speak To A Human** toggle for all AI Agent Steps. |
| Failure: AI Unable to Answer | This branch handles the situation when the AI Agent cannot answer a question for any reason. | Enabled by selecting the **Failure: AI Unable To Answer** toggle for the **Answer Questions** objective. |
| Failure: Others | This branch handles the situation when a technical failure occurs, e.g., the Channel is disconnected, Respond AI credits run out, etc. | Enabled by default for all AI Agent Steps and cannot be removed. |
| Failure: Idle | This branch handles the situation when the contact has not responded for 60 minutes (the default/max value). You can decrease this limit if required | Enabled by selecting the **Add Contact Idle Branch** toggle for all AI Agent Steps. |
### Configuration
In this Step, configure the following fields:
| Field Name | Description |
| ----------------------- | --------------------------------------------------------------------------------------------------------------------------------------------------------------------------------------------------------------------------------------------------------------------------------------------------------------------------------------------------------------------------------------------------------------------------------------------------------------------------------------------------------------------------------------------------------------------------------------------------------------------------------------------------------------------------------------------------------------------------------------- |
| Launch AI Agent Builder | Click to chat with AI to configure your objective for the AI Agent. |
| Objective |
Select one of the following two Objectives:
Answer Questions: Use this objective when you want the AI Agent to answer all incoming questions while referring to the assigned Knowledge Source. This Objective is highly suitable for FAQs and low-effort conversations.
Collect Information: Use this objective when you want the AI Agent to ask specific questions and save the responses as variables. This Objective is highly suitable for data collection, updating Contact fields, qualifying leads, and updating Third-party apps.
|
| AI Persona |
Provide a description of how the AI Agent should communicate i.e., the personality of your AI Agent, by defining the distinct characteristics you want your AI Agent to have.
For example, create a background of the persona by identifying the purpose/role it has in a conversation, define the personality (skillset, speaking style, etc.) and any other qualities that help Respond AI craft the behavior of AI Assist. However, a default persona has been provided for convenience which adheres to professional yet courteous conduct. Design the AI Assist persona carefully so that it can draft responses that best suit your business requirements. Learn more here
|
**Collect Information Objective**
| Variable Configuration | Expand the toggle to manage the variables used to gather information from the Contact. |
| ---------------------- | ----------------------------------------------------------------------------------------------------------------------------------------------------------------------------------------------------------------------------------------------------------------------------------------------------------------------------------------------------------------------------------------------------------------------------------------------------------------------------------------------------------- |
| Required | The toggle is enabled by default and indicates that the field is mandatory i.e., the AI Agent must ask the Contact for this information. |
| Variable name |
Enter the variable name. You can use this variable in other steps of the Workflow following this Step.
For example, you asked the Contact a qualifying question such as their age and save the information as a variable called contact\_age. After this AI Agent Step, you can use this variable in any other Step of the Workflow after this Step. When adding a variable, you can view the list of variables within the Workflow, by entering the $ sign and selected the desired variable.
|
| Variable type | Select the variable type from the dropdown list. |
| Variable description | Provide a brief description of the variable. This gives the AI Agent an insight into what the variable is used for. You can also define any rules that you want to imply to the variables, e.g., the phone number should start with +601 and should either be 11 or 12 digit long without the considering the + sign a digit. |
| Add Another Variable | Click this button to add another variable |
**Answer Questions Objective**
| Suggest New Objectives | Click the link to suggest other objectives that suit your business needs. You are directed to a Feature Request on Canny, where you can upvote the request and provide the objective in the comments section. |
| --------------------------------------- | --------------------------------------------------------------------------------------------------------------------------------------------------------------------------------------------------------------------------------------------------------------------------------------------------------------------------------------- |
| Knowledge Source | Select an existing Knowledge Source AI uses to answer the Contact’s queries. These Knowledge Sources can either be added from the Add Knowledge Source proceeding this field or from **Settings** > **Respond AI** > **AI Agent** tab, selecting **Manage Knowledge Source** button. |
| Add Knowledge Source | Add a new [Knowledge Source](https://help.respond.io/l/en/workspace-settings/workspace-setting-respond-ai#step_1_providing_knowledge_sources) from here if the existing knowledge sources do not meet your requirements. It is recommended that the Knowledge Sources be focused on one subject for better responses and response time. |
| Reply outside of added Knowledge Source | Enable this toggle by sliding it to the right. Once enabled, AI may also respond using external sources of information, i.e., ChatGPT. |
| Use Snippets as a Knowledge Source | Enable the toggle by sliding it to the right. Once enabled, AI can use your snippets as a knowledge source to draft responses to your conversations. |
**Advanced Setting**
| Add Contact Idle Branch | Enable the toggle by sliding it to the right. Once enabled, the conversation is automatically closed if it remains idle for a maximum of 15 minutes. You can alter the value if required. |
| ----------------------- | ----------------------------------------------------------------------------------------------------------------------------------------------------------------------------------------- |
{% hint style="info" %}
AI Agent You can use both Objectives in one workflow using different AI Agent Steps
{% endhint %}
### **AI Agent Builder**
You can chat with AI using the **AI Agent Builder** to simplify the process of creating an AI Agent. Using AI Agent Builder, you can chat with AI to figure out and select the objective that suits your requirements. The AI asks you more questions after the Objective has been set to configure the Objective.
A preview of the AI Agent, along with the variable settings including which fields are mandatory is displayed, if you are satisfied with the settings, click **Proceed** to continue. You can change the AI Agent configurations later as well.
### How It Works
With the **AI Agent** Step, the workflow automatically enables [AI Agent](/ismessenger/workspace-setting/managing-a-workspace.md) to respond to the Contact’s queries. The **AI Agent** Step configurations define the kind of responses AI Agent generates. The Knowledge Source, Snippets, and ability to reply outside of the Knowledge Sources determine the quality of the responses. The conversation continues until the Contact’s queries are satisfied.
{% hint style="warning" %}
Always close conversations properly for optimal performance. Improperly closed conversations confuse the AI Agent, leading to inaccurate context understanding and undesired outcomes
{% endhint %}
You can understand the AI Agent’s behavior by clicking the **Show AI Instructions** button. The button opens a dialog explaining the expected behavior of the AI Agent as configured by you.
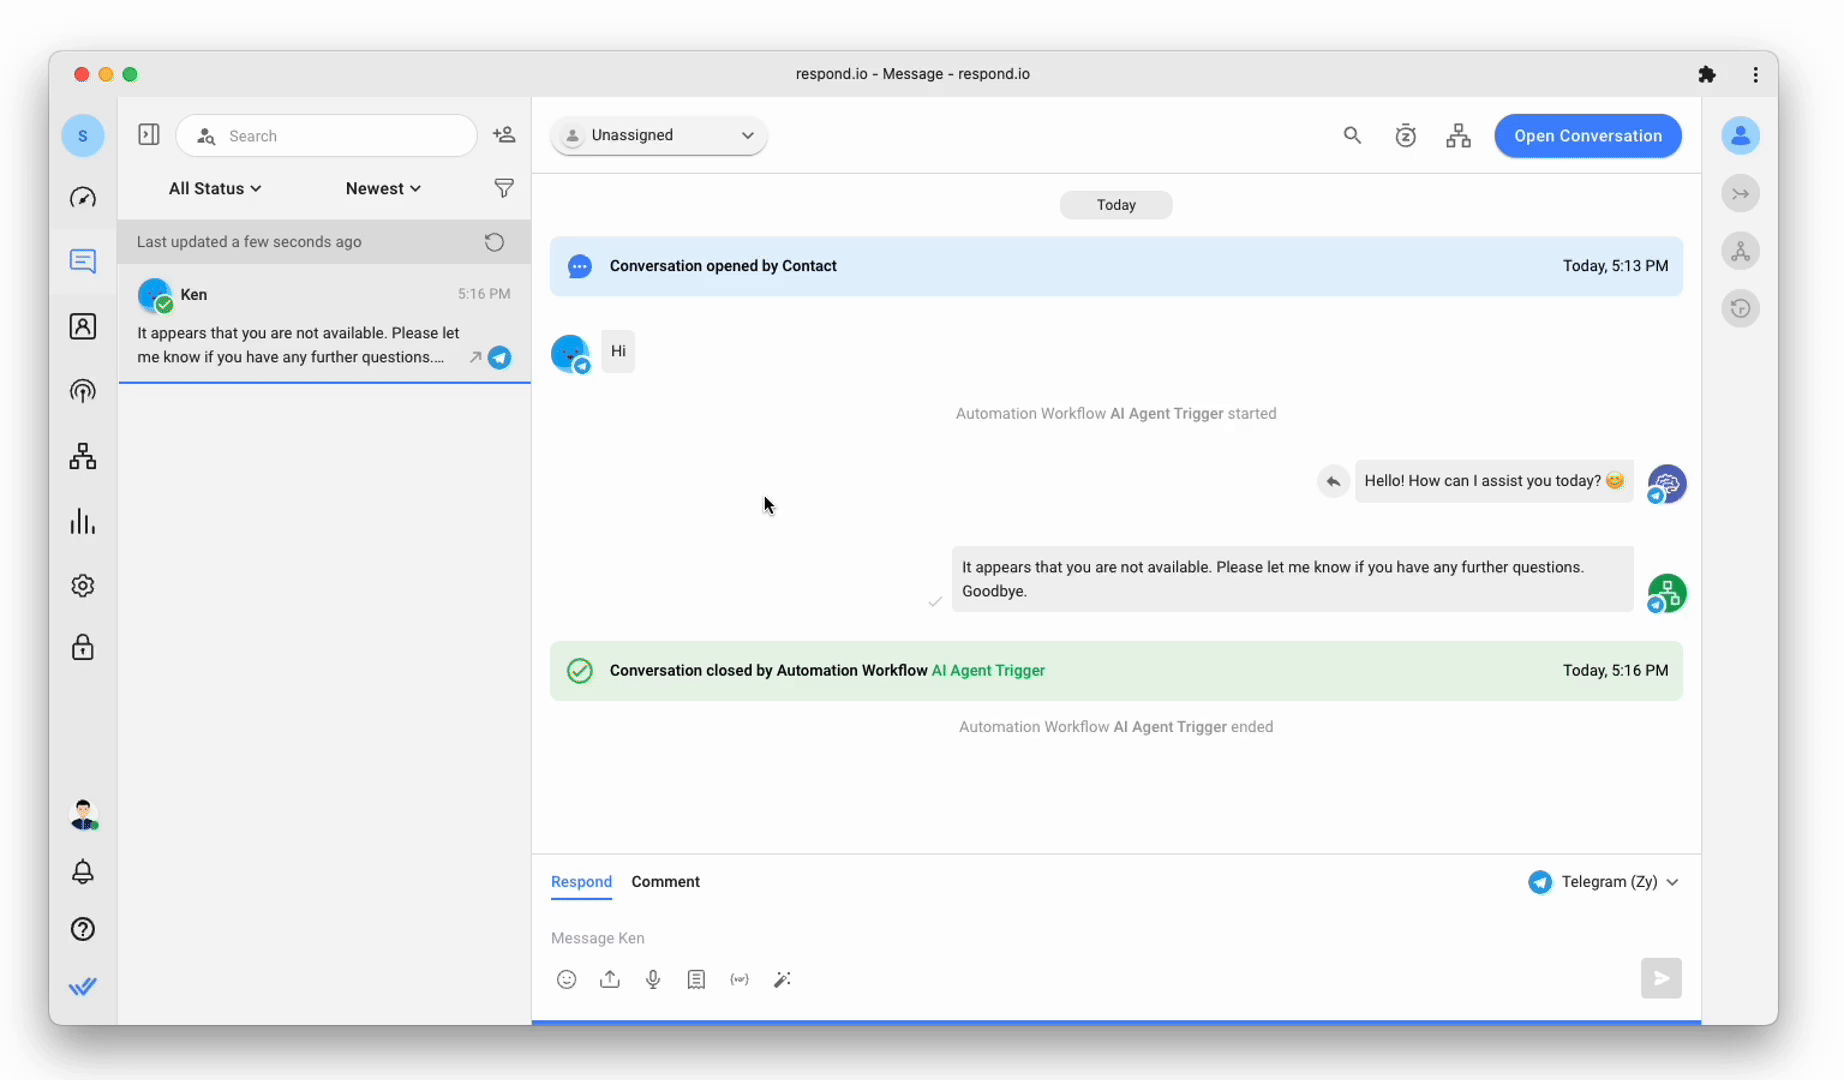
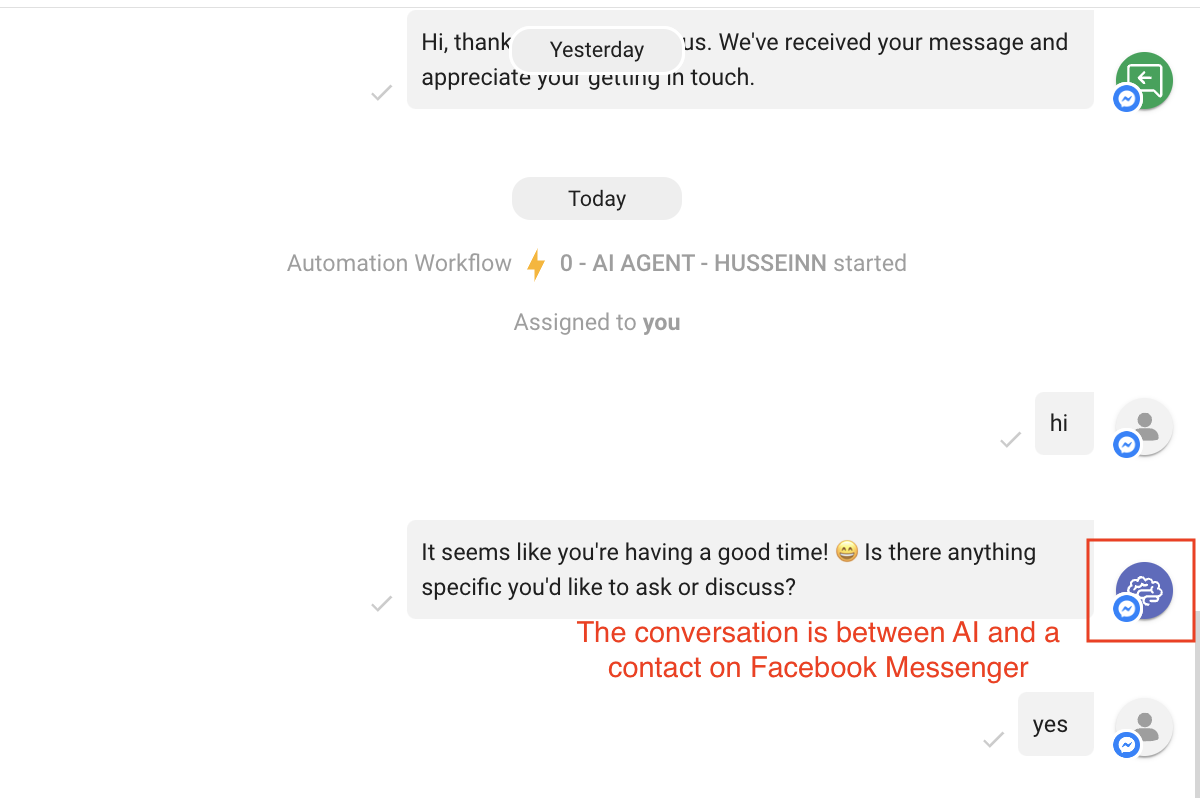
In the **Messages** module, you can recognize a conversation between AI and a Contact by the icons.
{% hint style="info" %}
You can only view a conversation between AI and Contact on the Messages module and currently cannot intervene in the conversation. However, you can [stop the workflow](/ismessenger/modules/workflow.md) and take over the conversation if necessary.
{% endhint %}
### Best Practices
Here are some best practices for this Step you can follow to optimize your Workflow:
* Adopting a focused approach while selecting the Knowledge Sources for your **AI Agent** Step is the key to good responses from AI. AI does not respond well when a broad spectrum of information is provided for reference.
* While creating workflows featuring multiple **AI Agent** Steps, ensure the Contact is engaged in talks with more than one AI at no point.
* You should enable the **Add Contact Idle Branch** toggle so that the conversation is automatically closed after it has been left idle for the specified time (maximum 15 min). The conversation can be opened again when the Contact sends a message.
### Suggested Use Cases
Here are some ways you can use the Branch Step:
* Maximise Customer Service Potential with AI Agent: The AI Agent enables businesses to engage with customers instantly by providing quick responses to low-level conversations involving basic product information (e.g., FAQ’s), policies (e.g., return policy), basic troubleshooting steps for common technical issues or errors, etc. By taking over such routine conversations, the AI Agents free up human agents for more complex conversations and tasks.
### FAQ and Troubleshooting
**Can my workflow have more than one AI Agents Steps?**
Yes, your workflows can include more than one **AI Agents** Steps, and each Step can have its own set of knowledge sources and other configurations that define how AI responds to the Contact.
**Is AI Agent Step available on my plan?**
Yes, this Step is available for every pricing plan on our platform.
---
# Agent Instructions: Querying This Documentation
If you need additional information that is not directly available in this page, you can query the documentation dynamically by asking a question.
Perform an HTTP GET request on the current page URL with the `ask` query parameter:
```
GET https://docs.is-messenger.com/ismessenger/modules/workflow/workflow-step/step-ai-agent.md?ask=
```
The question should be specific, self-contained, and written in natural language.
The response will contain a direct answer to the question and relevant excerpts and sources from the documentation.
Use this mechanism when the answer is not explicitly present in the current page, you need clarification or additional context, or you want to retrieve related documentation sections.