# Responding to Messages
### Messages Module
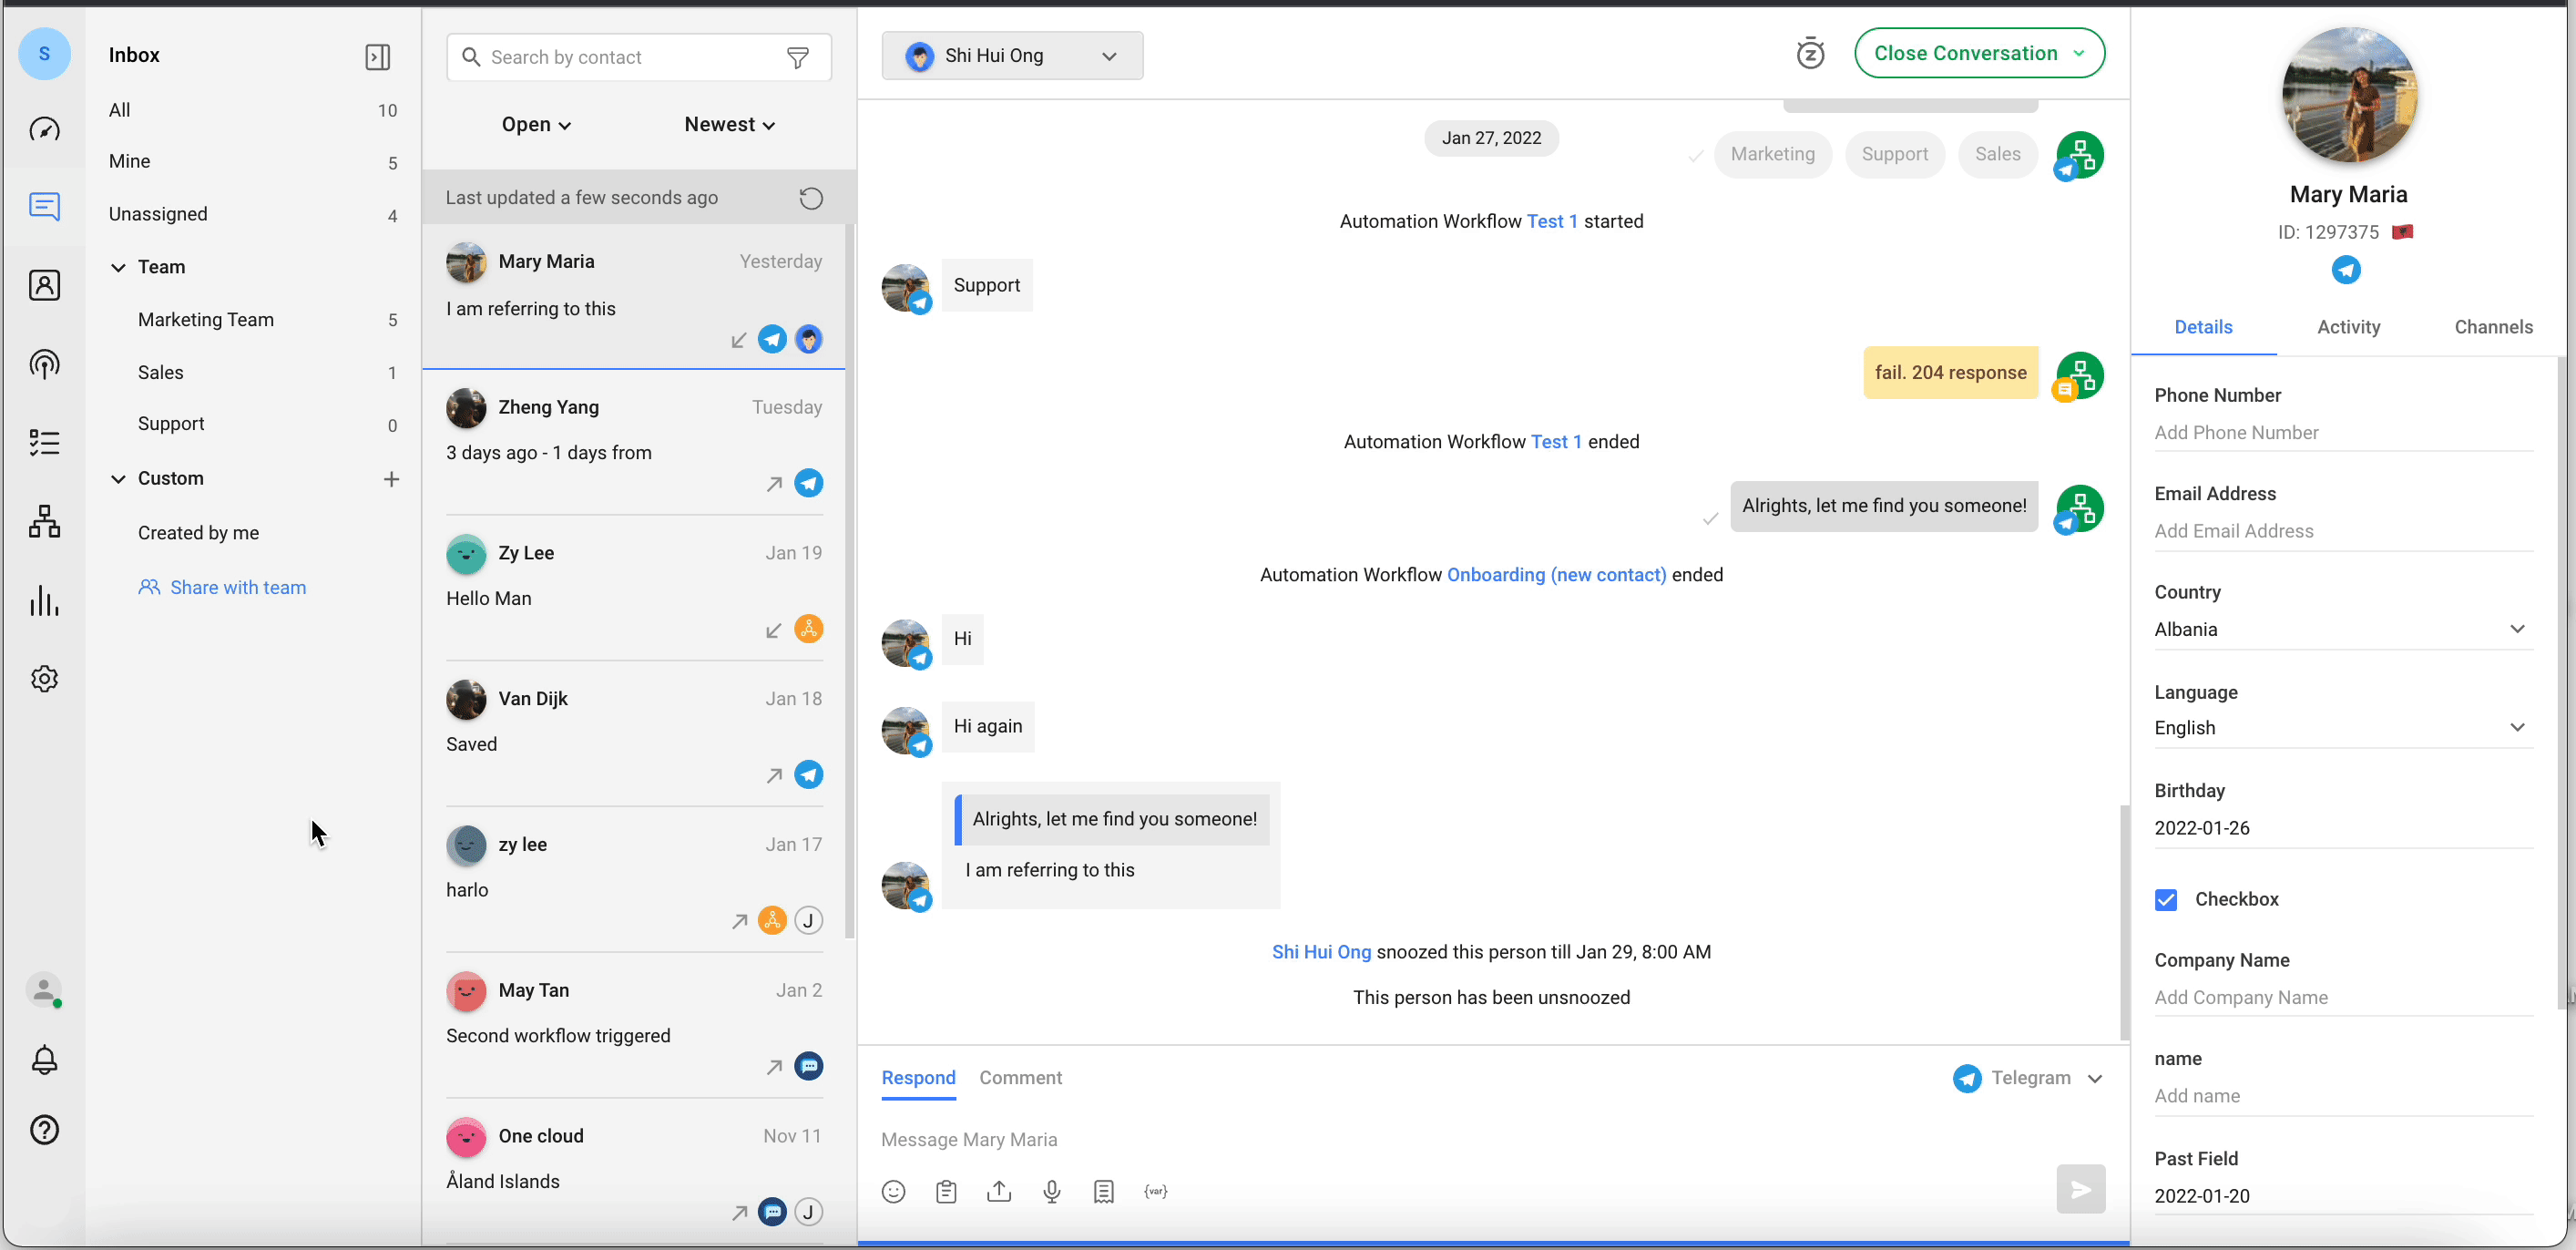
The Messages Module is where you can view all conversations with your Contacts and interact with them when necessary. You can access this module from the left navigation menu.
### **Receiving New Messages**
New messages will appear in the contact list of the Messages Module. New Contacts will be unassigned by default.
### **Replying to a Contact**
When the platform receives messages from a new Contact, the Contact will have an open conversation and is unassigned. There are two ways Users can respond to Contacts:
### **Responding Using Text**
A User can compose and send new messages from the text box below the conversation history window. Simply click the messaging console area and start typing.
### **Responding Using Voice Messages**
**Step 1: Click on Microphone**
User can click on the microphone icon in the messaging console to start recording the voice note.
**Step 2: Start recording**
Once the recording starts, the User can record a message for up to 5 minutes.
**Step 3: Click Stop**
When done, the User can click on the stop button to end the recording.
**Step 4: Send the message**
The User can play back the recording before sending it to the Contact. If the recording is not suitable, the User can delete the recording and repeat the process again.
{% hint style="warning" %}
For Channels that support voice messaging, the recording will be sent as voice notes. If the Channel does not support voice messaging, the recording will be sent as an attachment.
{% endhint %}
### **Useful Tips**
Here are some useful tips when responding to your Contacts :
Use emojis for friendly messages
You can include 😄, 👍, 🌟 or other emojis in your messages to appear friendlier.
### **Make use of Snippets to reply faster**
Snippets are message templates or canned responses that can be used to reply to Contacts.
{% content-ref url="../../workspace-setting/snippets" %}
[snippets](https://docs.is-messenger.com/ismessenger/workspace-setting/snippets)
{% endcontent-ref %}
**Attach files when you need to**
You can attach files such as invoices, instruction guides or more when necessary.
{% content-ref url="../../workspace-setting/files" %}
[files](https://docs.is-messenger.com/ismessenger/workspace-setting/files)
{% endcontent-ref %}
When you are ready to send the message, hit the Send button or press Enter on your keyboard to send it.
When you respond to an unassigned Contact, the Contact will be assigned to you automatically.
### Assigning a Contact
A Contact can be assigned to a User via two methods: Auto-assignment via Workflows and manual assignment.
{% hint style="info" %}
**Tip:** Assigning a Contact to a User is important so that your teammates are aware of who is responding to the Contact.
{% endhint %}
### **Manual Assignment**
If your business does not wish to assign the Contacts automatically, the assignment can be done manually via the Messages Module. [Here is how you can assign a Contact to another User](https://docs.is-messenger.com/ismessenger/modules/inbox/messages).
### **Automatic Assignment**
Automatic assignments can be set up using the Workflows Module. Workflows help you reduce manual work by automating processes. Learn more about [Workflows here](https://docs.is-messenger.com/ismessenger/modules/workflow).
### **Unassigning a Contact**
A Contact can be unassigned from a User via three methods: Manual unassignment, auto-unassignment via Workflows and automatic unassignment after closing a conversation (legacy behavior).
### **Manual Unassignment**
Users can manually unassign conversations in the Messages Module. Here is how you can [unassign a contact](https://docs.is-messenger.com/ismessenger/modules/inbox/messages).
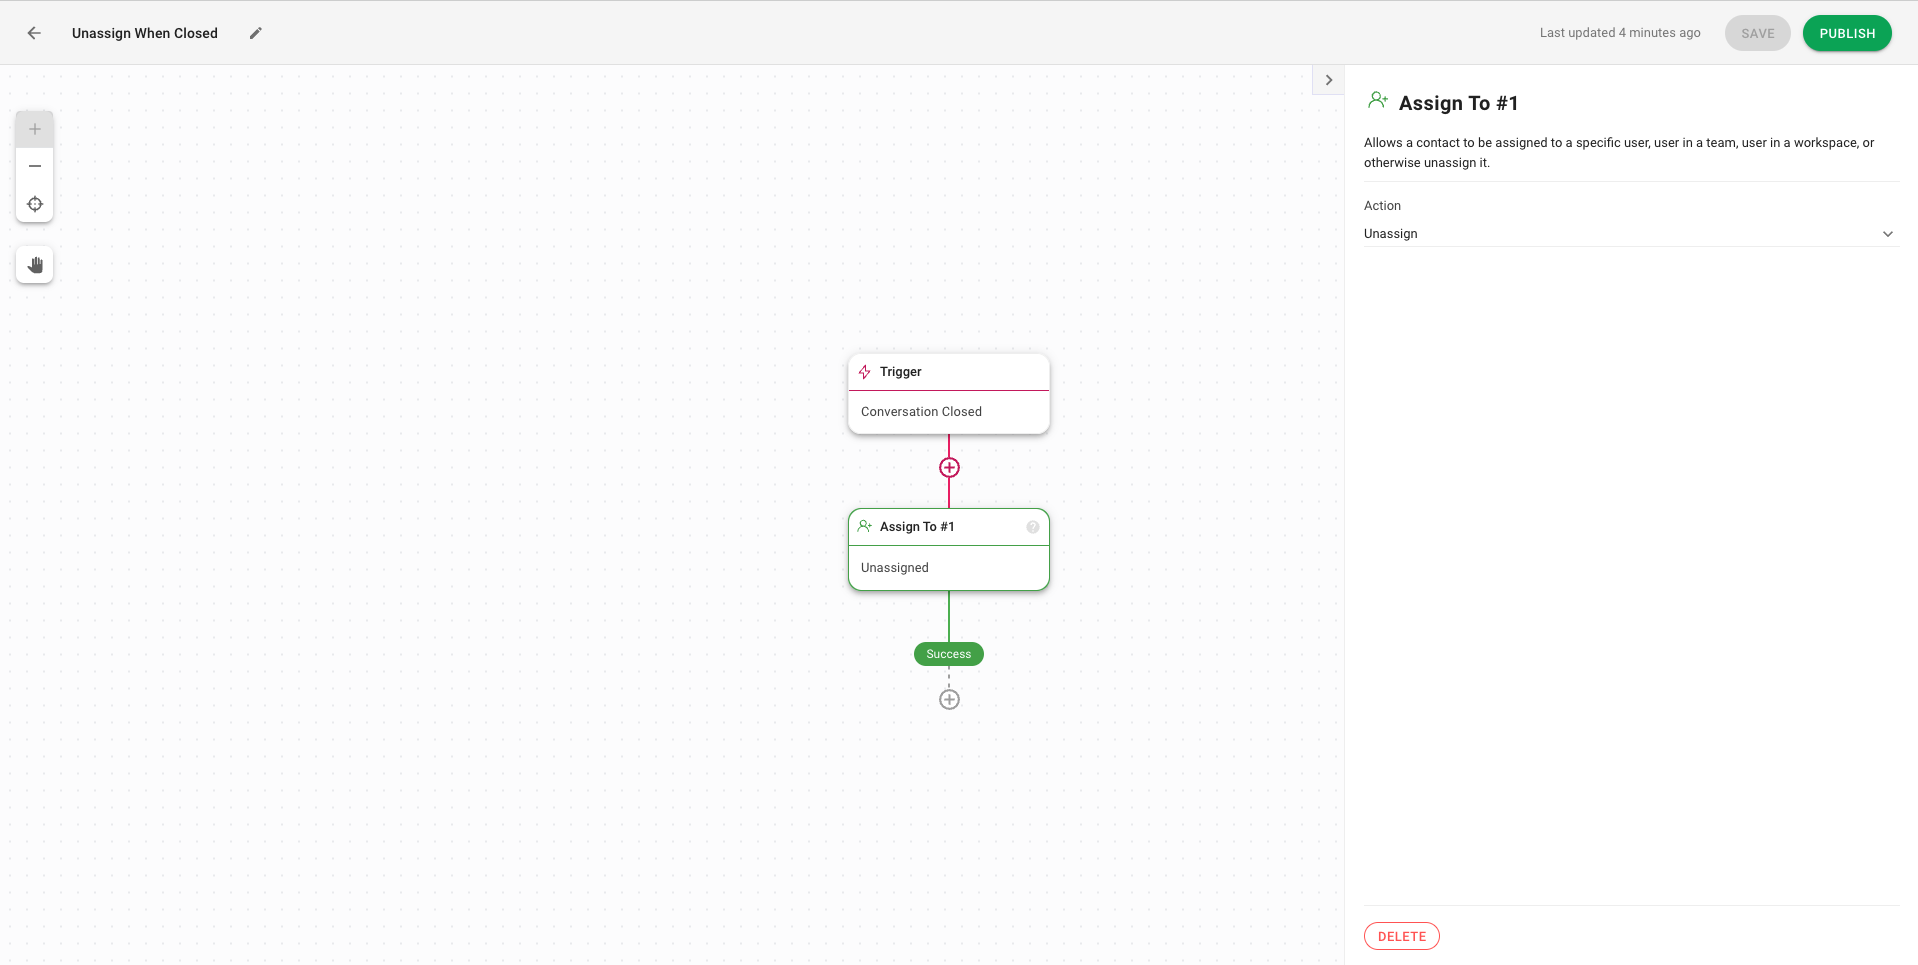
### **Auto-Unassignment Via Workflows**
You can automatically unassign Users from Contacts via Workflows, particularly after a conversation is closed. Learn more about [Workflows here](https://docs.is-messenger.com/ismessenger/modules/workflow).
### **Automatic Unassignment after a Conversation is Closed (Legacy)**
This is a legacy behavior only available in older Workspaces with the [Unassign Contacts toggle](https://docs.is-messenger.com/ismessenger/modules/workflow). Workspaces with this toggle on will automatically unassign Contacts when the conversation is manually closed.
### Conversations
**What is a Conversation?**
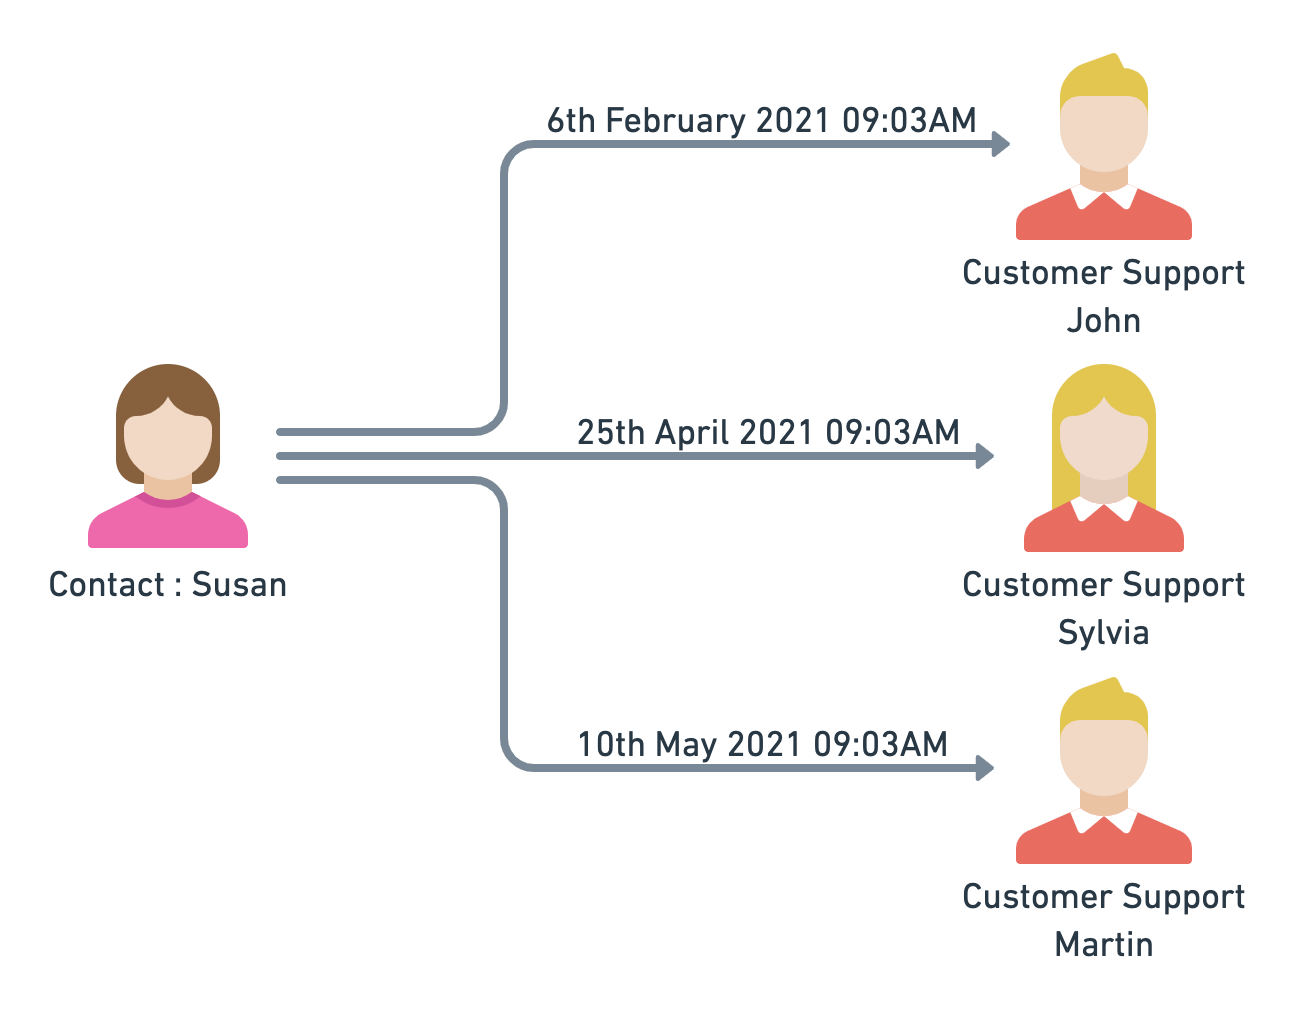
In the context of the platform, the interaction between the contact and platform is referred to as a conversation. Conversations are used to organize the communication in context. A contact can have multiple conversations with the platform but only one open conversation at a time.
Referring to the example above, Susan had contacted the platform at different times with different purpose. Susan had three conversations with the platform attended by different users. Each conversations has a different context and a specific issue to be resolved by the customer support team.
### **Opening a Conversation**
Conversations can be opened to initiate an interaction and it can be done by the following method :-
**1. New Incoming Message from Contact**
When a contact without any open conversation sends a message to the platform, a conversation will be opened for this contact. The same applies for new incoming message from new contacts.
**2. User**
A user can manually open a conversation from the Messaging Module.
**3. Automation**
An automation can be created with the Open Conversation which will result in a new conversation being opened for the triggering contact.
**4. Welcome Event**
For channels like Facebook and Viber, the Welcome Event can open a new conversation for a contact if there is no existing open conversation.
**Resolving a Conversation**
Once you have resolved a Contact's issue, close the conversation so the Contact is no longer in the Open Conversation queue. This reduces noise in your inbox.
{% hint style="info" %}
When a conversation is closed, the Contact and their future conversations will remain assigned to the same User. If you need to refer to the Contact or their conversation, search for them in the Contacts Module.
{% endhint %}
Following are some other ways conversations can be closed:
**1. Automation**
An automation can be created with the Close Conversation which will result in closing the open conversation for the triggering contact.
**2. Dialogflow**
Using the RB\_MARKDONE parameter, a conversation can be closed for the triggering contact.
**3. Contact Merge**
If there is an open conversation from the secondary contact, the conversation will be closed automatically.
**Closing Notes**
Users can use closing notes to provide a summary of their conversation with a Contact. Read more on Closing Notes.
{% content-ref url="../../workspace-setting/closing-notes" %}
[closing-notes](https://docs.is-messenger.com/ismessenger/workspace-setting/closing-notes)
{% endcontent-ref %}
### **Conversation Metrics**
Find metrics and analytical insights such as Resolution Time and Closed Count on conversations in both Reports and Dashboard to track team performance.
Find out more on conversation metrics in the following modules:
{% content-ref url="../../modules/untitled" %}
[untitled](https://docs.is-messenger.com/ismessenger/modules/untitled)
{% endcontent-ref %}
{% content-ref url="../../modules/reports" %}
[reports](https://docs.is-messenger.com/ismessenger/modules/reports)
{% endcontent-ref %}