# Automated Welcome and Away Messages
When someone messages your business, you’ll want to respond to them as soon as possible. Automated welcome and away messages allow an immediate response and can be used to manage Contacts’ expectations.
### Benefits of Welcome and Away Messages
Use welcome and away messages to:
* Provide a standard greeting and introduction to your business.
* Respond to Contacts immediately.
* Let Contacts know when they can expect a reply.
### Methods for Sending Welcome and Away Messages
1\. [Send a basic automated reply when a Contact opens a conversation](https://docs.is-messenger.com/ismessenger/getting-started/quick-start).
2\. [Send welcome and away messages based on business hours](https://docs.is-messenger.com/ismessenger/getting-started/quick-start).
### **Send a basic automated reply when a Contact opens a conversation**
**Use this method** when you want to immediately send a greeting or an away message when a Contact messages you.
**Method Objectives**
* Set up the Workflow templates to send a welcome or away message.
### **Workflow Setup**
There are Workflow templates set up by our team that you can use immediately. These templates can be edited to fit your business needs.
Learn more about [Workflow Templates here](https://docs.is-messenger.com/ismessenger/modules/workflow).
### **Set up the Workflow templates to send a welcome or away message**
On the respond.io platform menu, click **Workflows** > **+ Add Workflow** and choose your templates.
To send a welcome message, click **Welcome Message** > **Use Template**
To send an away message, click Away Message > Use Template
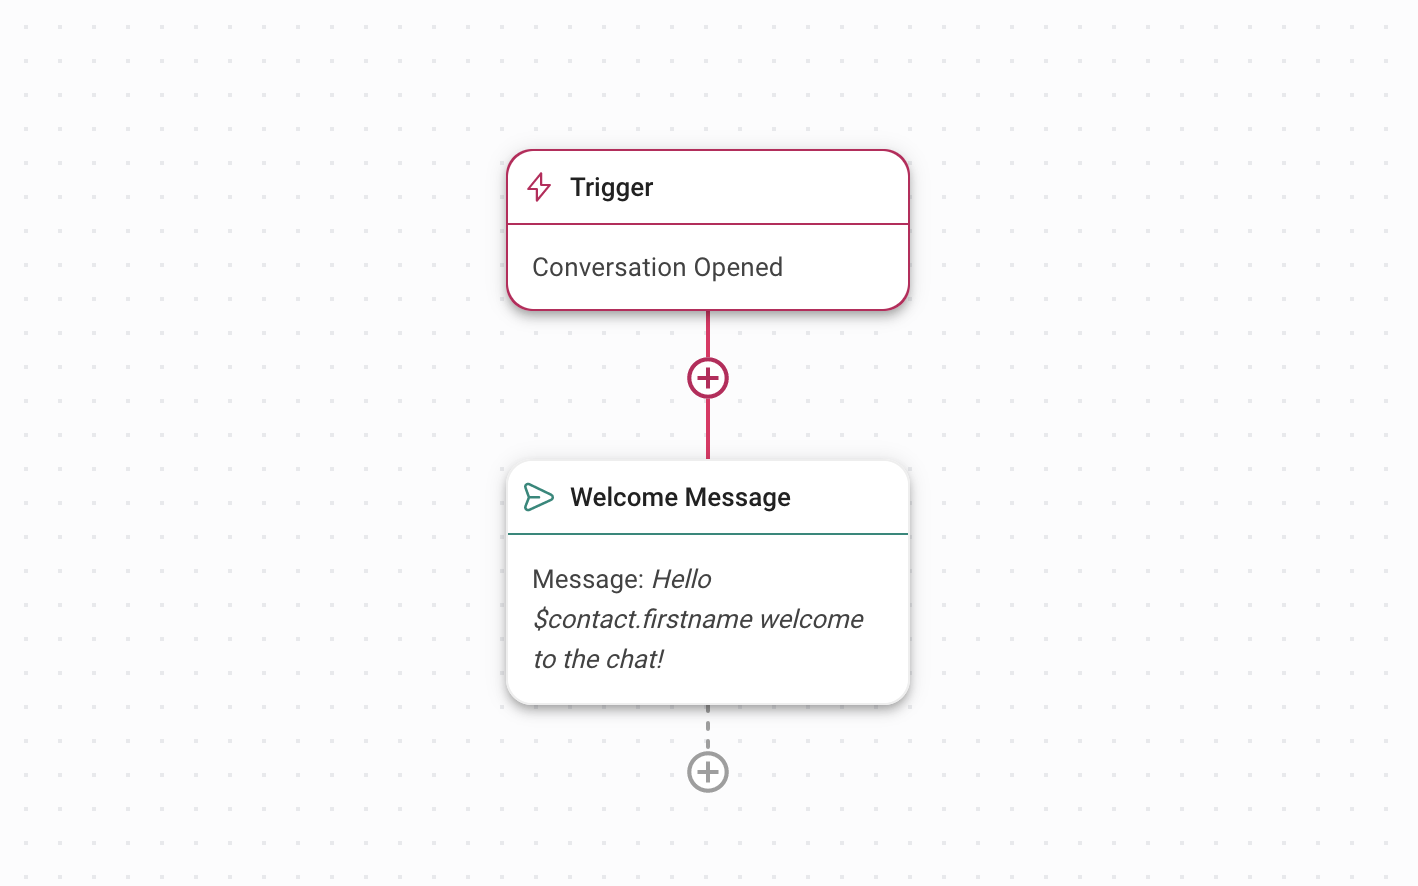
The Workflow template is set up with a Trigger and the Send a Message step. This sends an automated reply to Contacts when a conversation is opened.
{% hint style="info" %}
Learn more about [Triggers](https://docs.is-messenger.com/ismessenger/modules/workflow) and [Send a Message Step](https://docs.is-messenger.com/ismessenger/modules/workflow).
{% endhint %}
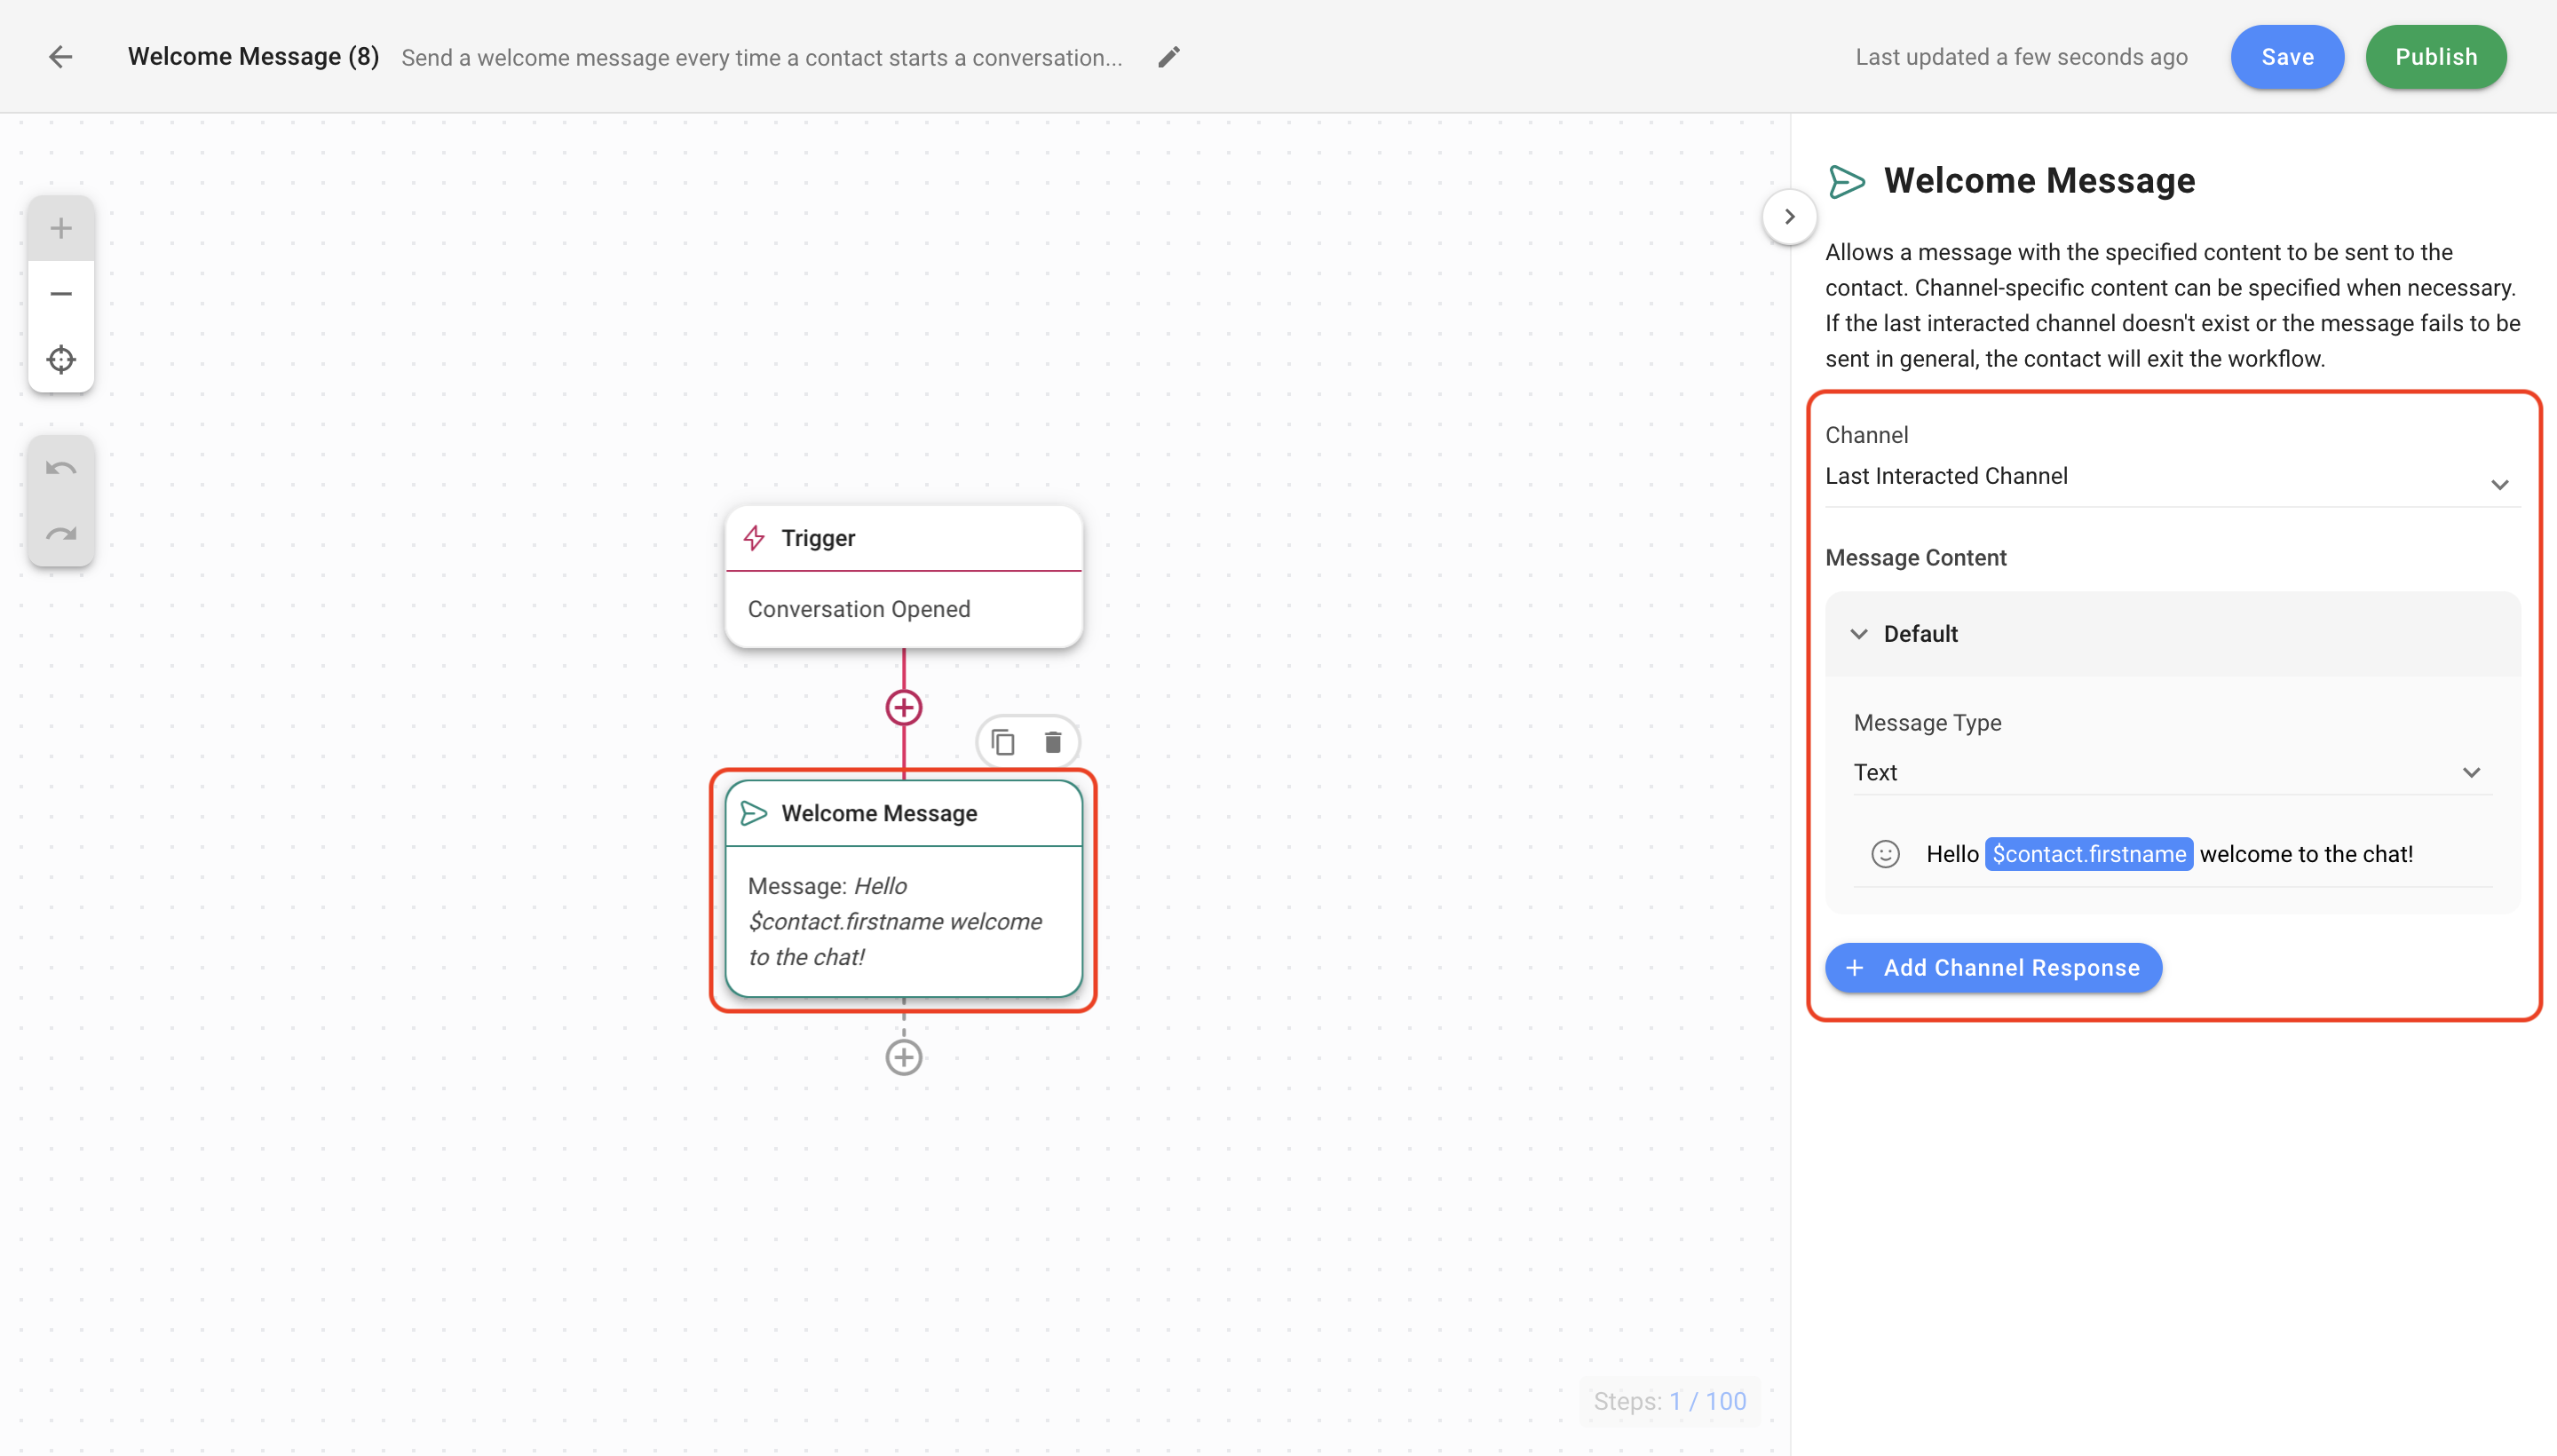
Edit the welcome and away messages to send an automated reply
Send a Message step configuration for Welcome Message
Click the **Welcome Message** step to edit the Message Content. The Message Type should remain as Text. Finally, click **Save** and **Publish** to activate the Workflow.\
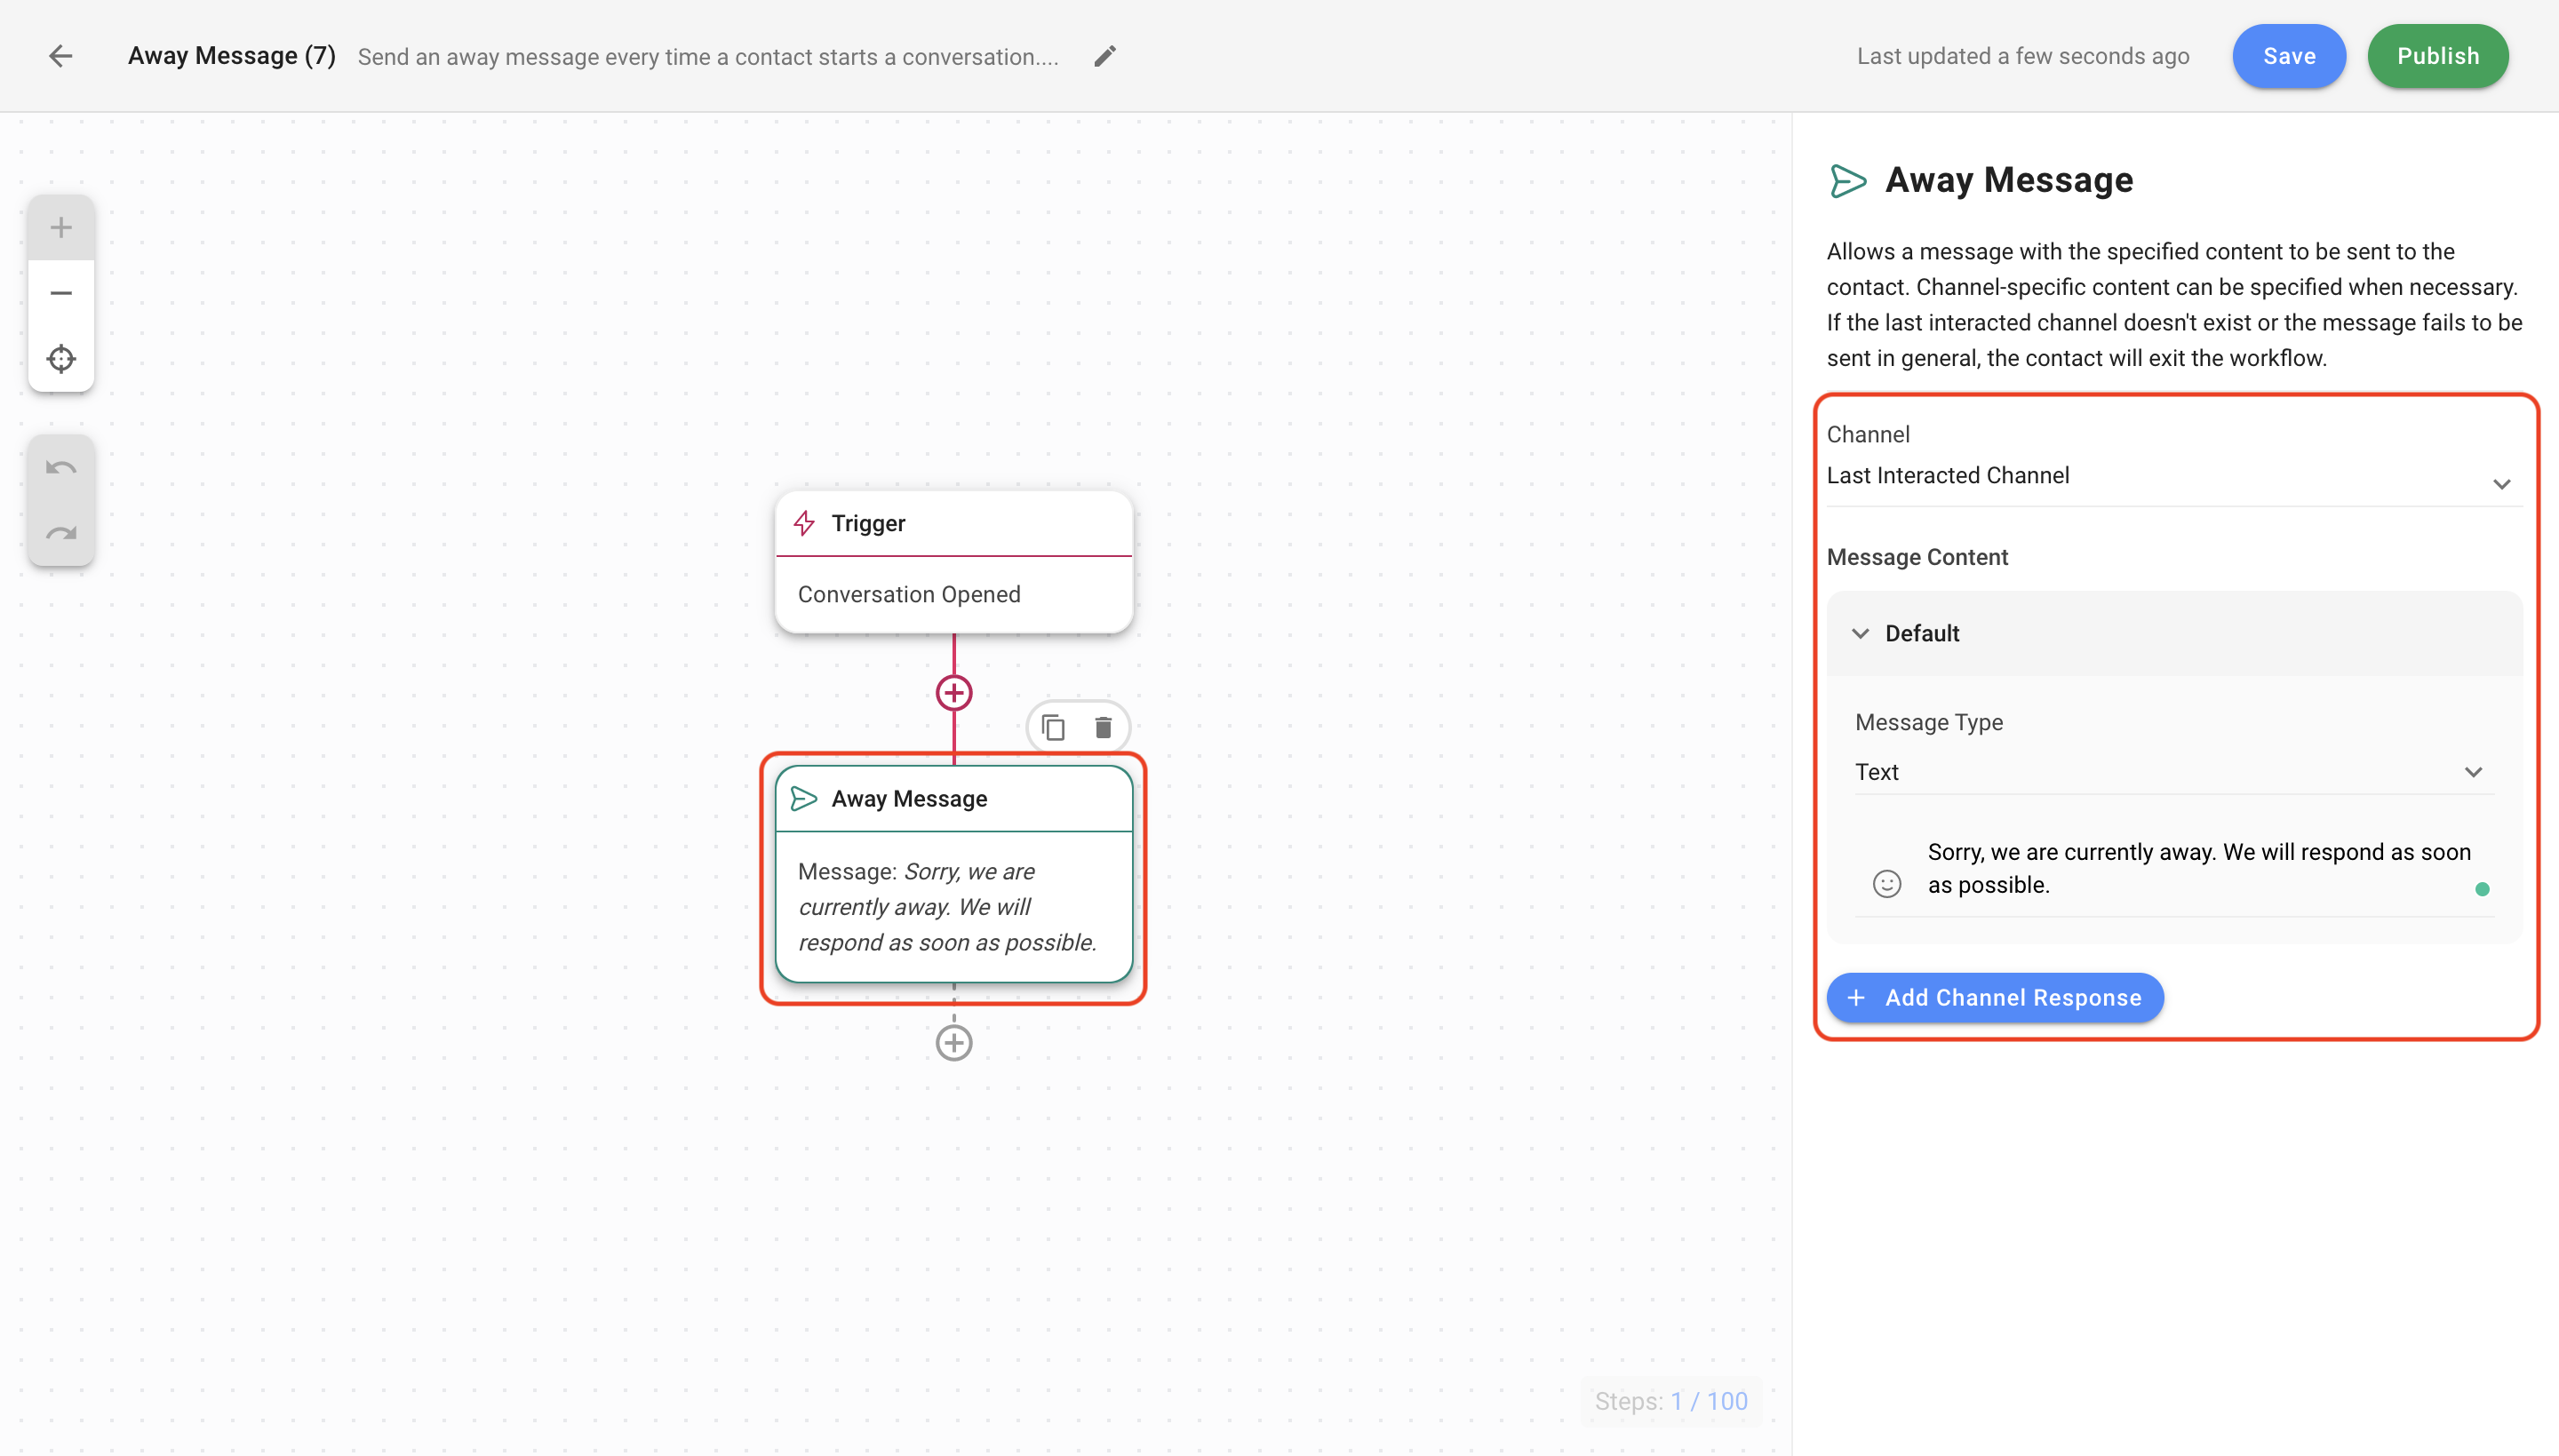
Send a Message step configuration for Away Message
Click the **Away Message** step to edit the Message Content. The Message Type should remain as Text. Finally, click **Save** and **Publish** to activate the Workflow.\
A basic Away Message lets Contacts know that no one is currently available. Turn this Workflow on when agents are all away and turn it off when they’re back online.\
\
### **Send welcome and away messages based on business hours**
{% hint style="success" %}
**Use this method** when you want to send a welcome message during business hours and an away message outside of these hours.
{% endhint %}
**Method Objectives**
* Set up the Workflow templates to send a welcome or away message based on business hours
* Configure business hours to send an automated reply
* Configure Welcome and Away message steps if needed
**Workflow Setup**
There are Workflow templates set up by our team that you can use immediately. You can edit the templates to fit your business needs.
{% hint style="info" %}
Learn more about [Workflow Templates here](https://docs.is-messenger.com/ismessenger/modules/workflow).
{% endhint %}
**Set up the Workflow templates to send a welcome or away message based on business hours**
On the respond.io platform menu, click **Workflows** > **+ Add Workflow.** Then, Click **Away Message with Business Hours** > **Use Template**.
To send an away message based on business hours, click **Away Message with Business Hours** > **Use Template**
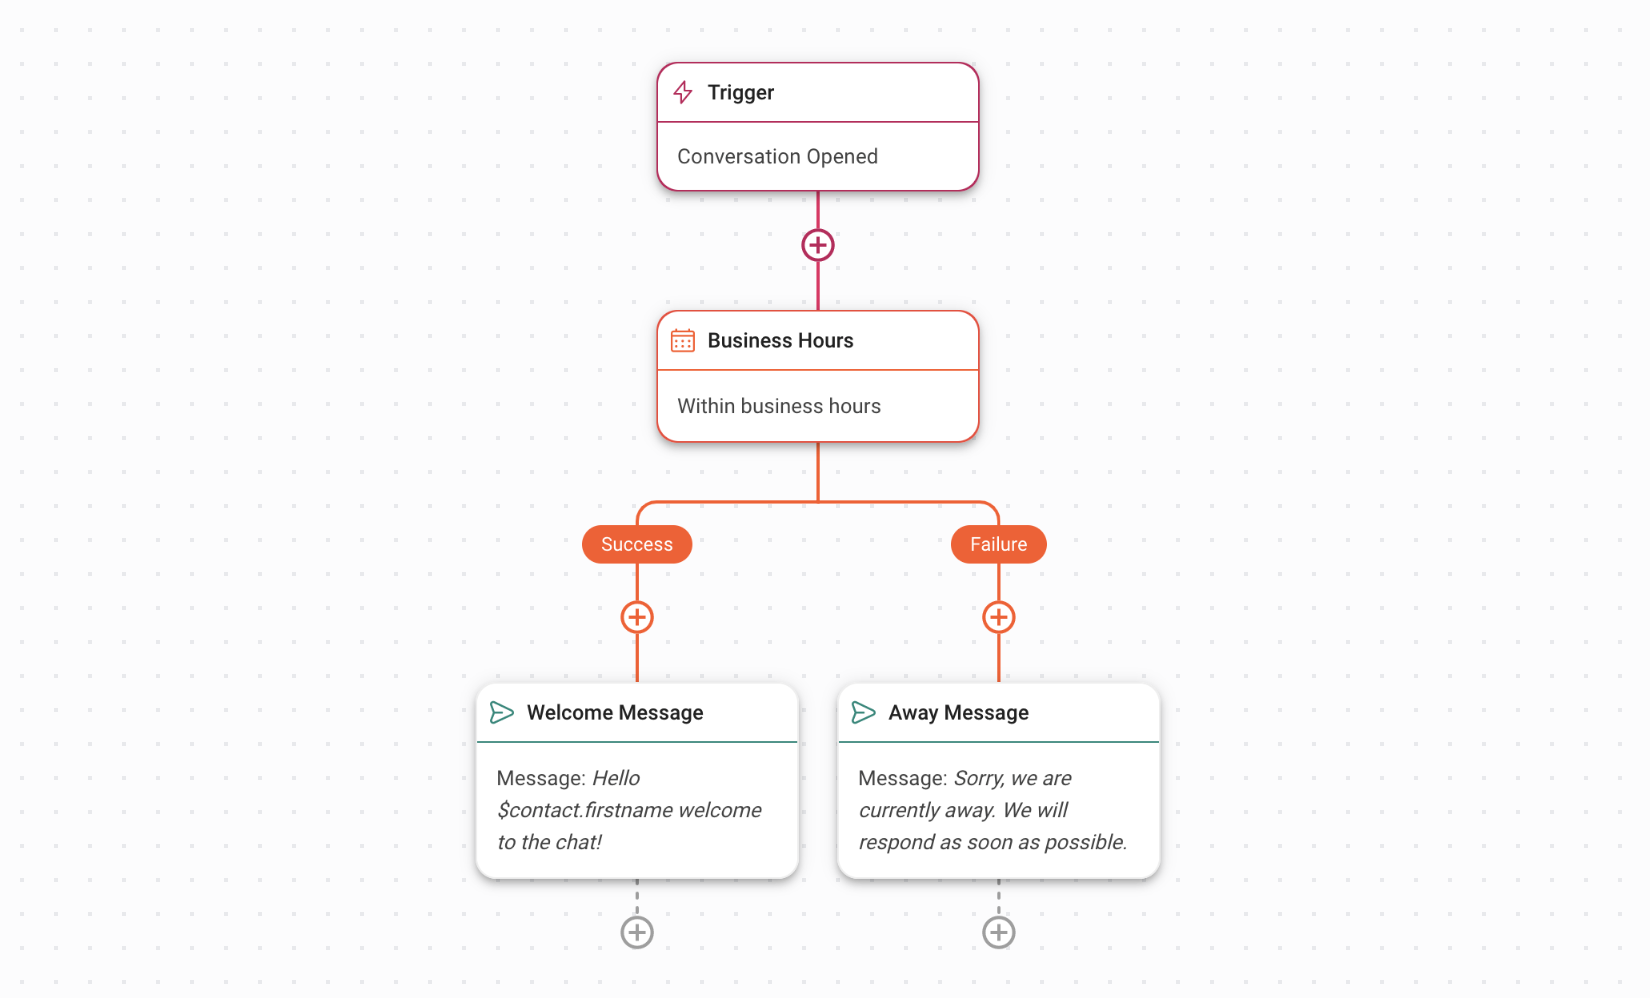
The Workflow template is set up with a Trigger, Date & Time step and the Send a Message step. This sends an automated reply to Contacts when a conversation is opened based on business hours.
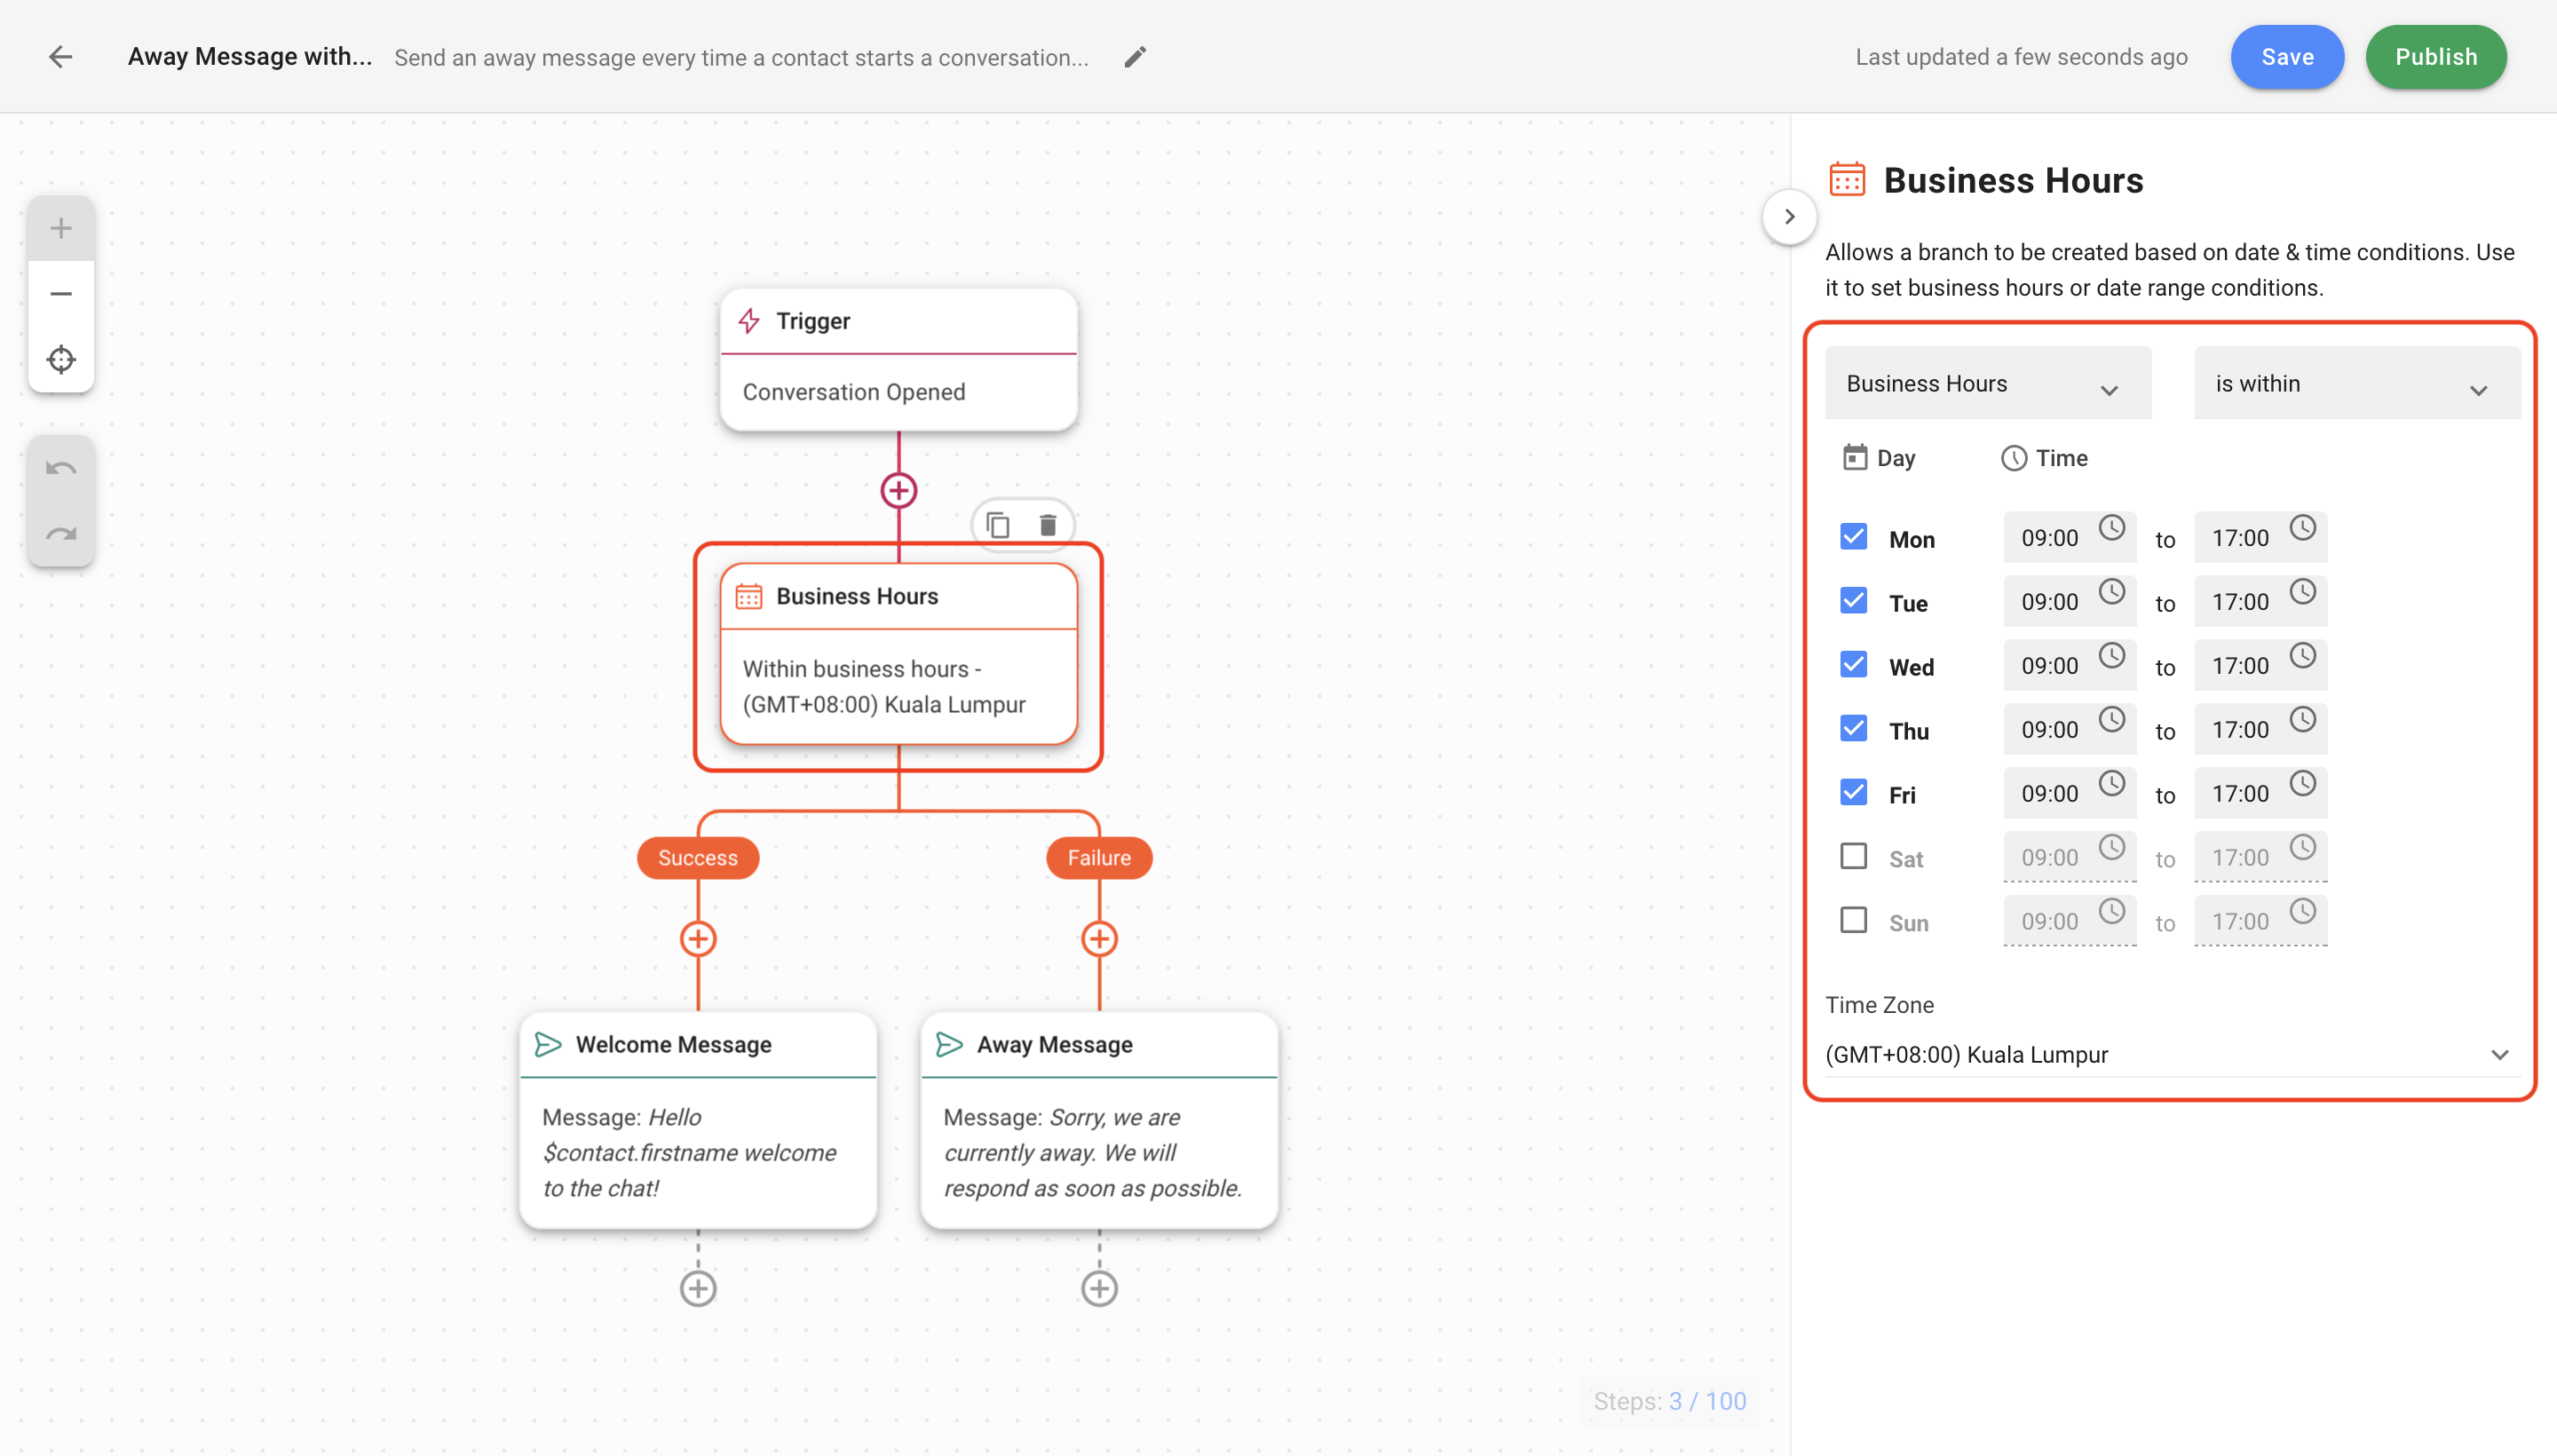
### **Configure business hours to send an automated reply**
Use the **Date & Time Step** to set your business hours.
{% hint style="info" %}
Learn more about [Date & Time Step](https://docs.is-messenger.com/ismessenger/modules/workflow).
{% endhint %}
### **Configure Welcome and Away message steps if needed**
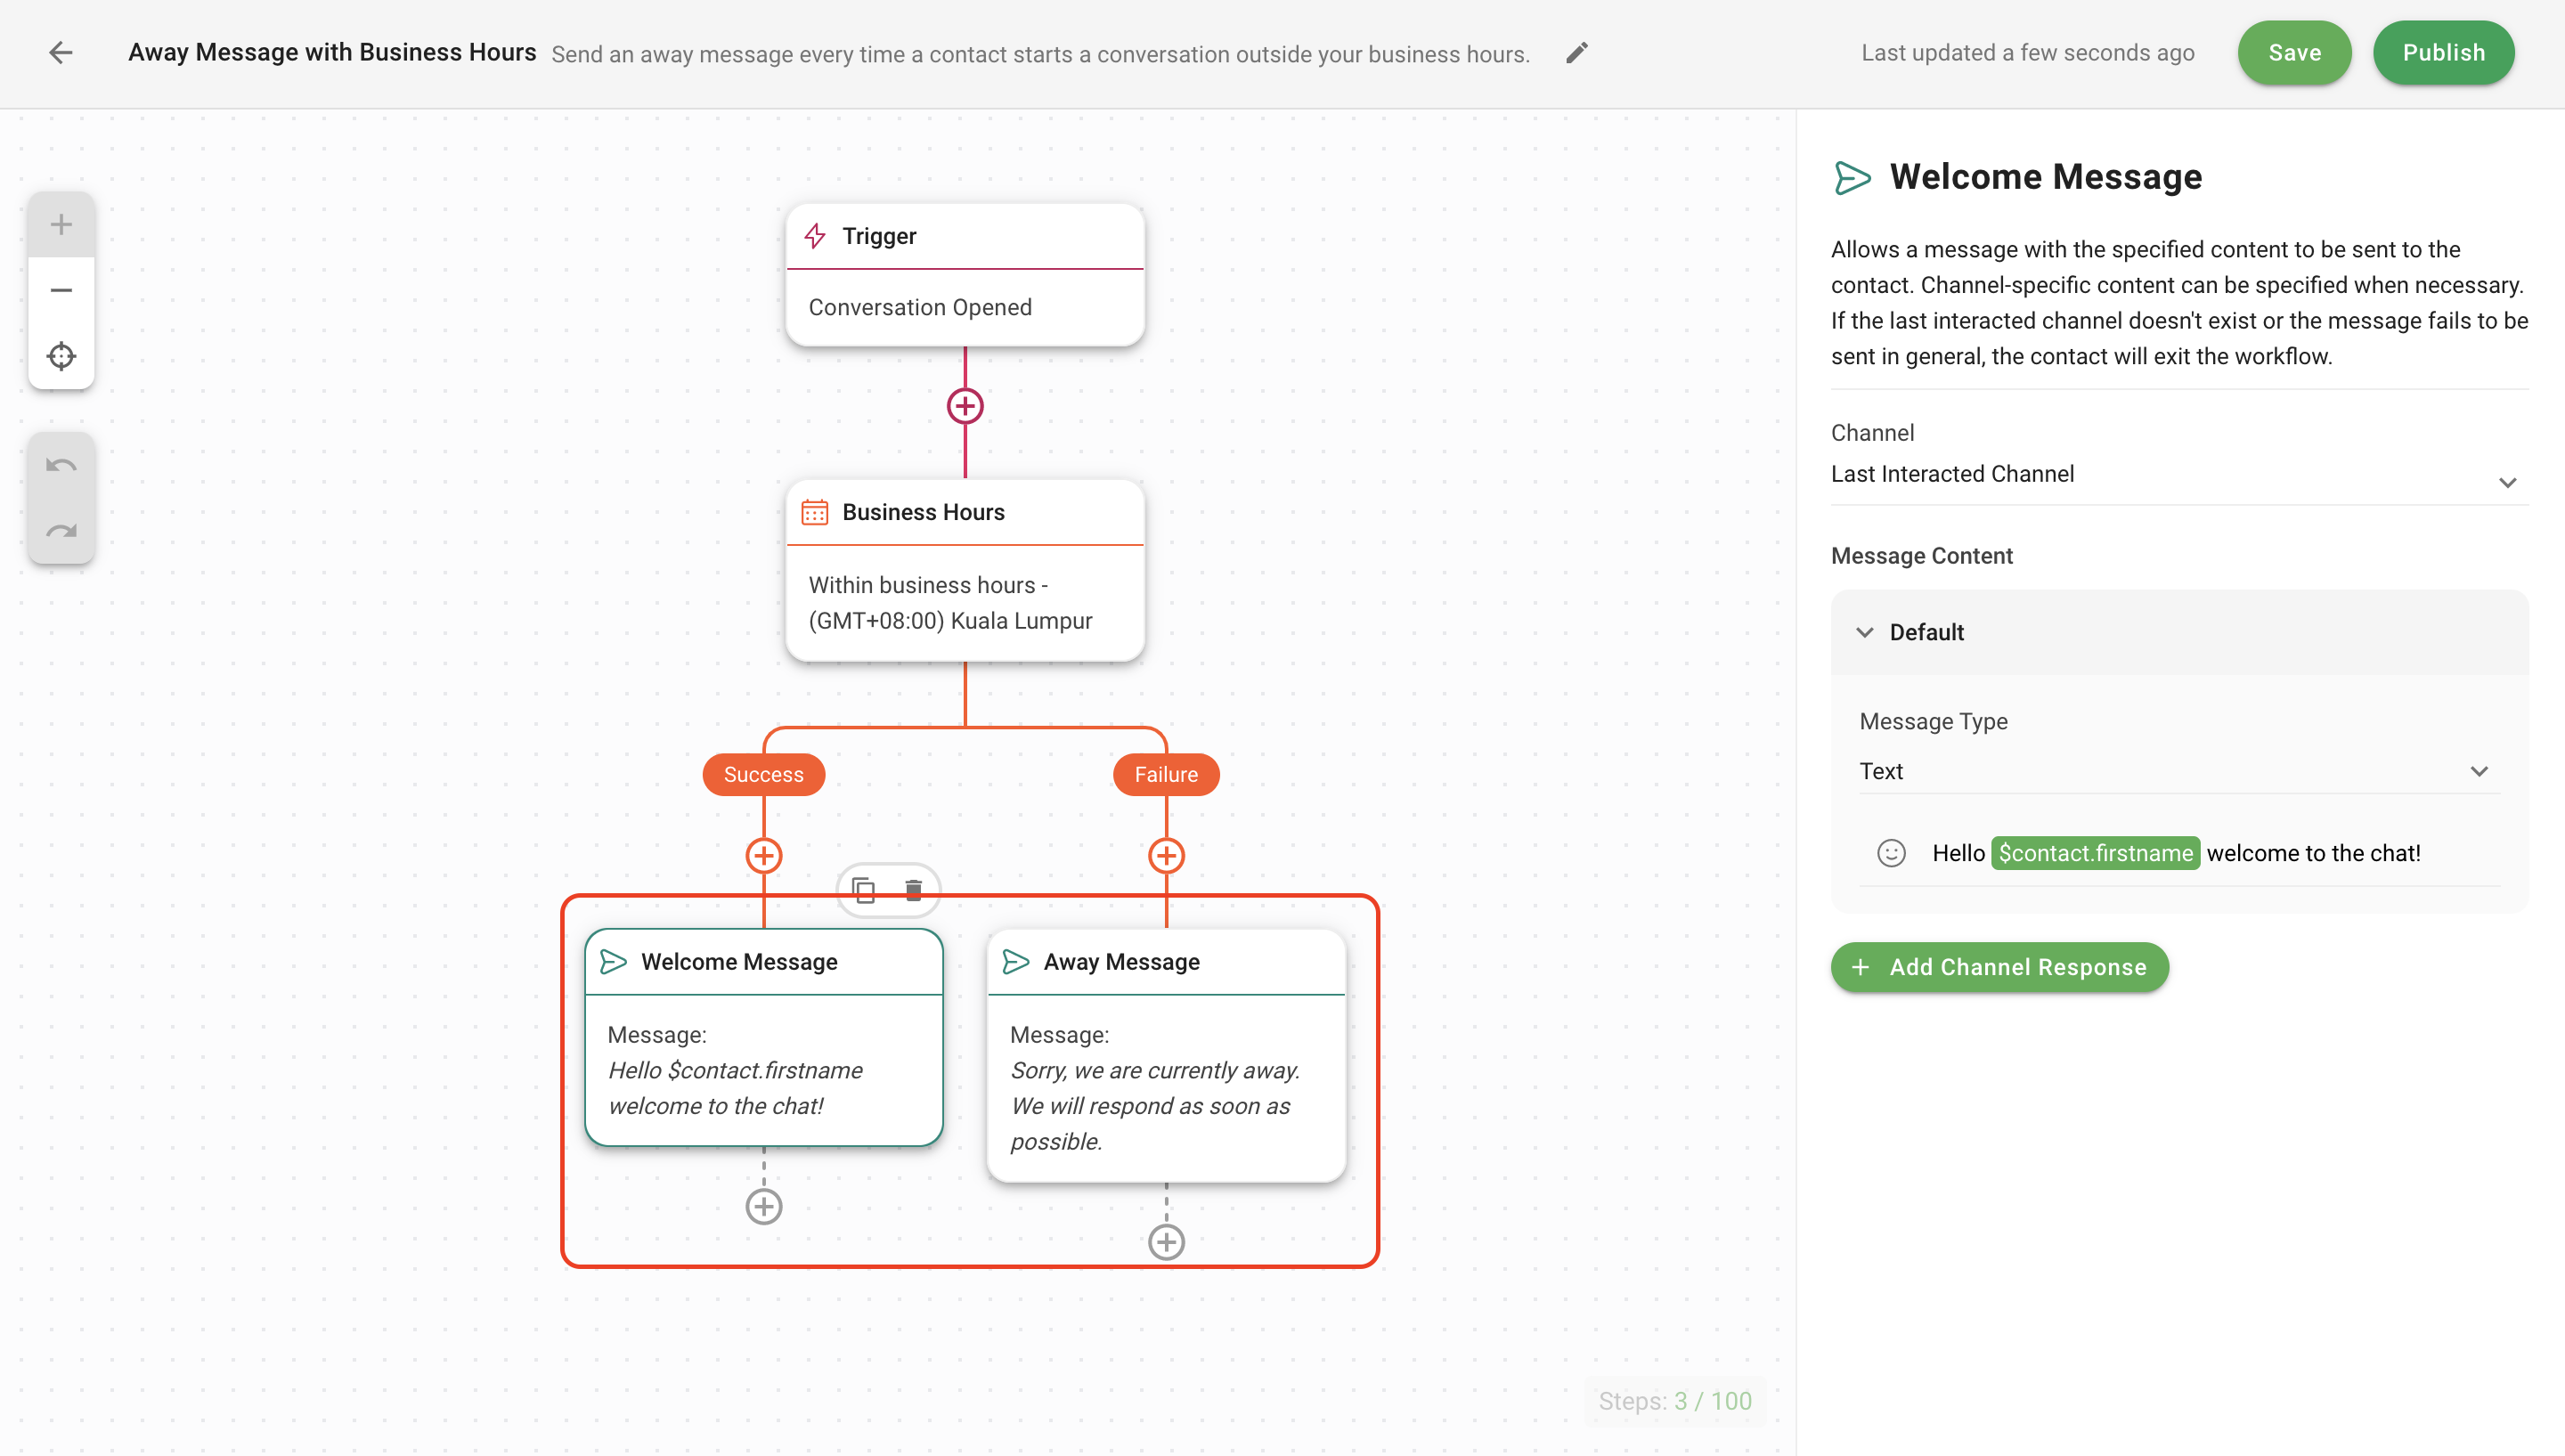
Use the **Send a Message Step** to send an automatic welcome or away message.
Click the **Welcome Message** or **Away Message** step to edit the Message Content. The Message Type should remain as Text. Finally, click **Save** and **Publish** to activate the Workflow.
{% hint style="info" %}
Learn how to [configure Welcome and Away messages](https://docs.is-messenger.com/ismessenger/getting-started/quick-start).
{% endhint %}