# Dialogflow : Managing Intents
#### What is an Intent?
Dialogflow's definition of Intent:
> An intent categorizes an end-user's intention for one conversation turn. For each agent, you define many intents, where your combined intents can handle a complete conversation. When an end-user writes or says something, referred to as an end-user expression, Dialogflow matches the end-user expression to the best intent in your agent. Matching an intent is also known as intent classification.
A basic intent contains the following :
* **Training phrases** - These are example phrases for what end-users might say. When an end-user expression resembles one of these phrases, Dialogflow matches the intent.
{% hint style="warning" %}
The template phrases will be deprecated and ignored during training. Learn more [here](https://cloud.google.com/dialogflow/es/docs/intents-training-phrases#example_and_template_modes).
{% endhint %}
* **Action** - You can define an action for each intent. When an intent is matched, Dialogflow provides the action to your system, and you can use the action to trigger certain actions defined in your system.
* **Parameters** - When an intent is matched at runtime, Dialogflow provides the extracted values from the end-user expression as parameters. Each parameter has a type, called the entity type, which dictates exactly how the data is extracted.
* **Responses** - You define text, speech, or visual responses to return to the end-user. These may provide the end-user with answers, ask the end-user for more information, or terminate the conversation.
A more complex intent may also contain the following:
* **Contexts:** Dialogflow contexts are similar to natural language context. If a person says to you "they are orange", you need context in order to understand what the person is referring to. Similarly, for Dialogflow to handle an end-user expression like that, it needs to be provided with context in order to correctly match an intent.
* **Events:** With events, you can invoke an intent-based on something that has happened, instead of what an end-user communicates.
{% hint style="info" %}
The intents can be triggered based on your contacts' **Country** and **Language**. If your contact has a country or language value present in their contact details, the intents can be triggered based on the different values of country and language.
{% endhint %}
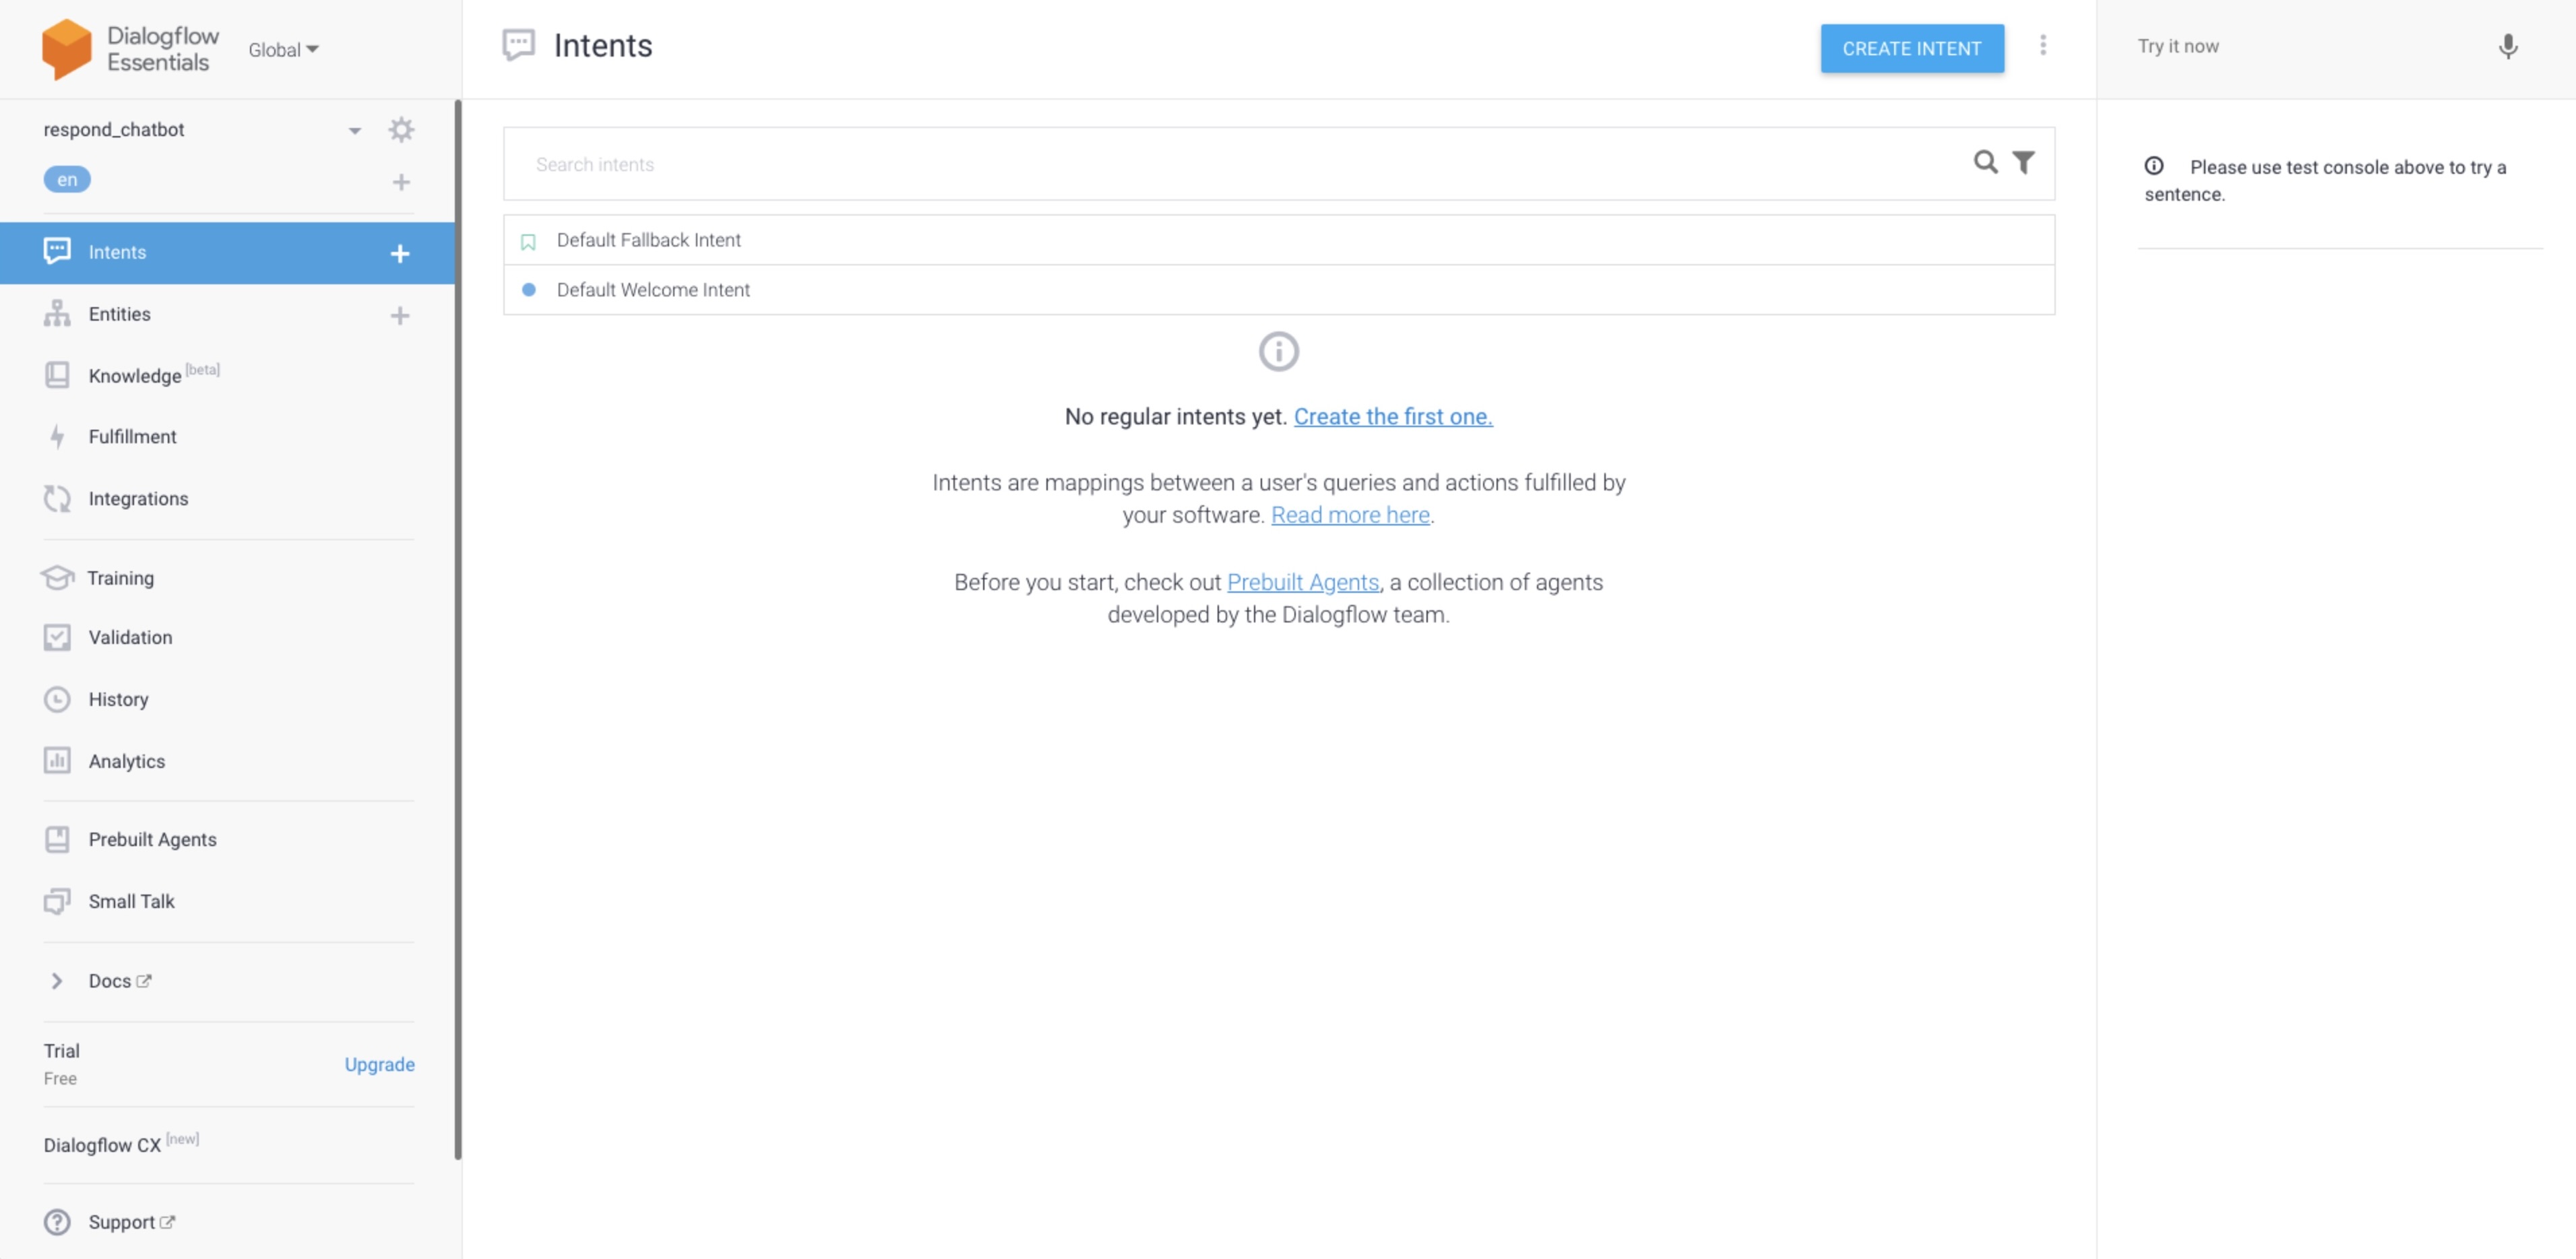
### Viewing Intents
**Step 1: Login to Dialogflow**
Navigate to the [Dialogflow](https://dialogflow.cloud.google.com/#/agent/appointmentscheduler-fiqd/intents) console and login with your user credentials.
**Step 2: Navigate to Intents**
Select the agent you would like to configure and select Intents from the side navigation menu
{% hint style="success" %}
All the default intents and created intents will be listed in this view.
{% endhint %}
### Default Intents
When you create an agent, two default intents will be created for you by Dialogflow.
* **Default Welcome Intent:** This intent is matched when the contact begins a conversation with the platform. This intent should return a response that lets the end-user know what your agent does or what they can say to begin a conversation.
* **Default Fallback Intent:** This intent is matched when the agent cannot match the end-user expression to any other intent.
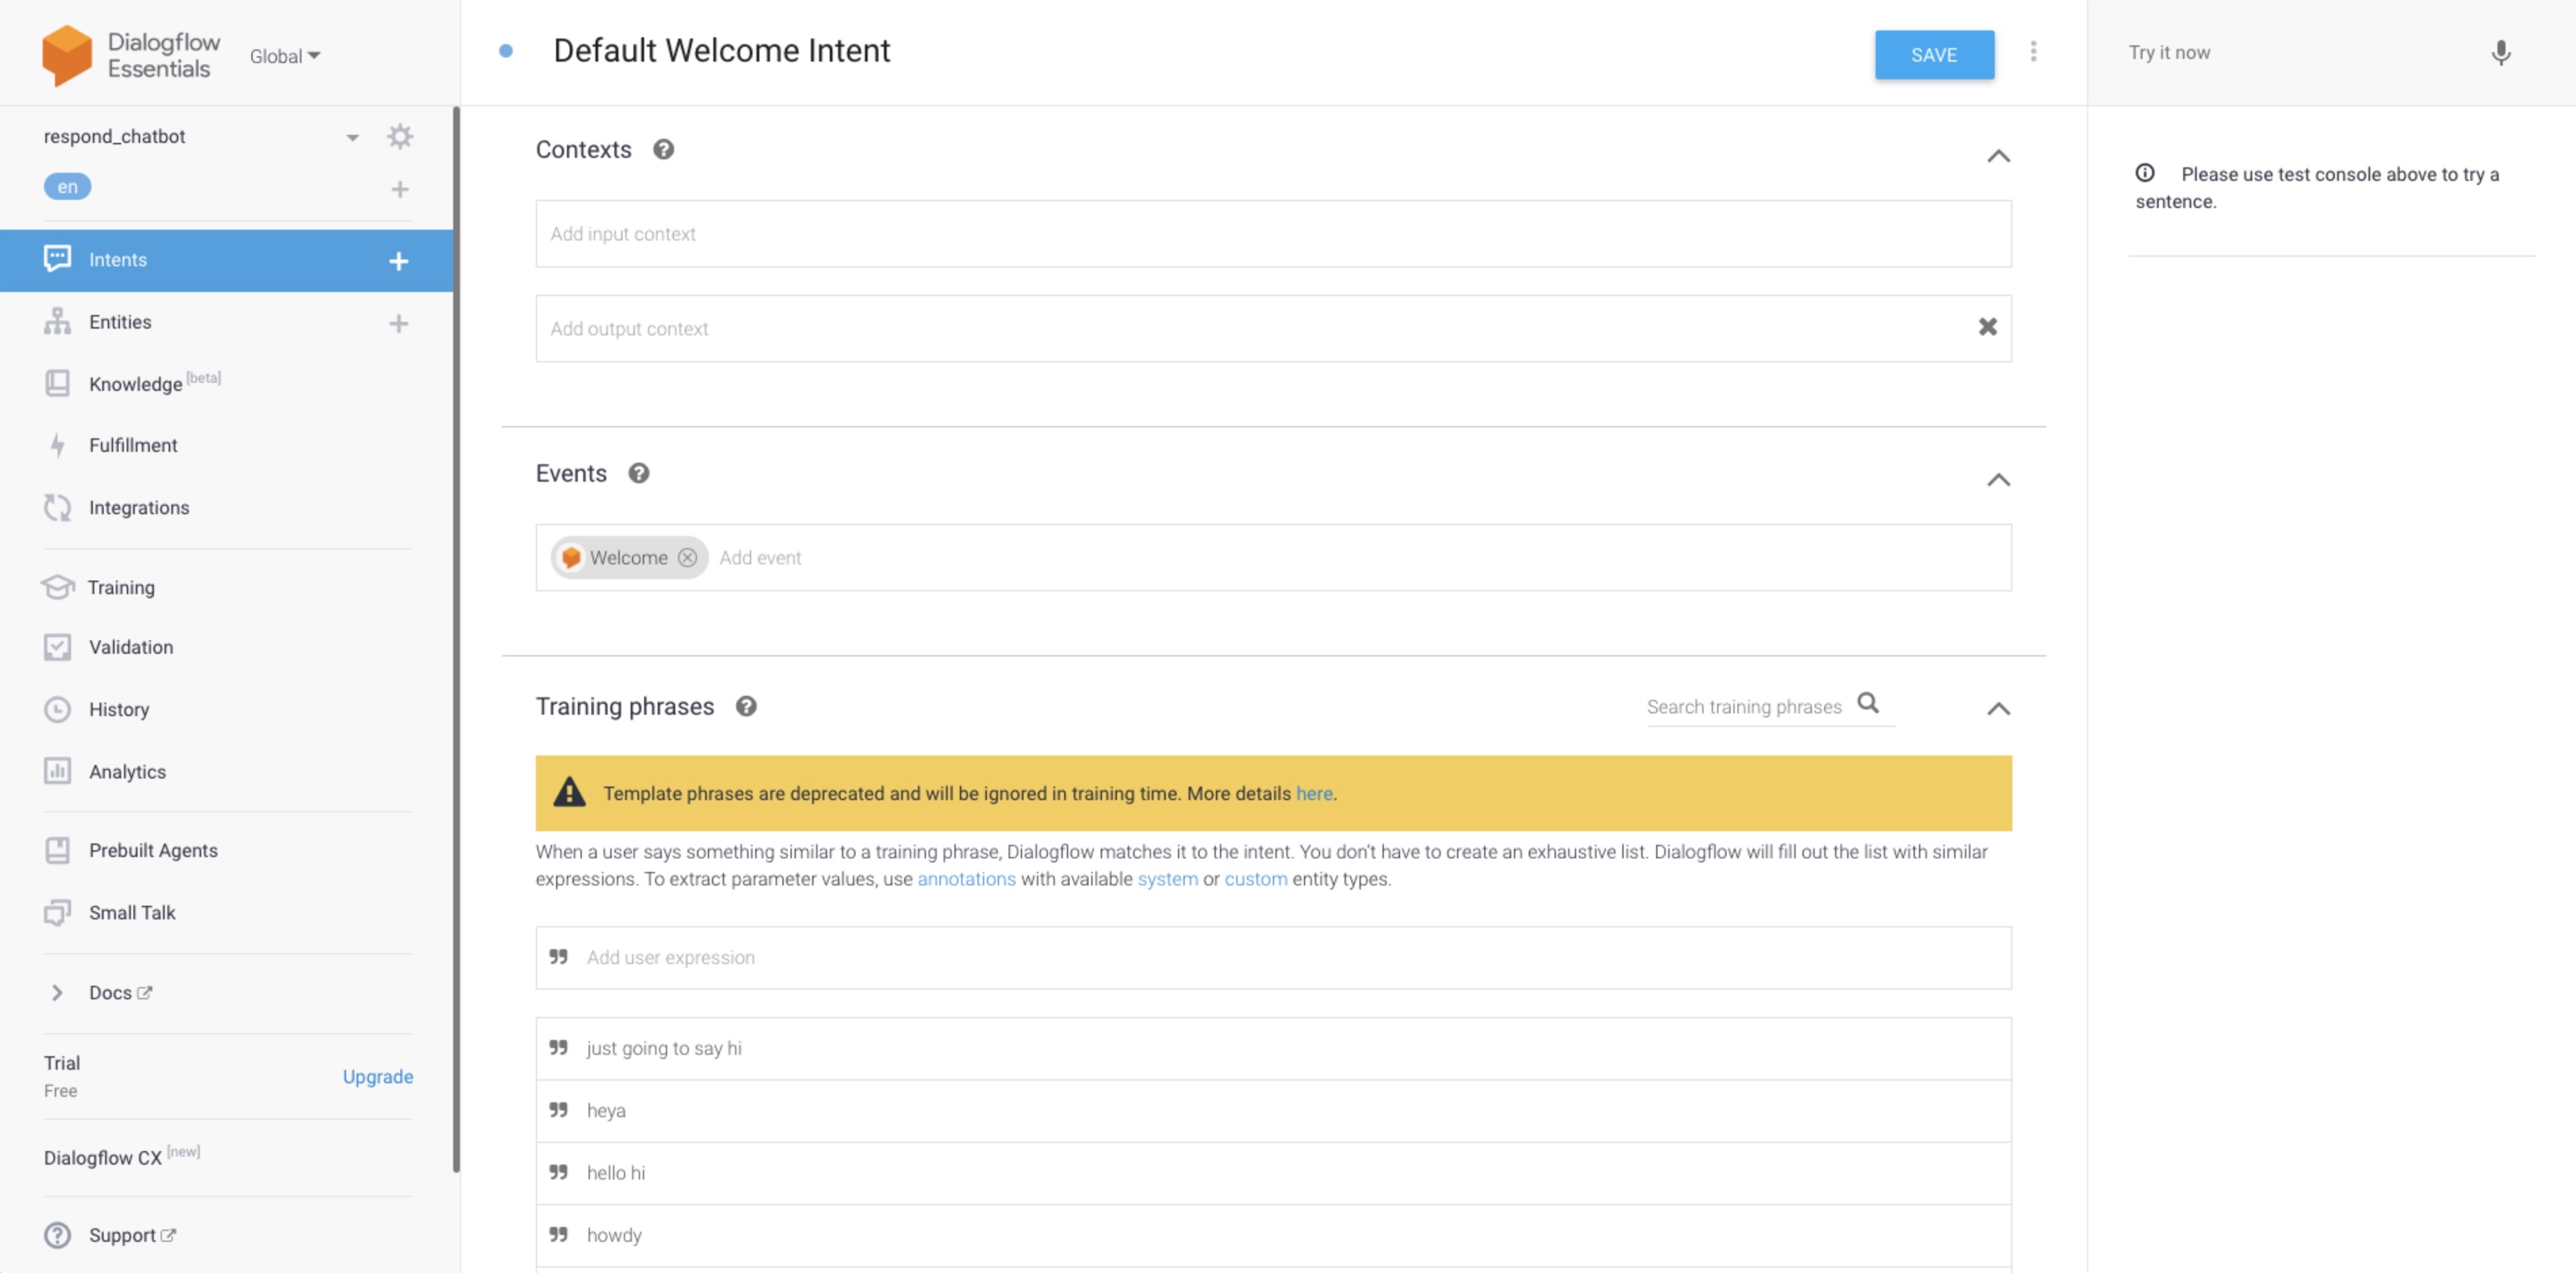
### **Default Welcome Intent**
{% hint style="info" %}
**Tip:** Learn more about [Dialogflow's definition of Default Welcome Intent](https://cloud.google.com/dialogflow/es/docs/intents-default#welcome).
{% endhint %}
As you can see, the Default Welcome Intent has a pre-requisite of Welcome event and greetings phrases. When a contact messages you for the first time, this intent will be matched according to what was specified.
Refer to the following example:
{% hint style="info" %}
**Suggestion:** To manage Contact's expectations, we suggest including responses that inform the contact that they are interacting with a chatbot.
{% endhint %}
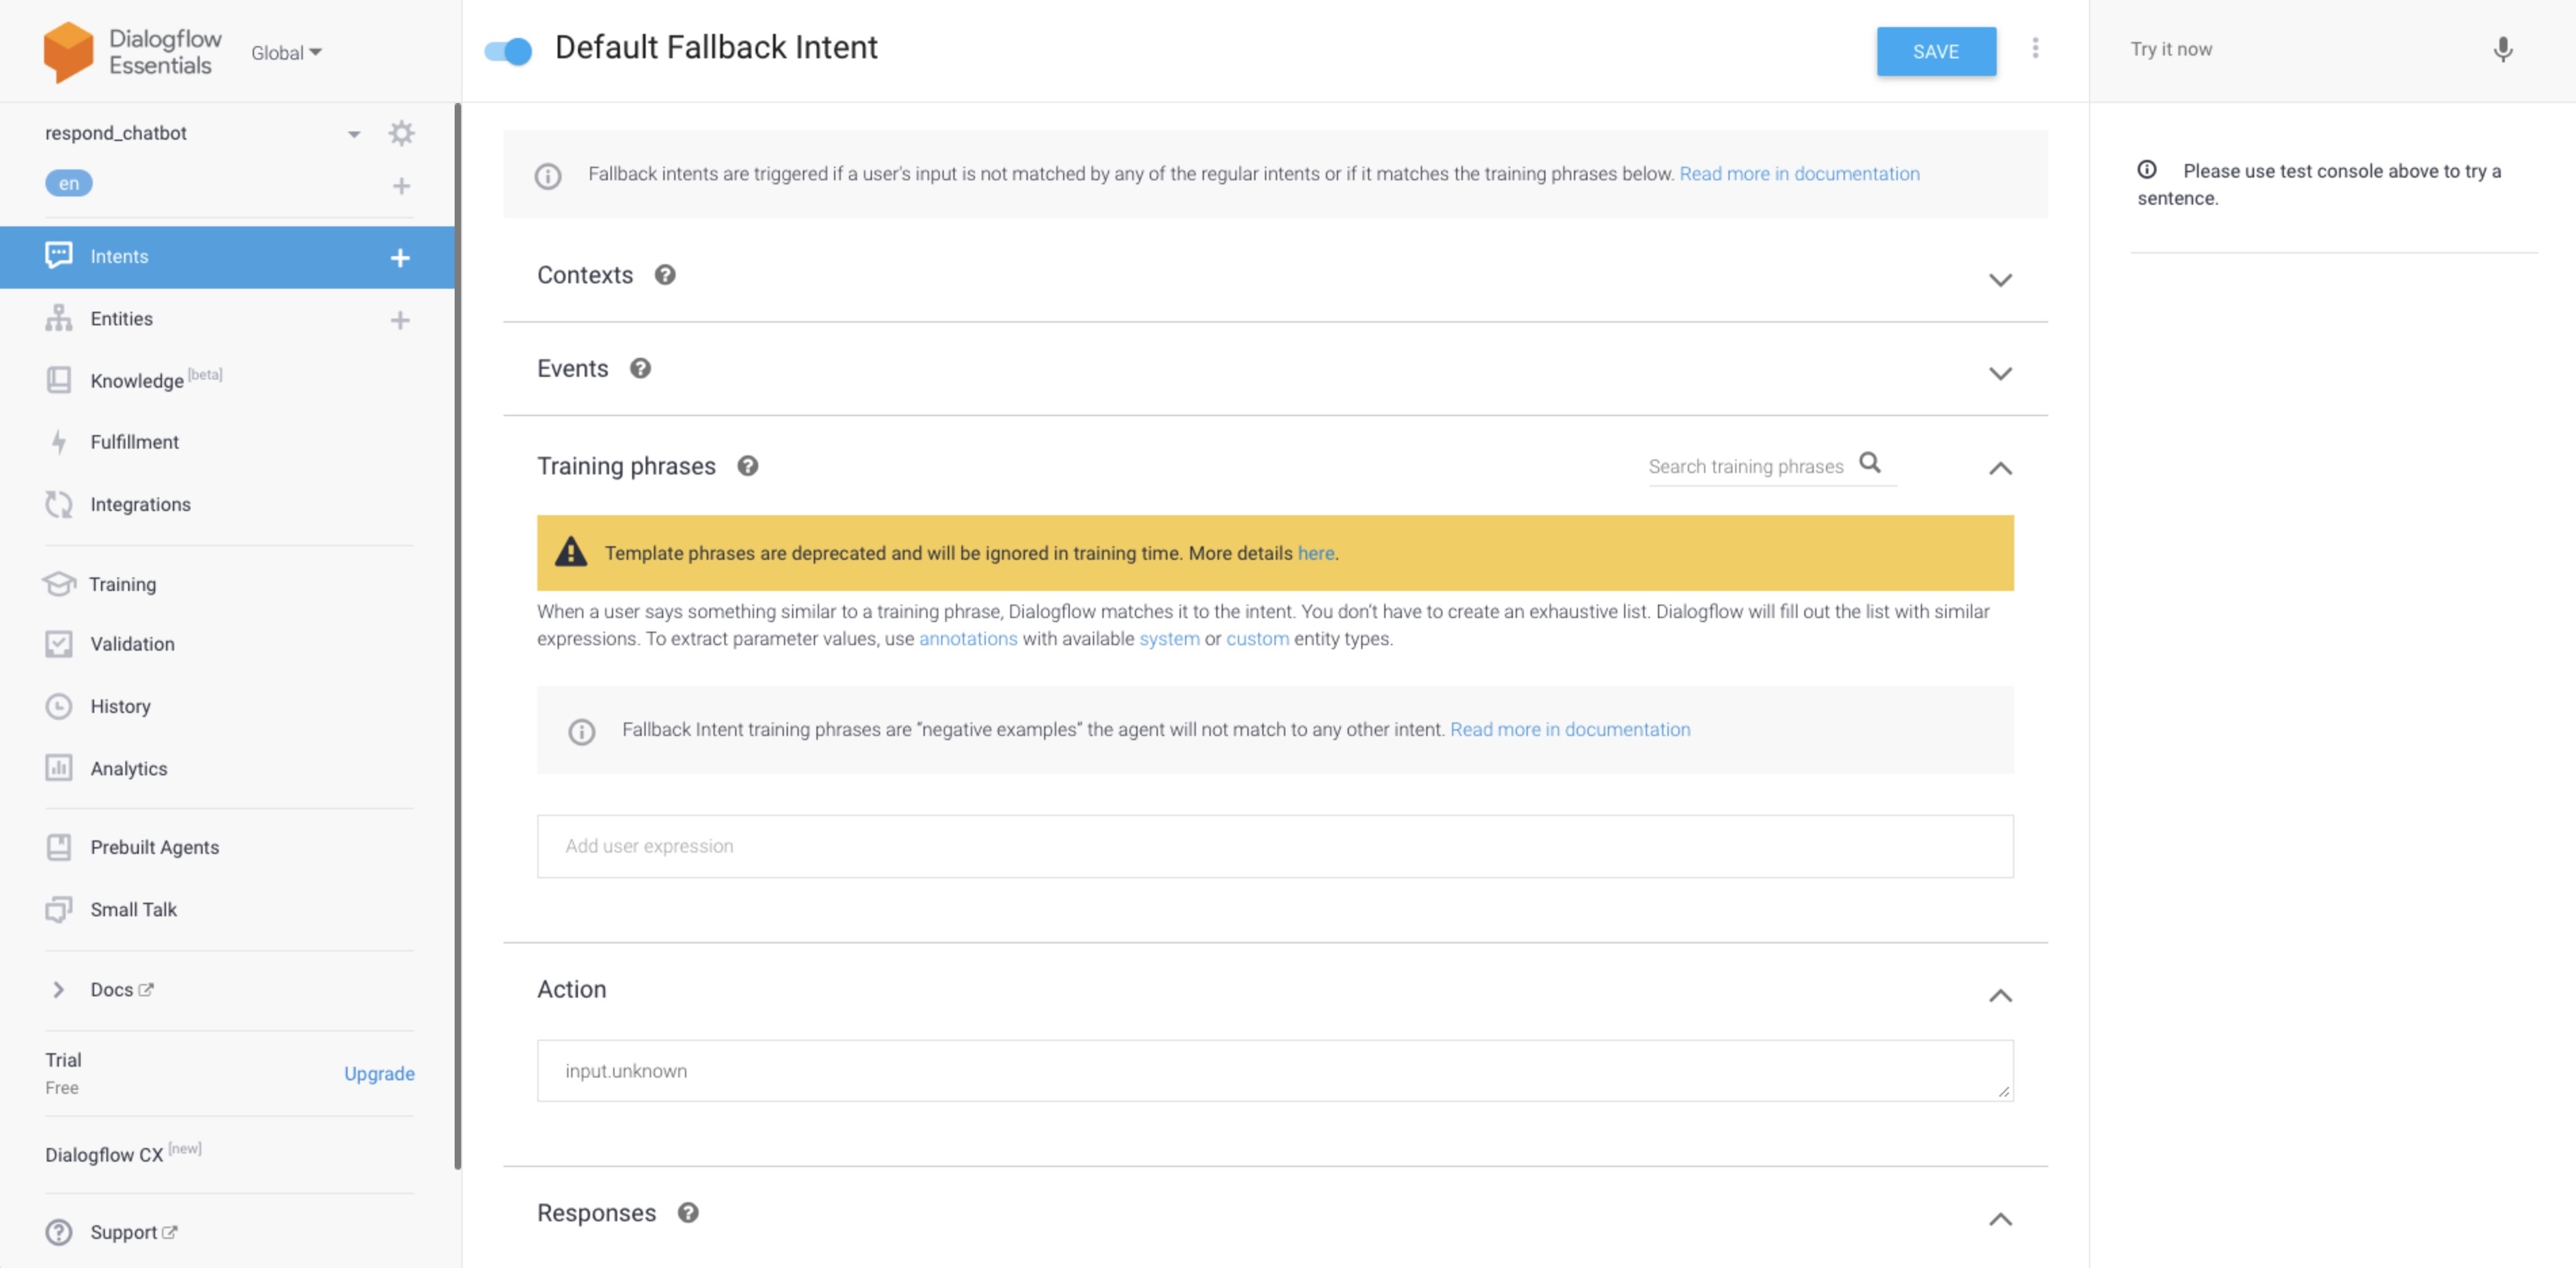
### **Default Fallback Intent**
{% hint style="info" %}
**Tip:** Learn more about Dialogflow's [definition of Default Fallback Intent](https://cloud.google.com/dialogflow/es/docs/intents-default#welcome).
{% endhint %}
When the incoming message or event does not match any of the existing intents, a fallback intent will be matched instead.
Refer to the following example :
{% hint style="info" %}
**Suggestion:** If the Agent cannot understand the message, the Agent should offer to hand off the conversation to a live agent to help with the contact's issue.
{% endhint %}
### Creating an Intent
You can create new intents if you would like to create automated processes for specific use cases. With Parameters and Events, intents can be created to suit multiple use cases.
In order to help you better understand, the following guide will be based on a specific use case as described below:
> Company XYZ often receives queries on order status from the website's webchat. As they were going through the conversations, they detected a common pattern where their agents would ask for the customer's customer ID to further check the issue or resolve the enquiry. Once they obtained the customer ID from the customer, they would update the custom field and add it as a tag.
Based on the scenario above, the process of obtaining the customer ID can be done by the chatbot. Once the customer ID is obtained, the contact will be handoff to a human agent for further assistance.
Let's break it down into simpler steps:
1. Create an intent to prompt for customer ID.
2. Create an intent to obtain the customer ID.
3. Save the customer ID as a custom field on IS-Messenger.
4. Add a tag.
5. Hand off the conversation to a human agent.
6. Notify the human agent.
7. Disable the bot.
### **Creating a Basic Intent**
**Step 1: Create Intent**
Navigate to the [Dialogflow console](https://dialogflow.cloud.google.com/#/agent/appointmentscheduler-fiqd/intents) and press Intents from the side navigation menu. Press the ➕
or **CREATE INTENT** from the top of the module.
**Step 2: Name your Intent**
Enter a name for your intent. Your intent name should represent the end-user expressions it recognizes.
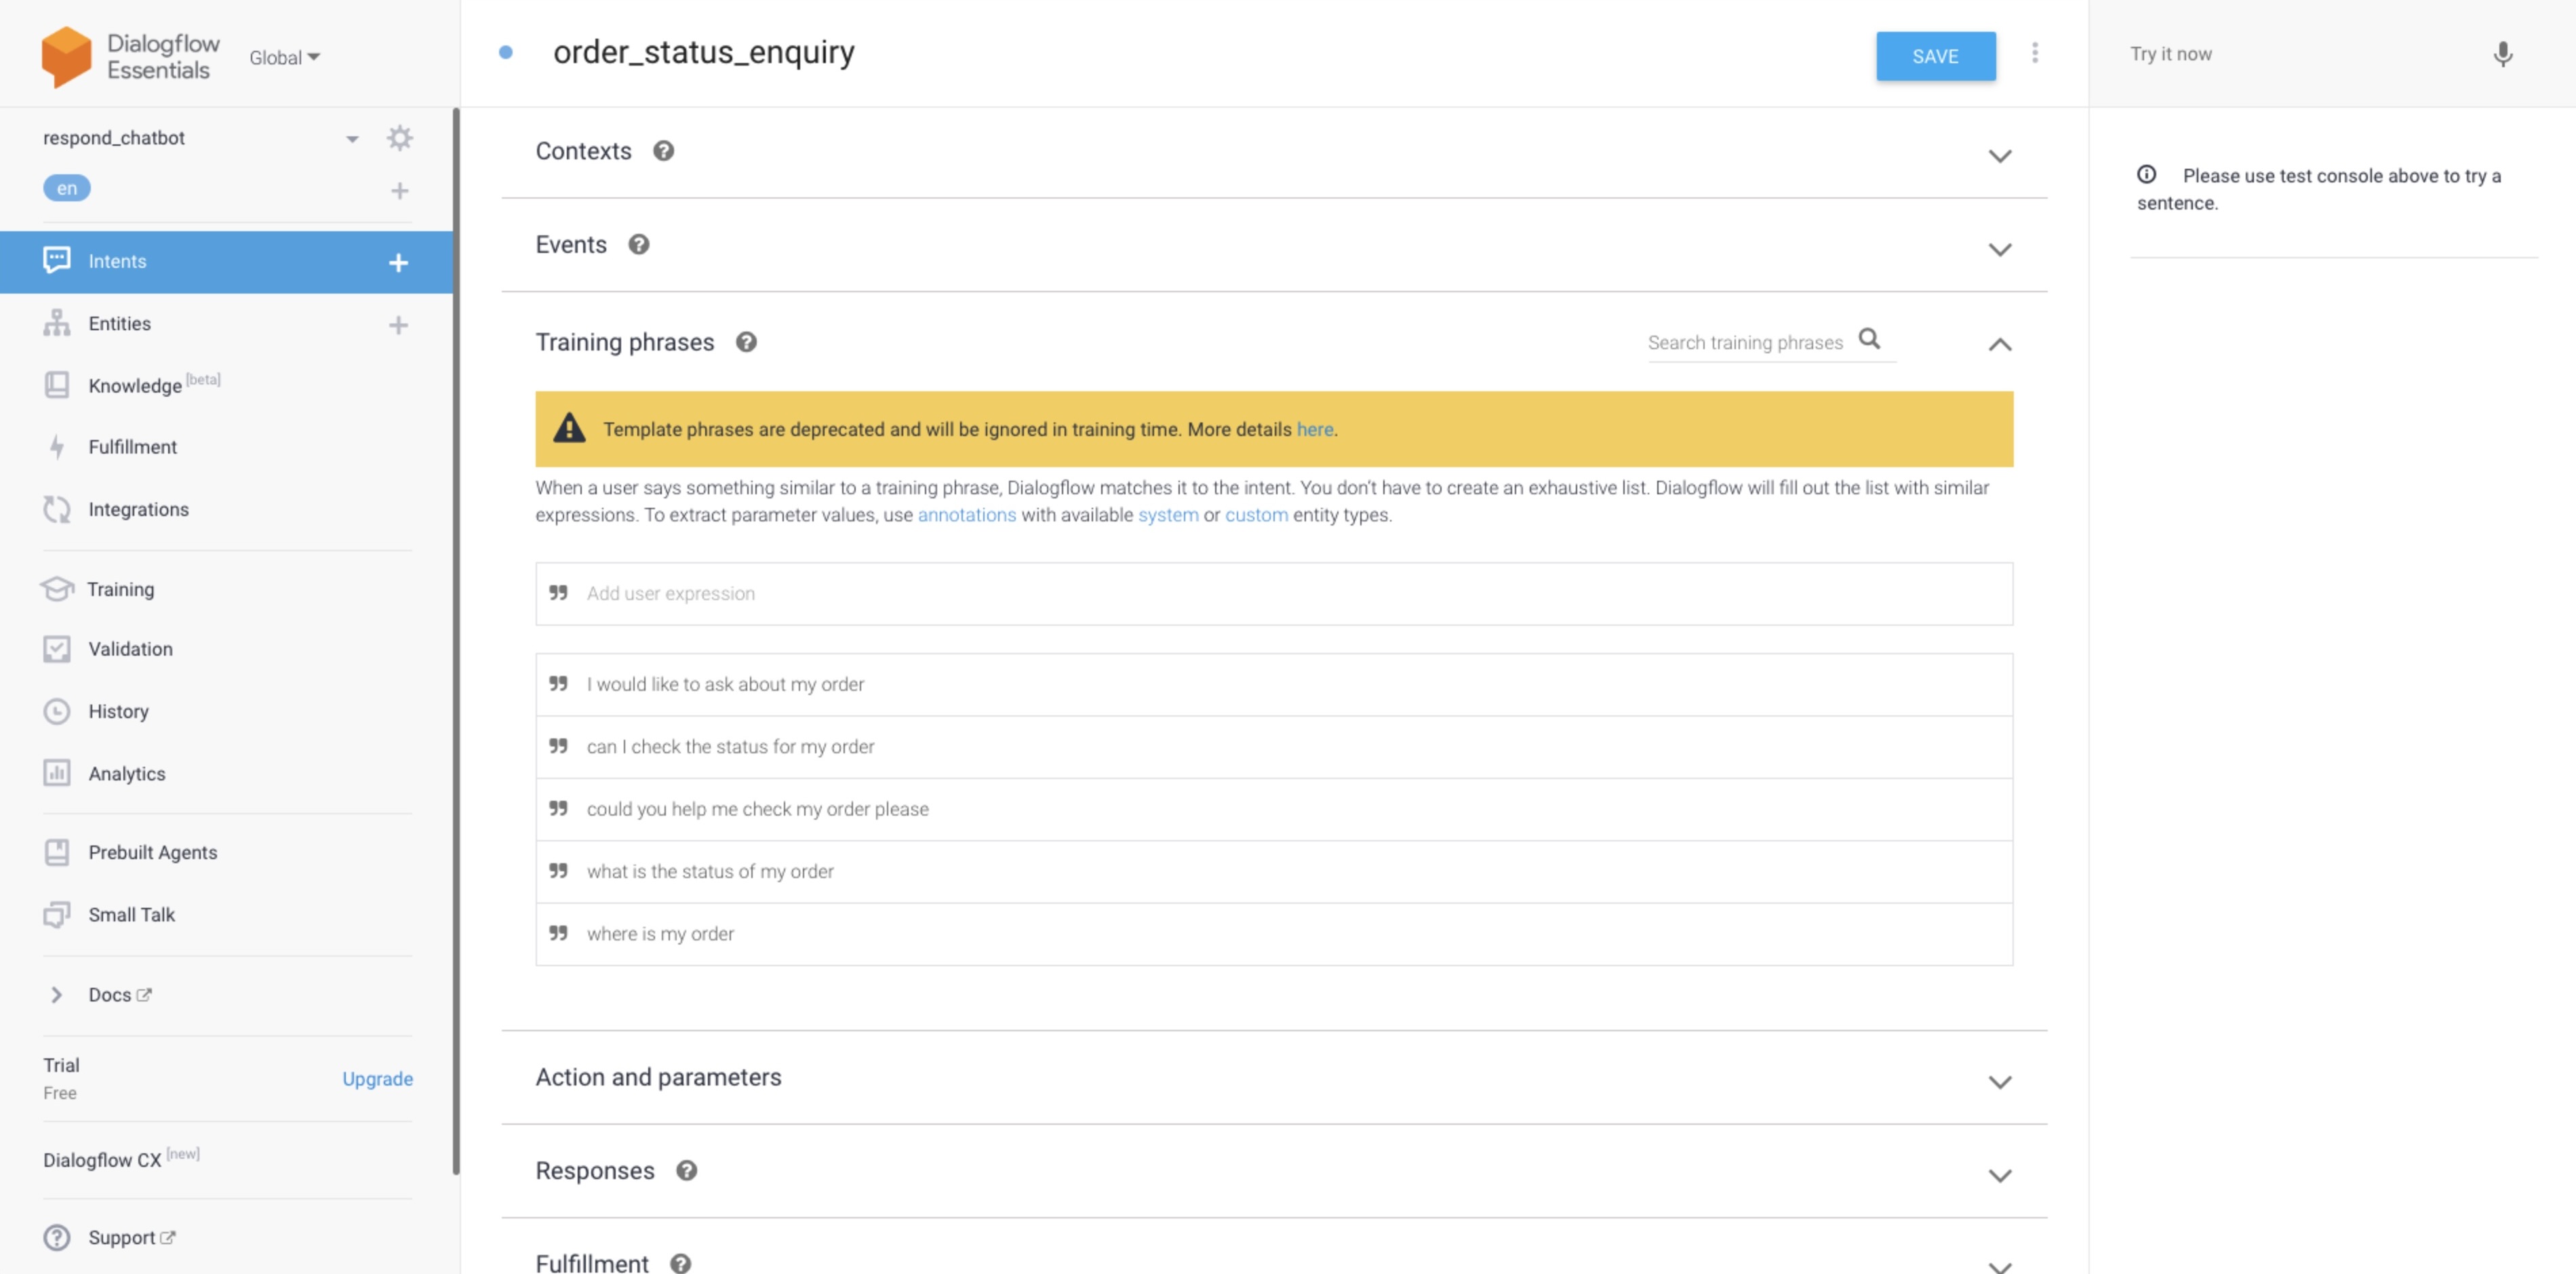
For this scenario, we'll name it `order_status_enquiry`.
**Step 3: Include Training Phrases**
Based on the scenario above, we should include training phrases that asked for order status specifically. Start by typing in the placeholders in Training Phrases section. You can include multiple phrases to cater for different type of phrases.
For example:
> where is my order
> could you help me check my order please
> what is the status of my order
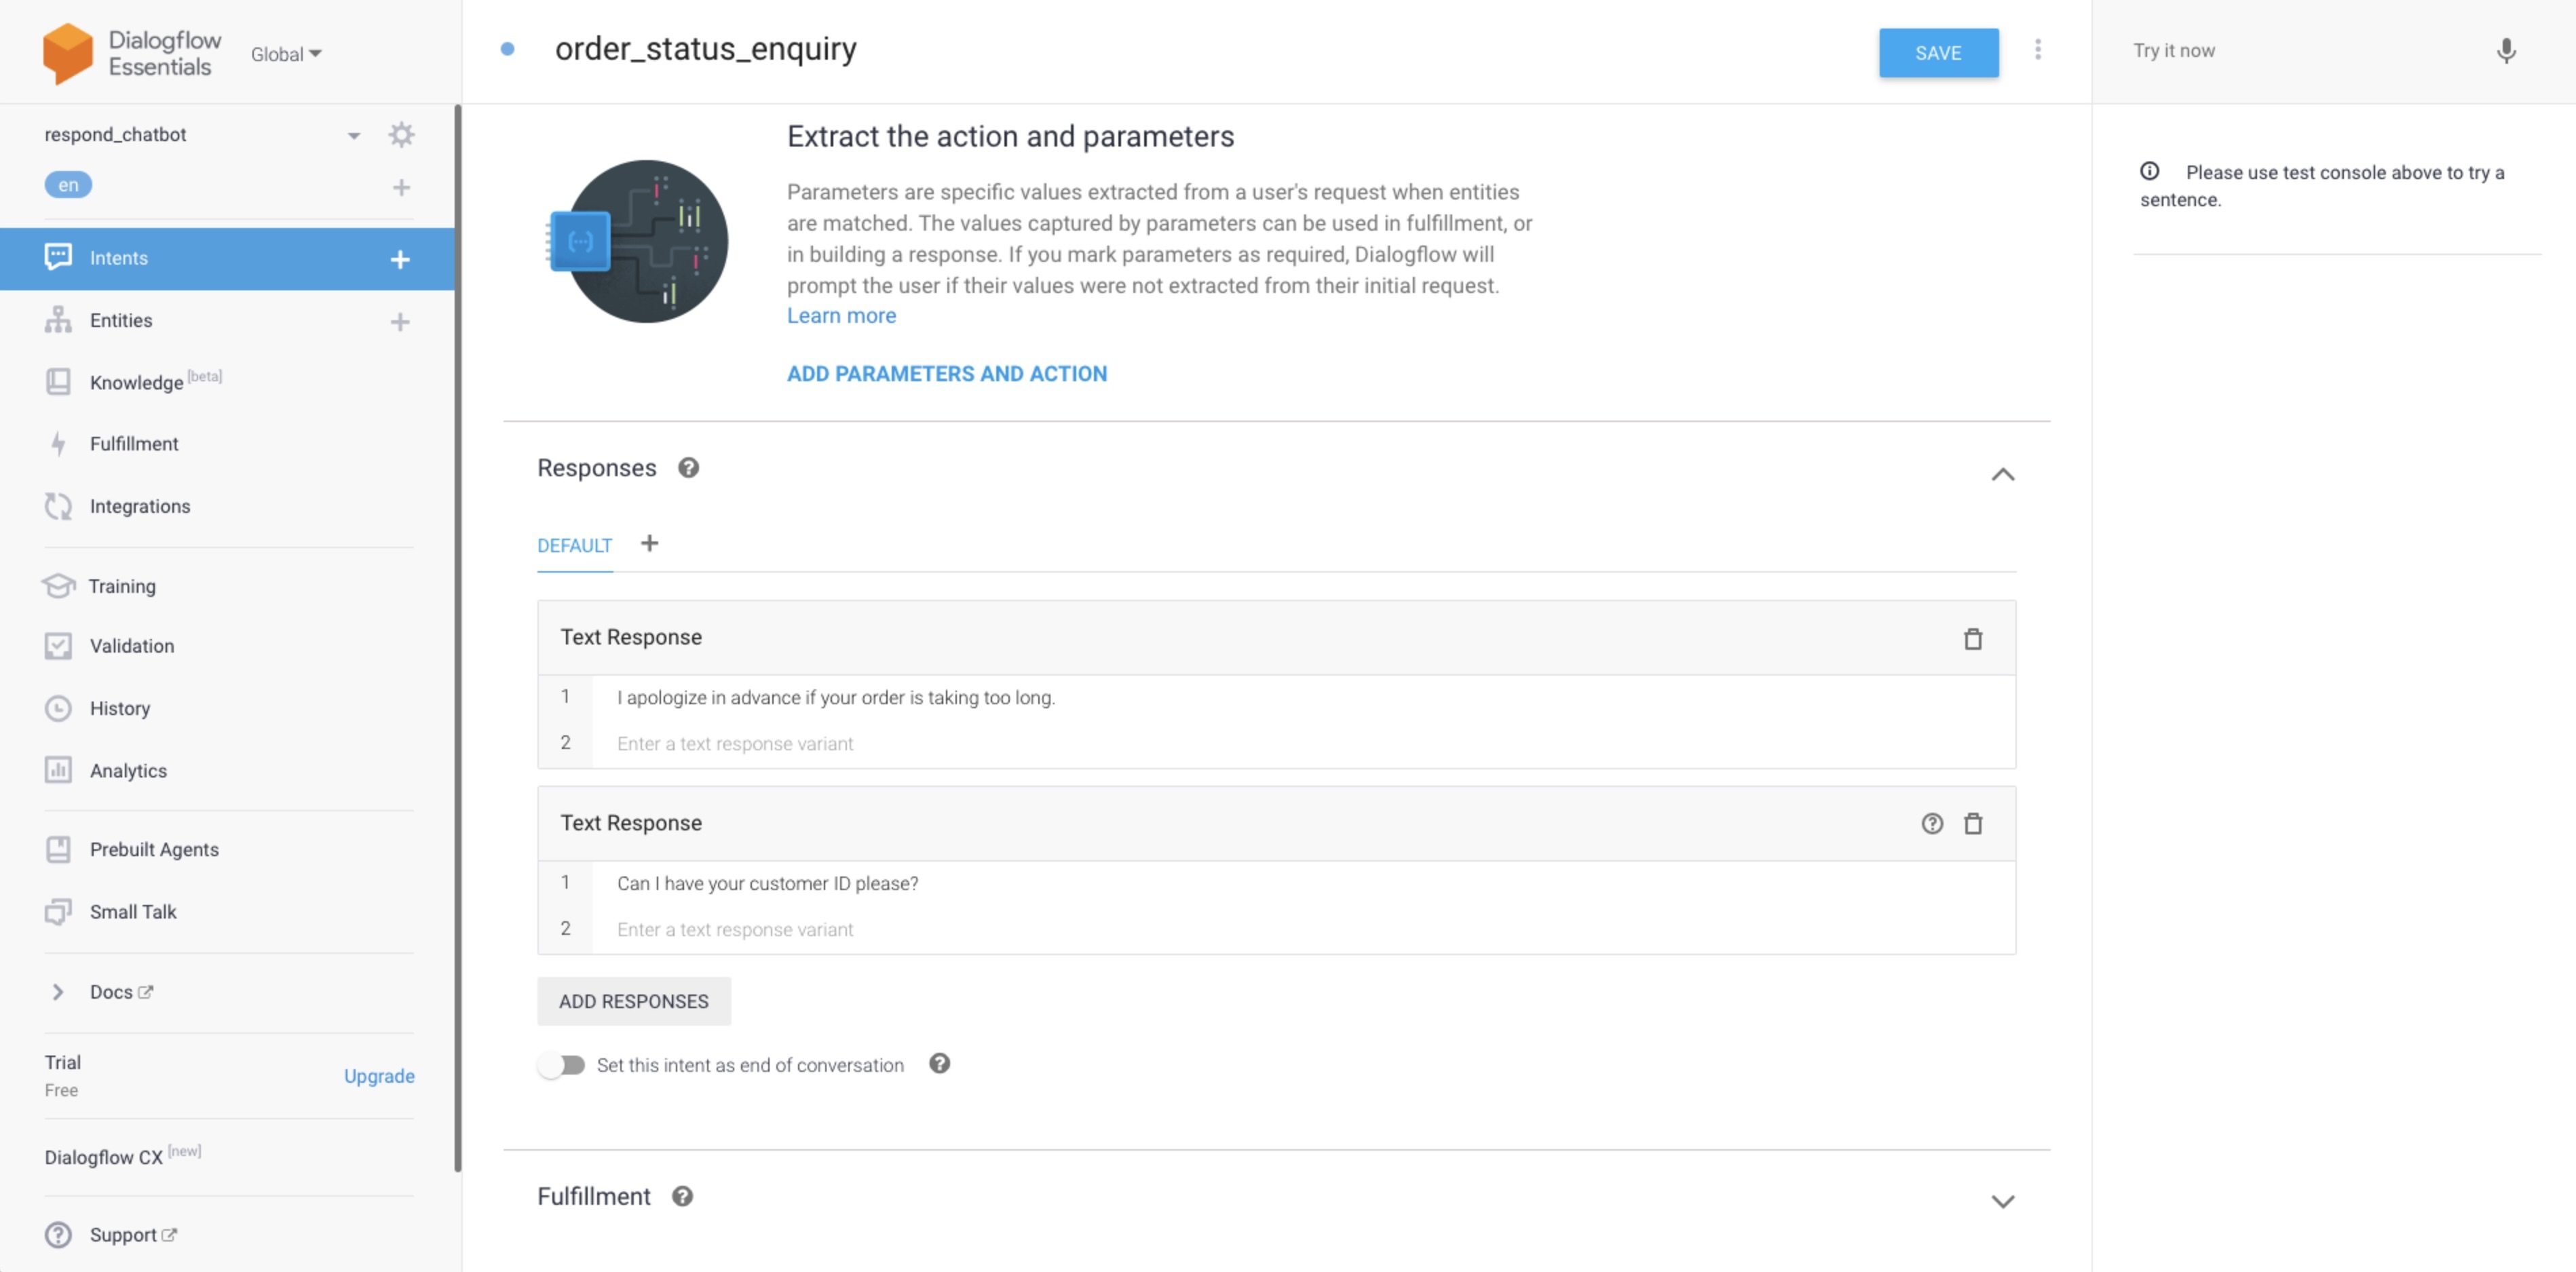
**Step 4: Build Intent Response**
For this intent, the response should prompt the Contact for their customer ID to be used for the following intent.
Scroll down to the **Responses** section and type in the response. You can either add a **Text Response** or **Custom Payload**. For this scenario, **Text Response** will serve the purpose.
{% hint style="info" %}
**Tips:**\
You can send multiple responses at one time for better readability.\
You may add a few variants of the response and they will be randomized when sent to Contacts.
{% endhint %}
The response we will build for this intent is:
> I apologize in advance if your order is taking too long.
> Can I have your customer ID please?
{% hint style="info" %}
**Tip:** Learn more about [response templates here](/ismessenger/workspace-setting/integrations/dialogflow/dialogflow-connecting-to-dialogflow.md).
{% endhint %}
### **Creating an Entity**
Before we can save the value as a custom field, we will need to create an entity to detect the value from incoming messages.
Based on the scenario above, we will name this entity as `customerId` and it will be used to store the customer ID for a customer.
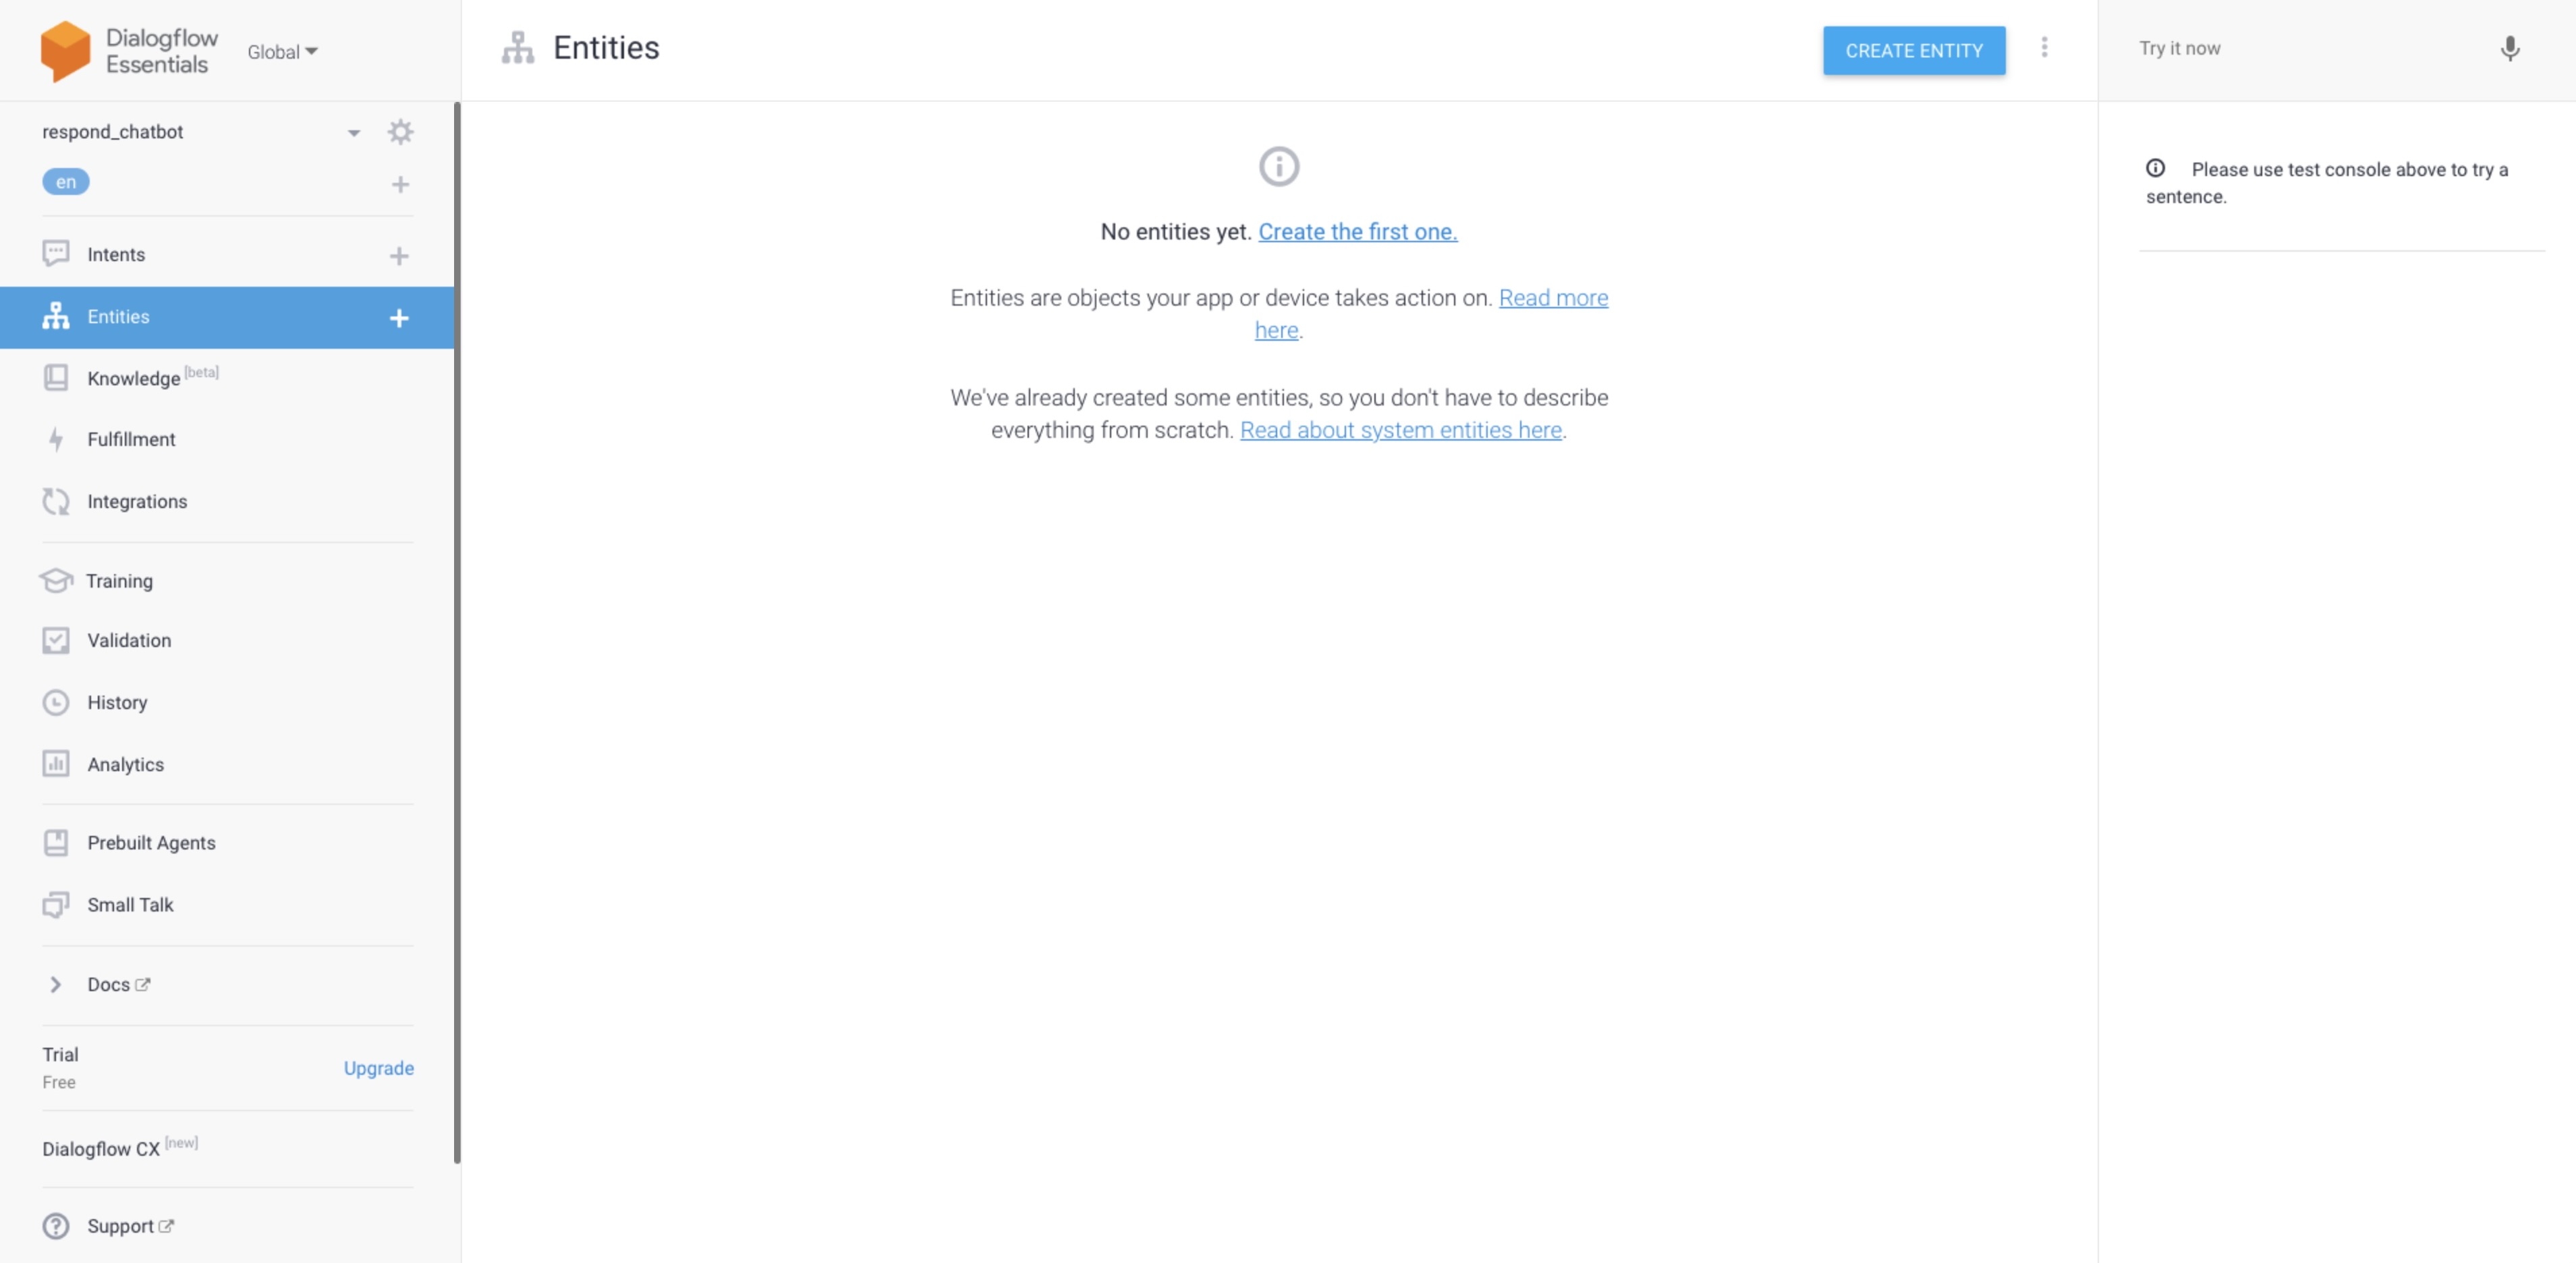
**Step 1: Create an Entity**
Navigate to the Entities module. Press on the ➕ or **CREATE ENTITY**.
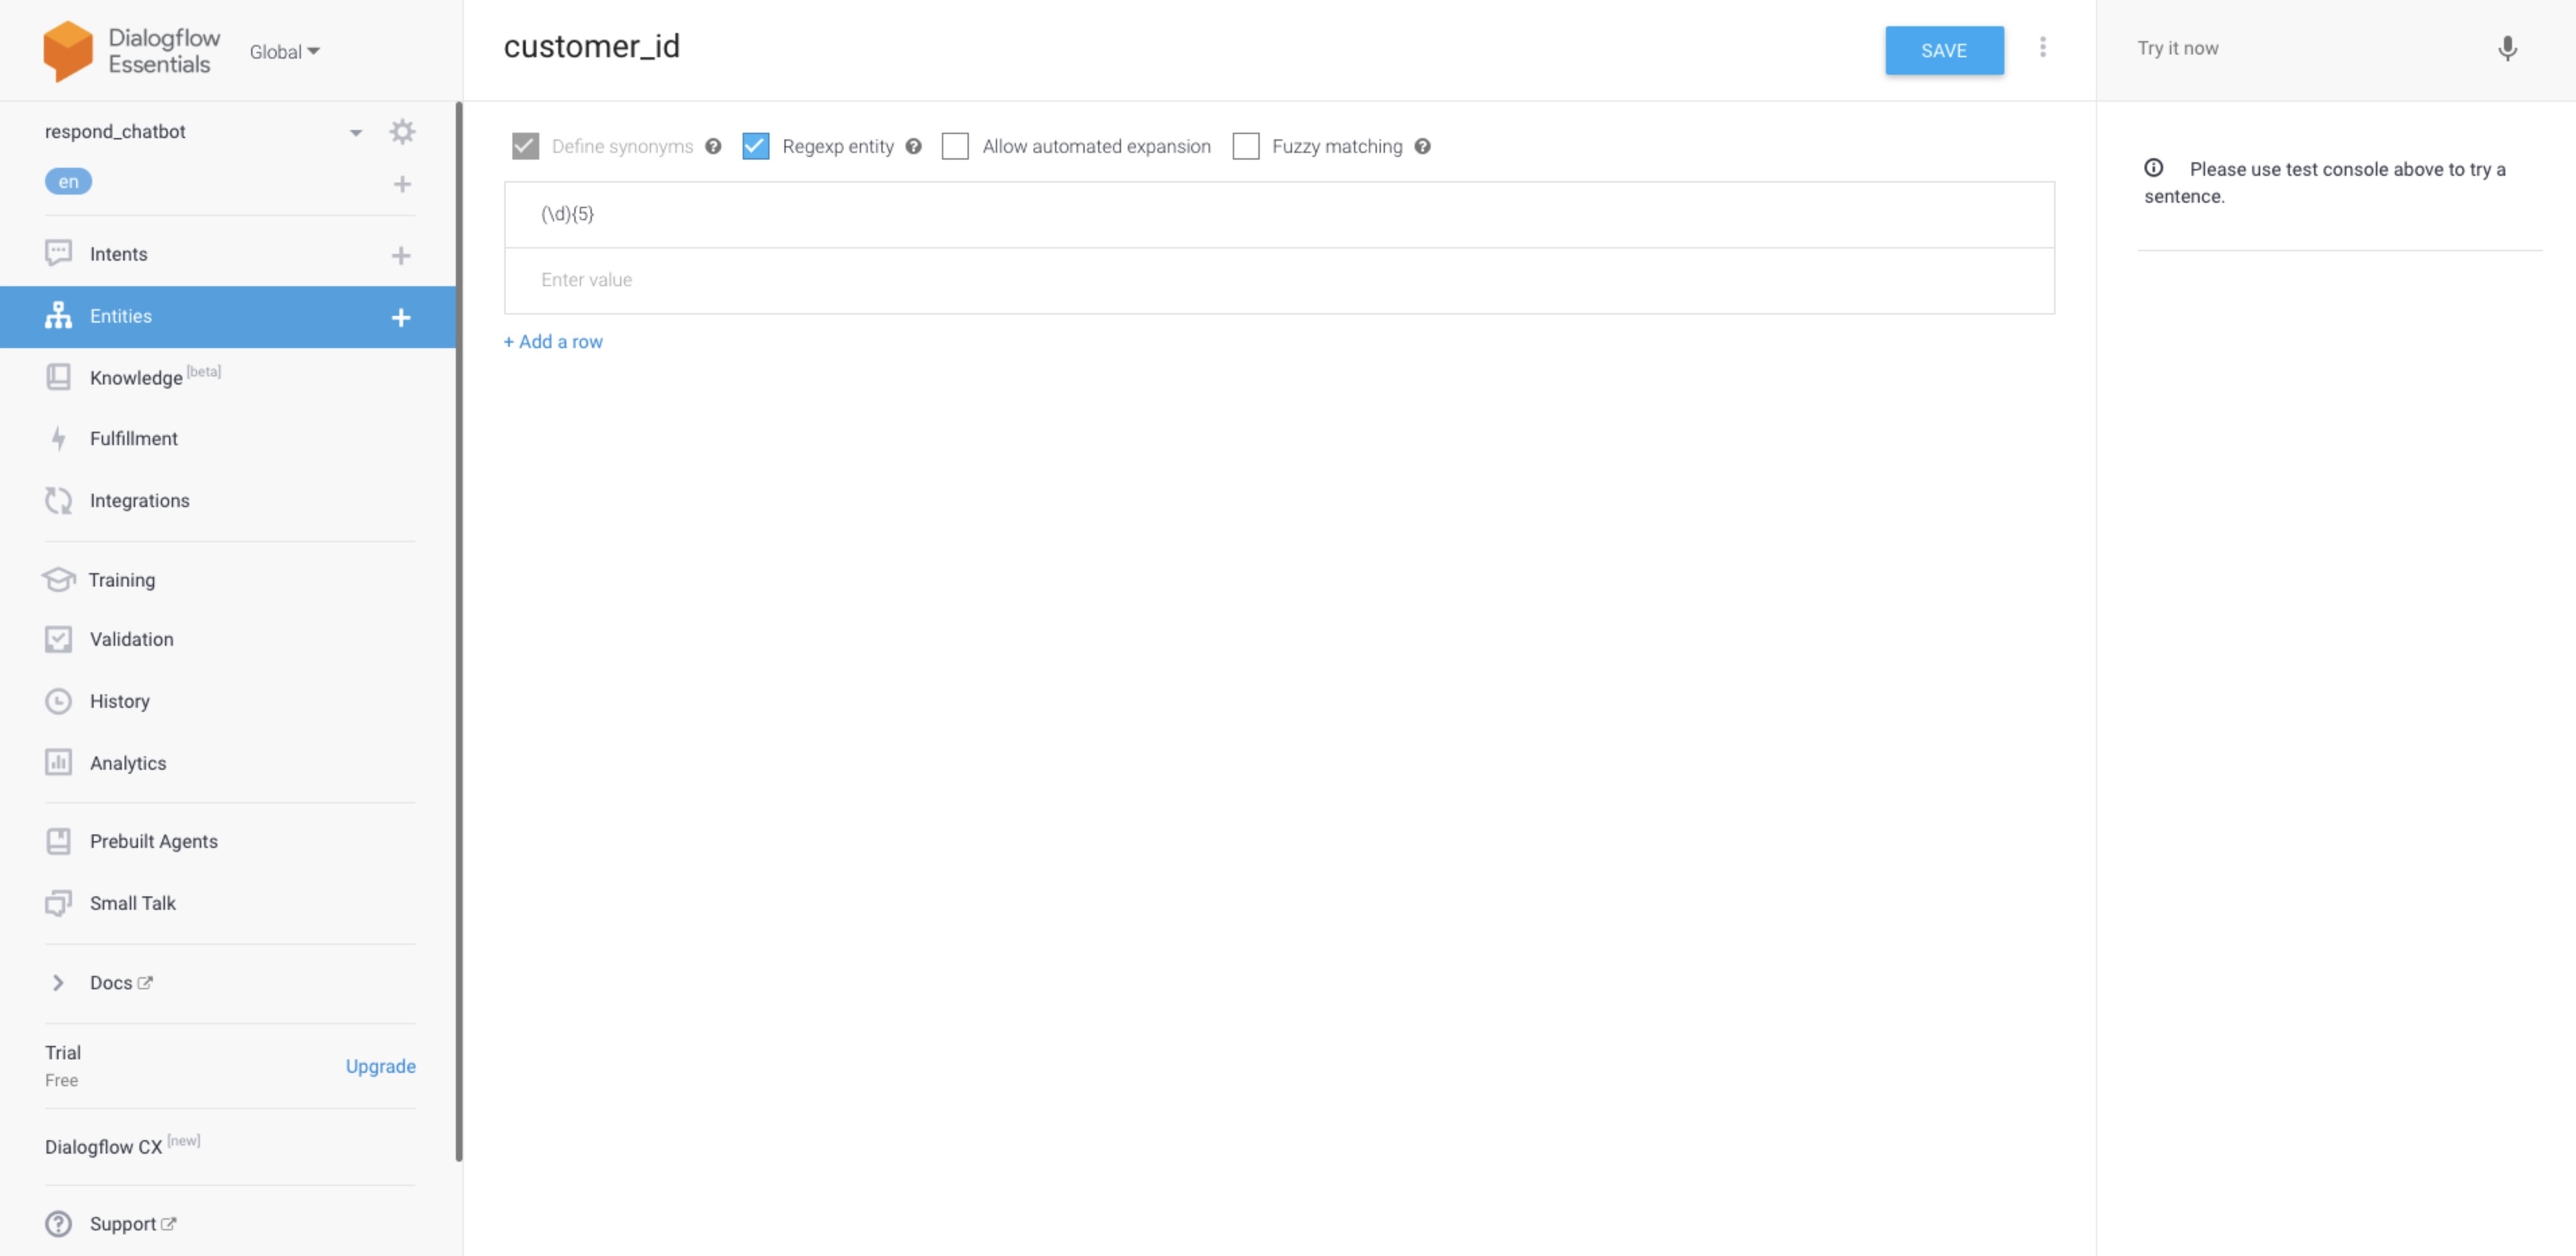
**Step 2: Name the Entity**
For this example, we will name it customer\_id.
**Step 3: Enter the possible values**
The entity should accept a string with 5 integers in length. Regular expression will be applied to validate the value.
For this example, the value will be `(\d){5}` that accepts any string with 5 digits.
{% hint style="info" %}
**Tip:** Learn more about [regular expressions here](https://github.com/google/re2/wiki/Syntax).
{% endhint %}
{% hint style="info" %}
**Tip:** Learn more about [entities here](https://cloud.google.com/dialogflow/es/docs/entities-overview).
{% endhint %}
### **Creating an Intent with Parameters**
**Step 1: Create Follow Up Intent**
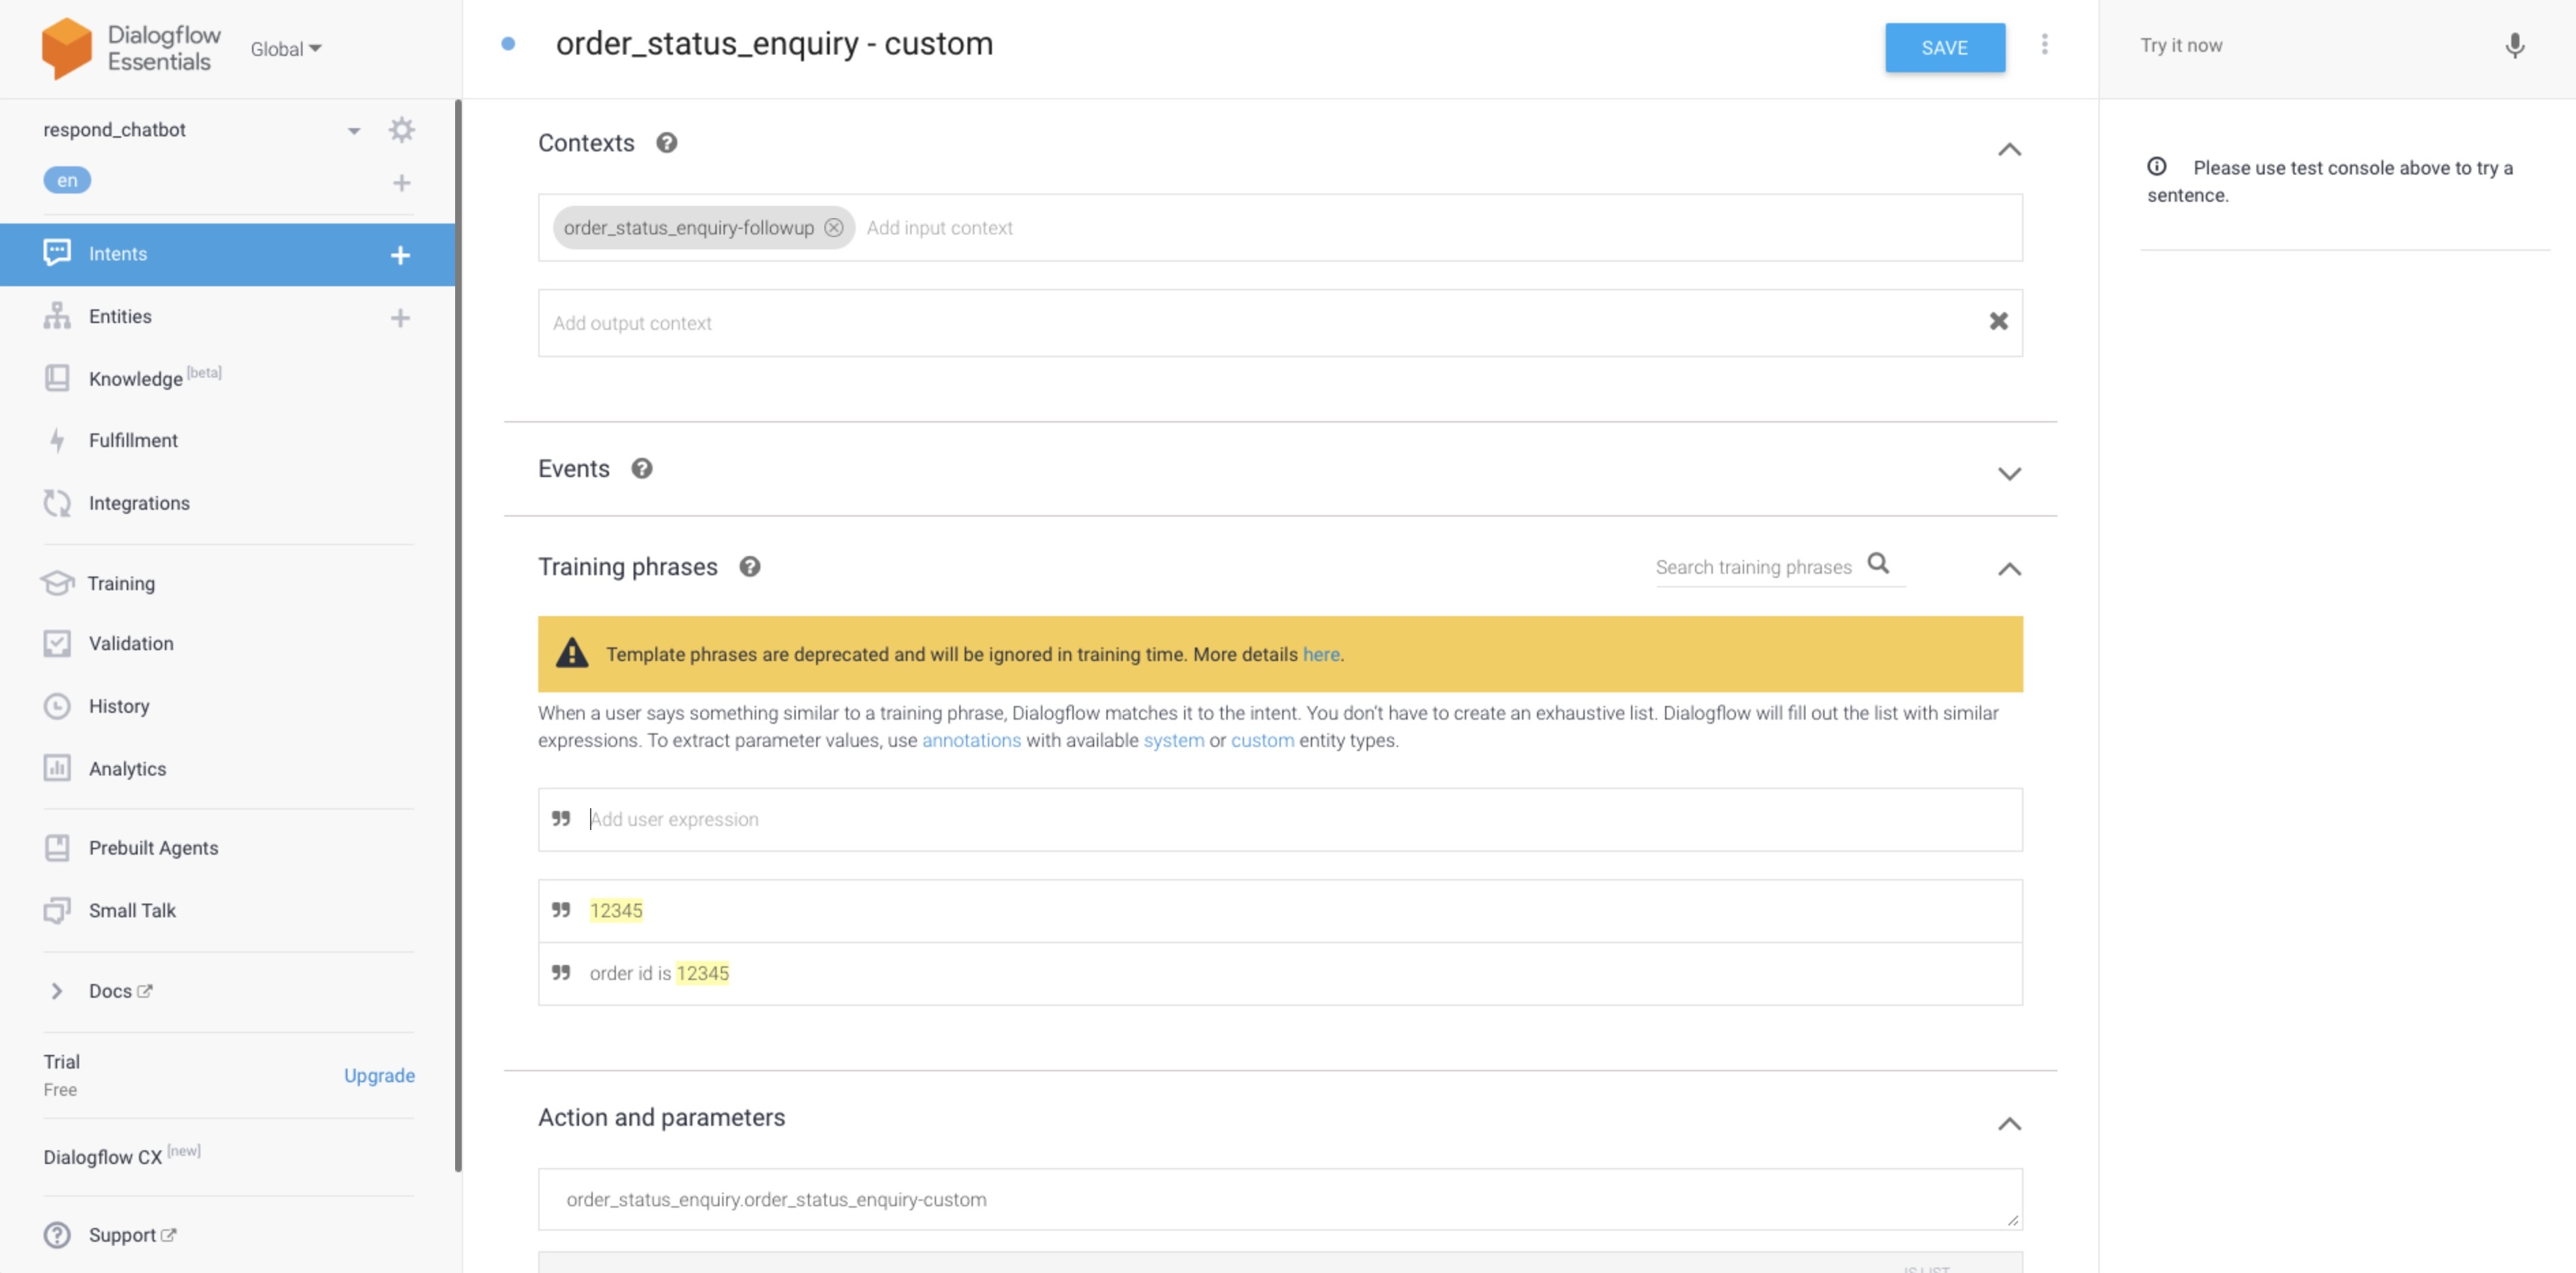
Navigate to the [Dialogflow console](https://dialogflow.cloud.google.com/#/agent/appointmentscheduler-fiqd/intents) and press **Intents** from the side navigation menu. Locate the previous intent created and press **Add follow-up intent**.
{% hint style="warning" %}
A follow-up intent is used instead because this intent will need to be triggered after the specified intent.
{% endhint %}
By default, the context and action will be populated by default so that the intent will work in sequence.
**Step 2: Include Training Phrases**
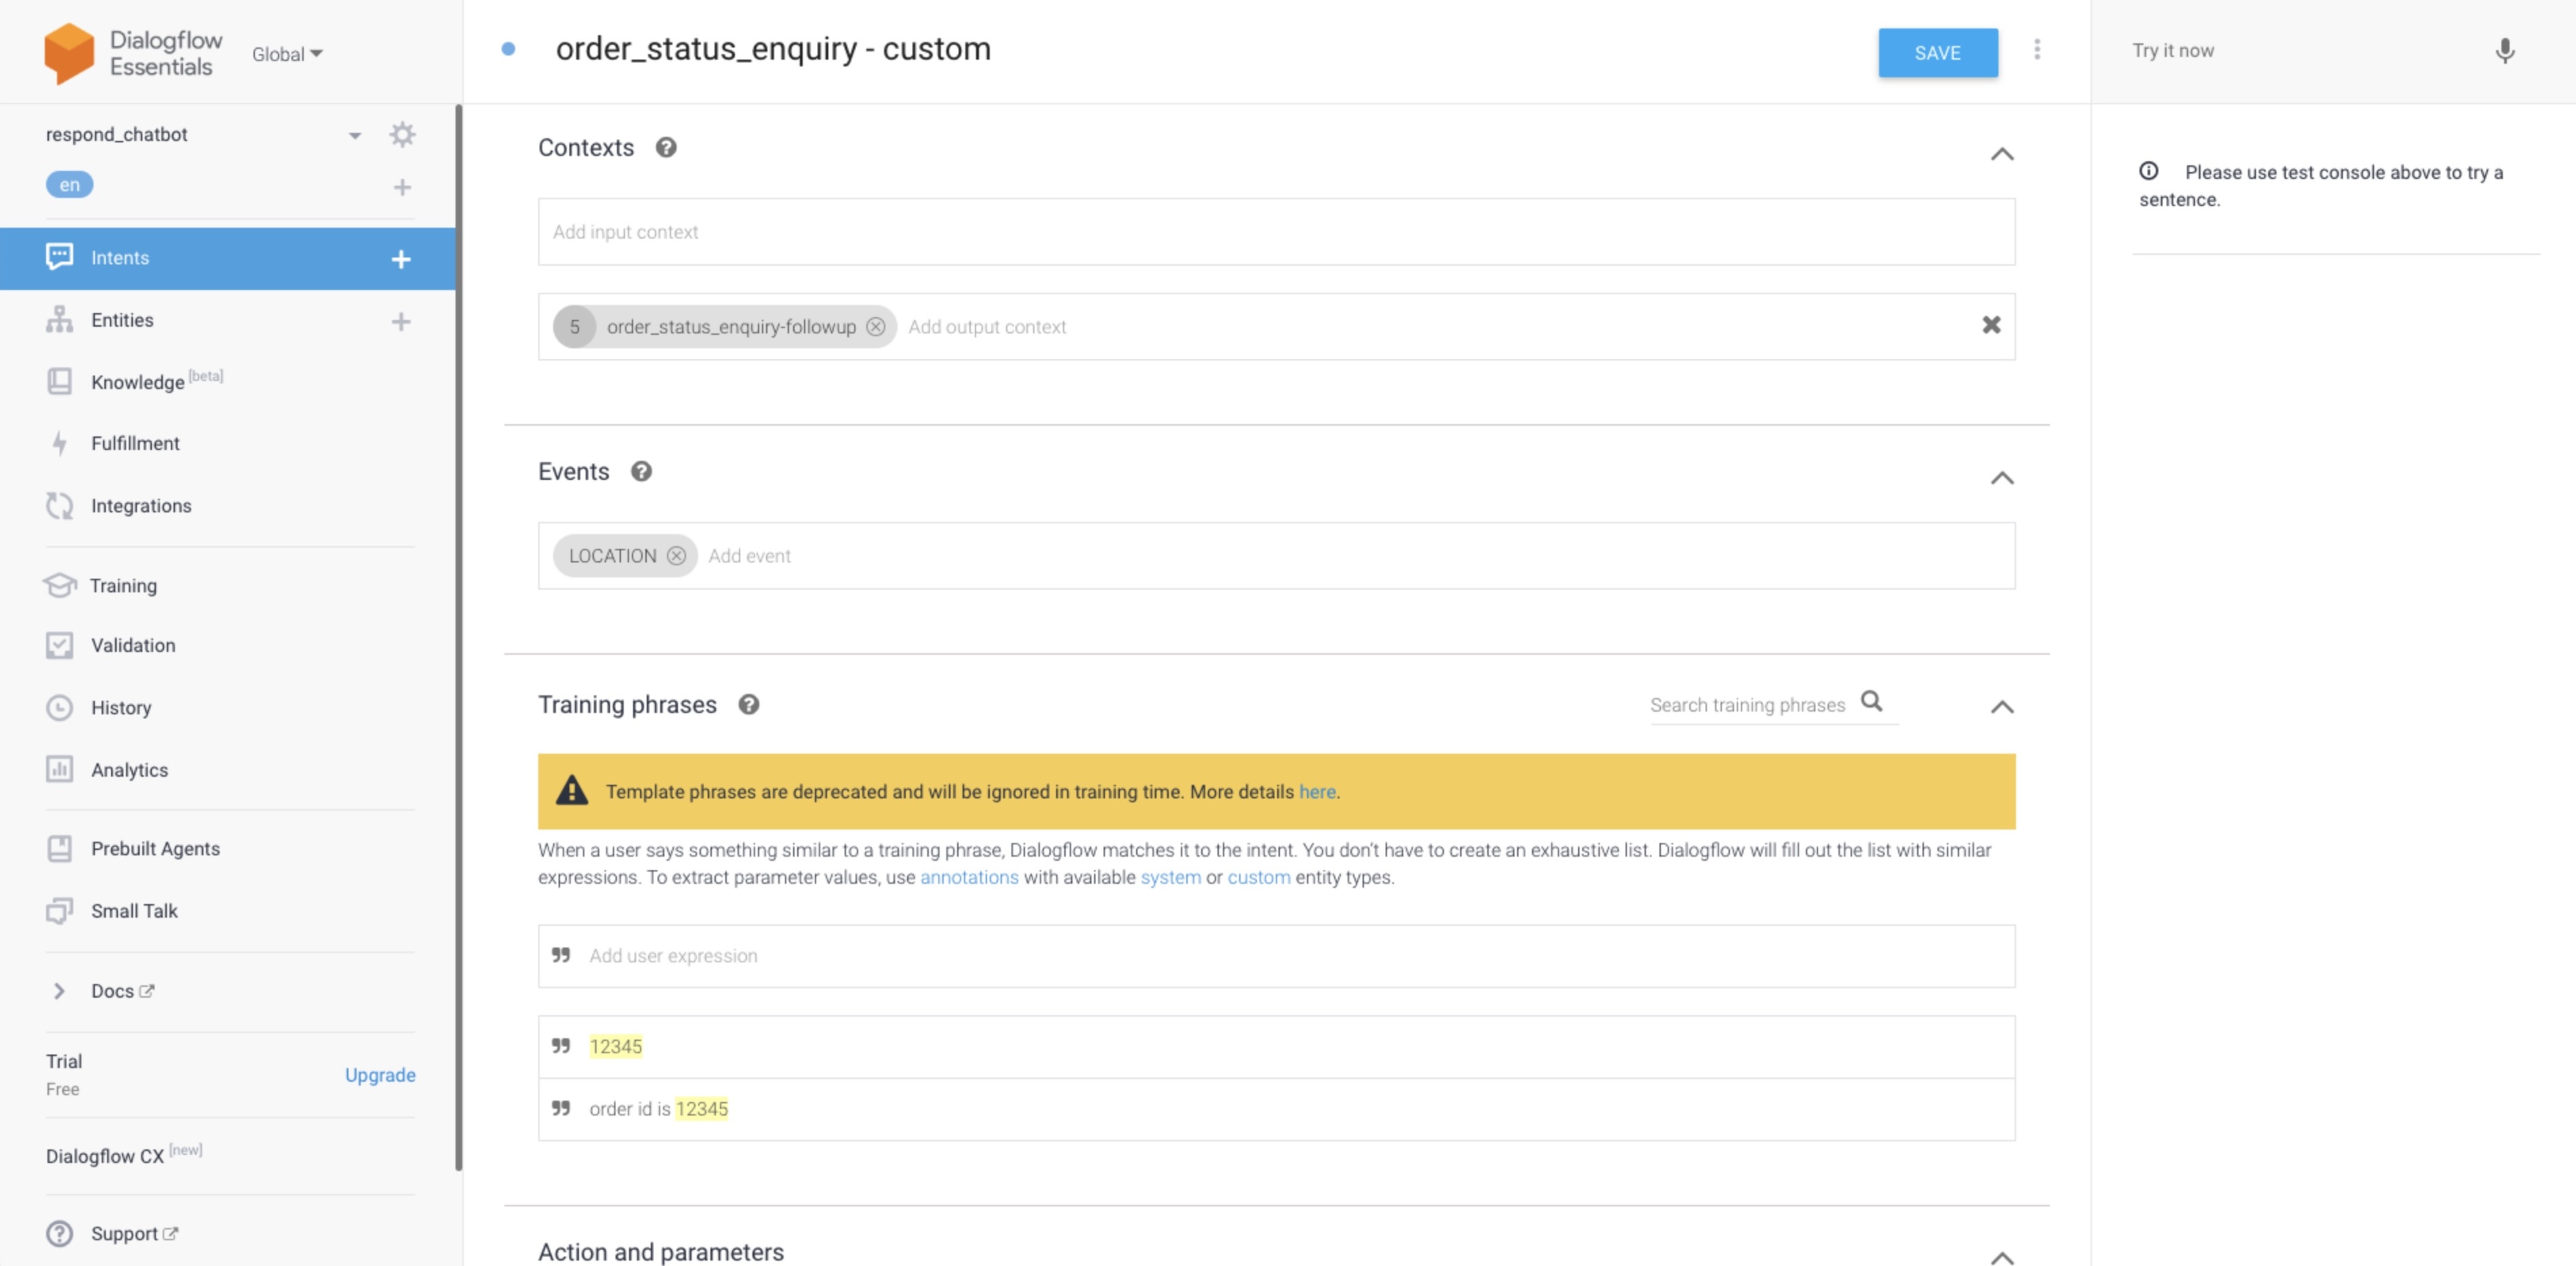
The phrases to include in this intent will most likely be phrases that contain the customer ID. We can input a phrase and highlight the text that is likely to be the customer ID. Select the entity created earlier and annotate the text with it.
By default, a parameter will be created when you annotate a text with an entity so store the values.
{% hint style="info" %}
**Tip:** Learn more about [annotating training phrases here](https://cloud.google.com/dialogflow/es/docs/intents-training-phrases#annotation).
{% endhint %}
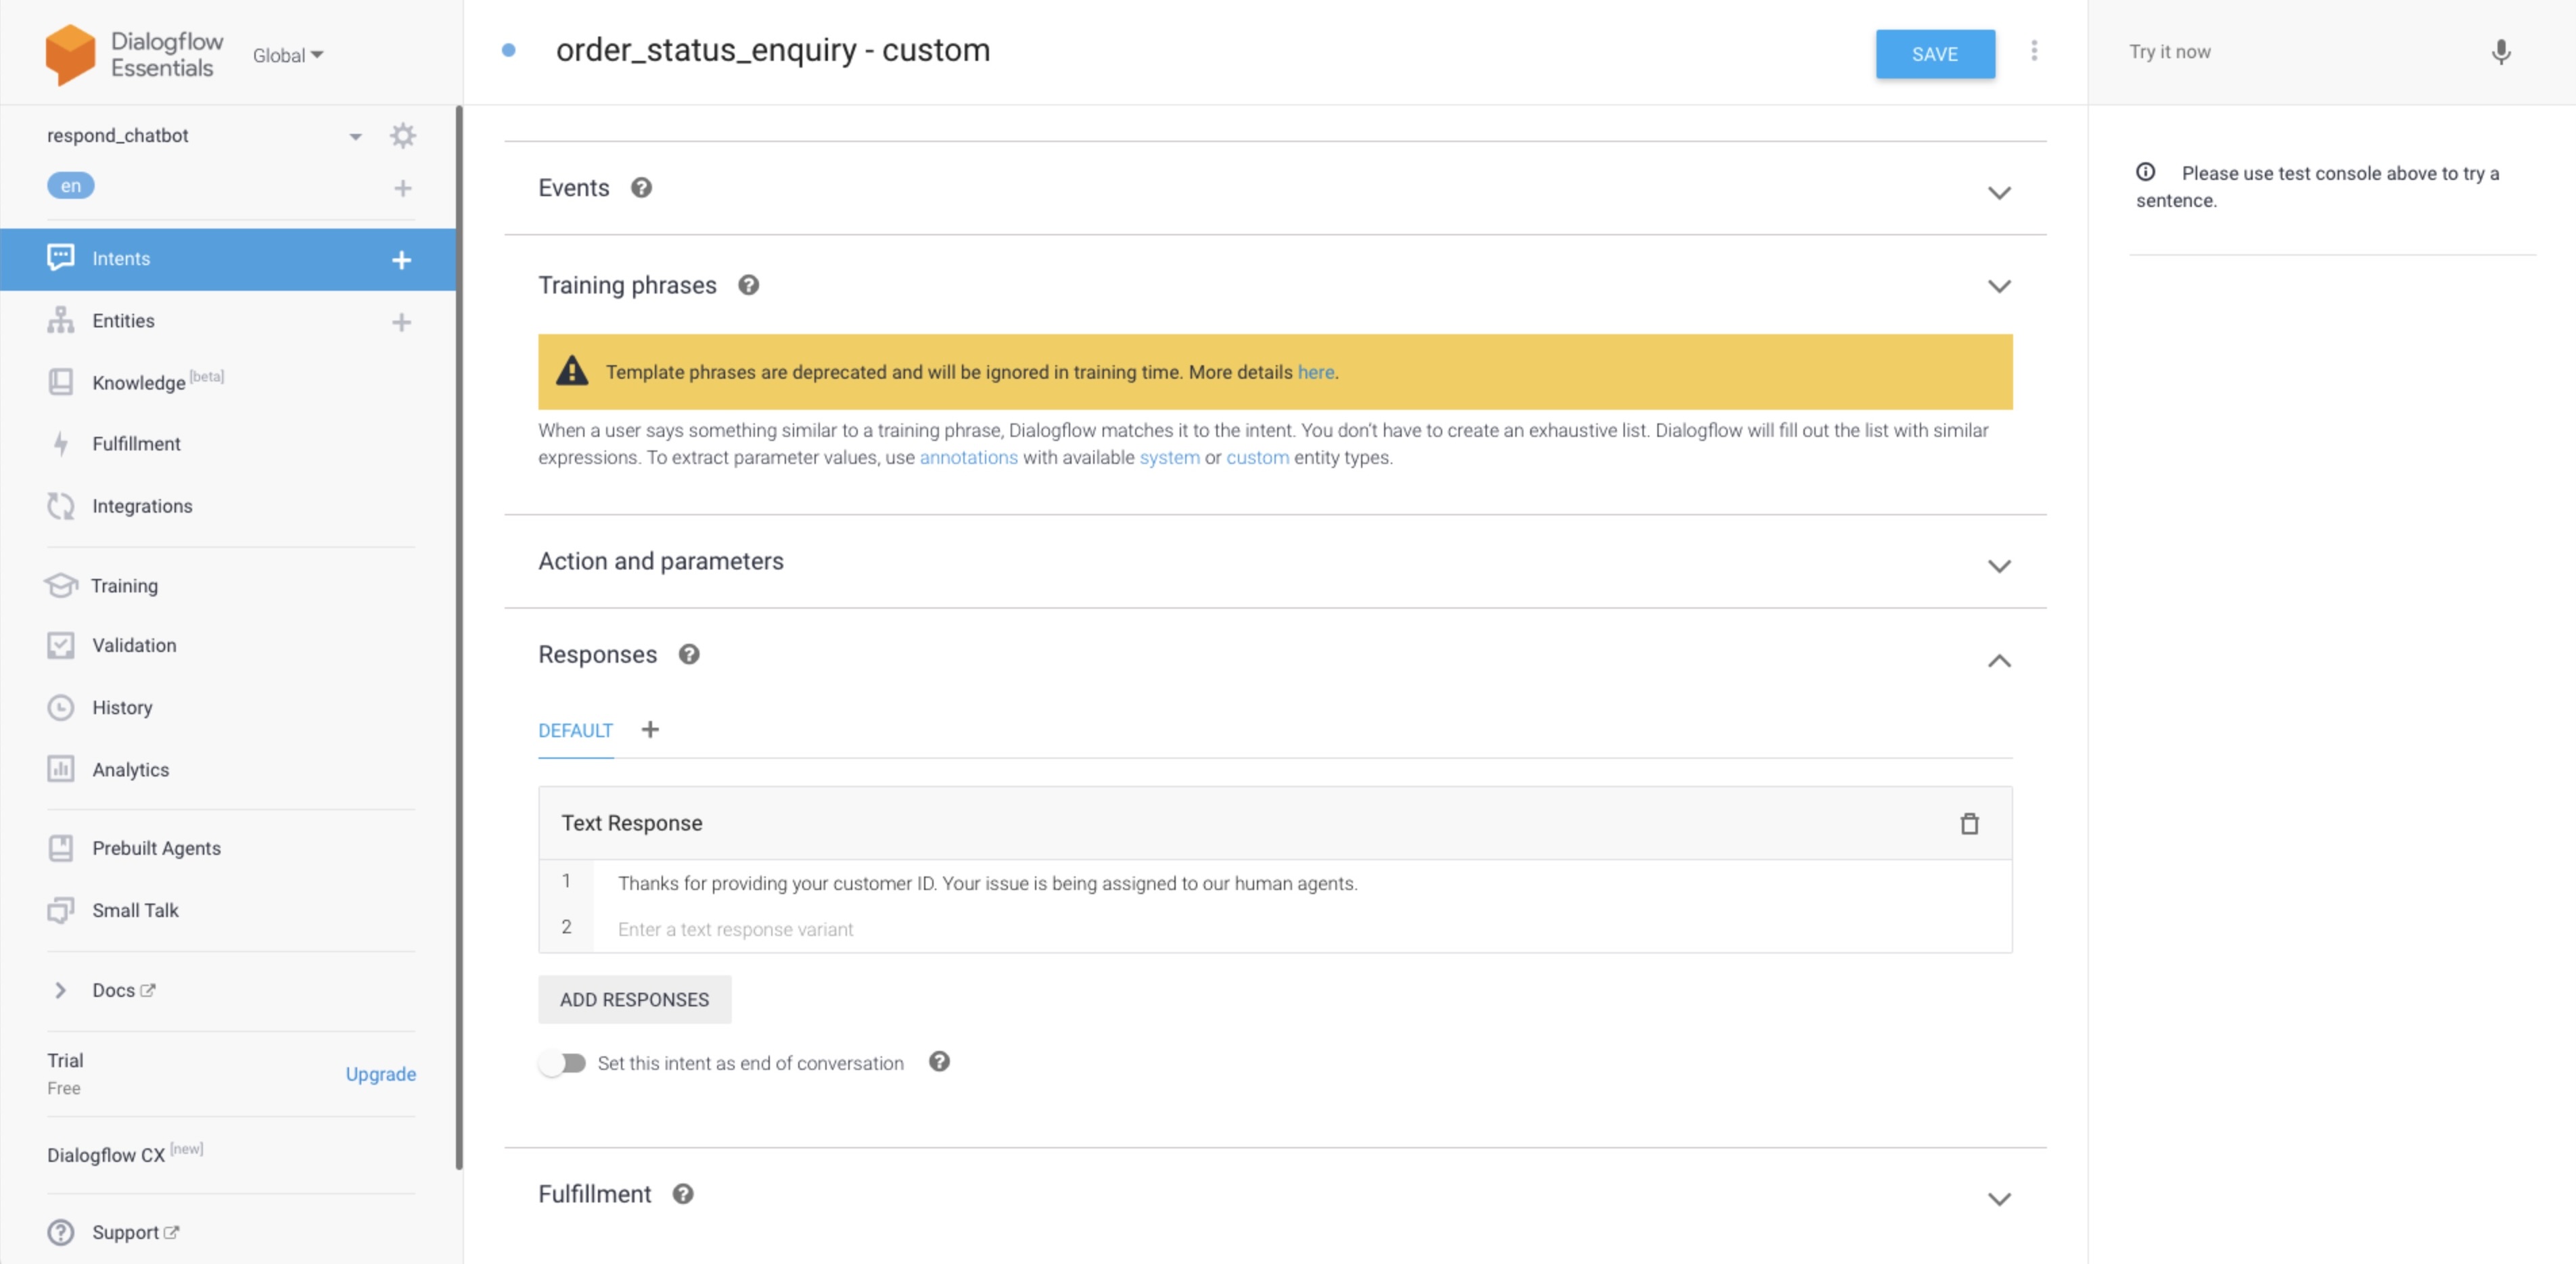
**Step 3: Build Intent Response**
For this intent, the response should inform the contact that the customer ID has been received and a human agent will take over the conversation and resolve the issue.
Scroll down to the **Responses** section and type in the response. Add a **Text Response**.
The response we will build for this intent is :
> Thanks for providing your customer ID. Your issue is being assigned to our human agents.
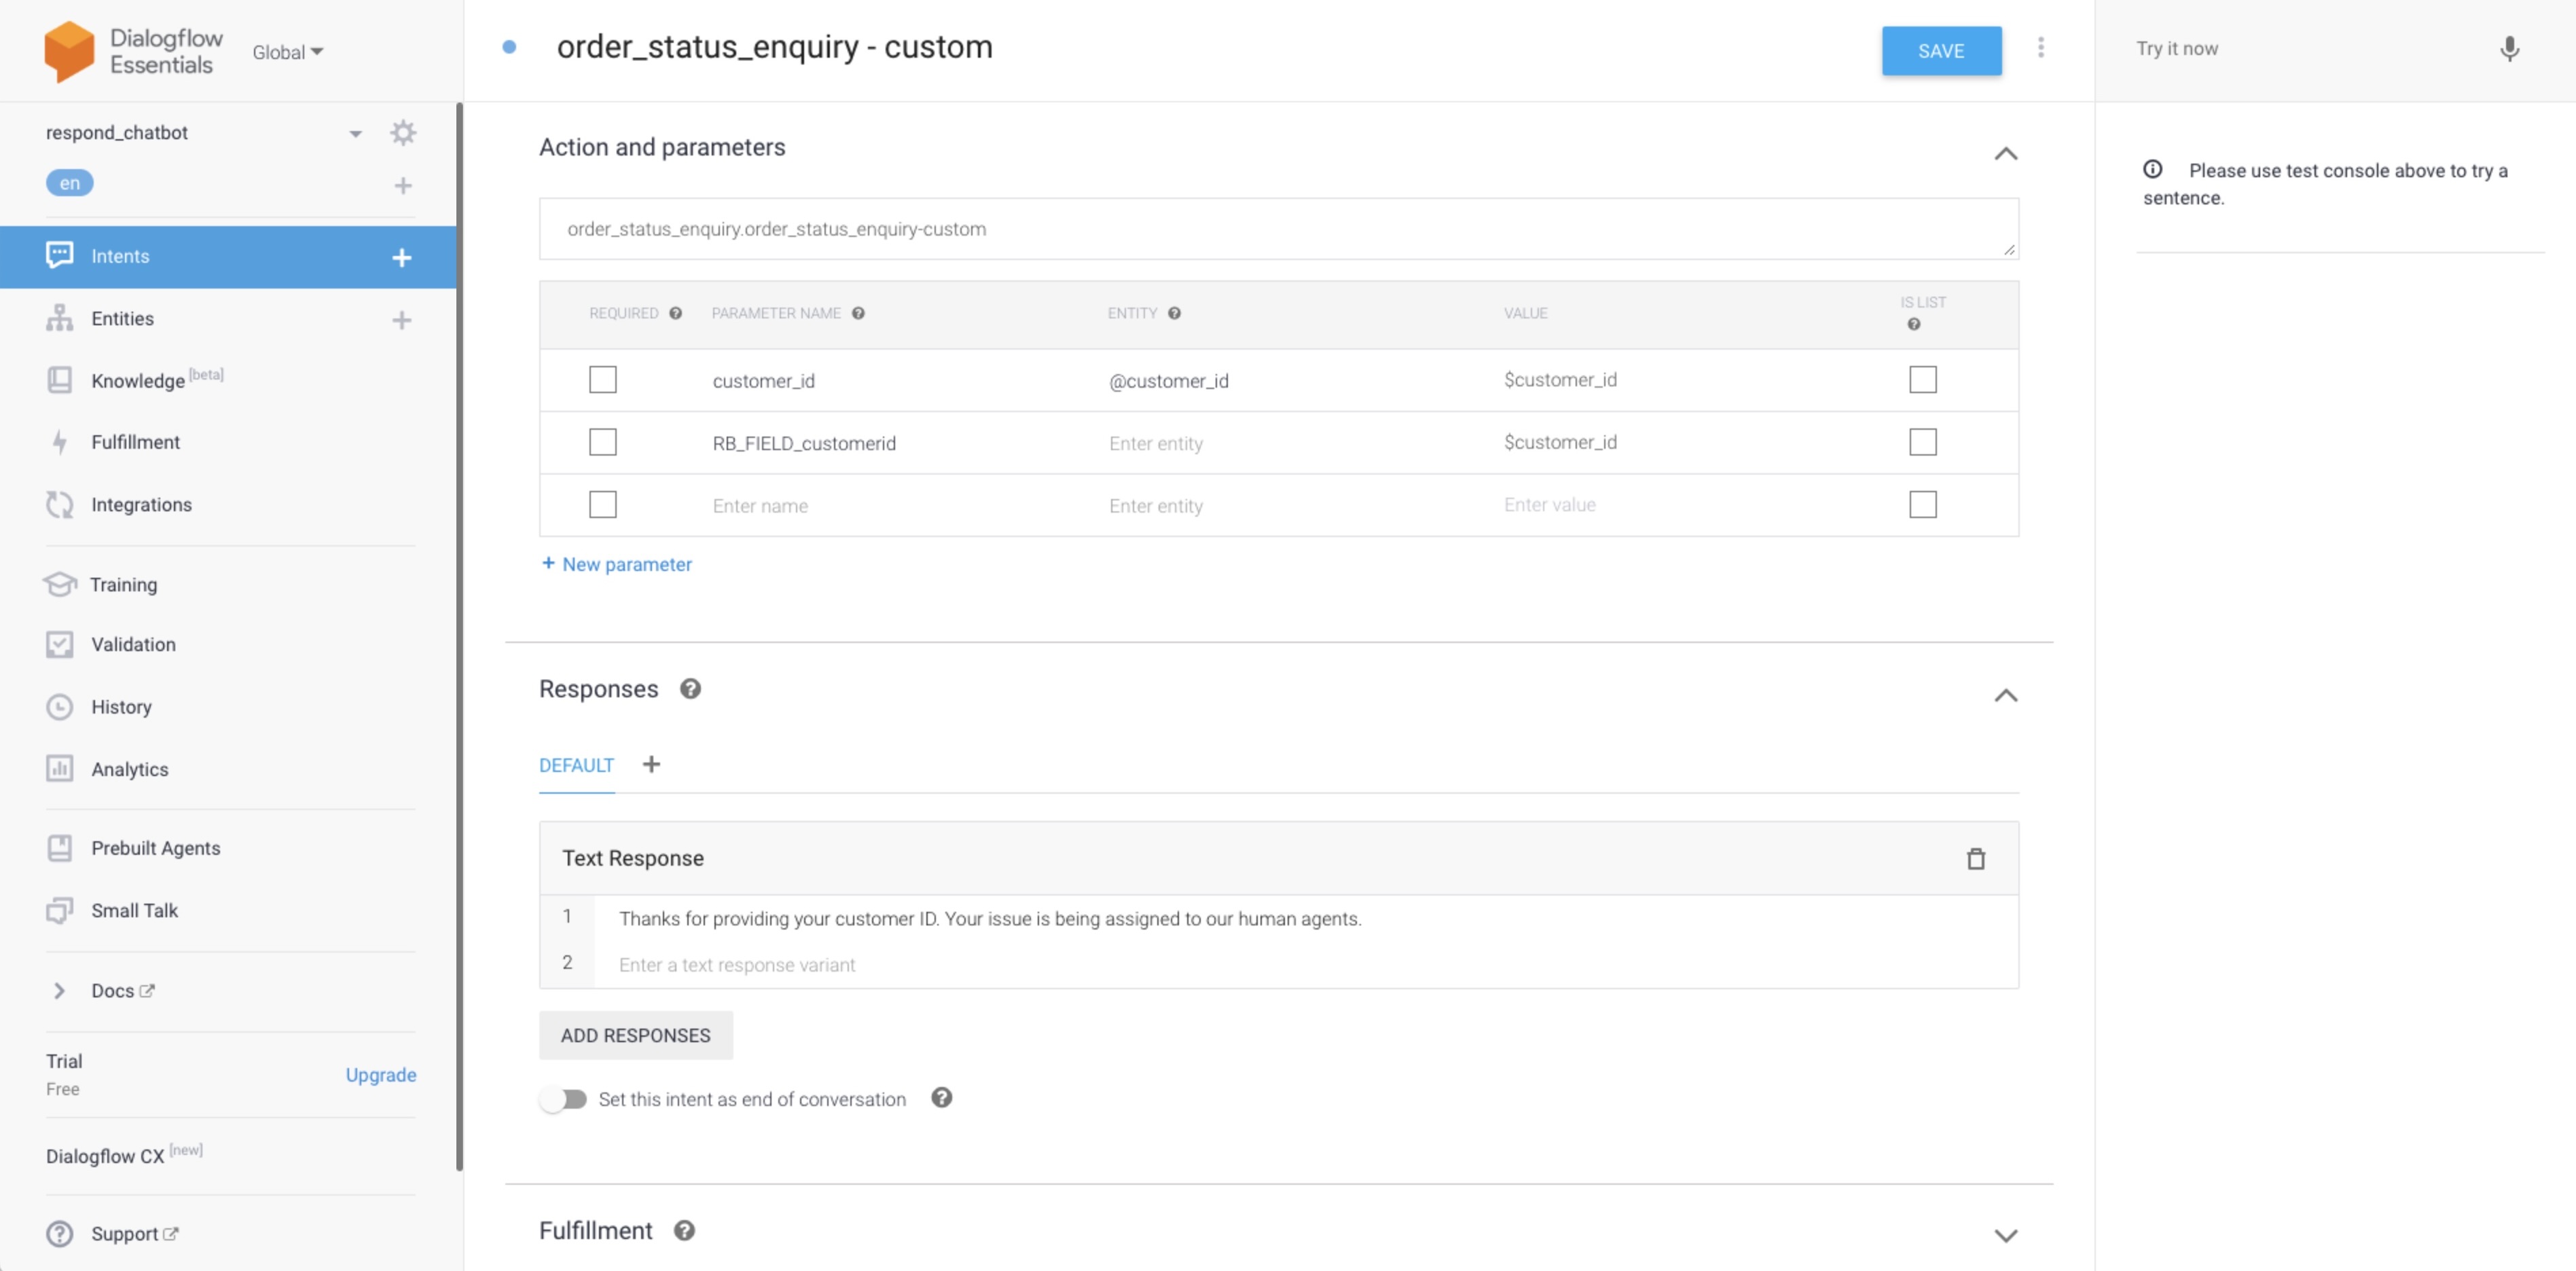
### **Saving a Value as a Custom Field**
When the contact responds with their customer ID, the value can be saved as a custom field in IS-Messenger platform.
{% hint style="info" %}
In order to save the value to a custom field, please ensure the custom field is created on the IS-Messenger platform.
{% endhint %}
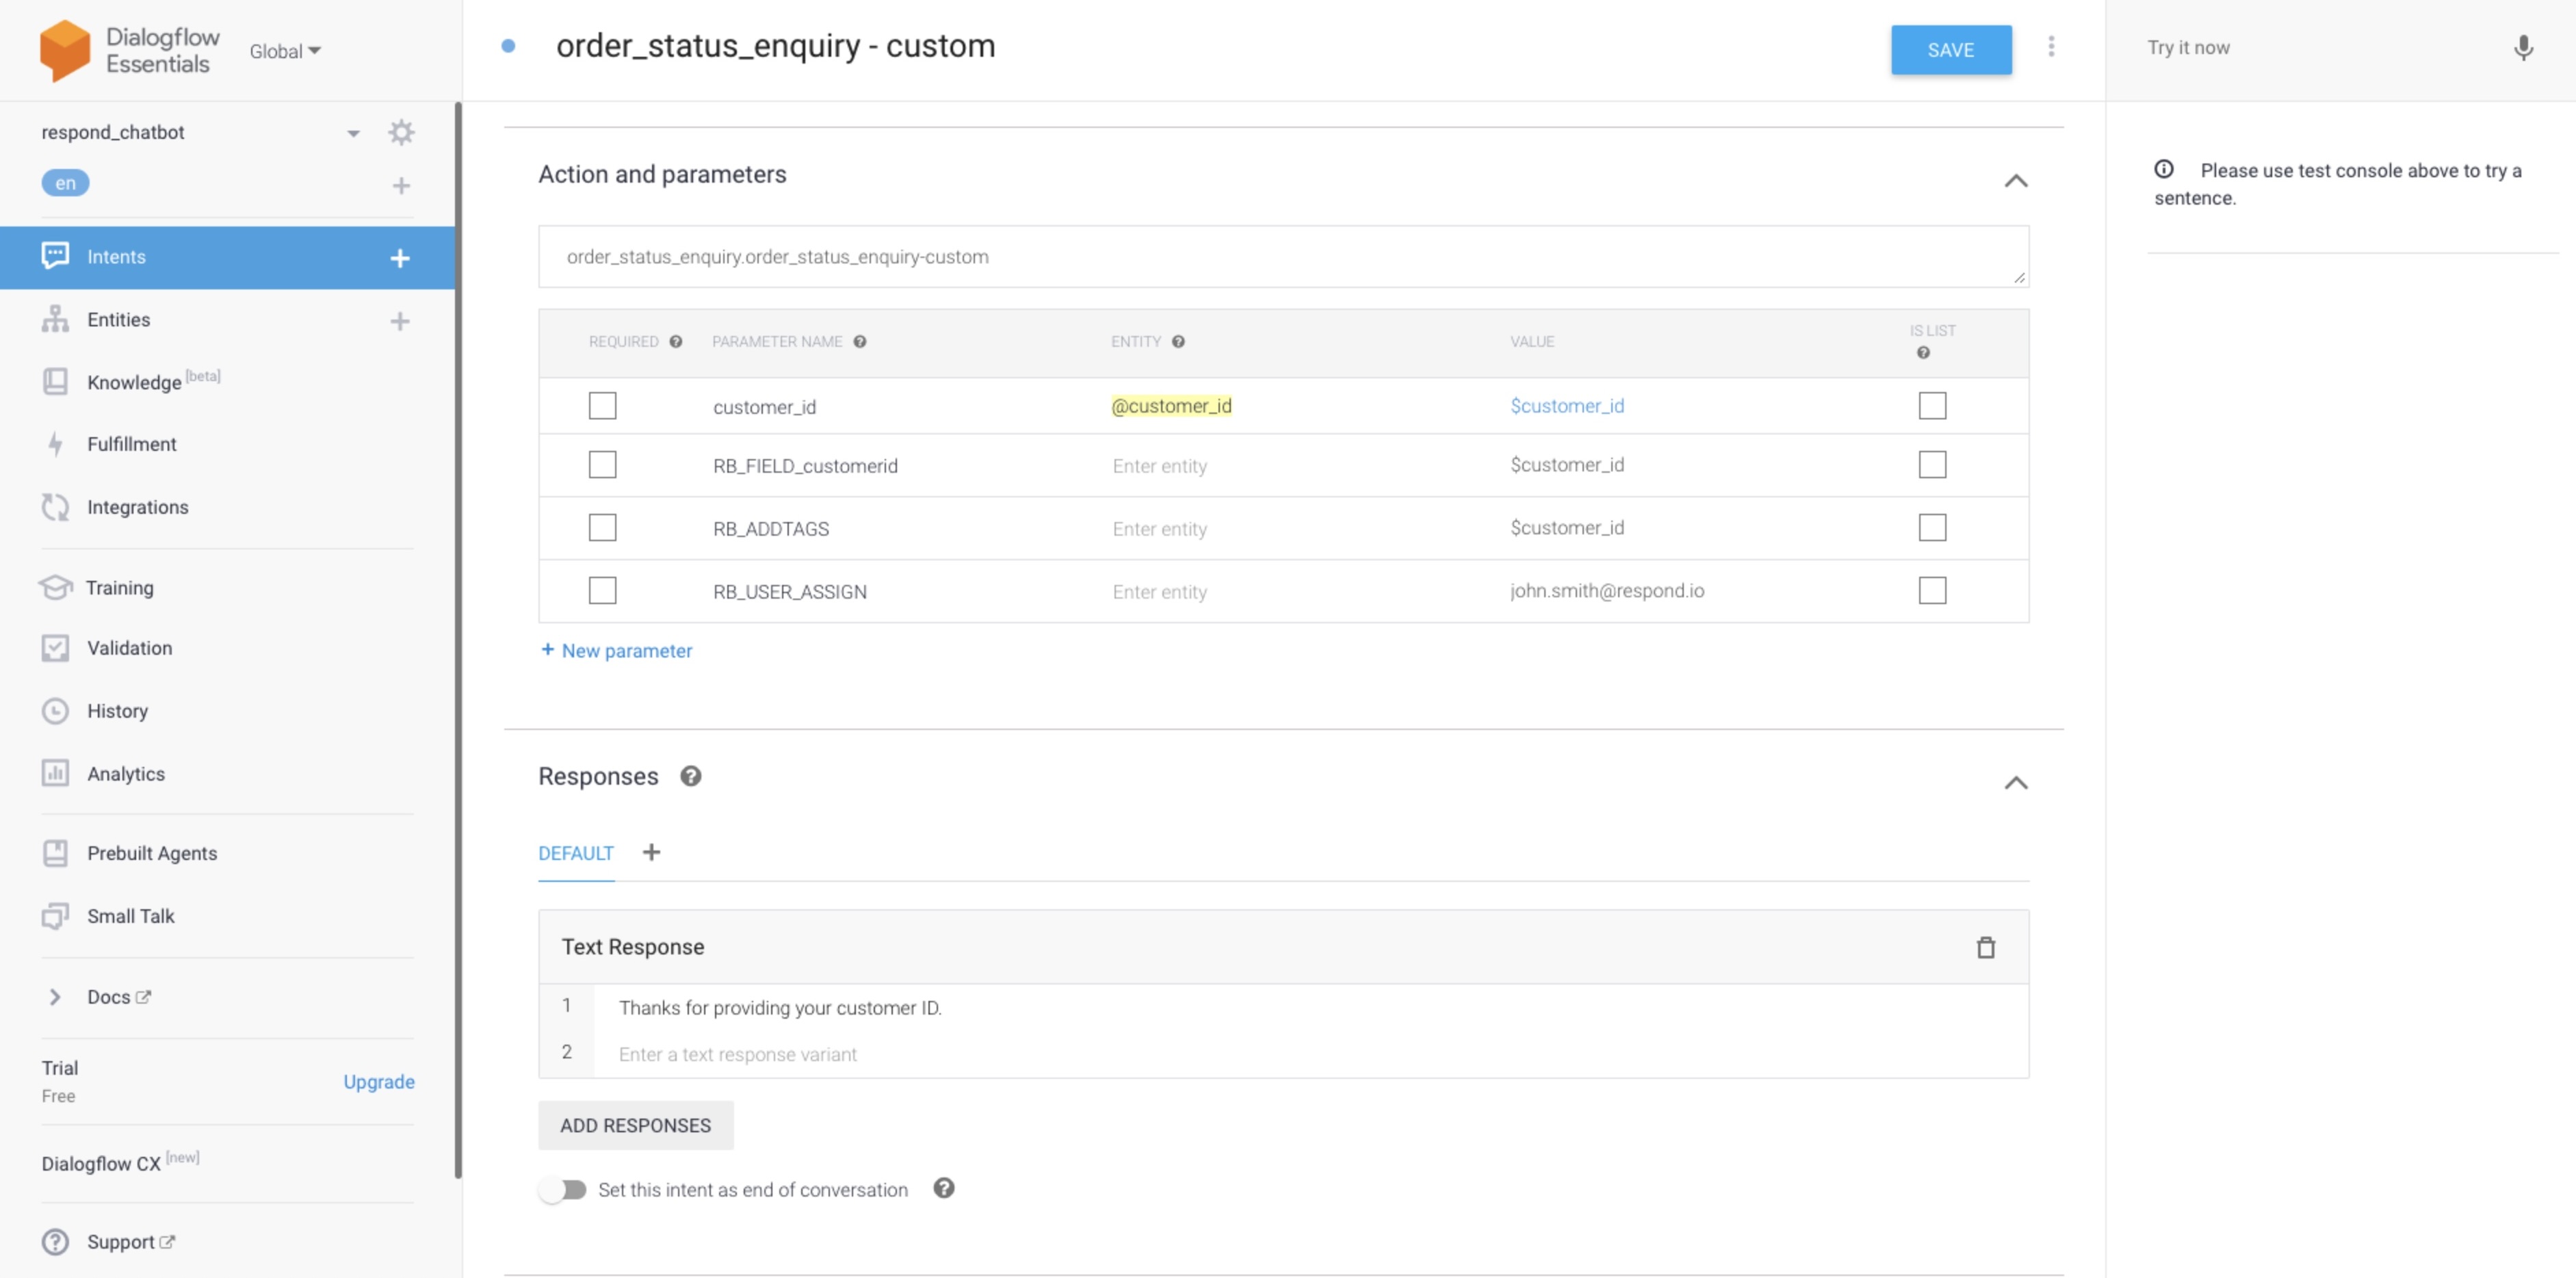
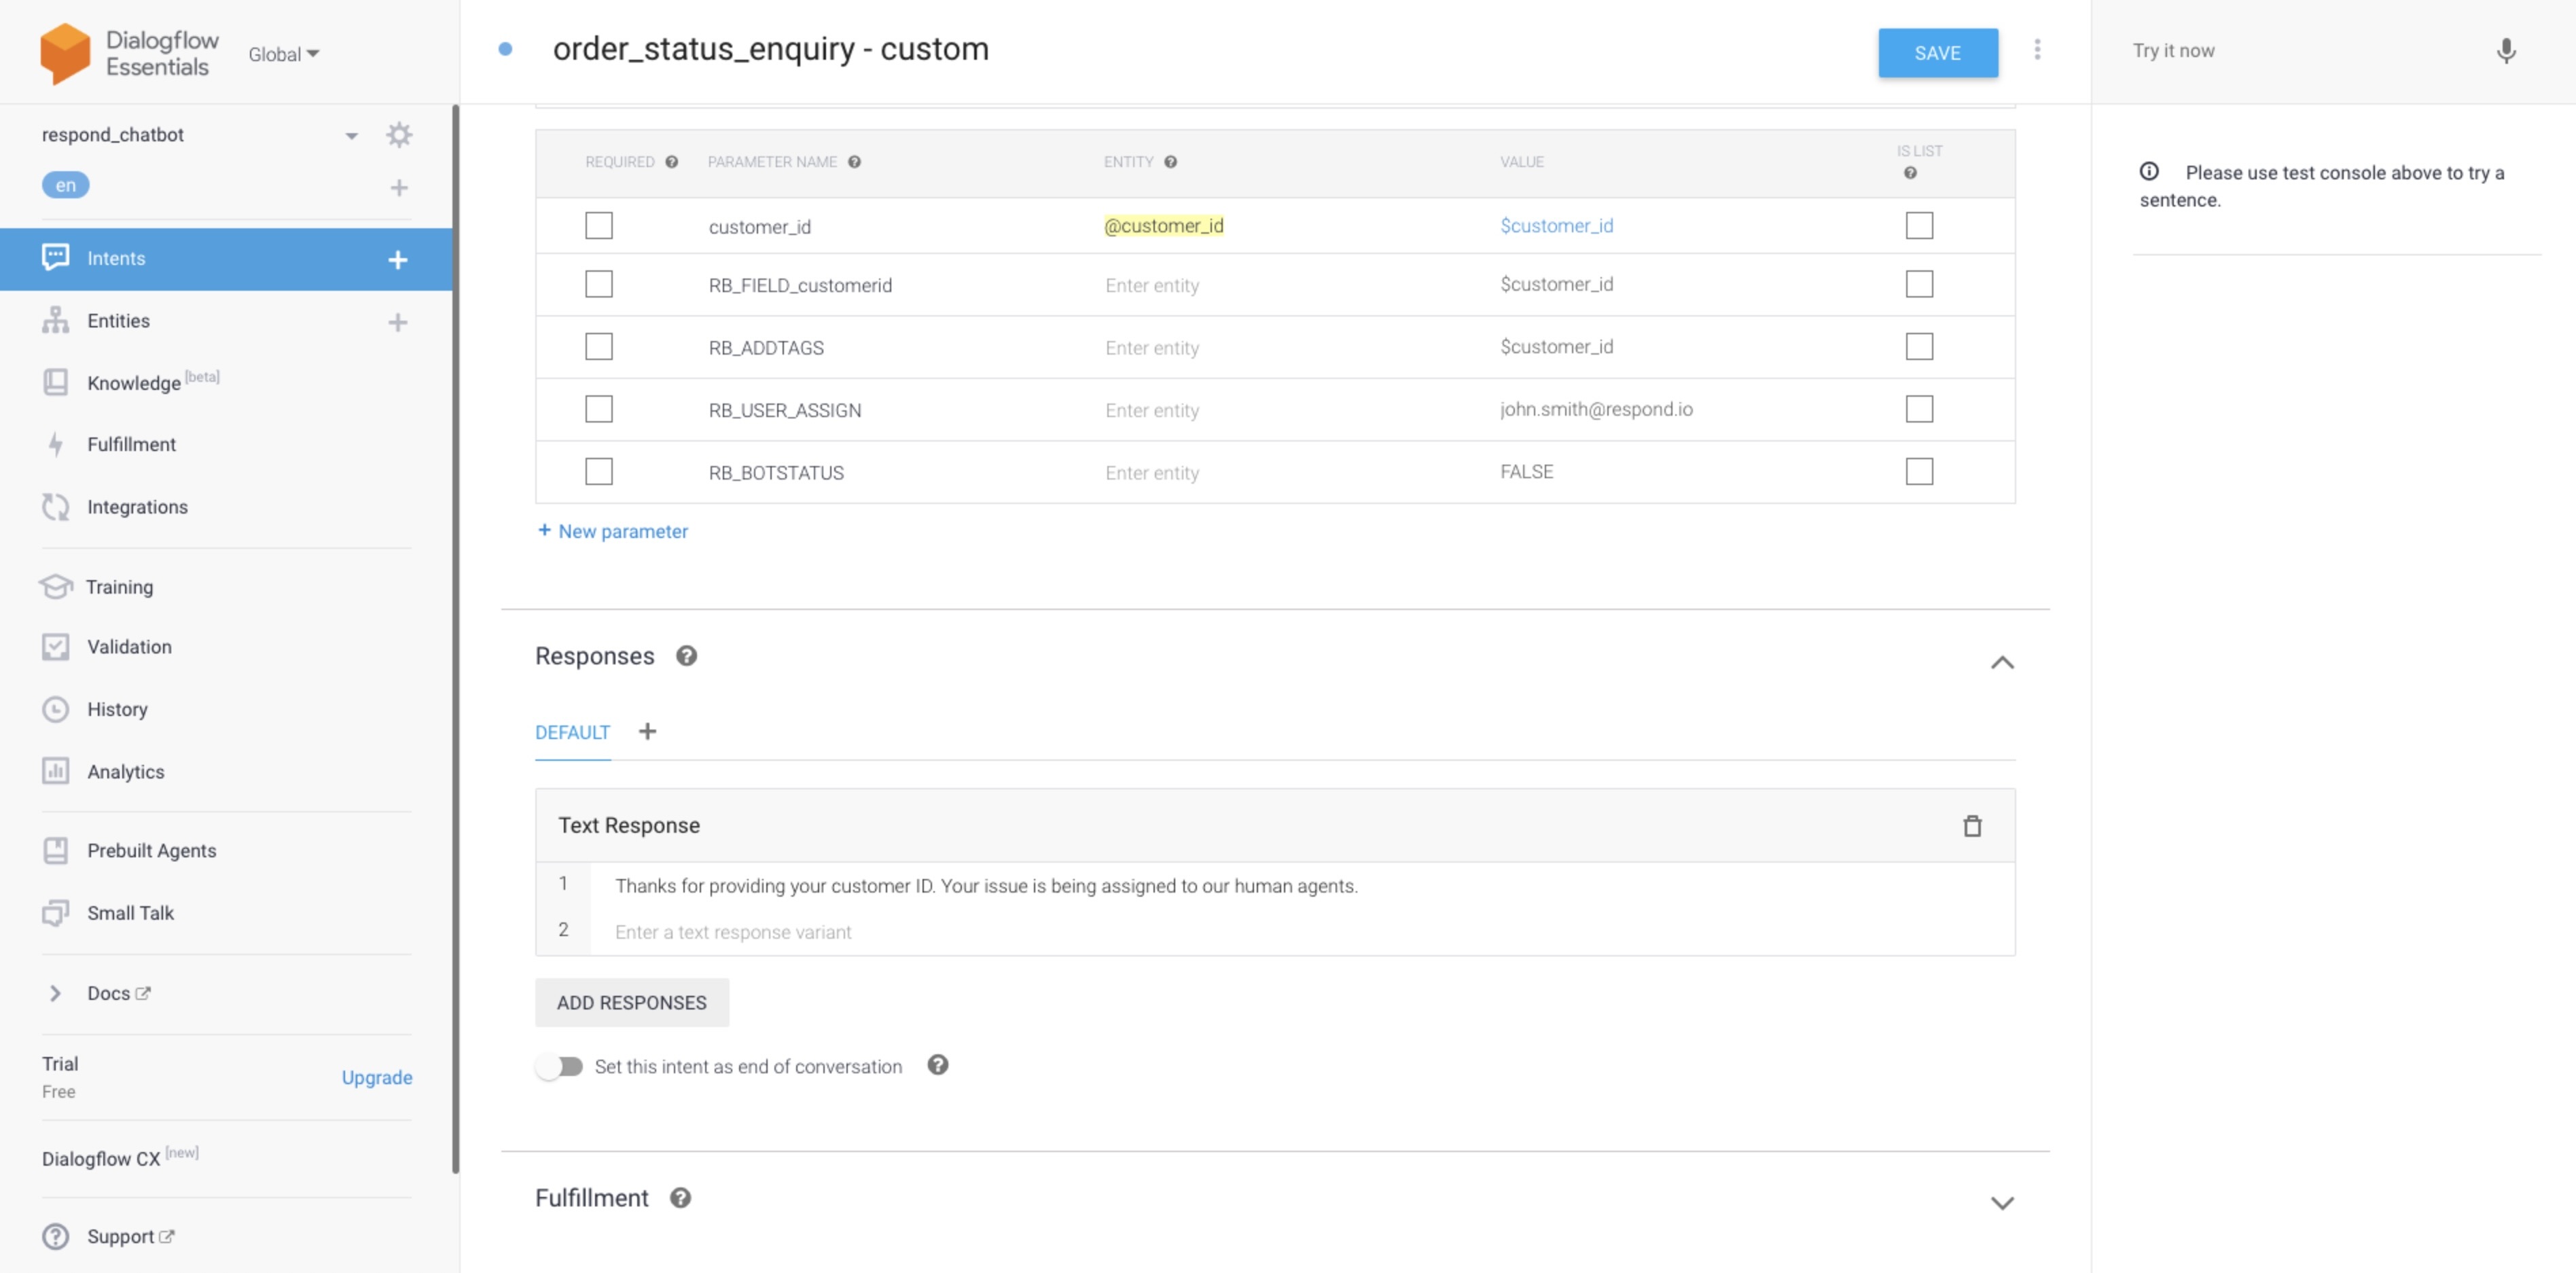
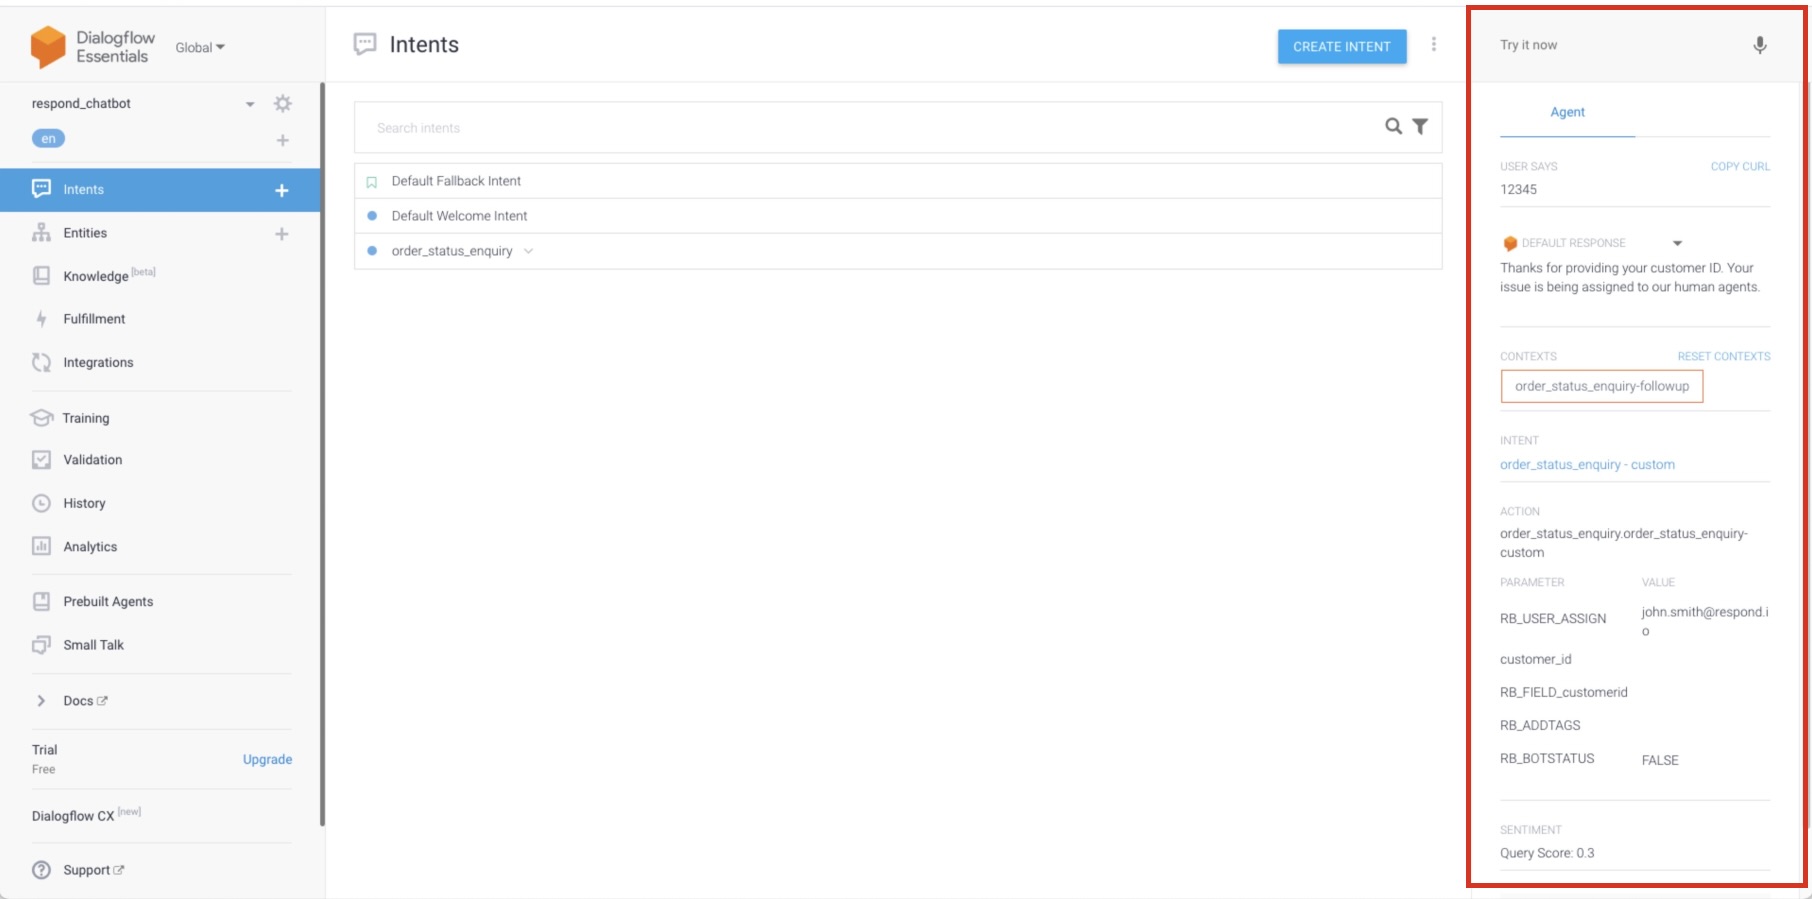
To save the value, add a parameter `RB_FIELD_{custom field's name}`. In this case, the parameter will be `RB_FIELD_customerid` and set the entity `$customer_id` as the value.
### **Adding a Tag**
Add a parameter `RB_ADDTAGS` and set the entity `$customer_id` as the value
### **Handing Off the Conversation**
Now, we want to hand off the conversation to a human agent. This can be achieved with another parameter, `RB_USER_ASSIGN` and set the user's email as the value
### **Disabling the bot**
The parameters will be executed in sequence. Lastly, we will disable the bot response for this contact because we do not want any intent to be triggered when the contact is handled by a human agent.
To do so, we will add another parameter, `RB_BOTSTATUS` and set `FALSE` as value.
{% hint style="warning" %}
When a bot is disabled, contacts can no longer receive messages from the bot until the bot status is enabled. The bot status can be enabled manually through the messaging console or via automation.
{% endhint %}
### **Location Handling**
When a location is received from a contact, an event of type `LOCATION` will be sent to Dialogflow. You may add `LOCATION` to the events to trigger the respective triggers.
Check out the other parameters available to use in Dialogflow:
{% content-ref url="/pages/1k5QH8TRtYOOXZ1BMKHK" %}
[Dialogflow: Parameters](/ismessenger/workspace-setting/integrations/dialogflow/dialogflow-parameters.md)
{% endcontent-ref %}
### Testing an Intent
If you need to test the intent, use the Testing panel located at the right side of Dialogflow console.
### Deleting an Intent
From the intent list, hover over the intent you wish to delete. Press the trash icon of the intent.
---
# Agent Instructions: Querying This Documentation
If you need additional information that is not directly available in this page, you can query the documentation dynamically by asking a question.
Perform an HTTP GET request on the current page URL with the `ask` query parameter:
```
GET https://docs.is-messenger.com/ismessenger/workspace-setting/integrations/dialogflow/dialogflow-managing-intents.md?ask=
```
The question should be specific, self-contained, and written in natural language.
The response will contain a direct answer to the question and relevant excerpts and sources from the documentation.
Use this mechanism when the answer is not explicitly present in the current page, you need clarification or additional context, or you want to retrieve related documentation sections.